

Kids School Lunch Ideas for Picky Eaters That Make Lunchtime Fun
Easy School Lunch Ideas for Picky Eaters
Imagine this: it’s a busy school morning, and you’re frantically trying to assemble a lunch that your little one will actually eat. You’re not alone; many parents face this challenge with picky eaters who might turn their nose up at most foods. It can feel frustrating, especially when all you want is for your child to have a nutritious and enjoyable meal at school. So, what do we do? We get creative! Here’s a roundup of easy school lunch ideas that will help bring some excitement to your child’s lunchbox without the daily stress. You may also find Kids Lunch Ideas For School 2 useful.
Fun Wraps and Roll-Ups
Wraps can be a fun way to present lunch, and they offer endless possibilities for customization. Here are a few easy options:
Turkey and Cheese Roll-Ups: Take a slice of turkey and a piece of cheese, roll them together, and secure with a toothpick. You can add a thin spread of hummus or cream cheese for an extra kick.
Veggie Hummus Wrap: Spread hummus on a whole-grain tortilla, add some cucumber slices, bell peppers, and spinach, then roll it up. This not only looks vibrant but also packs a healthy punch.
Peanut Butter and Banana Roll-Up: Spread peanut butter on a tortilla, add a banana, roll it up, and slice it into pinwheels. Kids love picking these up and munching away!
Wraps and roll-ups offer great variety and are actually quite easy to make. Plus, they can be prepped the night before. If you’re searching for more ideas that cater to picky eaters, check out these school lunch ideas for picky eaters that might inspire you.
Creative Lunchbox Combinations
Sometimes, it’s all about the presentation. If you can make the meal visually appealing, your child might be more inclined to try it. Here are some creative combinations to consider:
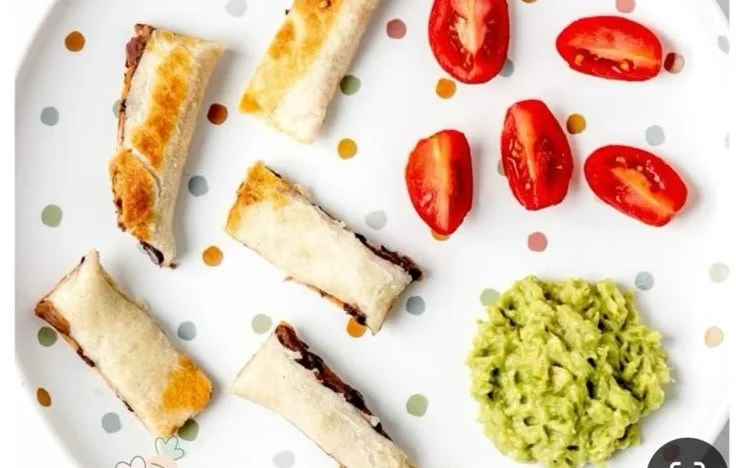
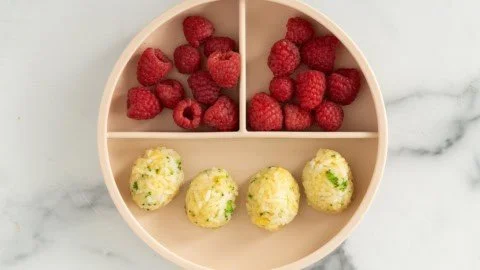
Colorful Bento Boxes: Experiment with bento-style lunches. Fill compartments with different colors and textures, like sliced strawberries, carrot sticks, mini cheese cubes, and whole grain crackers.
Mini Pita Pockets: Stuff mini pita pockets with shredded chicken, lettuce, and a sprinkle of cheese. Pair them with a small container of dipping sauce, such as ranch or yogurt-based dressings.
DIY Lunchables: Put together a homemade version of Lunchables with sliced deli meats, cheese, whole-grain crackers, and cherry tomatoes. This way, your child enjoys the fun of assembling their own meal.
Using a mix of colors and textures can make all the difference. You’re not just filling a lunchbox; you’re creating an experience!
Tasty Dips and Sides
Dipping can make even the simplest foods more exciting. Here are a few side options that will not only complement the main dish but also be engaging for your little ones:
Veggies and Dip: Pack some carrot sticks, cucumber slices, or bell pepper strips with a small container of ranch dressing or hummus for dipping. Kids are more likely to snack on veggies if they can dip them!
Fruit Skewers: Thread pieces of watermelon, grapes, and pineapple onto skewers. It’s a healthy snack that feels like a treat.
Cheese and Crackers: Slice some cheese into fun shapes using cookie cutters and pair it with whole grain crackers. You can include grapes or berries on the side for a sweet touch.
With things like dips and skewers, it’s all about making lunch interactive. Kids love foods they can engage with, and it often encourages them to be more adventurous with what they eat.
Leftover Makeover
Got leftovers from dinner? Don’t let them go to waste! Repurposing these can be a game-changer. Here’s how to transform your dinner into a school lunch:
Spaghetti Bake: If you have spaghetti from last night’s dinner, bake it in a muffin tin for a portable version of spaghetti cups.
Chicken Quesadillas: Use leftover chicken to make quesadillas. Simply add cheese and any leftover veggies. Slice them into triangles and pack them with salsa for dipping.
Vegetable Fried Rice: If you have leftover rice, toss it with some vegetables, eggs, and soy sauce for a quick stir-fry. It’s easy to pack and reheat if necessary.
Repurposing meals not only saves time but also helps reduce food waste. Plus, it can be fun for children to see their favorite dinners transformed into a different dish!
Quick Tips for Picky Eaters
Navigating the world of picky eaters can be a tricky endeavor, but here are some tips that might ease your journey:
Involve Your Child: Let them be part of meal planning. When children help choose their school lunches, they’re more likely to eat what’s packed.
Pack It Together: Make it a ritual to pack lunch together. This quality time can encourage them to feel more invested in what goes in their lunchbox.
Try New Foods Gradually: Introduce one new item at a time alongside their favorites to reduce resistance. This slow approach can help them acclimate to new flavors without feeling overwhelmed.
Trust me, it can take time to find what works for your little ones. But with patience and a playful approach, you’ll find the right mix of foods that they’ll actually enjoy.
Conclusion
Navigating mealtime with picky eaters can feel like a daunting task, but with a little creativity and flexibility, it’s totally achievable. By utilizing fun wraps, creative lunchbox combinations, and tasty dips, you’ll minimize mealtime meltdowns and ignite their appetite for new foods. Remember, it’s all about introducing variety while maintaining comfort foods, ensuring your child feels secure in their choices.
For more inspiration, consider exploring some additional ideas like 72 easy school lunch ideas that kids will enjoy, or this great resource on school lunch ideas for picky eaters. Happy lunch packing!
Easy Baby Food Recipes for Charlotte’s Favorite Meals Youll Love
Exploring Baby-Led Weaning and Finger Foods for Your Little One
Imagine this: your little one, sitting in a high chair, surrounded by colorful fruits and veggies, eagerly reaching for a piece of sweet potato, their little fingers grasping it triumphantly. It’s messy, it’s a bit chaotic, but it’s also an incredibly exciting milestone for both of you. Baby-led weaning (BLW) is a wonderful approach to introduce your child to solid foods, allowing them to explore flavors and textures at their own pace. Here’s the thing: it can feel a bit daunting to start, but with the right guidance and resources, you’ll be navigating this journey like a pro.
Understanding Baby-Led Weaning
Baby-led weaning allows your baby to skip purees and move straight to solid foods. This method is not only about eating; it fosters independence, improves motor skills, and encourages your child to listen to their hunger cues. If you’re wondering how to kick off this journey, you’re in the right place. Having a variety of healthy options is key, and introducing spinach waffles can be a delightful and nutritious start. They are soft enough for little ones to handle while packing a punch of vitamins.
In this approach, parents offer pieces of food rather than spoon-feeding. That means your baby gets to explore their culinary world firsthand. From gnawing on a carrot stick to smushing avocado in their hands, the experience is as exciting for you as it is for them. But before you jump right in, let’s delve deeper into how to navigate this flavorful journey.
When to Start Baby-Led Weaning
Now, you might be wondering when to start this adventure. Most pediatricians recommend starting baby-led weaning around six months, but be sure your baby is sitting up independently and showing interest in food. They might watch you eat with wide, curious eyes, or reach for your plate. These signs indicate that they’re ready to experiment!
Safety First
You’ve probably heard stories about babies choking, and understandably, it’s a major concern. Keeping safety in mind is vital. Always stay close, supervise your baby during meals, and avoid foods that pose choking hazards, like whole grapes or popcorn. Choking-awareness classes may also help ease your worries.
Essential Foods for Baby-Led Weaning
When it comes to food options, variety is your friend. Think about soft, easy-to-hold choices, such as:
- Soft fruits: Avocado, banana, or ripe peaches. These are not only nutritious but also easy for little hands to grasp.
- Roasted veggies: Carrots, sweet potatoes, or zucchini. Roasting makes them tender and easier to chew.
- Protein sources: Cooked chicken or fish. While it might seem tricky, introducing these early can help with texture variance.
As a parent, you can ease into meal times by offering perfectly sized portions. For instance, easy chicken recipes can introduce your baby to protein while keeping things simple for you.
Mealtime Tips for Successful BLW
Let’s be honest, not every meal is going to go according to plan. Here are a few tips to keep mealtime fun and engaging:
- Stay Calm and Patient: It’s okay if dinner looks more like “finger paint” at first! Messy play is a crucial part of the learning process.
- Encourage Exploration: Allow your child to explore their food. They’ll squish, mash, and taste — it’s a learning experience.
- Join In: Make mealtime a family affair. Show them how you eat the same foods they’re trying. They’ll be watching and learning from you!
Common Challenges
You’re not alone in this journey; many parents face challenges while introducing solids. Sometimes babies might not show much interest, other times they might gag or refuse certain foods. Remember, it’s completely normal. Each baby is different, and it might take time for them to adapt.
If they’re spitting out food or pushing it away, try not to take it to heart. Just keep offering diverse options, and eventually, they will develop a taste for new flavors. Also, keep in mind that repetition is key. Sometimes it takes several attempts before they warm up to a new food.
Other Resources
Exploring resources on baby-led weaning and finger foods can ease any anxieties and answer your burning questions. Connecting with communities, reading articles, or attending workshops can provide you with invaluable tips and support. It can sometimes feel overwhelming, but just remember, you’re doing great!
Conclusion
Embarking on the baby-led weaning journey is an exciting adventure for both you and your baby. By allowing your little one the freedom to explore food in their own way, you’re setting the stage for a lifetime of healthy eating habits. If you’re looking for more guidance, check out THE BOOK NOOK Online Ordering for resources that can help you navigate this journey. Additionally, having an accessible dictionary can provide a wealth of knowledge, especially when you come across unfamiliar ingredients. Let’s celebrate the messiness of this delicious experience together!
Keep Baby Stimulated with 30+ Busy Activities for a 1-Year-Old
Keeping Your Baby Stimulated with Fun Activities
Imagine this: it’s a rainy afternoon, and your little one is bouncing around the living room, restless and curious about everything. Sound familiar? We’ve all been there, right? Those early years are incredibly formative, and finding engaging activities for your one-year-old can feel overwhelming. Here’s the thing: keeping your baby stimulated doesn’t have to be a chore; it can be a delightful way to bond and learn together.
At this stage, your baby is developing rapidly. They’re learning to explore their environment, and you might notice them getting into everything (yes, even that cabinet full of pots and pans!). Engaging them with fun and educational activities can greatly support their growth. With a little creativity, you’ll have a treasure trove of activities that will keep your little one learning, growing, and exploring.
Sensory Play Activities
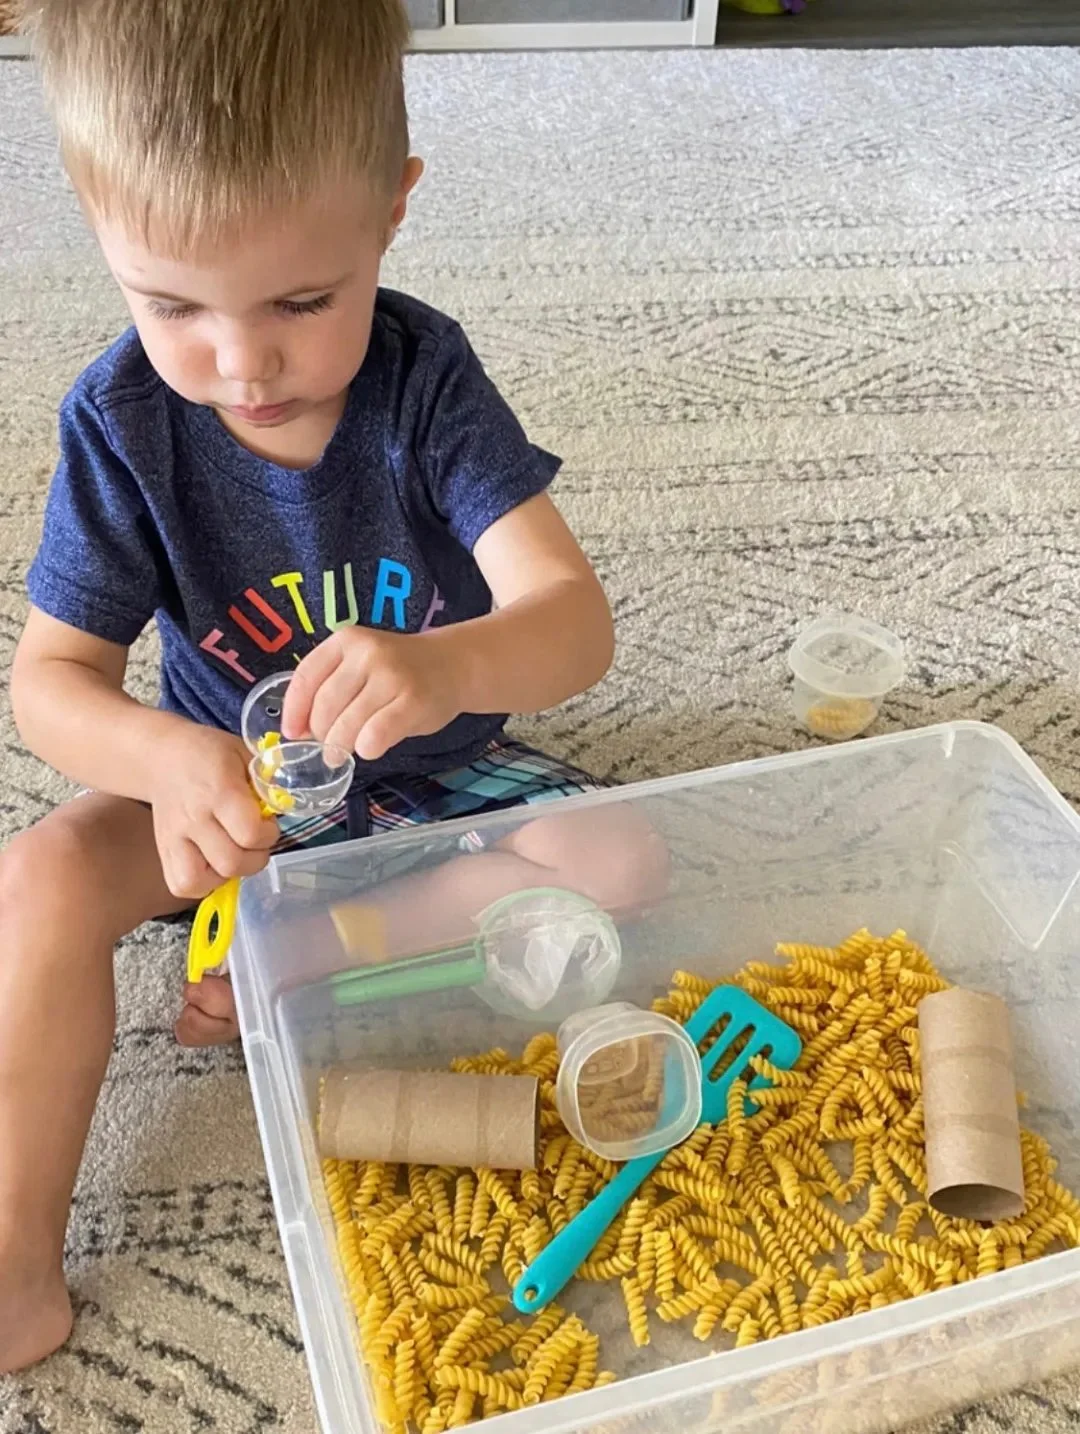
Sensory play is a fantastic way to stimulate your baby’s senses. You can create a sensory bin filled with items like rice, pasta, or water beads. Let your child explore the textures and sounds. Not only is this engaging, but it also promotes fine motor skills. You might like to make it even more exciting by adding different scoops and cups.
Building Blocks
Building blocks offer endless possibilities for creativity and learning. These simple toys help with hand-eye coordination and problem-solving skills. Encourage your child to stack them as high as they can — and then knock them down! It’s all part of the fun, and you might find yourself laughing along the way. This activity can also be tied into conversations about colors and shapes, which is a great way to engage their mind.
Wanting more ideas for keeping your little one’s creativity flowing? Check out this collection of easy toddler activities that can inspire you.
Outdoor Exploration
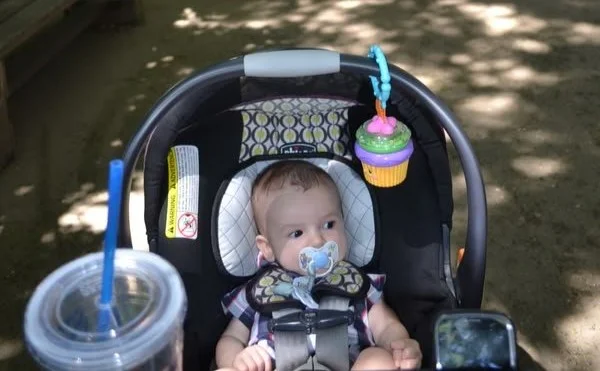
Taking your baby outside can also provide them with a world of wonder. A trip to the park or just a walk around your neighborhood exposes them to new sights, sounds, and smells. Bring along a blanket and set up a little picnic or simply let them explore the grass. The feel of the cool blades under their fingers and the sun shining down can be incredibly stimulating.
Arts and Crafts
It might be a bit messy, but introducing your child to arts and crafts can be a great way to explore their creativity. Use non-toxic finger paints or large crayons that are easy for little hands to grasp. Let them make their masterpiece on a large piece of paper. It’s less about the outcome and more about the process. You’re not only nurturing creativity but also developing fine motor skills.
Music and Movement
Music is another wonderful way to stimulate your baby. Play a variety of tunes and encourage them to dance. Singing nursery rhymes together also works wonders. You’ll be amazed at how quickly they pick up melodies and even start to move along to the beat. Incorporating an assortment of instruments—like maracas or a simple tambourine—can further engage them and foster a love for music.
Interactive Storytime
Reading is so important at this stage, so don’t underestimate the power of storytime. Picking out bright, illustrated books can capture your child’s attention. Encourage interactive elements like pointing to objects or making animal sounds together. You might even make it a cozy routine each day, winding down with a few stories before nap or bedtime.
Additionally, if you’re interested in raising kids who thrive in their later years, I highly recommend reading this insightful guide for parents from Parenting Gems, which can provide valuable frameworks for long-term parenting success.
Simple Household Items
Don’t overlook the potential of everyday items around the house! Pots, pans, and cardboard boxes can turn into an entire world of adventure. Your kitchen becomes an exploration station as they bang on pots or crawl through boxes. This type of play fosters imagination and problem-solving skills, making it super beneficial for their development.
Water Play
Setting up a small water play area can be incredibly enjoyable for your baby. Just fill a shallow basin with water and add some plastic cups, balls, or floating toys. It’s a delightful way to introduce the concept of cause and effect as they splash and pour water around. Just remember to supervise them closely; safety comes first!
Nature Discovery
You can also create simple scavenger hunts in your backyard or a local park. Show your baby natural items like leaves, rocks, or flowers. Let them touch and examine each one; you could describe the colors and textures as you do. It’s an eye-opening experience for them to witness nature up close.
Conclusion
Keeping your one-year-old engaged and stimulated is all about tapping into their natural curiosity. With the right activities, you can turn playtime into a rich learning experience. There are a myriad of resources out there to support your journey as a parent. For more activities that keep your baby stimulated, check out these exciting ideas at Kids Activities Blog and find a comprehensive list of toddler activities at Oh Hey Let’s Play. Remember, you’re doing a fantastic job, and these little moments of play can lead to a lifetime of learning!
Quick and Colorful Kids’ Pasta Salad Ideas for Busy Weekdays
A Simple Yet Nutritious Pasta Salad for Kids
Picture this: it’s lunchtime, and the clock is ticking. Your little one has just declared they are "super hungry!" but you haven’t prepped anything fancy. Sound familiar? You want something nutritious, easy to prepare, and kid-approved that doesn’t involve grinding your way through another sandwich. Enter pasta salad! This delightful dish is not just a lifesaver but also a delicious way to sneak in some veggies and protein.
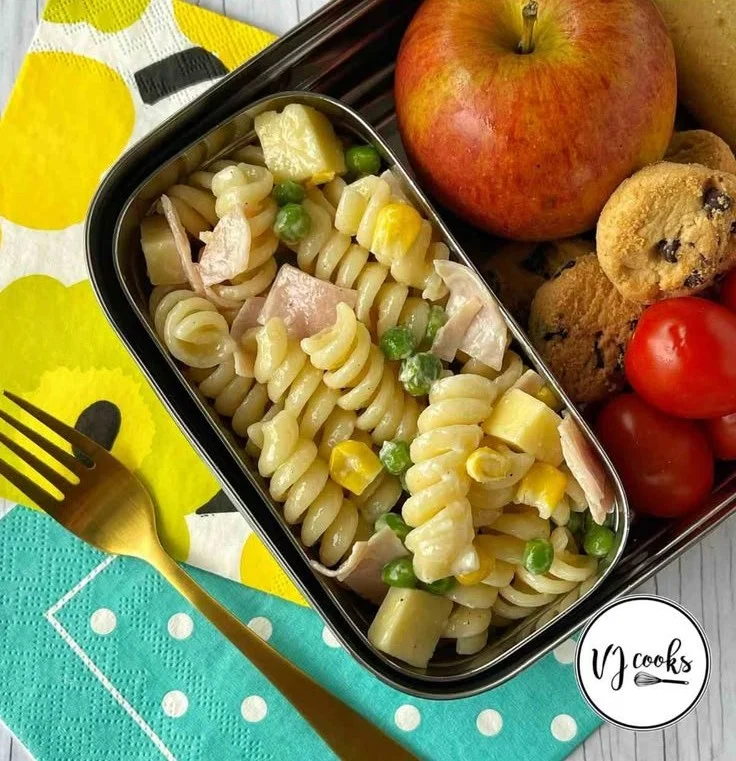
Imagine a pasta salad that combines the creamy goodness of a sweet mayonnaise dressing with chunks of colby cheese, savory shaved ham, and vibrant frozen peas and corn. It’s colorful, it’s wholesome, and yes, it’s totally enticing to kids. If you’ve ever found yourself in a culinary rut, wondering how to mix things up while keeping your family’s nutrition in check, this pasta salad is your answer.
But why is this recipe so great? Well, it’s quite versatile. Whether you’re serving it for lunch or dinner, it caters to all tastes, and I’m confident that you’ll also find joy in it as an adult meal. Best of all, it fits perfectly into lunchboxes, making it an ideal alternative for school lunches—just think of it as a mini picnic in their lunchbag!
Why Choose Pasta Salad?
So, you might be wondering what makes pasta salad a go-to choice in the kitchen. Here are a few reasons:
Quick and Easy: You can whip this up in mere minutes. Perfect for those hectic mornings when your time is limited.
Nutritious Ingredients: Packed with protein from the ham and cheese, plus the vitamins and minerals from the peas and corn, it’s a balanced option that keeps energy levels up through the day.
Picky-Eater Approved: Let’s be honest, every parent faces the challenge of picky eaters. The gentle sweetness of the dressing might just win over even the toughest critics at the table.
And if you’d like to explore even more great baby-friendly options, check out this avocado egg salad recipe for babies for another versatile dish!
Ingredients You’ll Need
Creating this delicious pasta salad doesn’t require a lengthy shopping list. Here’s your simple lineup:
- Pasta: Use small shapes like elbows or shells as they’re easy for little hands to grab.
- Colby Cheese: Cube the cheese for melt-in-your-mouth bites; it’s a favorite among kids.
- Shaved Ham: Precooked and packed with flavor, ham also adds a delightful texture.
- Frozen Peas and Corn: These babies not only contribute to the dish’s color but are also hassle-free—simply toss them in straight from the freezer.
- Mayonnaise: Go for a slightly sweet variety to balance the saltiness of the ham and cheese.
How to Prepare
Now that you’ve got your ingredients ready, here’s how to bring everything together:
Cook the Pasta: Start by boiling your pasta according to package instructions until al dente. Drain and rinse under cold water.
Mix in the Goodness: In a large bowl, combine the cooled pasta, cubed cheese, shaved ham, and frozen peas and corn.
Dress it Up: Pour in your mayonnaise and gently stir until everything is evenly coated. You want a slight creaminess without drenching everything too much.
Chill: For the best flavor, let the pasta salad chill in the fridge for at least 30 minutes before serving. This waiting time helps the flavors meld beautifully.
Serve: You can serve this pasta salad on its own or alongside some crunchy veggies for a complete meal.
By the way, if you’re interested in expanding your pasta repertoire, take a look at our guide on baby pasta recipes for more ideas!
Quick Tips for Success
As a parent who’s navigated the tricky waters of feeding kids, here are some handy hacks for making this pasta salad even better:
Add Veggies: If your kiddos are adventurous, consider adding diced bell peppers or cherry tomatoes for extra color and nutrition.
Swap Proteins: Not a ham fan? Chicken or turkey are great substitutes, and they still pack the protein punch.
Make it Fun: Let your kids help with the preparation. Kids love to take ownership of their food, and being involved can make them more willing to eat what they’ve contributed to making.
Mistakes to Avoid
While this pasta salad is a winner, there are a couple of common pitfalls you might run into:
Overcooking the Pasta: Avoid mushy pasta at all costs. Overcooked pasta can ruin the texture, leaving your salad less appealing.
Skip the Seasoning: A dash of salt and pepper can elevate the dish. Don’t be afraid to add these simple seasonings; they enhance the flavor in a subtle way.
Encouraging School Lunch Choices
As we look ahead to school lunches, this pasta salad can be a standout staple. Encourage your kids to try different variations throughout the week. Maybe they’ll want to experiment with different pasta shapes or even throw in a few new ingredients.
What about pairing the salad with whole-grain crackers or fresh fruit? These additions can cover all the bases in terms of nutrition, keeping your little ones satisfied, cheerful, and ready to tackle their day!
Finally, let’s remember that mealtime should bring families together. Kids who feel connected to their food, whether through cooking or selecting ingredients, are often more inclined to enjoy what’s served. Keep the fun alive, and I promise you’ll see the difference it makes!
Conclusion
Incorporating this easy and delightful pasta salad into your family meals can be a game-changer. It’s perfect for school lunches, offering a delicious and nutritious alternative to sandwiches. If you’re looking for more creative pasta ideas, check out Kids’ Pasta Salad – VJ Cooks and get inspired by other fun recipes. You might also enjoy this Kid Friendly Pasta Salad – Vegetarian Mamma for more options that your kids will love!
Baby Activities for a Calmer, Happier Daily Schedule for Babies
Exploring the Joys of Infant Milestones
Picture this: You’re sitting on the floor surrounded by colorful toys, and there lies your little one, staring at those squishy blocks. You can practically feel the excitement in the air, knowing that they’re about to hit an important milestone. It’s a thrilling time filled with tiny victories and proud moments. As parents, we cherish these stages of development where each new skill brings our babies closer to the world around them. Let’s dive into these key milestones that not only signify growth but also keep parents on their toes.
Understanding Infant Development
Now, you might be wondering why these milestones are so crucial. They serve as markers for physical, emotional, and cognitive growth. Each stage comes with new challenges and exciting moments. Here’s the thing: While the timeline for these milestones can vary, knowing what to expect can help you celebrate each moment.
The Big Ones: Major Milestones
Crawling: This one often comes around 7 to 10 months. It’s a game changer. Not only does it give your baby newfound freedom, but it also opens up a whole new world of exploration. Keep an eye on those little hands!
First Words: By around 12 months, babbling transforms into real words. When your baby calls you "Mama" or "Dada," it hits differently. It’s like they’ve finally found the code to connect with you.
Walking: The big step (literally) usually happens between 10 to 15 months. Remember that moment when your child takes their first few steps? You may even find yourself holding your breath in anticipation!
Social Smiles and Laughter: Those adorable giggles around 3 months are not just cute; they represent your baby’s social development. They’re learning about connection and joy in interaction.
Fine Motor Skills: By age 2, you’ll see improvements in those tiny fingers as they learn to stack blocks or turn pages in a book. This skill, although small, helps them gain confidence.
The Emotional Side of Things
It’s essential to recognize that emotional milestones are just as vital. Your baby’s first smile, giggle, or expression of frustration is a sign of their emotional development. They learn to communicate their needs and feelings through these expressions. Believe me, we’ve all been there when our little ones start throwing tantrums – it’s completely normal! You’ll find that understanding these emotional cues will make parenting a bit easier.
Creating a Nurturing Environment
So, how can you support your baby’s development? It starts with the environment. Here are a few tips that I’ve found helpful:
Encourage Exploration: Childproof your space and let them roam. It’s safe for them to explore while they learn about their surroundings.
Playtime is Learning Time: Engage in activities that boost their motor skills, like stacking toys. You could even incorporate snack time with engaging breakfast ideas that are freezer-friendly, perfect for busy mornings. Check out these delicious options.
Read Together: Yes, starting early counts! Reading simple books introduces them to language and strengthens the bond between you two.
Be Present: Spend quality time with them. Simple acts like making eye contact or responding to their coos can inspire them to keep communicating.
The Joys and Challenges of Toddlerhood
As your baby transitions to a toddler, you’ll see them developing a sense of independence. This stage can be thrilling but challenging, too – anyone else feel like they’re training for a marathon just to keep up? During this era, your toddler may assert themselves and test boundaries. We’ve all been there, right? It’s part of their development.
Here are some great ways to make this journey smoother:
Establish Routines: Kids thrive on routines. Whether it’s storytime before bed or regular snack times, they will feel more secure knowing what to anticipate.
Outdoor Adventures: Kids need to move! Activities, like visiting the park or simply going for a walk, help stimulate their senses.
Incorporate Social Play: Playdates can develop interpersonal skills. Sharing, waiting turns, and interacting with peers are all valuable lessons.
Consider Essential Items: Having a well-packed pool bag makes outings easier. If you’re unsure what to bring along, check out these must-have items.
Mistakes to Avoid on This Journey
Let’s talk about some common pitfalls that can occur during these developmental phases:
Comparing Development: It’s so easy to look at other kids and question if your child is on track. Remember, every child grows at their own pace. It’s normal for children to hit these milestones at different times.
Overstimulation: Too many toys or chaotic environments can be overwhelming. Keep it simple and let them explore in comfort.
Ignoring Emotional Needs: Your child will throw fits (they’re learning!), but it’s essential to understand the emotions behind those actions. Acknowledge their feelings and give them the latest love and support.
Encouragement and Community
As parents, we often need a little community to lean on. Whether you join local groups or connect with friends, having people share their experiences can provide reassurance. Remember, you’re not alone in this.
Final Thoughts
Enjoy the ride of these crucial milestones. Every cry, giggle, and tantrum signifies growth not only for your child but for you as a parent. Celebrate those small victories, learn from challenges, and embrace this beautiful journey of parenthood.
Conclusion
Embracing the nuances of parenting is no easy task, and understanding these developmental milestones can make a significant difference. If you’re looking for additional resources on engaging activities that you can incorporate into your baby’s daily life, check out 10 Activities to Include in Your Daily Schedule for Babies. Additionally, it’s essential to care for yourself during this journey, so take a look at Your Guide to Postpartum Health and Caring for Your Baby to ensure you’re thriving alongside your little one.
Quick Rice Balls (with Veggies) Your Kids Will Eat Happily
Exploring Rice Balls with Veggies as a Fun and Healthy Snack
Imagine this: it’s mid-afternoon, and your toddler, who’s previously munching on their favorite snack, suddenly decides they’re not hungry anymore. Sound familiar? It’s a challenge many parents face, and we often resort to those go-to foods that aren’t always the healthiest. This is where rice balls can save the day! These little bites can be both nutritious and incredibly fun to make, encouraging your kids to gobble up some veggies without even realizing it.
Why Rice Balls?
Now, you might be wondering why rice balls make such a great snack choice. They can be packed with a variety of nutrients and flavors, making them versatile for kids of all ages. Plus, they’re super easy to customize based on what you have in your fridge. When you incorporate veggies into the mix, you’re not only giving your kids a delicious snack, but you’re also ensuring they’re getting those essential nutrients.
And let’s be honest, kids love food they can pick up with their hands! Rice balls provide the perfect opportunity for little hands to explore and enjoy food. So how do you make these delightful snacks? It’s easier than you might think.
Choosing the Right Ingredients
To create delicious rice balls, you’ll want to start with a base of cooked rice—be it white, brown, or even sushi rice. Here’s where you can get creative!
- Rice: Choose a type your kids enjoy to ensure they’ll eat them.
- Veggies: Finely chop colorful vegetables such as carrots, peas, spinach, or bell peppers for a nutrient-packed punch.
- Binders: You can use cheese or even a bit of egg to help the rice and veggies stick together.
- Flavorings: Don’t forget herbs and spices! A pinch of garlic powder, onion powder, or even a bit of soy sauce can elevate the flavor.
Once you’ve got everything ready, combine your cooked rice and veggies in a bowl. Get your hands in there (this is a great chance for sensory play), and start forming small balls. A good size for little hands is about the size of a ping pong ball.
Cooking Methods
You have a couple of options for cooking these rice balls. You could simply serve them as is if you don’t want to deal with cooking. However, if you’re looking to add some crunch, here are two methods:
1. Pan-Frying: Heat some oil in a pan over medium heat, and fry the rice balls until golden brown on all sides. This method adds a delightful crunch outside while keeping the insides soft.
2. Baking: Preheat your oven to 375°F (190°C) and place the rice balls on a baking sheet. Bake them for around 20 minutes or until they’re crispy on the outside. This is a healthier option that requires less oil, which many parents prefer.
Feel free to experiment! Depending on the vegetables you choose, you might want to check out some creative methods for incorporating them into dishes. For instance, if you’re hosting a baby shower or kids’ party, consider pairing these rice balls with other fun finger foods.
Storing Leftovers
If you happen to make a larger batch (which is likely, because they disappear quickly!), storing the leftovers is important. You can keep them in an airtight container in the fridge for up to three days. They also freeze well—just pop them in the freezer and let them thaw in the fridge overnight when you’re ready to enjoy them again.
Fun Variations to Try
You might be asking yourself, “What if my kids aren’t fans of certain vegetables?” That’s completely normal! Try some of these other variations to suit your family’s tastes:
- Cheesy Spinach Rice Balls: Mix in some shredded cheese and cooked spinach for a creamy twist.
- Veggie-Packed Pizza Balls: Use pizza seasoning and add small bits of olives or diced bell peppers for a pizza flavor.
- Sweet Potato Rice Balls: Replace regular rice with sweet potato for a naturally sweet option.
Engaging Your Kids
What’s more fun than making food together? Involving your kids in the kitchen can turn cooking into an enjoyable activity rather than a chore. Get them to help with mixing ingredients, rolling the balls, or even decorating them with little faces using veggies.
You could also take this a step further by framing it as a fun DIY project—like crafting bouncy balls with an exciting science experiment! If this sounds intriguing to you, check out this great activity for kids that combines play with learning.
Adjusting to Preferences
Every child has their own unique tastes, and while some might love the flavor, others may need time to warm up to new textures and ingredients. If your little one shows hesitance with certain veggies, try hiding them in other meals, or serving the rice balls alongside a familiar dip.
Making Snacks Enjoyable
It’s crucial to create positive associations with food in these early years. Help your kids explore new flavors without putting too much pressure on them. You can share stories about the vegetables or even create a fun game—like a taste test to guess the ingredients!
Nutrition Matters
Let’s talk about nutrition. Rice balls can offer a balanced meal or snack that includes carbohydrates from rice, proteins if you add cheese or egg, and fibers and vitamins from your chosen vegetables. It’s a complete package that supports your child’s growth and gains their trust in trying diverse foods.
Conclusion
Incorporating rice balls made with veggies into your child’s diet not only helps them get essential nutrients but also creates an opportunity for family bonding through cooking. Plus, they’ll love these bites of joy that come in all flavors. If you’re looking for more veggie recipes, be sure to check out this recipe for veggie rice balls or explore these delightful rice cheese and veggie balls that can provide inspiration for your next cooking session! So roll up your sleeves, gather the ingredients, and let the fun begin!
Easy Tinfoil Rivers Projects Your Kids Will Love and Learn From
How to Make Tinfoil Rivers for Summer Fun
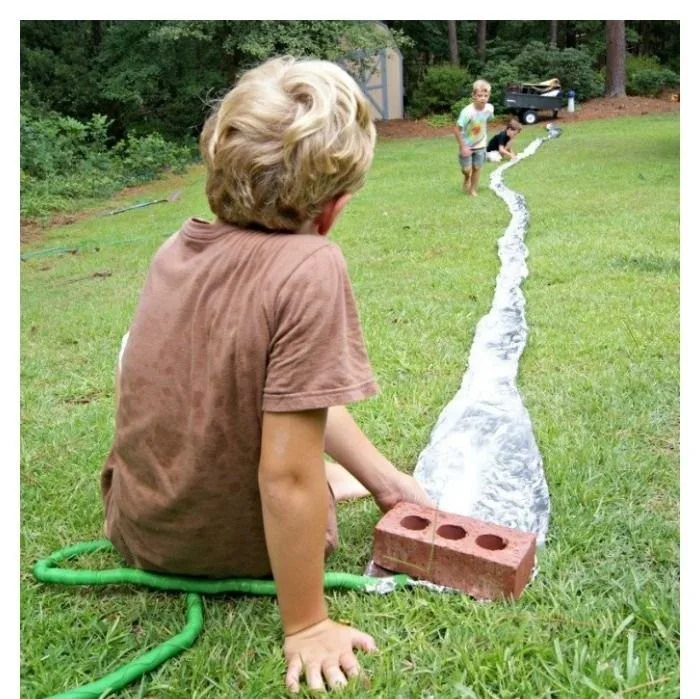
Imagine this: it’s a hot summer day, your little ones are bouncing off the walls, and you want to keep them entertained without breaking the bank. Here’s the thing about summer activities – they don’t have to be big, expensive, or complicated. You can create all kinds of memories with just a few supplies from around the house. One of the most delightful and simple activities you can set up is making tinfoil rivers! This easy craft not only keeps kids engaged but also sparks their creativity and problem-solving skills.
What You’ll Need
Before diving in, let’s gather some materials. Making tinfoil rivers is incredibly easy and requires only a few items, many of which you’re likely to have at home already:
- Aluminum foil
- A plastic tub or a baking sheet (to contain the mess)
- Water (for the rivers)
- Plastic cups or small toys (to act as boats)
- Optional: tape, scissors, and markers for decorating
Step 1: Preparing the Base
First, you’ll want to create a base for your tinfoil river. If you’re using a baking sheet or a plastic tub, you’re off to a great start. Make sure it’s flat and large enough to hold your river. This is where the fun begins! You can even get the kids involved right away by letting them help you set up.
Once you have your base ready, it’s time to make the river itself. Tear off a large piece of aluminum foil, and gently shape it into a wavy path that will act as the riverbed. Pro tip: Don’t make it too flat; the unexpected bends and curves will keep things interesting for little ones. Plus, hills and dips mean it takes a bit of strategy to get things moving along the river!
Step 2: Setting Up the River
Now, let’s bring your river to life. Carefully place your tinfoil river onto the base you selected. Make sure the ends are raised a little higher than the middle, allowing water to flow down the channel you’ve created.
Here’s an idea – you can also create smaller streams that branch off the main river. This not only adds complexity but gives kids multiple pathways to explore. You might say something like, “What if we invented a whole tinfoil city with rivers running through it?” and watch their imagination blossom.
Step 3: Testing the Flow
Once your river is set up, it’s time to pour in some water. Here’s where excitement truly builds! Get your little ones to help you pour the water slowly along the length of the river and watch as it flows through. They’ll be amazed at how the water travels along the curves you built.
You can even turn this into a fun game: make boats out of cups or small toys and see whose “boat” reaches the end of the river first. This competitive angle adds an element that will keep them engaged. Plus, you can teach them how to make adjustments to their ships using trial and error (it’s honestly a great way to introduce early science concepts).
Additional Variations to Try
The great thing about tinfoil rivers is their versatility! Here are some fun variations you might consider trying with your kids:
- Add Obstacles: Introduce rocks or sticks in the path to create challenges for the boats. Watch as they navigate around them.
- Create Adventures: You could even have them design stories around their adventures on the river, recounting tales of pirate ships or rescue missions.
- Color the Water: If you want to add a bit more creativity, consider adding food coloring to the water. Imagine the surprise on their faces when they see a bright blue “river”!
Embracing Creativity
Let’s be honest, while this activity is filled with fun and laughs, it also fosters creativity. As you explore tinfoil rivers, encourage your children to ask questions like, “What if we built a dam?” or “How can we make the river deeper?” Such inquiries will stimulate their minds and lead to exciting discoveries along the way.
If you’re looking for more activities to keep that creative flow going, be sure to check out some timeless vintage nursery decor ideas. While it may not be rivers, fostering a dreamy atmosphere can lead to enjoyable crafting time!
Quick Tips for Success
- Safety First: Make sure to supervise your kids, especially around water, to prevent slips and spills.
- Expect Mess: Depending on how adventurous your kids get, you might want to set this up outside or on a surface that’s easy to clean.
- Time to Improvise: If the river flow is slow, consider sloping the tinfoil or adjusting the water flow to find the best path for your flowing river.
Common Mistakes to Avoid
We’ve all been there – things don’t always go as planned. Here are some common mistakes you can avoid:
- Flat Riverbed: If the tinfoil is too flat, the water won’t flow well. Make sure there are enough bends and slopes.
- Too Much Water: Pouring too fast can overwhelm the river’s structure and lead to spills. Slow and steady wins the race!
- Not Enough Fun: If your kids lose interest, jazz it up! Introduce friendly competitions or add fun challenges to keep them engaged.
Conclusion
Tinfoil rivers are a fantastic way to engage your child’s creativity and imagination, offering endless fun right at home. Whether you’re competing to see which boat reaches the end first or crafting a story about your river adventures, this activity is sure to be a hit. Plus, there are plenty of other resources to explore for more fun ideas as your family makes memories together. For artistic inspiration, you might love Linda Crossan – River Gallery, and if you’re looking for great meal ideas for lunches, check out the budget-friendly school lunch ideas. Happy crafting!
Spectacular Preschool Garden Ideas for Kids’ Outdoor Play Areas
Embracing the Joys of Parenting Toddlers
Imagine this: you’ve just settled down with your favorite cup of coffee, ready to embrace a moment of tranquility. Then suddenly, your little one transforms into a whirlwind of energy, their laughter ringing through the house as they dash across the living room. Sound familiar?
Parenting toddlers is a unique adventure filled with delightful chaos and heartwarming moments. Yet, amidst all the fun, it can also be overwhelming. We’ve all been there, grappling with the challenges of helping our children grow, learn, and navigate the world around them. Today, we’ll explore some helpful tips and activities that make parenting a bit easier and a lot more enjoyable.
The Importance of Play in Toddler Development
Here’s the thing: play isn’t just a way for children to pass the time; it is essential for their development. Through play, toddlers learn everything from motor skills to social interactions. Engaging in different kinds of play supports various aspects of their growth.
For instance, imaginative play fosters creativity, while physical play helps develop coordination and strength. Activities like building blocks or playing with clay can boost fine motor skills, while sessions in the park provide essential gross motor experience.
One of my favorite ways to foster this learning in our home is by incorporating design into their play spaces. If you’re curious about some fabulous ideas, check out these amazing kids’ room design ideas that grow with your child.
Engaging Activities for Toddlers
So now, you might be wondering how to keep things fresh and exciting. Here are some engaging activities that I’ve found to be huge hits with my little one:
1. Art Exploration
Supplies like crayons, washable markers, and non-toxic paints can transform a regular afternoon into a colorful masterpiece. Set up an art station where your toddler can freely express themselves and experiment with colors. Not only does it enhance their creativity, but it also strengthens their hand muscles!
2. Nature Scavenger Hunts
These are perfect for getting outside and moving around. Create a simple list of items for your child to find on your walk—like leaves, flowers, or rocks. It encourages exploration and helps them learn to observe the world around them.
3. Sensory Bins
Okay, this one can get messy, but it’s worth it! Fill a bin with rice, dried beans, or sand and add small toys, cups, or scoops. Sensory play like this can be incredibly calming and helps toddlers learn through exploration.
4. Free Outdoor Activities
With warmer weather around the corner, remember that some of the best activities are completely free! Jumping in puddles, playing tag, or simply playing with bubbles can bring tons of joy. If you need more ideas for outdoor fun, consider browsing through these summer activities for kids that are not only budget-friendly but also packed with inspiration.
Establishing a Routine
One thing I’ve found to be absolutely crucial is establishing a routine. Toddlers thrive on predictability, so having a daily schedule can ease anxiety for both parents and children.
Make sure to include times for meals, play, nap, and even quiet time. This doesn’t mean every minute needs to be planned out, but having a general structure can help children feel secure. You can even involve them in the process by letting them choose which activity comes next, fostering a sense of autonomy.
Tips for Navigating Toddler Tantrums
Let’s be honest: tantrums are inevitable. They can be exhausting, but remember, they are completely normal for toddlers. Here are a couple of techniques to manage these moments:
Stay Calm: Your toddler feeds off your energy. Keeping a cool demeanor can help soothe them. Even a deep breath can work wonders!
Offer Choices: Giving your child limited choices can empower them. For example, “Do you want the blue cup or the red cup?” Simple choices can prevent power struggles.
Distraction Techniques: When you sense a tantrum brewing, change the subject or redirect their attention. A favorite toy or snack can sometimes do the trick!
Encouraging Healthy Nutrition
Feeding a toddler is often a bouncing act of trial and creativity. Here are a few simple strategies to foster healthy eating habits:
Make Meals Fun
Cut fruits and veggies into fun shapes or arrange food in creative patterns on their plate. You might be surprised at how engaging this can be for your little one.
Involve Them in Cooking
Letting your toddler help in the kitchen can spark excitement about food. They can mix ingredients, wash veggies, or even help with simple measuring tasks.
Introduce New Foods Gradually
Do you remember the first time you tried asparagus? It can take several tries for children to develop a taste for new foods, so patience is key.
Final Thoughts
Parenting toddlers is no small feat, but it’s also one of the most rewarding experiences you’ll ever have. The little victories, joyful moments, and even the challenges are all part of this beautifully chaotic journey.
Conclusion
I hope these insights bring you comfort and inspiration as you navigate these early years. For families looking for more resources, a great place to start is by exploring options for play-based preschools to foster your child’s growth. You can learn more about this by visiting play-based preschools. Additionally, for those located in Morehead City, NC, you may find helpful information about local preschool and daycare options at this link. Remember, you’re not alone—a supportive community is always here to help!
80+ Ridiculously Fun DIY Backyard Ideas Kids Will Love and Play With
Transforming Your Backyard into a Fun Zone for Kids
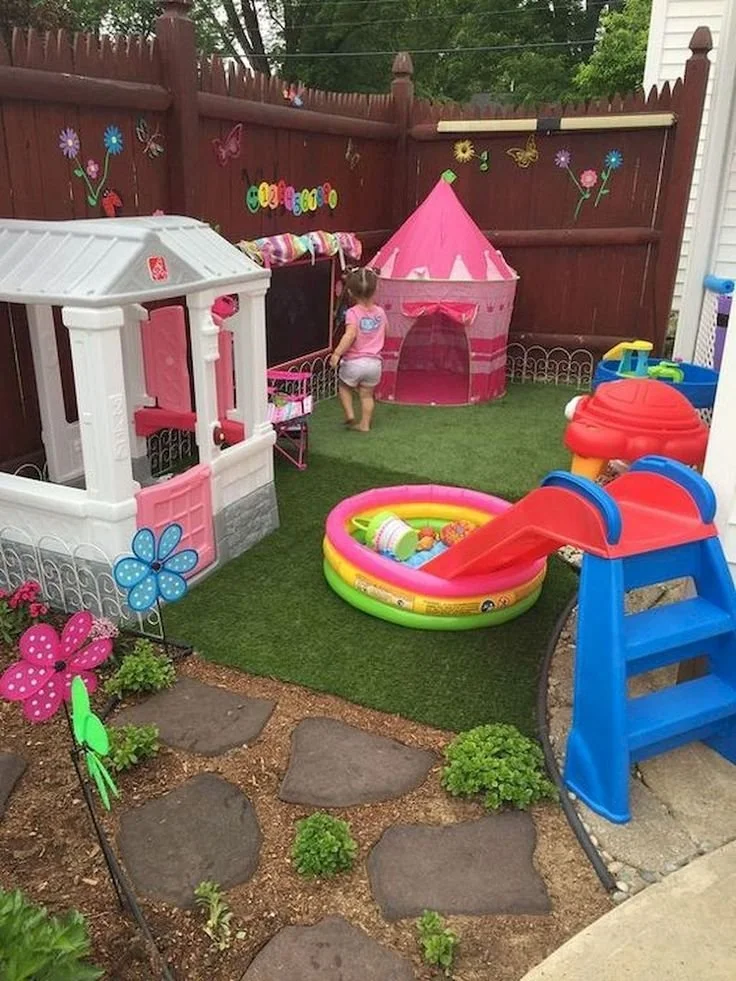
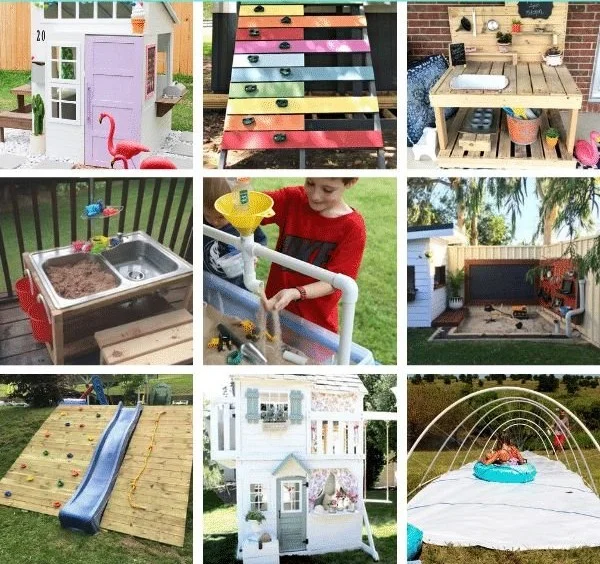
Imagine stepping into your backyard and seeing your little ones laughing and playing with delight, completely engaged in their own world of creativity and adventure. Now, you might be wondering how to turn your rather boring outdoor space into a vibrant play zone that captures your children’s imagination. Well, you’re in luck! Here’s the thing: creating an engaging outdoor space doesn’t require a hefty budget or landscaping magic—just a little creativity and a DIY spirit.
Start with a Playful Base
The first step in transforming your backyard is to choose a vibrant play zone base. Create designated play areas that cater to different activities. Sandboxes are fantastic for sensory play. You can construct a simple wooden frame and fill it with sand for endless digging and building. It’s an easy way to introduce fine motor skills while keeping them entertained.
Incorporating DIY sensory bins, like the ones described in this guide, can provide versatile play opportunities. Sensory bins offer a controlled environment for kids to explore textures, shapes, and colors. Plus, they can be set up quickly, making them ideal for spontaneous playdates or backyard gatherings.
Building Fun Structures
Let’s be honest: every backyard needs a structure that sparks the imagination. Think about putting up a fort or a playhouse. You don’t have to go for something extravagant; a simple wooden frame with a tarp can become a pirate ship or a castle. Your kids can decorate their fort with flags, make-believe furniture, or their secret “keep out” signs, making it truly their own.
Speaking of engaging structures, you might also consider a climbing wall. Using some plywood and grips, you can create a safe and fun climbing space. It’s thrilling and an excellent way for kids to expend energy. Just imagine the joy on their faces as they conquer their personal Everest!
Supercharge with Activities
Now that you’ve got structure, let’s layer in activities. What if you had a water play area? A simple inflatable pool in the summer can become a base for games like catch or a mini splash pad with sprinklers. Fill it with water toys, and it’s a guaranteed winner for hot days.
On the flip side, when the weather cools down, you might build a mini obstacle course with household items. Hurdles made from pool noodles, tunnels from boxes, and even balance beams using wooden planks can provide hours of fun. Kids love challenges, and this will keep them active and fit while honing their coordination skills.
Crafting It Together
Here’s a fun idea: involve your kids in the DIY process. Making things together not only teaches them valuable skills but also strengthens your bond. Whether you’re painting signs for their playhouse or constructing a birdhouse, they’ll feel a sense of investment in their play area. This experience is about more than just play; it’s about creating lasting memories.
If you really want to enhance fine motor skills, you could even create a simple DIY robotic hand together. This project is not only a fun craft but also educates them on how movement works. It’s kind of magical for kids to see the connection between play and learning!
Adding Personal Touches
No play area is complete without personal touches. Adding a few whimsical decorations, like garden gnomes or colorful wind spinners, can truly bring the space to life. Also, consider setting up a creative arts corner in your yard once the big play structures are in place. Keep supplies like chalks, paints, and craft materials available so kids can spontaneously dive into a new project whenever inspiration strikes.
One important thing to note: Don’t forget the importance of shade and seating. You might want to set up a cozy nook with blankets, cushions, or even a hammock where kids can chill after playtime, helping them foster their imaginative storytelling.
Safety First
Of course, while you’re making everything engaging and fun, remember that safety is paramount. Check that all structures are stable and surfaces are cushioned where needed. If you’re installing items like slides or climbs, proper ground cover (like soft grass or mulch) will help minimize bumps and scrapes.
Before you know it, your backyard will be transformed into a hub of joy and creativity where you can relax and enjoy your children’s laughter—and perhaps even join in the fun!
Conclusion
Creating a playful backyard doesn’t have to be overwhelming; simple DIY projects can lead to endless fun. For further inspiration on making sensory bins that boost play, explore this helpful resource here. And if you’re looking to mix in some creative craft projects, check out these instructions for a fun DIY robotic hand< a href="https://parentinggems.com/easy-diy-robotic-hand-for-kids/">here. Plan this summer for some unforgettable adventures right in your own backyard!
Creative Kid Activities to Spark Fun Learn and Family Bonding
The Magic of Quiet Time Bins for 3 Year Olds
Imagine it’s a chilly afternoon, and you’re juggling laundry, meal prep, and an endless list of to-dos while your little one is bouncing off the walls. Sound familiar? We’ve all been there. You want your child to have fun and explore, but at the same time, you need a moment of peace. Enter the magic of quiet time bins—a simple but powerful solution that can transform your chaotic afternoons into serene moments of productivity and play.
So, what exactly are quiet time bins? These are containers filled with carefully curated activities and materials that engage your child’s curiosity and creativity while allowing them the independence to play on their own. They’re a lifesaver for busy parents, giving you that much-needed breather while keeping your child entertained.
Understanding Quiet Time Bins
So, you might be wondering, how do quiet time bins work? They serve as a tool for teaching your child how to play independently while they explore various activities at their own pace. When you present them with engaging materials, you foster creativity and problem-solving skills. Plus, there’s a sense of accomplishment that they feel when they complete tasks or create something on their own.
Quiet time bins can include various items such as puzzles, building blocks, sensory materials, art supplies, and more. The key is to tailor these bins to your child’s interests and developmental level. For instance, if your little one enjoys animals, consider including animal figurines and a small world setup.
Essential Components of a Quiet Time Bin
Now, let’s break down what makes a great quiet time bin. Here are a few essential components to consider:
Variety: Include different types of materials to keep things interesting. Think about incorporating sensory items like rice or beans, along with art supplies and books.
Themes: You can have themed bins based on holidays, seasons, or your child’s favorites. For example, a pirate-themed bin with treasure maps, toy ships, and puzzles can really ignite their imagination.
Accessibility: Ensure the bin is easy for your child to access. This not only empowers them to take charge of their playtime but also teaches responsibility when it comes to clean-up.
Duration: Keep activities within the bin appropriate for their attention span. For a 3-year-old, short bursts of creative play can often yield greater engagement.
Instructions (if needed): For some children, a brief visual guide can be helpful in understanding how to utilize the items in the bin effectively.
Tips for Creating Your Quiet Time Bins
As you dive into creating quiet time bins for your 3-year-old, here are some tips to maximize effectiveness:
Observe Their Interests: What does your child gravitate toward? Do they adore animals? Are they budding artists? Tailoring the bins to their interests makes a world of difference.
Rotate Contents: Don’t feel the need to keep the same materials in the bins indefinitely. Rotating the contents every couple of weeks can keep things fresh and exciting!
Incorporate Learning: Look for materials that can support early learning. For instance, letters, numbers, or shapes can be integrated into sensory play.
Make It Special: Present the quiet time bin as a treat! You could even create a special "quiet time corner" in your home where your child knows the magic happens.
Examples of Engaging Quiet Time Activities
You might be wondering what types of activities work well in quiet time bins. Here are a few popular options:
Sensory Play: Use items like kinetic sand, water beads, or even simple rice in the bin. Add scoops, containers, and small toys for them to discover and explore.
Art Supplies: Include crayons, colored pencils, and stickers. Perhaps throw in a coloring book, or even let your child create their masterpiece on blank paper.
Small Building Blocks: Items like LEGO Duplo or other large blocks can keep them busy for hours. You can also set challenges like building a house or a specific shape.
Puzzles: Simple puzzles with their favorite characters can provide a sense of achievement when completed and require focus.
Books: A few age-appropriate books can provide quiet engagement as your little one immerses themselves in a story.
Encouraging Independent Play
It’s important to remember that introducing quiet time bins doesn’t mean you have to walk away and ignore your toddler. Initially, you might want to sit nearby and engage with them as they explore the contents. This helps them understand how to use items and offers you a moment to bond too.
You could even discuss the activities together, reinforcing language development and cognitive skills. Over time, as they become more confident in playing independently, you can gradually allow them to take the lead.
As you start this journey, you may also consider integrating other activities into their routine, such as fun activities for toddlers that promote growth and learning.
Benefits of Quiet Time Bins
The benefits of using quiet time bins extend beyond mere entertainment. Here are some key advantages you can expect:
Skill Development: Your toddler will naturally be developing fine motor skills as they manipulate items in the bin.
Self-Soothing: Quiet time can help your child learn to calm themselves and engage with the world independently.
Creativity Boost: Having a variety of materials allows for endless imaginative play, enhancing their creative thinking.
Parental Peace: Most importantly, these bins provide you with a little breather amidst the chaos of parenting.
Common Mistakes to Avoid
As you dive into creating quiet time bins for your little one, it’s essential to be mindful of some common pitfalls:
Overloading the Bin: While variety is important, too many options can overwhelm a toddler. Stick to two or three activities per bin to keep it manageable.
Neglecting to Refresh: If your child seems bored, it might simply be time to refresh the contents. Keep their interests in mind, and don’t hesitate to switch things out.
Ignoring Safety: Always consider age-appropriate materials. If the bin includes small objects, ensure they are suitable for your child to avoid any choking hazards.
If you’re looking for more creative ideas, you might also enjoy exploring these creative egg carton activities that are fun and easy to set up.
Conclusion
Quiet time bins are a magical way to engage your child while giving you some much-needed breathing room. By providing various activities in a dedicated space, you’re fostering independence, creativity, and learning. It’s a win-win for both parents and kids! For additional fun ideas, consider checking out Pin & Pound Pumpkin Kid Activities or explore options at PINSTACK for more family activities that can turn any day into an adventure. Happy bin-making!
