
Quick & Healthy Strawberry Banana Oatmeal Hacks for Busy Moms
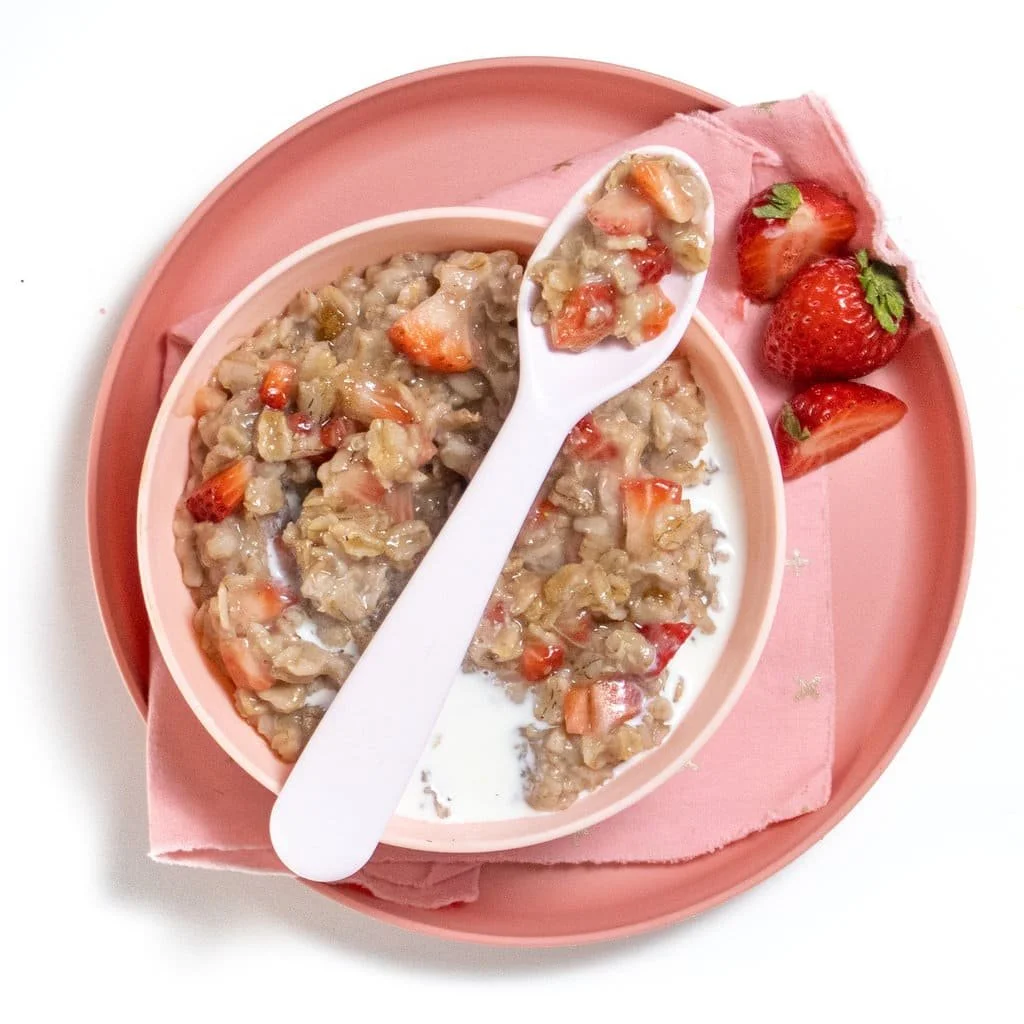
Quick and Healthy Strawberry Banana Oatmeal
Picture this: It’s a busy morning, and you’re juggling your sleepy toddler who’s desperately demanding breakfast. Sound familiar? We’ve all been there! You want to ensure your little one starts the day with something wholesome and nutritious, but let’s be honest—who has the time for complicated recipes? This is where quick and healthy strawberry banana oatmeal comes to the rescue. Not only is it easy to whip up, but it’s also a delightful way for your child to enjoy breakfast.
Why Oatmeal?
Oatmeal is one of those pantry staples that deserves a permanent spot on your kitchen shelf, especially when you have toddlers. It’s versatile, packed with fiber, and can be made deliciously sweet without a ton of added sugar. Plus, it offers a comforting base for various toppings. Strawberries and bananas are not only loved by kids but are also great fruit choices. They come with their own vitamins, antioxidants, and plenty of natural sweetness.
Getting Started with Strawberry Banana Oatmeal
Here’s a simple recipe to serve up this breakfast favorite in little to no time.
Ingredients
- 1 cup of rolled oats
- 2 cups of milk (or any non-dairy alternative)
- 1 ripe banana, sliced
- 1 cup of fresh strawberries, hulled and chopped
- A pinch of salt
- Honey or maple syrup (to taste)
- A sprinkle of cinnamon (optional)
Directions
- In a medium saucepan, combine the oats, milk, and salt. Bring to a rolling boil.
- Reduce the heat and let it simmer for about 5 minutes, stirring occasionally.
- Once the oats are cooked, stir in the sliced banana and chopped strawberries.
- Sweeten with honey or maple syrup if desired, and add a sprinkle of cinnamon for an extra flavor kick.
What’s great about this recipe is that it takes just about 10 minutes from start to finish. But what if your child isn’t a huge fan of bananas or strawberries? You could swap in different fruits! The possibilities are endless, and if you need more inspiration, check out these kid-approved healthy muffins that also pack in fruits and veggies.
Customizing Your Oatmeal
Now that you have a basic oatmeal recipe, let’s spice it up a little.
Here are a few quick ideas:
- Add Nut Butter: A tablespoon of almond or peanut butter not only adds creaminess but also makes it protein-rich.
- Top with Seeds: Flaxseeds or chia seeds can be sprinkled on top for a nutritional boost that your kids will barely notice.
- Mix in Some Yogurt: A scoop of yogurt can make this oatmeal extra creamy and enjoyable, perfect for kids who love that smooth texture.
- Try Different Milks: Whether you prefer almond milk, soy milk, or coconut milk, feel free to experiment and find what works best for your family.
It can sometimes be tough to keep breakfast fresh and exciting. If you’re looking for more healthy meals that kids will enjoy, don’t miss out on these kid-friendly lunch ideas too!
Quick Tips for Busy Parents
- Meal Prep Oats: Consider prepping a big batch of oatmeal on the weekends. Just reheat as needed during the week.
- Try Overnight Oats: If you’re feeling adventurous, look up overnight oatmeal recipes. They require no cooking but have a delightful texture.
- Add a Fun Twist: Make oatmeal more playful! Let your children create their own oatmeal faces with sliced fruits and nuts.
Mistakes to Avoid
- Skipping the Salt: A pinch of salt is essential as it enhances the flavors.
- Overcooking: Don’t walk away! Pay attention to your oatmeal as it cooks to prevent it from turning mushy.
- Ignoring Sweetness: Adjust the sweetness to your child’s preferences! Some kids might enjoy their oatmeal sweeter than others.
If you’re experiencing a lack of variety in your child’s diet, it’s important to stay creative and flexible. Keep those ideas flowing, and encourage your little ones to not only partake in eating but also making their meals. You’ll find that mealtime can be an opportunity for connection and fun!
Benefits of Strawberry Banana Oatmeal
Eating oats, enriched with strawberries and bananas, can help support your child’s growth and energy levels. Here are some benefits you may appreciate:
- Good for Digestion: The fiber in oats helps regulate digestion, something every parent loves to hear!
- Stabilizes Energy: By providing steady energy, your child won’t crash mid-morning, reducing the crankiness that often accompanies hunger.
- Pleasure in Eating: The mixed flavors and textures can help develop a healthy palate in your young ones, showing them that healthy food can be delicious!
Conclusion
Incorporating quick and healthy meals into your child’s routine is essential for their development. A dish like strawberry banana oatmeal can be both nutritious and delightful. For even more tasty breakfast ideas, check out the Strawberry Banana Oatmeal by Laura Fuentes or try a different twist with the Strawberry Banana Oatmeal Recipe for variations your kids might love. By making nourishing meals that appeal to their taste buds, you’ll be setting a solid foundation for their eating habits. Keep it simple, keep it fun, and you’ll have your little one diving into breakfast with a smile!
Kid-Friendly Cakey Sweet Potato Brownies Ideas Your Family Will Love
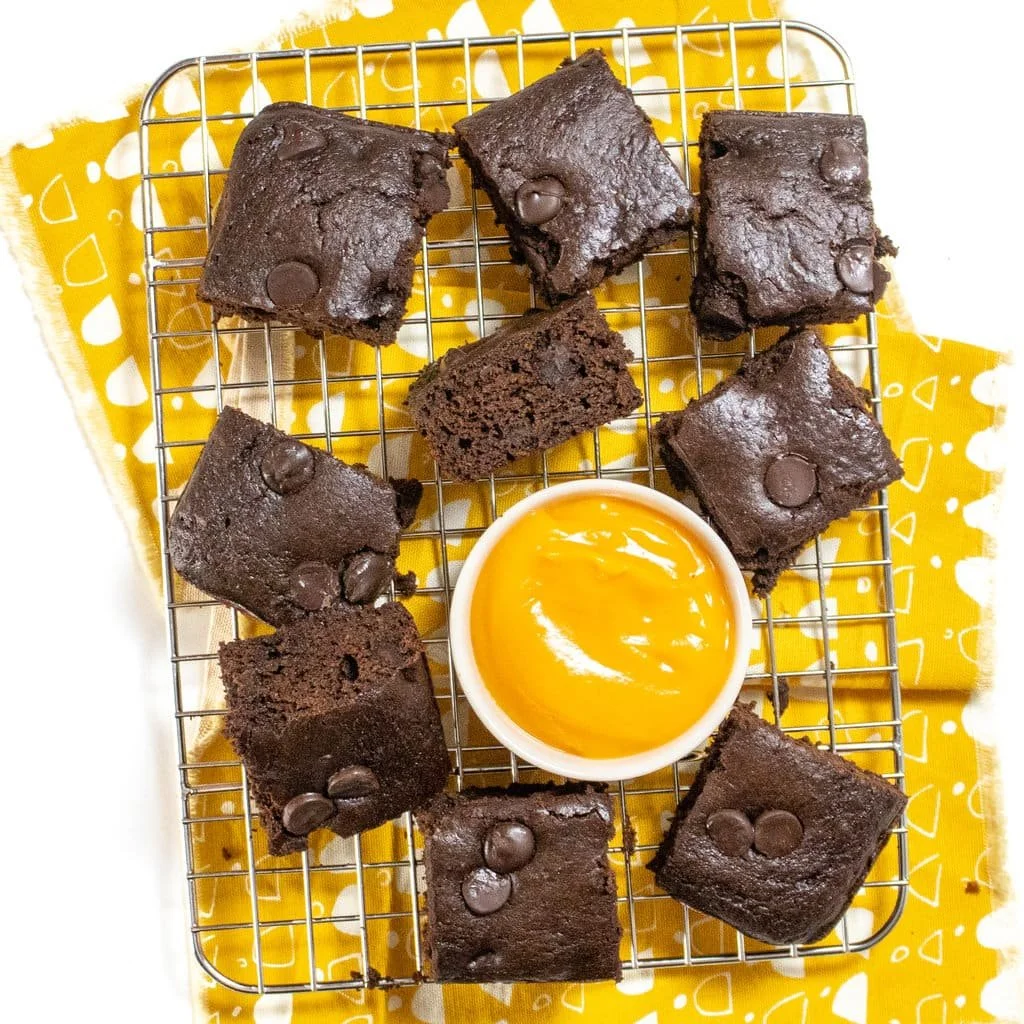
Exploring Kid-Friendly Cakey Sweet Potato Brownies
Imagine it’s snack time at your house or, better yet, a rainy afternoon. Kids are bouncing off the walls, and you’re desperately searching for a fun, healthy treat that keeps everyone happy. Here’s the thing: how often do we really strike the perfect balance between delightful and nutritious? Enter sweet potato brownies—yes, you heard that right! These little gems are a fantastic way to incorporate nutrition into a beloved treat, making them a perfect option for your family. You may also find Delicious Fruit Sweetened Smash Cake For Baby useful.
Sweet potatoes are not just versatile; they’re incredibly nutritious too. Loaded with vitamins, minerals, and fiber, sweet potatoes can boost your children’s health while satisfying their sweet tooth. Now, you might be wondering, what if I could make these brownies cakey, soft, and oh-so-delicious? That’s entirely possible! I’m here to guide you through this delightful culinary adventure that will leave both you and your kids grinning from ear to ear.
Why Choose Sweet Potato for Brownies?
You might be asking, "Why sweet potatoes?" Well, they are a fantastic alternative to traditional brownie bases. Not only do they add a natural sweetness and moisture to the batter, but they also pack a punch of nutrients. Here are a few great reasons to consider sweet potatoes for your brownies:
- Nutrient-Rich: Sweet potatoes are rich in vitamin A, antioxidants, and dietary fiber.
- Naturally Sweet: Their inherent sweetness means you might need less added sugar, making them an excellent choice for health-conscious parents.
- Versatile Texture: When blended, sweet potatoes give a lovely cakey texture to brownies, making them more appealing to kids.
Plus, they’ve got that vibrant color that kids seem to love—it’s like a treat that’s both enchanting and nutritious!
Making the Perfect Cakey Sweet Potato Brownies
Let’s dive into the magic of creating these treats. If you’re ready to impress your little ones and their friends, here’s how to get started with the recipe:
Ingredients You’ll Need
Gather these simple, wholesome ingredients for your brownie adventure:
- 1 cup mashed sweet potatoes (cooked)
- 1/2 cup peanut butter or almond butter
- 1/4 cup honey or maple syrup
- 2 eggs
- 1 teaspoon vanilla extract
- 1/2 cup cocoa powder
- 1 teaspoon baking powder
- A pinch of salt
- Optional: Chopped nuts or chocolate chips for added texture
Steps to Make the Brownies
Preheat the Oven: Start by preheating your oven to 350°F (175°C). Grease a baking pan for easy removal later.
Mix the Batter: In a large mixing bowl, mash the sweet potatoes until smooth. Then, mix in the peanut butter, honey (or maple syrup), eggs, and vanilla extract until well combined.
Combine Dry Ingredients: In a separate bowl, whisk together the cocoa powder, baking powder, and salt. Gradually add the dry ingredients to the sweet potato mixture, stirring until you create a smooth batter.
Bake: Pour the batter into the prepared baking pan, spreading it evenly. Bake for about 20-25 minutes, or until a toothpick comes out clean.
Cool and Slice: Allow them to cool in the pan for a bit, then slice them into squares. Watch your kids’ faces light up when they see these delightful brownies!
Now, if you’re looking for alternatives to classic snacks that are both delicious and healthy, consider trying out some cute gluten-free kids’ potatoes as well. You can find a great recipe for that here.
Tips to Make It Even Better
Want to elevate these brownies? Here are some fun tips:
- Experiment with Mix-Ins: Consider adding chocolate chips or nuts for added crunch. These can make the brownies even more appealing, especially for older kids.
- Double the Recipe: If your family loves them, why not make a double batch? They freeze well and can be a quick snack or dessert option later.
- Substitute: If nut allergies are a concern, you can swap out nut butter for sun butter, or coconut oil can be a good alternative for a vegan option.
The Joy of Healthy Snacking
Family snack time doesn’t have to revolve around sugary or processed foods. By adding wholesome ingredients to the mix, we can keep our children healthy while tantalizing their taste buds. Not to mention, baking together can cultivate a wonderful bonding experience. So, when your little chef asks to help, don’t hesitate—let them stir, scoop, and taste-test!
What if you turned that joyful kitchen moment into a tradition? Imagine your kids growing up with memories of making sweet potato brownies together, creating lasting connections to healthy eating.
Conclusion
When it comes to introducing healthier snack options, kid-friendly cakey sweet potato brownies are a game-changer. They not only satisfy cravings but also nurture your growing child’s nutritional needs. Let’s be honest—who wouldn’t want a brownie that’s good for them too?
If you’re looking for more creative sweet potato recipes, check out this favorite sweet potato brownie recipe that incorporates even more delightful ingredients. You might also find inspiration in this kid-friendly cakey sweet potato brownies guide for additional variations to try. Happy baking!

Hidden Veggie Recipes for Super Moist Veggie Loaded Muffins
Hidden Veggie Muffins That Kids Love
Imagine your child asking for a snack and you present them with a muffin. A muffin they think is just tasty, fluffy goodness, but underneath all that deliciousness lurks a world of hidden veggies! As parents, it can often feel like a battle to get our little ones to eat their vegetables. You’re not alone in this; we’ve all been there, trying to sneak in those crucial nutrients without any complaints. Well, today, I’m super excited to share 20 hidden veggie recipes for super moist veggie-loaded muffins that your kids will absolutely enjoy.
Now, here’s the thing: the key to these muffins is not just the hidden vegetables. It’s also about creating a flavor experience that excites your kids. So, get ready to whip up some delicious treats that can double as snacks or breakfast!
Why Hidden Veggies Matter
We know that vegetables are packed with vitamins and nutrients, but convincing a toddler to eat a broccoli stalk is like trying to get a cat to take a bath—nearly impossible! By blending veggies into muffins, you’re adding important nutrients while making them enjoyable. Let’s be honest, the right recipe can make even the pickiest eaters curious enough to take a bite. These muffins can also be a great way to introduce your kids to a variety of veggies without them even realizing it.
Top Hidden Veggie Muffin Recipes
Here are some of our favorite recipes that incorporate hidden veggies seamlessly. Grab your apron and let’s dive into these yumminess!
1. Carrot and Zucchini Muffins
These muffins are a fantastic way to use up those zucchini you might have in the fridge. Grated carrots and zucchini pair perfectly for a moist muffin. Add a dash of cinnamon for that extra flavor.
2. Spinach Banana Muffins
Yes, you read that right! Spinach and banana might sound like a peculiar combo, but trust me, when blended together, they make for a delightful and nutrient-packed treat.
3. Sweet Potato Muffins
Packed with fiber and naturally sweet, sweet potato muffins can also include a sprinkle of chocolate chips for a little extra flair. They’re perfect for breakfast or as an after-school snack.
4. Beetroot Chocolate Muffins
This one’s a game changer. Who doesn’t love chocolate? The addition of beetroot not only adds moisture but also gives those muffins a rich color. Your kids will never know they’re eating beets!
5. Cauliflower Muffins
Blending cauliflower into your muffins is another sneaky way to get in some veggies without changing the flavor much. Use them in savory muffins with cheese, and watch them disappear.
6. Pumpkin Spice Muffins
Pumpkin is not just for pies! These muffins incorporate pureed pumpkin which is loaded with vitamins. Add some spices like nutmeg and allspice for that classic flavor.
7. Broccoli Cheddar Muffins
Think of these as a mini broccoli and cheddar quiche! Perfect for lunchboxes, these muffins can be made ahead and freeze well.
8. Avocado Banana Muffins
Avocado adds a creamy texture and healthy fats. Paired with banana, you’d never guess it was in there!
9. Apple Carrot Muffins
Apple sauce is a great way to add moisture while sneaking in some fruit and veggies. Combine with grated carrots and you’ve got a sweet, delightful treat.
10. Summer Veggie Muffins
Incorporate your favorite summer veggies like corn, zucchini, and bell peppers to make a colorful muffin that brings in tons of flavor!
Tips for Perfect Hidden Veggie Muffins
- Grate Your Veggies: Ensure your veggies are finely grated to avoid detection.
- Use Spices: Spices can mask any taste that might give away the veggies.
- Sweetness Matters: Don’t be afraid to add a bit of honey or maple syrup to sweeten the deal.
- Experiment: Try different combinations to find what your kids love best.
If you’re looking for even more creative hidden veggie ideas, you can check out this collection of the best hidden veggie recipes.
Creative Serving Suggestions
Once your muffins are baked and ready, the fun doesn’t stop there. You might want to consider some creative ways to serve them:
- Mini Muffin Platter: Create a platter with different types of muffins for a fun snack time.
- Pair with Dips: Serve your savory muffins with a yogurt or hummus dip.
- Decorate: Allow your kids to decorate their muffins with fruits, nuts, or a drizzle of honey.
Storing Muffins
Don’t forget to store your muffins properly! They can be kept in an airtight container at room temperature for a few days, or you can freeze them for up to three months. Simply heat them up for a quick snack or breakfast option.
You can also take it a step further and make corn fritters with a delicious twist. Check out the recipe for these healthy southern corn fritters that are loaded with hidden veggies. They’re a savory surprise that your kids will enjoy!
Conclusion
In our quest to ensure our kids get their fill of nutrients, hidden veggie muffins provide a perfect solution. They’re easy to make, versatile, and most importantly, tasty! You can explore fun and healthy muffin recipes like Healthy Chocolate Muffins (with Veggies!) that sneak in those essential nutrients while still delighting the taste buds. Similarly, don’t miss out on the Kid-Requested Easy Cheesy Veggie Muffins that can be prepped in just 25 minutes.
Happy baking, and remember—every bite counts!
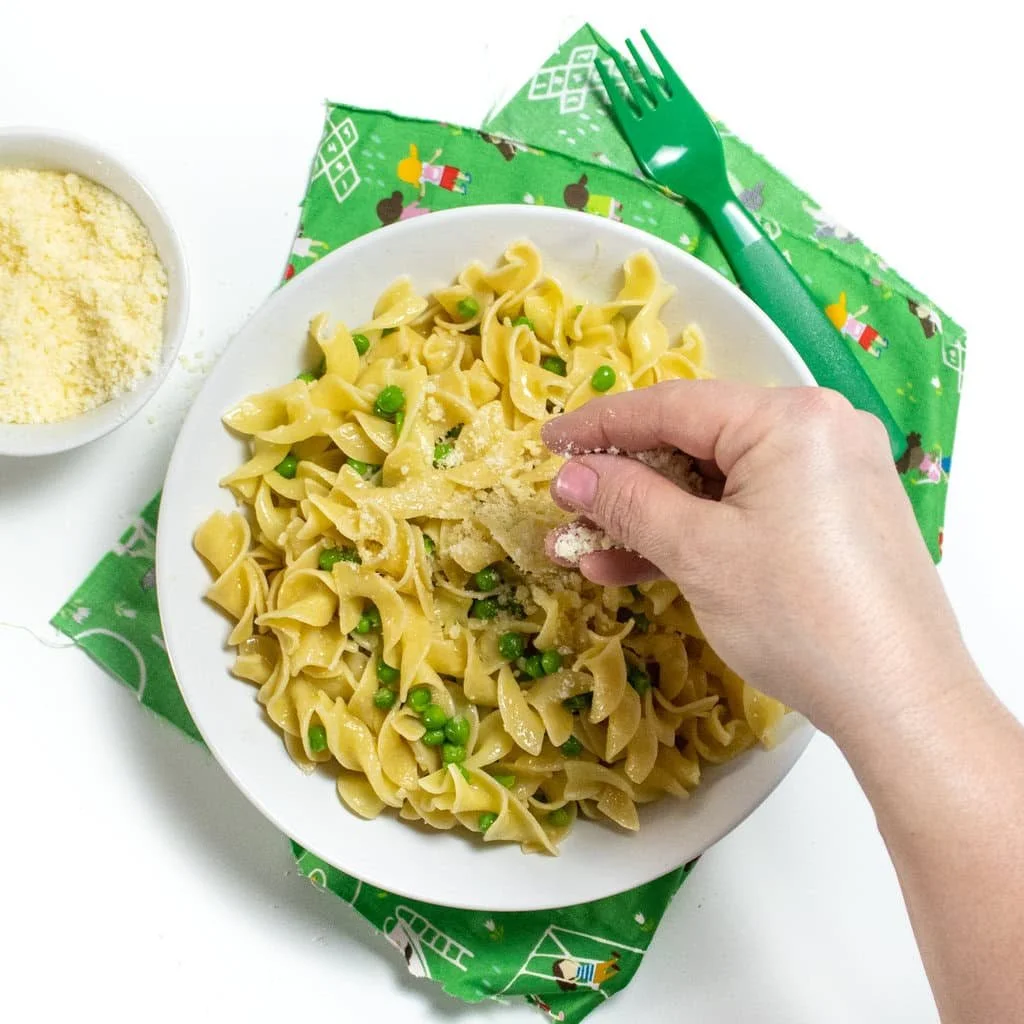
Kid Approved Butter Noodles with Peas & Parmesan Ideas for Moms
Kid-Requested Butter Noodles with Peas and Parmesan
Picture this: it’s dinner time, your toddler is exhausted after a long day, bouncing between the living room and the playground. You’ve lovingly prepared a variety of dishes, hoping to entice their little taste buds. Yet, it seems all they can utter is, “I want noodles!” Sound familiar? Well, I’ve been there too, and trust me when I say that these kid-requested butter noodles with peas and parmesan can save the day!
This simple dish strikes the perfect balance between easy preparation and kid-friendly flavors. Not only is it quick to whip up, but it also incorporates nutritious ingredients that will make parents and little ones alike happy. If you’re looking for a meal that your child will genuinely enjoy—and maybe even help make—read on to learn how to bring this delightful dish to life.
Why Kids Love Butter Noodles
Now, you might be wondering, what is it about butter noodles that kids find so irresistible? It’s pretty straightforward. The soft, comforting texture along with the rich flavor of melted butter creates a dish that is simple yet satisfying. And let’s not forget, kids are naturally drawn to familiar flavors, and butter noodles hit that sweet spot of comfort food.
In addition to being a hit at the dinner table, this dish allows for creative variations! What if you want to round out the meal with vegetables? Well, peas are a fantastic addition. They bring a pop of color and a burst of sweetness that complements the buttery noodles beautifully. If your little one loves to experiment, involve them in the cooking process—grab some fresh vegetables and let them choose what to add!
Ingredients You’ll Need
For the perfect buttery noodle experience, you’ll need the following ingredients:
- 8 ounces of your favorite pasta (spaghetti, fettuccine, or even shapes like shells work well)
- 1 cup frozen peas (fresh peas if you can find them, but frozen is super convenient)
- 4 tablespoons unsalted butter
- ½ cup grated parmesan cheese
- Salt and pepper to taste
- Optional add-ins: peas, shredded chicken, or whatever else your little one enjoys
Now, let’s be honest—who doesn’t feel a wave of nostalgia when they think about pasta? From effortless weeknight meals to elaborate family gatherings, there’s something simply wonderful about it. Speaking of nostalgia, if you ever find yourself thinking about fun family activities while cooking, check out these engaging activities with your baby to keep things lively in the kitchen.
Making the Butter Noodles
Step-by-Step Process
Cook the Pasta: Start by boiling a large pot of salted water. Add the pasta and cook it according to package instructions until al dente. This will usually take around 8-10 minutes, depending on the type of pasta you choose.
Add the Peas: If you’re using frozen peas, toss them into the pot during the last 2 minutes of cooking the pasta. This will cook them perfectly without compromising their vibrant color or crunch.
Drain and Combine: Once the pasta and peas are cooked, drain them using a colander. Remember to reserve a little bit of the pasta water—about half a cup—just in case you need it later for added creaminess.
Butter It Up: In the same pot (or a large skillet), melt the butter over low heat. Add the drained pasta and peas back in, stirring gently to coat everything in that delightful melted butter.
Add the Cheese: Sprinkle the grated parmesan over the noodles and stir to combine. If it seems a bit dry, add a splash of the reserved pasta water to make it creamy.
Season and Serve: Give it a taste, and add salt and pepper as needed. I like to serve this right away, topped with a little extra parmesan for good measure.
We’ve all been there, where kids can be picky, so if they shy away from the idea of peas, it’s okay to leave them out. You can always encourage them to try just a few!
Tips to Make It Extra Special
Here are some quick tips that can elevate your butter noodle game:
Herb Enhancements: Consider adding fresh herbs like basil or parsley for a fresh twist. They can also inspire your little ones to engage with more green food!
Protein Boost: For older kids and those needing more energy, you can easily mix in some shredded chicken or cooked ham. This not only adds flavor but also makes the dish more filling.
Experimenting with Cheese: While parmesan is classic, feel free to try out other cheeses like mozzarella or a bit of cheddar. Just getting into a new cheese could spark curiosity in experimenting with flavors.
If you’re a mom constantly on the go and seeking easy meal prep strategies, check out these essential tips for busy parents. You’ll find plenty of practical advice that can make mealtime smoother!
Customize Your Noodles
The beauty of this butter noodle dish lies in its versatility. You can adjust the ingredients however you see fit. Some kids love tomato sauce, while others crave a bit of zest with lemon juice. The key here is to help foster an exploratory experience during meal times.
Possible Additions:
- Veggies: Besides peas, you can throw in cooked spinach, roasted butternut squash, or tiny bits of broccoli which blend well under that heavenly layer of butter.
- Flavor Enhancements: Consider a sprinkle of garlic powder or Italian seasoning to add even more dimensions to the flavor, enticing even the most discerning eaters.
A Family-Friendly Meal
Getting kids comfortable in the kitchen is invaluable as they grow and develop. Involving them in tasks like stirring, mixing, or even measuring can open up delightful conversations about food. And who knows? Today’s butter noodle dish might become tomorrow’s culinary inspiration. We all cherish that feeling of creating something delicious together as a family.
In sharing these moments, you’ll find that cooking can be more than just about the final plate; it’s about bonding and making memories that last a lifetime!
Conclusion
In the whirlwind of parenting, sometimes it’s the simple meals that create the biggest smiles. This kid-requested butter noodles with peas and parmesan dish is a delightful way to keep things easy while ensuring your child enjoys a nutritious meal. Encourage their creativity in the kitchen, and you’ll find that every meal can become a cherished memory.
For some more inspiration, you might check out this Kid-Requested Butter Noodles with Peas & Parmesan if you need variations, or perhaps this Fusilli Alfredo recipe for an additional creamy, comforting option. Happy cooking!
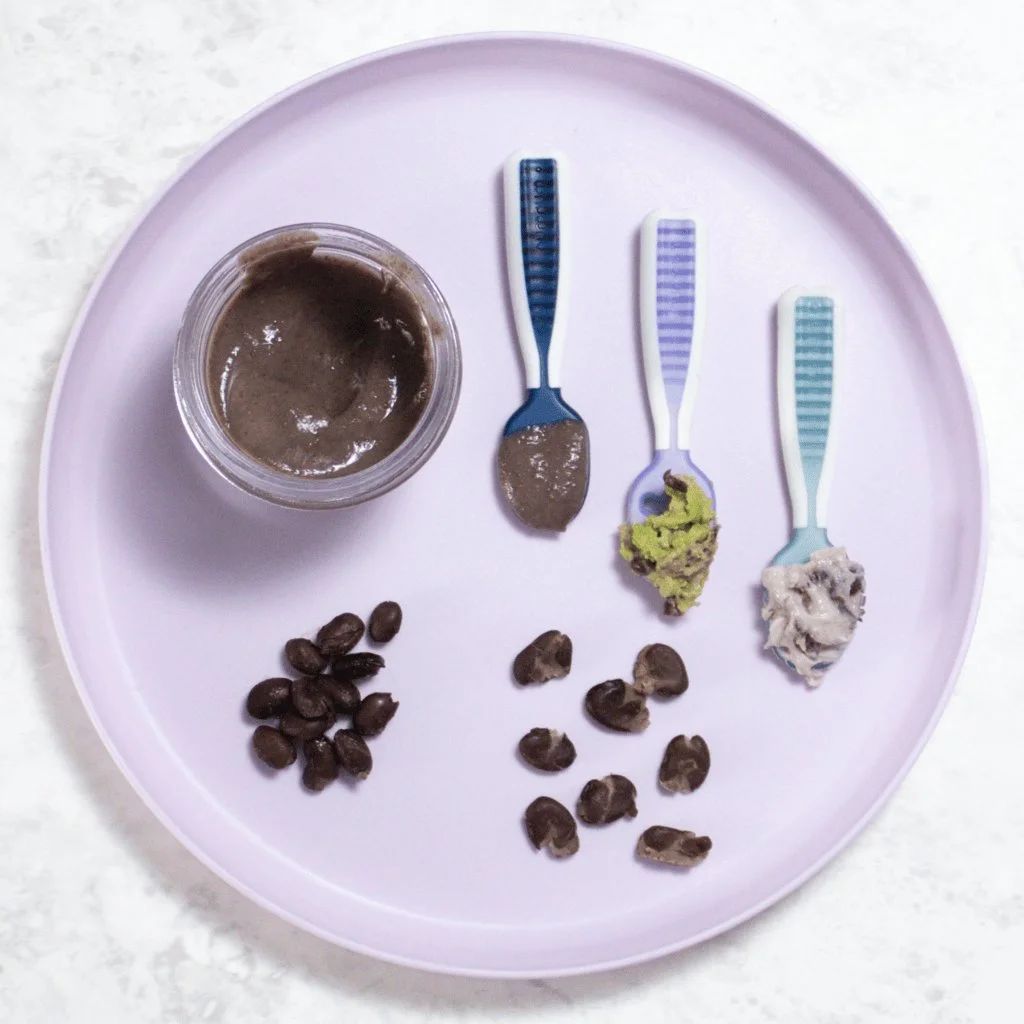
Easy Black Beans & Cumin Baby Food Ideas for BLW and Purees
Imagine this: You’re in the kitchen, your little one is in their high chair, eyes wide with anticipation as you prepare their next meal. You’ve been experimenting with all sorts of fruits and vegetables for baby food, but you’re looking for something a little different, just to keep things interesting. Enter black beans and cumin—an unexpectedly delightful combination that’s nutritious, flavorful, and suitable for your baby’s palate. Let me share how to incorporate black beans into your baby’s meals, whether you’re making purees or practicing baby-led weaning (BLW).
Why Black Beans are a Great Choice
Let’s start with the basics. Black beans are packed with protein, fiber, vitamins, and minerals. They’re not only gentle on your baby’s tummy but also a fantastic way to introduce hearty flavors early on. Cumin adds a warm, earthy flavor that can help your little one develop a taste for diverse spices, which is a wonderful habit as they grow.
Here’s the thing: many parents stick to safe options like apples and bananas, but introducing foods like black beans can open up a whole new world of taste experiences for your child. Plus, they can be easily transformed into smooth purees or finger foods, making them ideal for whatever feeding method you choose.
How to Prepare Black Beans for Baby
You can serve black beans to your little eater either as a puree or in small finger-sized pieces. Either way, the key is to ensure they’re cooked well and properly prepared.
Preparing Black Bean Puree
- Ingredients: Start with cooked black beans. If you’re using canned beans, make sure to rinse them well to remove excess sodium.
- Blend: Add the beans to a blender along with a little water or breast milk/formula to achieve the desired consistency.
- Serve: This creamy puree can be a meal on its own or mixed with other pureed veggies for added nutrition.
Baby-Led Weaning Approach
If you’re excited about going the BLW route, black beans can be a fantastic finger food!
- Cook Thoroughly: Ensure the black beans are well-cooked and soft. Overcooking them a bit can make them easier for tiny hands to grasp.
- Serving Ideas: Offer whole beans for your baby to pick up, or mash them slightly so they can still hold onto them and explore textures.
Not sure where to find more tips on baby food? Check out these baby food recipes tailored for the important 6-8 month age range.
Combining Flavors: Cumin with Black Beans
While black beans are delicious on their own, adding a twist with cumin can elevate the flavor profile.
Simple Recipe: Black Bean and Cumin Puree
- Ingredients:
- 1 cup cooked black beans
- ¼ teaspoon cumin
- Water or breast milk/formula as needed
- Blend: Combine all ingredients in a blender until smooth.
- Adjust: Add more liquid if you want a thinner consistency.
This combo can be a great addition to your baby’s meals. And if they enjoy this flavor, you can experiment with other spices as they get older.
Alternate Recipe: Black Bean and Sweet Potato Mash
- Cook: Steam or roast sweet potatoes and cook black beans.
- Mash: Combine and mash together for a nutrient-rich option that packs a flavor punch.
Safety Tips for Introducing New Foods
Every parent has experienced the anxiety of introducing new foods to their little ones. Here are some tips to help ease your mind:
- Start Slow: Introduce one new food at a time and wait for a few days before trying something else. This way, you can monitor for any allergic reactions.
- Watch for Choking Hazards: Always supervise your baby while they eat, especially if you’re serving whole black beans.
- Observe Preferences: You might find that your baby loves one food and rejects another. That’s completely normal!
Flavor Pairing Ideas
Don’t hesitate to combine black beans with other foods to create delicious meals. Here are a few ideas to get your creative juices flowing:
- Rice and Beans: Combine mashed black beans with rice for a nutritious meal.
- Veggie Mix: Blend with carrots, peas, or avocados for added flavor and texture.
- Tacos: Once your child is older, consider making mini tacos with black beans and soft tortillas.
Feeling unsure about more inspiration for delicious meals? You can explore these baby shower food ideas that might also get you thinking about creative ways to incorporate new flavors.
The Journey Ahead
Cooking for your little one is a journey. From selecting ingredients to exploring new flavors, it’s about creating a fun and engaging experience both for you and your developing eater. Black beans and cumin are just the tip of the iceberg when it comes to flavors that will excite your baby and promote healthy eating habits for years to come.
Conclusion
As you embark on this culinary adventure with black beans and cumin, remember that each new flavor is an opportunity for exploration. For even more inspiration, check out the recipe for Black Bean & Cumin Baby Food along with the Butternut Squash, Black Bean & Cumin Homemade Baby Food Recipe. Here’s to happy feeding experiences and a lifetime of healthy eating!
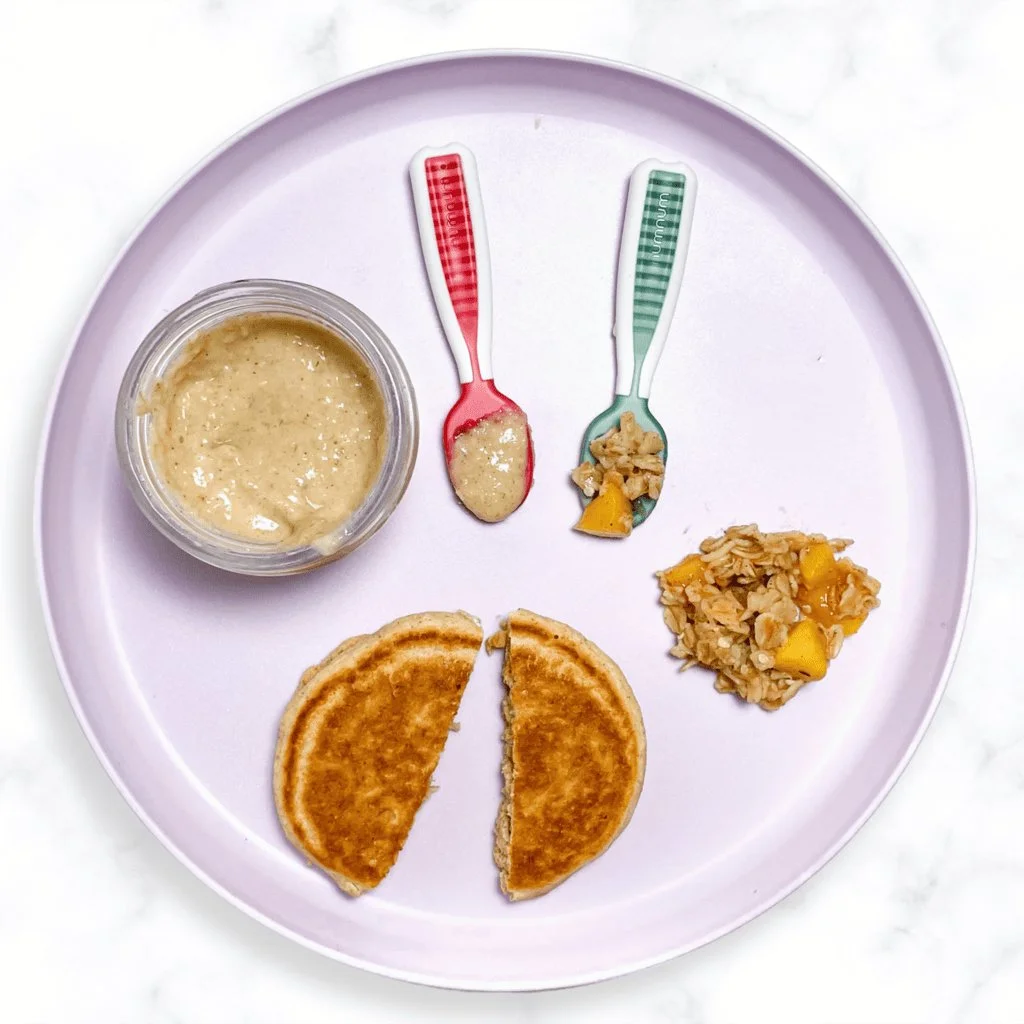
Quick Oats with Peaches for Baby-Led Weaning Unlocks Health and Joy
Oats with Peaches for Baby-Led Weaning
Picture this: you’re in the kitchen on a busy morning, trying to whip up a delicious breakfast that’s both nutritious and engaging for your little one. You glance over at the fruit bowl, and there it is—ripe, juicy peaches beckoning you. What if I told you that with just a few more ingredients, you could create a mouthwatering dish that’s perfect for baby-led weaning? Oats with peaches is not only a yummy choice but also a great way to introduce your baby to new flavors and textures! You may also find 10 Genius Pool Bag Essentials For Moms With Babies Toddlers useful.
As parents, we know that starting solids is both exciting and nerve-wracking. We want to provide our babies with healthy options while making mealtimes fun and engaging. Just like how my friend Jessie found success with introducing her toddler to Solid Starts, I discovered the magic of oats with peaches the first time I made it for my daughter. She loved it—and I was thrilled to see her gobble it up!
Why Oats and Peaches?
Let’s be honest; oats alone are delightful, but add in some juicy peaches, and you’ve taken breakfast to a whole new level. Oats are excellent for babies because they’re rich in fiber, which is crucial for developing tiny tummies. When you mix in peaches, you not only enhance the flavor but also provide your baby with vitamins A and C, plus potassium. Here’s the thing: peaches are a great way to introduce fruits into your baby’s diet, and they pair perfectly with the subtle earthiness of oats.
Here’s another bonus: it’s incredibly simple to prepare. Whether you’re a kitchen wizard or just a novice, this recipe is straightforward, fun, and so satisfying.
Ingredients You’ll Need
- Oats – Rolled or quick oats work best for this recipe.
- Peaches – Fresh or canned in their juice, chopped into small pieces.
- Water or Milk – You can use breast milk, formula, or whole milk for more creaminess.
- Sweetener (optional) – A dash of cinnamon or honey (for babies over one year).
Making Oats with Peaches
So, how do we whip up this delightful dish? Here’s a simple step-by-step guide to making oats with peaches that even your little helper can assist with.
Prepare Your Oats: Cook the oats according to the package instructions. Typically, this involves adding oats to boiling water or milk and reducing it to a simmer. Stir occasionally to keep them from sticking. If you’re in a hurry, quick oats usually cook in just a few minutes.
Add Peaches: Once the oats are cooked, fold in the chopped peaches. If you’re using fresh peaches, you might find it’s best to add them while the oats are still warm, allowing them to soften ever so slightly.
Serve and Enjoy: Let it cool a bit before serving it to your little one—nobody wants a surprise hot mouthful! Serve it creamy or add a splash more liquid for a smoother consistency, particularly if your baby is still getting used to texture.
Tips for Success
Texture Matters: As your baby becomes more accustomed to eating solids, you can start experimenting with texture. For younger babies, pureeing the oats and fruits is a great way to ensure they’re manageable. Over time, let them enjoy the texture of whole oats and chunks of peach.
Mix It Up: Want to switch things up? Adding different fruits like bananas or berries is a fantastic way to keep breakfast interesting. You could try spinach waffles as an exciting addition to your breakfast rotation too!
Make It Ahead: If you’re anything like me, mornings can be a whirlwind. Preparing a big batch of oats and storing them in the fridge can make your life easier. Just reheat and serve!
Benefits of Baby-Led Weaning
Choosing baby-led weaning (BLW) means allowing your child to self-feed and explore various textures and flavors at their own pace. This method encourages independence and helps babies develop fine motor skills. From my experience, I noticed how my daughter became more adventurous with food—she wasn’t just tasting what I put in front of her; she was actively exploring it.
Studies suggest that babies who are introduced to a variety of flavors early on may be less picky eaters later in life. By introducing foods like oats with peaches, you’re not only fueling their bodies but their appetite for culinary exploration.
Mistakes to Avoid
As exciting as this stage is, there are a few common pitfalls to look out for. Here are a couple:
Avoid Overcooking: Too mushy oats can lack flavor and texture. Aim for a creamy consistency but still with a bit of chew.
Safety First: Always supervise your baby while they eat. Make sure there are no large chunks that could pose a choking hazard.
Quick Tips for Eating with Peaches
Use Small Pieces: When cooking peaches, ensure they’re cut into small, manageable pieces for your baby.
Watch for Allergies: Although peaches are generally safe, it’s always wise to introduce new foods one at a time and watch for any allergic reactions, especially if your family has a history of allergies.
Conclusion
As you embark on this exciting journey of baby-led weaning, oats with peaches might just become a staple in your household. Not only are they nutritious and delicious, but they also offer your little one a chance to explore new textures and flavors. For more delightful ideas, you might want to try out this oats with peaches recipe or explore the delightful peaches and cream oatmeal. Happy feeding!
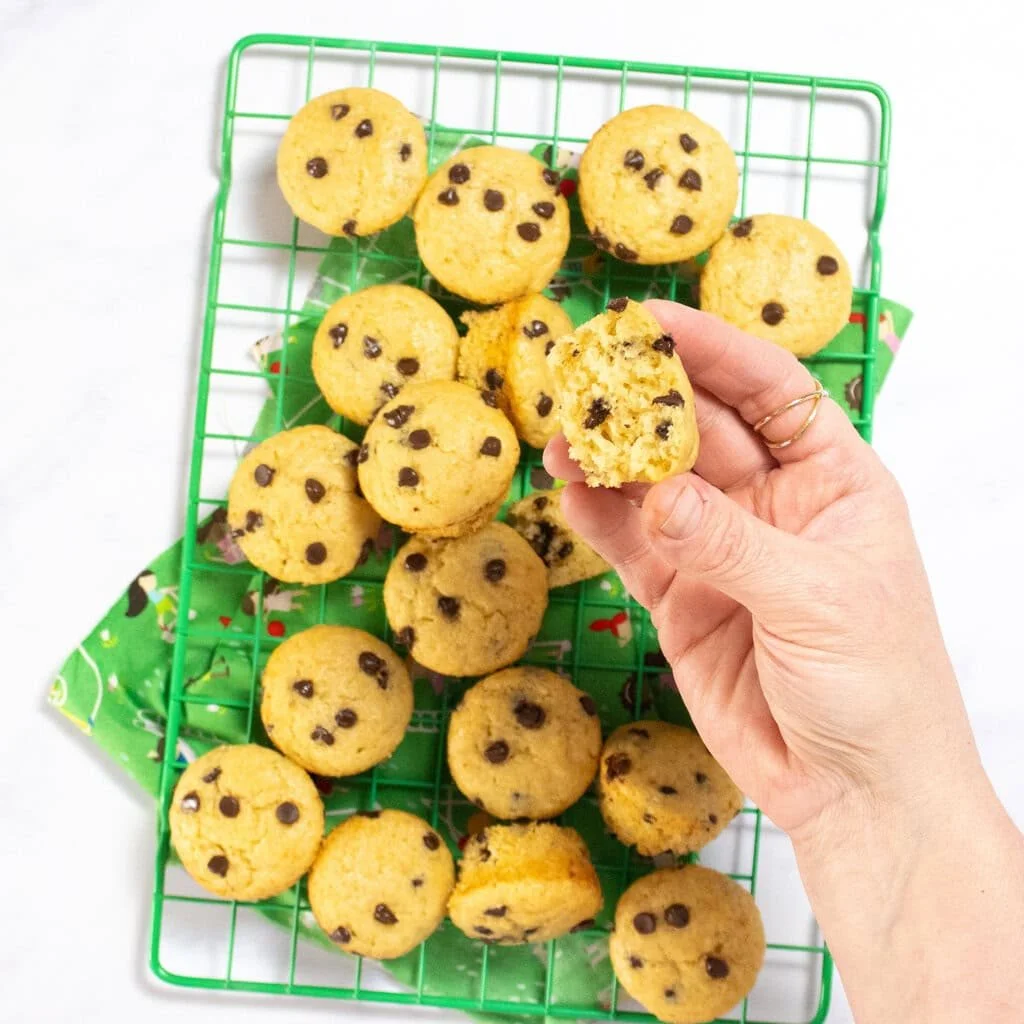
Sanity-Saving Yogurt Mini Chocolate Chip Muffins for Busy Moms
Introducing the Perfect Mini Muffins for Busy Parents
Imagine this: it’s a chilly Tuesday morning, and your little one is climbing onto the kitchen counter, curious as ever. You’ve just realized you’re out of breakfast options, and you have a million things to tackle before the day begins. Sound familiar? We’ve all been there, right? Luckily, I have a sanity-saving solution for those chaotic mornings: mini chocolate chip muffins made with yogurt. They’re not only quick to whip up but also packed with flavor and nutrition.
These mini muffins come together effortlessly, making them a go-to recipe for busy parents wanting to serve something tasty without the hassle. Plus, they can easily be made ahead of time and stored for later—a huge bonus for anyone trying to maintain some order amidst the chaos of having little ones around.
Why Choose Mini Muffins?
Now, you might be wondering, why mini muffins? The answer is simple: kids love them! These perfectly portioned bites are easy for tiny hands to grab and munch on. But that’s not all—they’re incredibly versatile and can be customized to whatever ingredient you have on hand. Have you tried flavors like blueberry and avocado? They offer a delicious twist, and I definitely recommend giving them a try with these blueberry avocado muffins.
Let’s break down what makes these mini chocolate chip muffins so special. For starters, using yogurt in the recipe adds moisture, a slight tang, and tons of health benefits, making them not just a treat, but also a nutritious option for your kids.
The Benefits of Using Yogurt in Baking
Incorporating yogurt into baked goods can have several positive effects. Here’s why you’ll want to give it a try:
- Moisture: Yogurt helps keep your muffins moist, ensuring they don’t dry out quickly.
- Health Benefits: It’s a great source of protein and calcium, which are essential for growing kids.
- Flavor: The tangy taste of yogurt pairs beautifully with sweetness, balancing out the chocolate chips perfectly.
Now, you might be intrigued by how simple the recipe is! Let’s dive into the ingredients you’ll need.
Ingredients You’ll Need
For these delightful mini chocolate chip muffins, gather the following ingredients:
- 1 cup of yogurt: Choose your favorite flavor or go with plain.
- 1/2 cup of sugar: Feel free to adjust depending on your sweetness preference.
- 1 cup of flour: A mix of whole wheat and all-purpose can be a nutritious option.
- 1/2 teaspoon of baking soda and baking powder: These will help your muffins rise beautifully.
- 1/2 cup of chocolate chips: Because let’s be honest, what’s a chocolate chip muffin without them?
- 1-2 eggs: For binding the ingredients together.
As you can see, these ingredients are pantry staples that you might already have, making it even easier to whip up these muffins when the hunger strikes!
Quick Steps to Bake Your Mini Muffins
Here’s how you can put everything together in no time:
- Preheat the Oven: Set your oven to 350°F (175°C).
- Mix the Wet Ingredients: In a large bowl, combine the yogurt, sugar, and eggs. Beat them until mixed well.
- Combine Dry Ingredients: In a separate bowl, mix together the flour, baking powder, and baking soda.
- Combine Together: Slowly add the dry ingredients to the wet mixture until just combined—it’s okay if there are lumps!
- Add Chocolate Chips: Gently fold in the chocolate chips.
- Bake: Spoon the batter into mini muffin tins and bake for about 12-15 minutes, or until a toothpick comes out clean.
And voila! You’ve got delicious mini muffins that are ready to be devoured.
Storage Tips for Muffins
One of the best parts about these mini muffins is that they store well. When they come out of the oven, allow them to cool, then store them in an airtight container. You can keep them at room temperature for a couple of days, or pop them into the fridge to extend their freshness. If you’ve made a large batch, freezing them is a perfect option as well.
To thaw, just leave them out for a bit or pop them in the microwave for a few seconds. Trust me; you’ll be glad you have a stash ready for those busy mornings!
Fun Variations to Try
Once you’ve mastered the basic recipe, why not switch it up a little? Here are some suggestions:
- Banana Nut Muffins: Mash in some bananas for extra sweetness and nutrients.
- Cinnamon Swirl: Add a brown sugar and cinnamon mix for a delightful twist.
- Berry Blast: Toss in your favorite berries, like blueberries or raspberries, for a fruity punch that kids love.
Experimenting with different flavors can make muffin-making a fun activity for you and your little ones. It also opens up the opportunity for them to learn about different ingredients and flavors.
Muffins as Snack Alternatives
These mini muffins can easily replace less nutritious snacks throughout the day. Instead of reaching for sugary granola bars or processed snack foods, offer your kids these muffins to keep their energy sustained. They are perfect for school lunches, after-school snacks, and even as a light breakfast on the go.
In addition to these chocolate chip muffins, you might find that flavors like blueberry and avocado hold just as much appeal and are another excellent option to add to your recipe book.
Conclusion
Incorporating homemade snacks like mini chocolate chip muffins into your family’s routine can truly be a game changer. Not only are these muffins delicious and nutritious, but they also create a wonderful opportunity for family bonding—baking together! If you’re looking for more ideas to keep snack time exciting, check out these recipes for Sanity-Saving Mini Chocolate Chip Muffins and Banana Chocolate Chip Muffins. With a little creativity, you can make snack time something everyone in the family looks forward to!
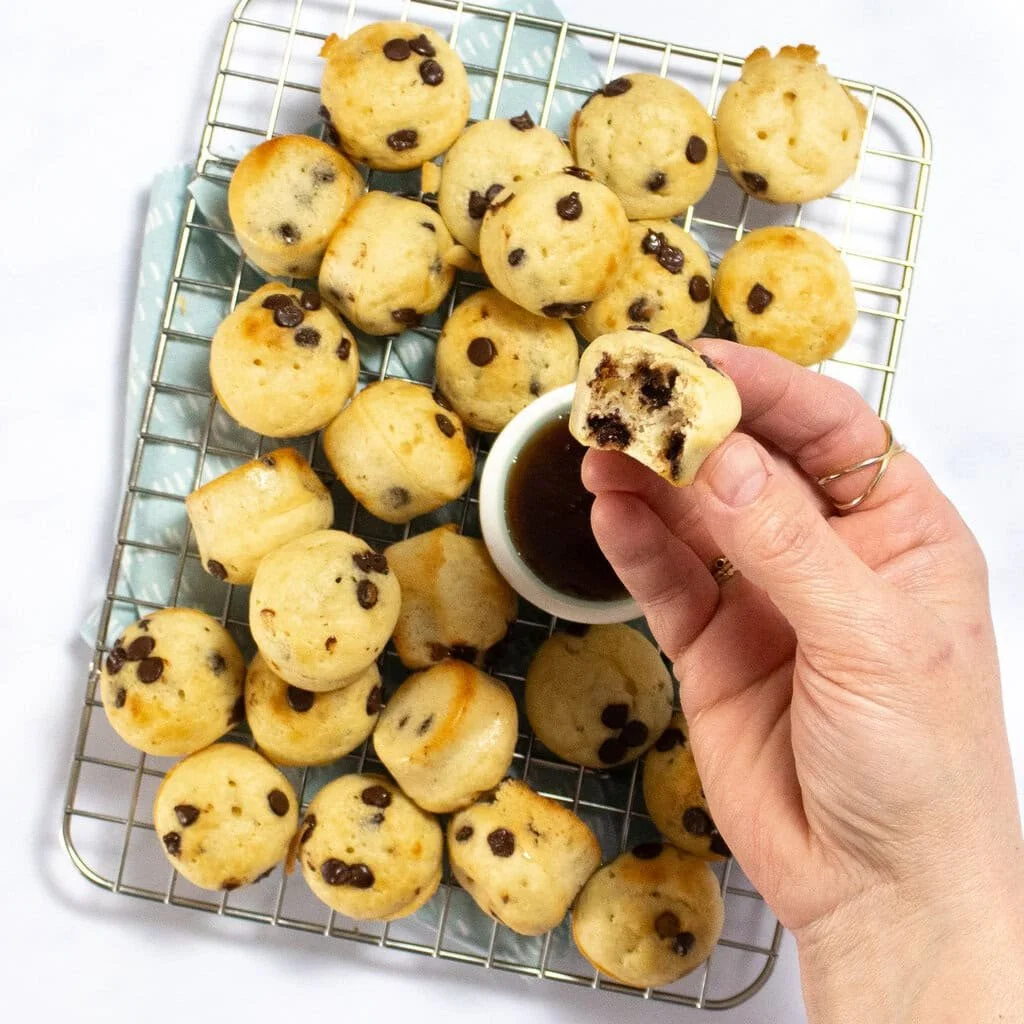
Quick 15-Minute Mini Pancake Bites with Yogurt for Busy Mornings
Imagine this: it’s a busy morning, and your little one is clamoring for something delicious to eat. You’re juggling tasks, and while you’d love to whip up a gourmet breakfast, you really just need something quick and easy. Sound familiar? If so, let me introduce you to a game-changer: 15-minute mini pancake bites! These little delights are not only adorable but also perfectly tailored for tiny hands. Plus, they’re packed with nutrition when you add yogurt into the mix.
Why Mini Pancake Bites Are a Hit
Let’s be honest, mini food is always a hit with kids. There’s something special about those tiny pancake bites that makes them fun to eat. They’re the perfect finger food that fits snugly in little hands and can be dipped, dunked, or topped with whatever your kids crave most. And the best part? They’re incredibly versatile! Whether you’re adding fruits, drizzling syrup, or serving them with yogurt, these bites are bound to keep your kiddos excited about breakfast.
What if I told you that they can be made in just 15 minutes? Yes, you read that right! With just a few ingredients and minimal prep time, you can have a delightful breakfast that even the pickiest eaters will love. They also make for a fantastic option if you’re hosting a get-together or just having a casual brunch at home.
To get started, let’s break down how you can whip up these easy mini pancake bites.
Easy Ingredients
Before diving into the steps, here’s what you’ll need:
- 1 cup all-purpose flour
- 1 tablespoon sugar
- 2 teaspoons baking powder
- ½ teaspoon baking soda
- ½ teaspoon salt
- 1 cup yogurt (this is where the magic happens)
- 1 large egg
- 2 tablespoons milk (adjust as necessary for batter consistency)
- Optional: vanilla extract, chocolate chips, or fruit add-ins
By using yogurt instead of a traditional batter base, you’re adding essential nutrients while keeping the pancakes soft and fluffy. For additional inspiration and variations, consider checking out these easy mini pancakes ideas that will have your creative wheels turning!
Step-by-Step Preparation
Step 1: Mix the Dry Ingredients
In a large bowl, whisk together the flour, sugar, baking powder, baking soda, and salt. This step helps ensure that the leavening agents are evenly distributed throughout your mixture, which is crucial for achieving that perfect fluffy pancake.
Step 2: Combine Wet Ingredients
In another bowl, mix the yogurt, egg, and milk until well combined. This is also where you can add a splash of vanilla for a tasty twist. Now, here’s a tip from one busy parent to another: measure your yogurt first, then use the same cup to measure the milk. It saves on washing up!
Step 3: Combine Dry and Wet Ingredients
Gently fold the wet mixture into the dry ingredients until just combined. The goal here is to avoid over-mixing. A few lumps are okay! If you’d like to add chocolate chips or fruit, this is the moment to fold them in gently.
Step 4: Cook the Pancake Bites
Heat a non-stick skillet or griddle over medium heat. If you want to avoid sticking, you can add a tiny bit of oil or butter. Using a mini cookie scoop or a tablespoon, drop small amounts of batter onto the skillet.
Cook until bubbles form on the surface (about 1-2 minutes), then flip and cook for an additional minute or until golden brown. These mini pancake bites cook quickly, so keep an eye on them!
Step 5: Serve and Enjoy
Once cooked, remove the pancakes from the skillet and serve them warm. You can stack them up on a plate, drizzle with syrup, or add a dollop of yogurt and some fruit on the side. If you have leftovers (which I doubt!), these pancake bites can be stored in an airtight container in the refrigerator for a quick breakfast option throughout the week.
Let’s Talk Nutrition
As parents, we want our little ones to have nutritious options. Incorporating yogurt into these pancake bites not only boosts the protein content but also adds calcium, which is vital for growing bones. As you’re serving these delightful bites, think about pairing them with slices of fruit or a side of eggs for a balanced meal.
Additionally, if your little one happens to have dietary restrictions, these mini pancakes are easy to modify based on your needs—whether that means going gluten-free or substituting dairy. Just think about what works best for your family.
Fun Ideas to Mix It Up
One of the most glorious parts about cooking for kids is that you can mix things up endlessly. Here are some fun ideas to take your mini pancake bites to the next level:
- Fruit-Infused Options: Add mashed bananas or pureed pumpkin to the batter for extra flavor and nutrition.
- Superhero Pancakes: Use spirulina or matcha powder to create colorful pancakes that might just make your little one feel like a superhero.
- Tasty Dipping Sauces: Create a dip station with yogurt, fruit preserves, or homemade syrup. Kids love the act of dipping!
Need more inspiration? You can explore these irresistible mini pancakes ideas that will not only delight your kids but also impress the guests at your next brunch gathering.
Conclusion
Incorporating fun food into our kids’ diets doesn’t have to be overwhelming. With these 15-minute mini pancake bites, you’ll have a tasty, nutritious option that even the most discerning tiny eater will love. If you’re looking for more unique recipes, don’t miss out on the delightful 15-minute mini pancake bites or try out the indulgent Nutella pancake bites. Happy cooking!
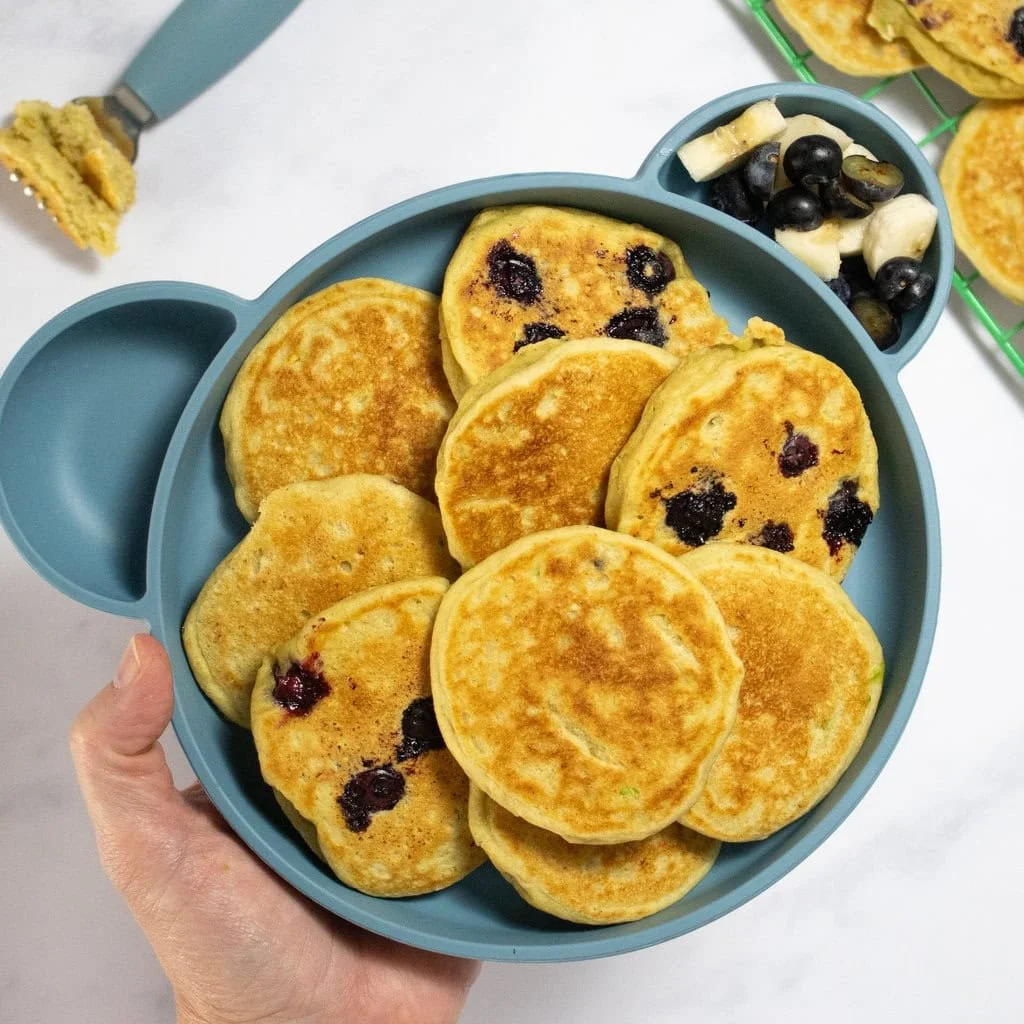
Minute Fluffy Avocado Pancakes for Baby Toddlers and Kids
Fluffy Avocado Pancakes for Babies, Toddlers & Kids
Imagine this: It’s a busy morning, and you’ve got a hundred things on your to-do list before heading out the door. You’ve bathed the kids, dressed them, and set up a million snacks for the day—but oh no, you forgot breakfast! We’ve all been there, right? Luckily, I’ve got a solution that’s quick, nutritious, and your little ones will absolutely love—fluffy avocado pancakes!
Avocado, the green superfood, is packed with healthy fats and nutrients perfect for growing babies and toddlers. These 15-minute pancakes not only offer a tasty treat but also boost your child’s diet with the goodness of avocados. If you’re looking for a creative breakfast idea that feels both indulgent and healthy, then you’ve got to try these pancakes.
Let’s be honest—making breakfast for children can sometimes feel like a chore, especially when they’re not in the mood to eat. But with this recipe, you’ll have fluffy, delicious pancakes on the table in no time, and you might find that breakfast becomes their favorite meal of the day!
The Benefits of Avocado in Your Child’s Diet
So, why should you consider adding avocado to your toddler’s diet? Avocados are nutrient-dense, containing a range of vitamins such as vitamin K, E, C, and B6. Plus, they’re rich in healthy monounsaturated fats, which are crucial for your kids’ brain development. Furthermore, adding different flavors and textures is essential for the developing palate of babies and toddlers, making these pancakes a great way to introduce new ingredients.
And if you’re looking for a variety of breakfast options, I recommend checking out these toddler-approved breakfast ideas. Your mornings will never be boring again!
Making the Fluffy Avocado Pancakes
Here’s how you whip up these delicious pancakes in a flash:
Ingredients
- 1 ripe avocado
- 1 cup of flour (whole wheat or all-purpose)
- 1 cup of milk (or dairy-free alternative)
- 1 egg (optional for egg-free diets)
- 1 tablespoon of baking powder
- 1 tablespoon of sugar (optional)
- A pinch of salt
- Butter or oil for cooking
Instructions
- Start by mashing the avocado in a bowl until smooth.
- Add in the flour, milk, egg, baking powder, sugar, and salt. Mix until just combined.
- Heat a non-stick skillet over medium-high heat and add a little butter or oil.
- Pour about 1/4 cup of batter onto the skillet for each pancake. Cook for about 2-3 minutes until bubbles form, then flip and cook for another minute or two until golden brown.
Tips for Success
- Make it Egg-Free: If you’re looking to make these pancakes free from eggs, simply omit the egg and substitute the liquid milk with a bit of chia seed mixed with water for binding.
- Serving Suggestions: Serve these pancakes warm with fresh fruits, a drizzle of honey, or a sprinkle of cinnamon for added flavor. Sliced bananas or berries on top make it visually appealing too!
Variations to Try
Feel like spicing things up? Here are a few variations you can explore:
- Add-ins: Toss in some blueberries, chocolate chips, or chopped nuts for an extra flavor explosion that they won’t be able to resist.
- Crepes Style: If your kids prefer something thinner, you can easily make avocado crepes by using a thinner batter. Just adjust the flour quantity and increase the milk.
Also, if you’re looking for another unique pancake recipe, you might enjoy the 3-ingredient egg-free banana pancakes. They’re a fantastic treat that can complement the avocado pancakes in your breakfast rotation.
Storing Leftovers
What about leftovers? If you happen to have any pancakes left (which is rare in my household), you can store them in an airtight container in the fridge for up to three days. Reheat them in a toaster or a pan for a quick breakfast on another busy morning.
Conclusion
Getting your child to eat well can sometimes feel like an uphill battle, but with delicious options like fluffy avocado pancakes, you can make breakfasts easier and healthier. For more unique pancake recipes for your little ones, don’t miss out on these fluffy avocado pancakes or explore flavorful combinations like fluffy ricotta pancakes with avocado for added variety. You’ve got this!
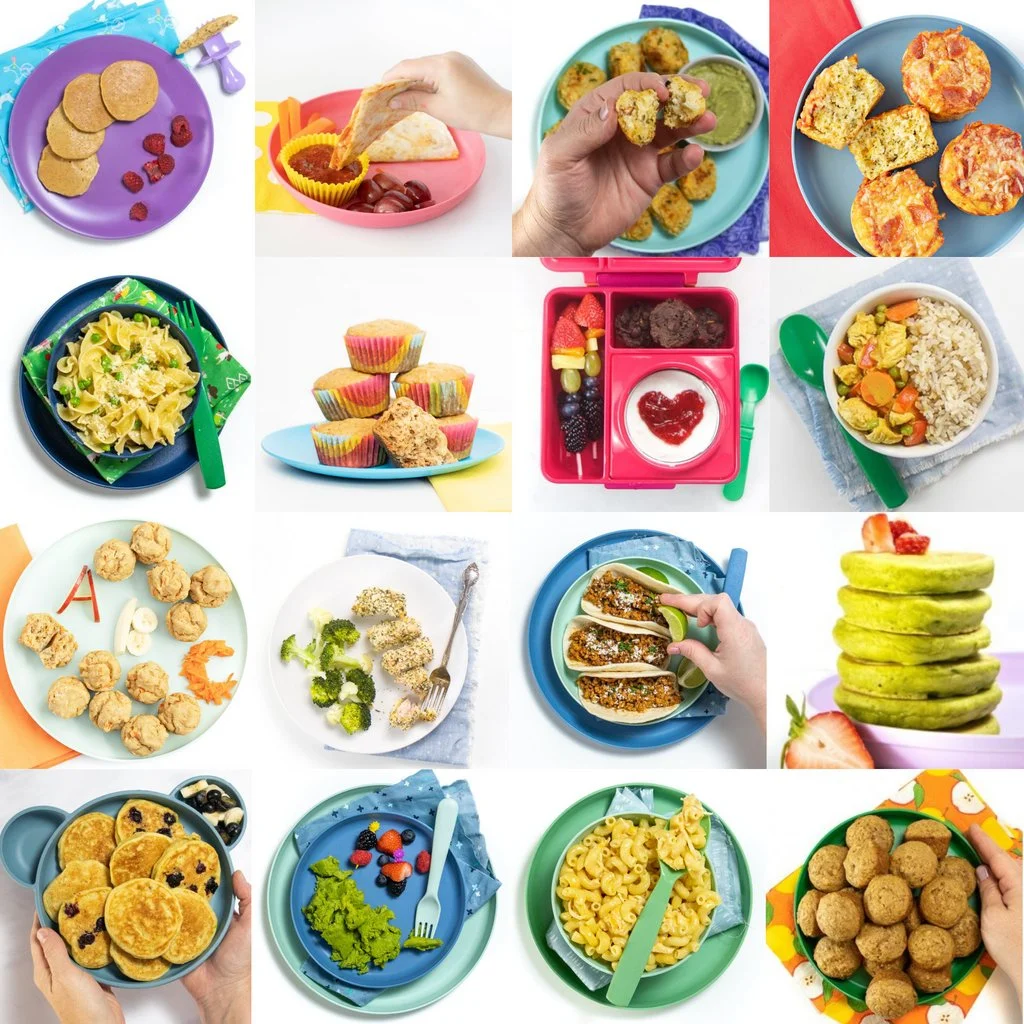
Toddler Meal Ideas That Are Quick and Easy Your Kids Will Love
Imagine it’s lunchtime and you’re staring at a fridge full of ingredients, yet for some reason, nothing seems good enough for your little one. Sound familiar? We’ve all been there. As parents, we want to feed our toddlers nutritious meals that they’ll love, but sometimes, it feels like trying to solve a really tricky puzzle! Let’s dive into some quick and easy toddler meal ideas that will make mealtime smoother while also ensuring your child gets the nutrition they need. Whether you’re dealing with picky eaters or simply want new meal inspiration, there’s something here for everyone.
Breakfast Ideas to Start Their Day Right
Breakfast is the most important meal of the day, especially for growing toddlers. Here are some kid-friendly breakfast ideas that can kickstart their day:
- Mini Veggie Omelets: Whip up some eggs, throw in some finely chopped veggies, and bake them in a muffin tin. They’re easy to grab and packed with nutrients!
- Peanut Butter Banana Toast: Spread a layer of natural peanut butter on whole-grain toast and top it with banana slices — it’s tasty and filling.
- Yogurt Parfaits: Layer yogurt with fruits and whole-grain cereal. Let your toddler help with layering to make it more fun!
In case your toddler is a picky eater, you might want to check out these easy meal ideas for picky eaters that can ensure they enjoy their meals while still being healthy.
Quick Lunch Ideas
When it comes to lunch, it’s all about keeping it simple yet delicious. Here are a few ideas that even the pickiest eaters might love:
- Quesadillas: Fill whole-wheat tortillas with cheese and beans. Grill until golden and serve with salsa.
- DIY Lunchables: Create a fun platter with whole-grain crackers, cheese slices, turkey, and fruits. They can pick and choose what they want!
- Soup and Sandwich: A warm bowl of soup with a half sandwich can be a comforting meal. Try butternut squash soup paired with a grilled cheese for a tasty combo.
Wholesome Dinner Ideas
Dinner is often the hardest meal for toddlers, especially after a long day of activities. Let’s explore some fun dinner options:
- Pasta Primavera: Toss whole-grain pasta with a variety of colorful veggies and a light cream sauce. Kids love pasta, and this is a sneaky way to get in more vegetables.
- Baked Chicken Nuggets: Coat chicken pieces in whole-grain breadcrumbs and bake for a healthier twist on a fast-food favorite.
- Stir-Fried Rice: Use leftover rice, toss in veggies, and add scrambled eggs for a quick stir-fry that is both filling and nutritious.
If you’re looking for more dinner inspirations, I highly recommend checking out these fantastic meal ideas for toddlers that will surely keep mealtime exciting.
Snack Time Solutions
Snacks can be a great opportunity to give your kids healthy options. Here are some delightful and easy snacks to prepare ahead of time:
- Fruit Kabobs: Put pieces of different fruits on skewers. Kids love to eat things off sticks!
- Veggie Sticks with Hummus: Cut up veggies like carrots and bell peppers and serve them with a side of hummus. It’s a tasty way to enjoy healthy snacks.
- Nut Butter Energy Bites: Mix oats, honey, and nut butter into little balls for a quick bite that’s both nutritious and satisfying.
Tips for Making Mealtime More Enjoyable
Making mealtime a pleasant experience doesn’t have to be a battle. Here are some tips that might help:
- Let Them Help: Involve your toddler in the cooking process. Kids are more likely to eat what they’ve helped make.
- Presentation Matters: Serve food in visually appealing ways. You can create fun shapes using cookie cutters or arrange food in colorful patterns on their plates.
- Stay Calm and Patient: If your toddler refuses to eat something, try not to stress. Continuous exposure to new foods often leads to acceptance over time.
Conclusion
Feeding toddlers can feel overwhelming, but with a few quick and easy meal ideas in your back pocket, you can simplify mealtime. From delightful breakfasts to creative snacks, there’s a world of options to ensure they get the nutrients they need. For further inspiration, you might want to explore 75 toddler meal ideas and discover even more recipes that will have your little ones excited about eating. You may also find some great quick dinner recipes that can save you time and keep your kids happy at the table. Happy cooking, and remember, you’re doing a great job!
