
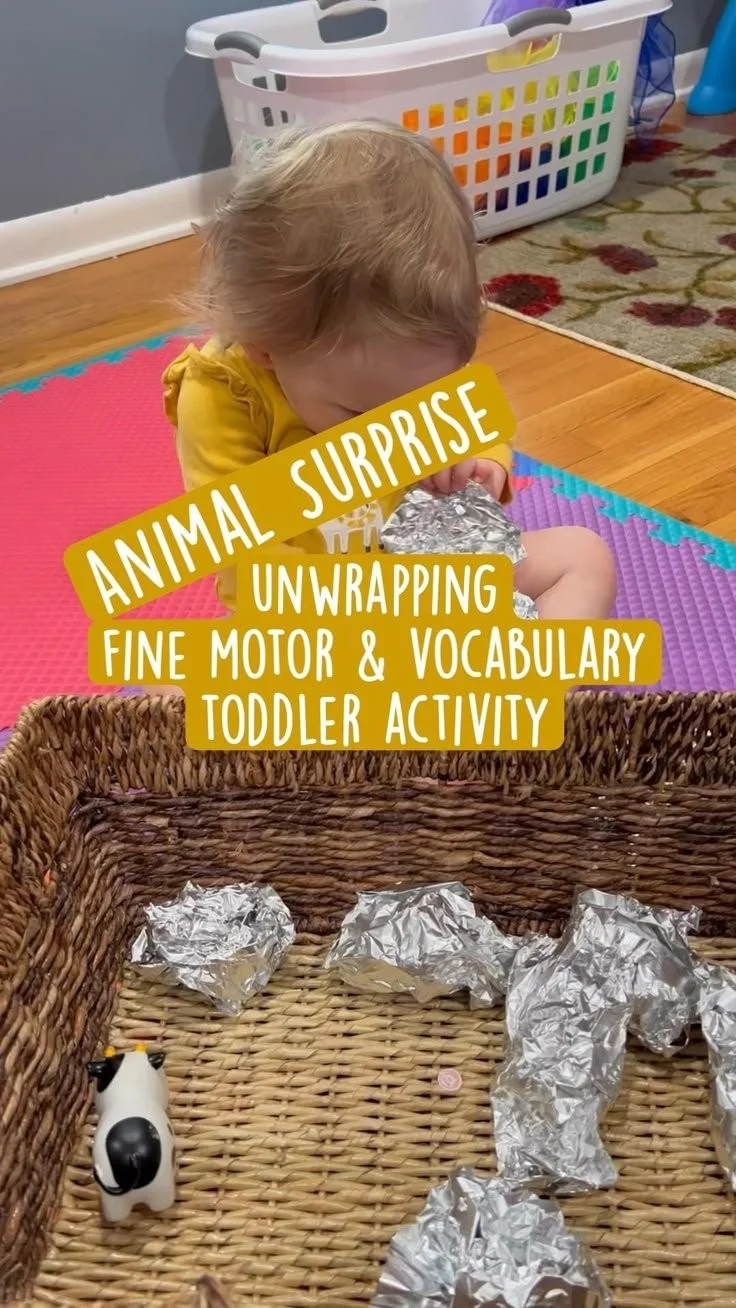
Learn Animals Unwrapping Fine-Motor, Sensory, Vocabulary, & Montessori Activity for Toddlers!
Learn Animals Unwrapping: A Montessori-Inspired Fine-Motor, Sensory, and Vocabulary Activity for Toddlers
This playful unwrapping activity invites toddlers to discover toy animals by peeling back layers, combining fine-motor practice, sensory exploration, and rich language exposure. It’s easy to set up with household materials and fits well within a Montessori approach that encourages independence, repetition, and hands-on learning. If you’re gathering calm, child-sized materials for a morning of exploration, consider pairing this activity with mindful snack times like the Montessori snack ideas for 3-year-olds to create a predictable, nurturing routine.
Why this works for toddlers
- Fine-motor development: peeling, pulling, and manipulating wrappers strengthen pincer grasp and bilateral coordination, essential for later skills such as writing and dressing.
- Sensory input: different textures (paper, cloth, foam) and mild resistances when unwrapping provide proprioceptive and tactile feedback.
- Vocabulary expansion: naming animals, describing textures, and using verbs (unwrap, peek, reveal) grow receptive and expressive language.
- Executive function & concentration: sequencing and staying focused while revealing an object support attention span and working memory.
- Montessori alignment: self-directed discovery, simple purposeful materials, and repetition let the child lead their learning.
Materials (simple and adaptable)
- Small toy animals or animal figurines (one per hide)
- Wrapping materials in varied textures: tissue paper, felt scraps, crinkled paper, soft fabric, small envelopes, and paper towel rolls
- A low tray or basket for presenting the wrapped animals
- Safety scissors for adult prep (never leave with toddlers)
- Optional: a blindfold (for older toddlers under supervision) or container with a hole to reach in and feel
Preparation (adult steps)
- Select several small animal toys — aim for 6–10 to match toddlers’ attention spans.
- Wrap each animal in a different material or combination (e.g., tissue + ribbon, felt + sticker tab) to create varied unwrapping experiences.
- Place the wrapped items neatly on a small tray at child height. Include a demonstration sample for the first use.
- Keep the environment calm and free of distractions so the child can focus on the task.
How to introduce the activity
- Sit nearby and invite the child: “Would you like to open an animal?”
- Model one reveal slowly: use words to describe each step (“I pull the paper,” “I see a tail!”), emphasizing verbs and animal names.
- Offer choices: “Which one would you like to open first?” This encourages decision-making and language.
Step-by-step activity flow
- Child chooses a wrapped item from the tray.
- Child uses fingers to peel, slide, or tear away the wrapping to reveal the animal.
- Adult labels the animal and comments on features: “It’s a giraffe — long neck! Tall giraffes eat leaves.”
- Encourage imitation sounds or actions: “Can you stomp like an elephant?”
- Replace the animal in its wrapping for repeated practice, or invite the child to rewrap for fine-motor strengthening and sequencing practice.
Differentiations and progressions
- Simplify: use loosely wrapped tissue paper or envelopes for beginners.
- Challenge: add taped seams to require more sustained effort or include multiple nested layers to increase steps.
- Sensory focus: include scented papers (mild, child-safe scents) or textured fabrics to emphasize descriptive vocabulary.
- Language focus: create a two-part game where the child matches animal pictures to the unwrapped toy to build vocabulary and memory.
Integrating other routines and learning moments
- Storytime tie-ins: after unwrapping, read a short animal book to connect the toy to narrative language.
- Sorting & counting: after several reveals, sort animals by habitat or count how many were unwrapped.
- Self-care practice: invite the child to put toys back in the tray independently to build responsibility.
Safety and supervision
- Always supervise toddlers during the activity to prevent ingestion of small parts or choking hazards.
- Avoid sharp or tightly sealed wrappings that could frustrate or injure little hands.
- Ensure toys are age-appropriate and follow safety guidelines.
Assessment and observation tips
- Watch hand movements: are fingers isolating (pincer) or using the whole hand? Adjust challenge accordingly.
- Note attention span: increasing time spent engaged suggests growing focus.
- Listen for language growth: does the child name animals, use verbs, or combine words into short phrases?
- Track progress by increasing difficulty gradually and seeing finer motor improvements over weeks.
Cleanup and maintenance
- Make rewrapping a part of the activity: show the child how to fold paper or tuck fabric back around the toy.
- Store wrapped sets in a labeled box for future rotations; rotating materials keeps novelty high.
Extension activities and ideas
- Sensory boxes: place wrapped animals inside a shallow bin of rice or dried pasta for combined tactile search and unwrapping.
- Mystery sound game: record animal sounds and have the child guess which wrapped animal makes each sound before unwrapping.
- Art connection: after revealing, the child draws the animal or stamps its footprint with washable ink.
Recommended age and duration
- Best for toddlers roughly 18–36 months, but easily adaptable for slightly younger or older children.
- Keep sessions short and child-led: 10–20 minutes typically matches toddler attention spans.
Body paragraph with the second internal link
For a calm transition from play to snack or quiet table work, you might serve a simple, protein-rich bite that supports focus; a baby-friendly avocado egg salad recipe is an easy option to prep ahead and bring continuity between activity and nourishment.
Conclusion
This unwrapping animals activity is a low-prep, high-impact way to combine Montessori principles with sensory play, fine-motor practice, and vocabulary building for toddlers. For a deeper theoretical look at related developmental patterns, see the article on the enveloping schema for ideas on how children explore by surrounding and enclosing objects. If you want more ready-to-use daily activities tailored to very young children, review the curated list of development-promoting activities for one-year-olds to find simple extensions and rhythm ideas for your routine.
enveloping schema
development-promoting activities for one-year-olds

20 Kid Friendly Lunch Ideas and Lunchbox Favorites Kids Actually Eat
20 Kid-Friendly Lunch Ideas and Lunchbox Favorites Kids Actually Eat
Packing lunches that are both nutritious and appealing to kids can feel like a daily balancing act. Below are 20 practical, easy-to-assemble lunch ideas — plus swaps, packing tips, and simple tweaks to keep variety in the lunchbox and picky eaters satisfied. For extra inspiration focused on cold options, see these helpful cold lunch ideas for kids you can adapt.
Quick tips before you start
- Mix textures: pair something crunchy with something soft (pretzels + cheese cubes).
- Keep portions kid-sized: smaller containers and bento-style compartments help.
- Involve kids in planning: letting them pick between two options reduces resistance.
- Use colorful fruits and veggies to make the meal visually inviting.
- Prep once, use all week: cook grains or proteins in batches to save time.
20 Lunch Ideas (with variations and packing notes)
Turkey & cheese roll-ups
- Use whole-wheat tortillas, add lettuce or avocado slices. Cut into pinwheels for small hands.
DIY mini pita pizzas
- Spread marinara, sprinkle cheese, add pepperoni or veggies; heat or pack cold with a small sauce container.
Pasta salad with veggies and chicken
- Use tri-color pasta, toss with olive oil or pesto. Add diced cucumbers, cherry tomatoes, and cubed chicken.
Bento box with hummus, pita, grapes, and cucumber slices
- A dip makes veggies more appealing; include a few crackers for variety.
Quesadilla wedges with salsa
- Fill with cheese and black beans or shredded chicken. Pack wedges and a small salsa cup.
Snackable sushi (rice roll-ups)
- Make with cooked rice, nori or tortilla, cucumber, and cooked crab or smoked salmon.
Sunbutter and banana sandwich (nut-free)
- For nut-restricted schools, sunflower seed butter is a great swap.
Egg salad or mashed chickpea salad on crackers
- Serve in a small container with whole-grain crackers for scooping.
Mini meatballs with carrot sticks and dip
- Turkey or beef meatballs are hearty; include a yogurt-based dip.
Greek yogurt parfait with granola and berries
- Keep granola separate to stay crunchy; include a spoon.
Veggie-packed fried rice or quinoa bowl
- Use leftover rice, scrambled egg, peas, carrots, and a splash of soy sauce.
Sliders with a side of sweet potato chips
- Mini burgers or pulled chicken sliders are easy to eat and can be customized.
Cheese and fruit skewers plus whole-grain crackers
- Thread cheese cubes and fruit onto sticks (remove pointed skewer if needed for school).
Turkey meat & veggie pinwheels
- Roll deli turkey with cream cheese and finely chopped veggies in a tortilla and slice.
Cold noodle salad with edamame and snap peas
- Toss with sesame dressing; use chopsticks or a fork depending on your child’s comfort.
Cottage cheese cup with pineapple and sliced bell pepper
- Protein-packed and refreshing, pair with whole-grain bread or crackers.
Homemade chicken nuggets with apple slices
- Bake nuggets and freeze extras for quick reheats; pack with applesauce.
Build-your-own taco lunchbox
- Mini tortillas, shredded cheese, beans, and a mild salsa let kids assemble at school.
Stuffed mini bell peppers with cream cheese and herbs
- Colorful and crunchy — great for little hands.
Pancake roll-ups with yogurt dip
- Sweet option: roll pancakes with a thin spread of jam or cream cheese and include a yogurt dip on the side.
Make-ahead options and storage
- Freeze portions of sandwiches (except ones with produce that sogs) and thaw overnight in the fridge.
- Pack cold items with an ice pack or in an insulated lunchbox. Invest in a small insulated container for warm items.
- Keep dressings and crunchy toppings separate until lunchtime.
Allergy and picky-eater swaps
- Nut-free: use sunbutter or cream cheese.
- Dairy-free: swap yogurt for coconut-based yogurt and cheese for dairy-free slices.
- Picky eaters: present deconstructed versions (e.g., cubes of cheese, separate fruit, and bread on the side).
Lunchbox gear that helps
- Bento-style containers with compartments
- Leakproof dressing cups
- Small ice pack rectangles
- Mini silicone muffin cups for portioning
Incorporating one new idea each week keeps lunches fresh without overhauling your routine. If you want more school-specific meal plans and themed boxes, these kids lunch ideas for school can help you rotate favorites.
Conclusion
For a larger list of ready-to-use options and seasonal twists, check out this curated collection of 72 easy school lunch ideas at Cubby that many parents find helpful for planning. If you’re looking for creative combos to win over picky eaters, this roundup of 30 creative school lunch ideas from The Everymom offers adaptable templates and packing tips.
Toddler absolutely refusing to eat? Try some of these tricks.
Toddler absolutely refusing to eat? Try some of these tricks
Introduction
Toddlers can flip from eager eaters to stubborn refusers overnight — it’s usually normal, but exhausting. Start simple: offer familiar, well-liked items (for example, apples are often a hit; learn more about the benefits of apples for toddlers) and expect small, slow wins rather than immediate transformations.
Why toddlers refuse food
- Appetite variability: Growth spurts and slowdowns change hunger day-to-day.
- Control and independence: Saying "no" is a way to assert themselves.
- Sensory issues: Texture, smell, or temperature can put them off certain foods.
- Medical reasons: Teething, mouth pain, reflux, or illness can reduce interest in eating.
Practical, proven tricks that actually work
- Keep calm and neutral: Avoid pressure or negotiation. Neutral responses remove the reward of power struggles.
- Offer small portions: Tiny servings feel manageable and reduce waste anxiety.
- Give limited choices: Let them pick between two healthy options (e.g., banana or pear) to foster control.
- Use dips and pairings: Toddlers often love dipping — pair veggies with hummus, yogurt, or mild cheese.
- Make food playful: Cut sandwiches into shapes, build faces on pancakes, or arrange colorful plates.
- Rotate, don’t force: Keep bringing back refused foods without pressure; repeated exposure helps.
- Combine rather than hide: Mix grated veggies into muffins or omelets so textural changes are gradual.
- Serve finger foods: Many toddlers prefer self-feeding. Small, soft pieces let them explore safely.
- Avoid grazing: Limit snacks 60–90 minutes before meals so there’s appetite at sitting times.
- Model eating: Eat the same foods together; toddlers learn by copying adults and siblings.
Mealtime environment and routine
- Set consistent meal and snack times so your child learns a predictable schedule.
- Remove screens and distractions; make mealtimes a calm family activity.
- Keep meals short and positive — 15–25 minutes is plenty for a toddler.
- Praise attempts, not success: clap or smile when they try a new bite, but avoid over-celebration that creates pressure.
Sensory and texture strategies
- Offer the same food in different textures: steamed vs. roasted carrots, or mashed vs. chunked avocado.
- Let them touch and explore food before tasting — sensory familiarity can reduce resistance.
- Introduce temperature variety: some kids prefer warm, others cool. Try both.
Quick snack-and-meal ideas
- Mini frittatas with grated veggies.
- Fruit skewers with yogurt dip.
- Smoothie pops made with fruit, spinach, and yogurt.
- Tiny sandwiches on soft bread, cut into shapes.
- Soft meat or plant-based protein pieces with a favorite dip for dipping practice.
Celebrate progress (without pressure)
Celebrate small wins — a single bite today matters. If you like capturing milestones, a light-hearted family photo to mark progress can help you remember that change is gradual; for inspiration on capturing family moments see these maternity photoshoot ideas.
When to seek help
If refusal is persistent, accompanied by weight loss, developmental concerns, or extreme gagging/choking, consult your pediatrician. A feeding therapist or occupational therapist specializing in pediatric feeding can assess sensory or oral-motor issues and provide targeted strategies.
Final tips to remember
- Consistency and patience are your best tools.
- Keep mealtimes low-drama and high-support.
- Offer variety across days, not necessarily every meal.
- Trust that most toddlers move through phases — with steady routines and gentle exposure, many return to varied eating on their own.
Conclusion
For more tactics specifically about introducing protein, this article offers practical steps for getting a picky toddler to try meat: 5 Tips for getting your picky toddler to try meat – My Little Eater. If you want a broader overview of what feeding behavior is typical and how to solve common mealtime problems, this resource explains developmental expectations and practical solutions: Feeding Toddlers – What’s Normal? Mealtime Problems & Solutions.

How We Cured The “Terrible Twos” in One Day
How We Ended the "Terrible Twos" in a Single Day: A Practical, Gentle Plan
Toddlers are famously unpredictable, and the "terrible twos" can feel like a season that never ends. What we describe here isn’t magic—it’s a concentrated day of setup, consistency, and emotional coaching that reset our household and turned a day of battles into one of breakthroughs. Before I dive in, I should admit that some parenting lessons come from unexpected places; while planning a shower, I found myself thinking about routines and environments, which sparked the approach you’ll read about here. For example, inspiration about themed structure came up while looking at ideas like the Baby in Bloom baby shower theme, where small, intentional details had big emotional effects.
Why one day can be enough
- Toddlers respond quickly to clear signals. An abrupt, consistent change in how caregivers react is noticeable and can change behavior fast.
- The goal isn’t to "fix" a temperament overnight but to teach a new pattern: predictable boundaries + trusted comfort = fewer meltdowns.
- A single day focused on consistency gives both child and parents a reset and makes it easier to maintain new habits afterward.
The one-day plan (what we did)
Morning: Reset basic needs
- Prioritize sleep and food. Start the day after a full nap or a good night’s rest and a protein-rich breakfast to reduce low-blood-sugar meltdowns.
- Predictable start: we used the same three-step morning ritual—greet, choice, and plan—to signal safety and routine.
Mid-morning: Clear, simple expectations
- We announced one or two house rules in plain language, phrased positively: “Hands gentle,” “Walking feet.”
- When a boundary was crossed, we used a very short, calm consequence (e.g., one-minute pause at a neutral spot) and immediately moved on.
Noon: Empower with choices
- Toddlers crave control. Offering limited choices—“Do you want apple slices or banana?”—reduced power struggles.
- We paired choices with time warnings: “In five minutes we clean up,” so transitions weren’t abrupt.
Afternoon: Emotional coaching and a calm-down corner
- During upset moments, we labeled feelings: “I see you’re angry. Angry is okay.” Naming emotions helps toddlers feel understood and reduces escalation.
- We created a calm-down corner stocked with a soft toy and a breathing jar. We never sent them there as punishment—only as a place to regroup.
Evening: Reinforce with positive attention
- We made a big deal about small victories: consistent praise for cooperation, extra cuddles after calming down, and a brief celebration when routines were followed.
- Bedtime followed a very predictable wind-down routine so the toddler knew what to expect.
How we handled tantrums that day
- Planned ignoring: For attention-seeking behaviors that were safe but disruptive (e.g., dropping toys), we used planned ignoring combined with later praise for the behavior we wanted.
- Immediate, brief, neutral consequences: For potentially dangerous behavior (throwing food, climbing unsafe furniture), we used a one-minute removal from the situation without lectures.
- Calm adults, clear actions: We stayed physically calm, used minimal words, and followed through. Toddlers notice when caregivers are consistent.
Troubleshooting common setbacks
- If the tantrum escalates: Ensure safety first. Then use slow, reassuring physical contact if the child allows it—a hand on the shoulder or a calm hug—to reestablish connection.
- If a strategy isn’t working: Check basic needs (hunger, sleep, overstimulation). Switch to a simpler approach (fewer rules, more choices) until the child is settled.
- If you feel overwhelmed: Take turns with your partner or a trusted adult. A short break for the caregiver prevents reactive responses.
Signs the reset took hold
- Fewer unexpected meltdowns across transitions (meals, leaving the park).
- The child offers more cooperative behaviors when given choices.
- Faster recovery after upsets—shorter tantrums and more willingness to be soothed.
Maintaining progress after day one
- Consistency is everything. Keep the same routines and language for at least a couple of weeks.
- Prepare transitions with warnings and choices.
- Keep the calm-down corner available and model breathing or quieting strategies yourself.
A final note on expectations
This plan doesn’t erase a toddler’s developing feelings overnight, but it does provide a clear pathway from chaos to calm. Some days will be harder than others; the key is predictable, loving consistency so your child learns what to expect and how to self-regulate.
Conclusion
For the specific story that inspired our one-day reset, see the firsthand account titled How We Cured The "Terrible Twos" in One Day – Mommy on Purpose, which shares similar principles and practical examples. If you’re bracing for what comes next, read this helpful reminder that PSA, parents of toddlers: age three is way harder than the terrible twos to set realistic expectations for the road ahead.
How to Make a Toddler Morning Basket (+ Easy Ideas!)
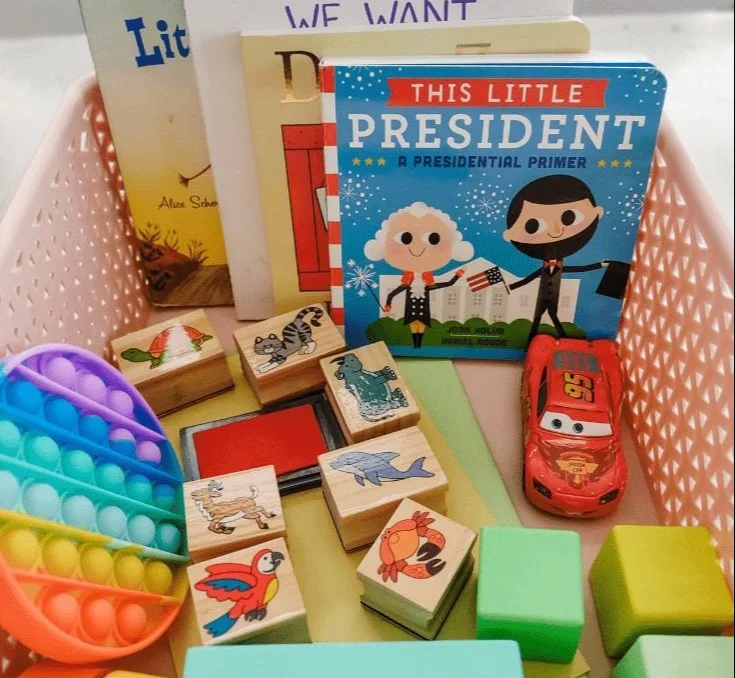
How to Build a Toddler Morning Basket: Simple Steps and Easy Ideas
A morning basket is a small, intentional collection of activities that gives toddlers a calm, predictable start to the day. It helps children learn routines, practice independence, and enjoy short, focused moments of discovery before the household gets busy. If you’re managing a toddler who’s learning to share and cooperate, strategies for how to deal with a self-centered toddler can help set the tone before introducing a morning basket.
Why a morning basket works for toddlers
- Predictability: Toddlers thrive on routine. A consistent basket signals “morning time” and reduces transitions that feel abrupt.
- Short, varied activities: Young children have brief attention spans; a basket of small options lets them switch when they’re ready.
- Independence: Items the child can access and operate on their own build confidence.
- Connection: Shared basket time can be a calm way for caregivers to engage before the day’s demands start.
What to include (and why)
- Board books and textured books: Simple stories and tactile pages encourage language and sensory play.
- Lacing cards or large beads: Fine-motor practice disguised as a game.
- Puzzles (2–6 pieces): Boosts problem-solving without frustration.
- Play dough and tools: Sensory exploration and hand strength development.
- Stacking cups or nesting toys: Open-ended and low-mess cooperative play.
- A quiet stuffed animal or puppet: Promotes storytelling and social language.
- A small music shaker or soft instrument: Rhythmic play and motor skills.
- A simple visual first/then card or mini routine chart: Helps toddlers anticipate what comes next.
Tips for assembling the basket
- Choose a durable, shallow basket: Easy to reach and impossible to topple completely.
- Rotate items weekly: Keep novelty without overwhelming storage needs.
- Limit quantity: Aim for 4–6 items so choices are meaningful and attention isn’t scattered.
- Make items accessible: Place the basket at your child’s level so they can choose independently.
- Include a caregiver “pause” item: A short-song playlist or a book you read together that signals a cuddle or check-in.
Integrating the basket into your routine
- Morning cue: Use the basket after diapering, after a brief breakfast, or as the first independent activity.
- Gentle expectations: Model use once or twice, then allow independent play while you prepare nearby.
- Combine with simple chores: Toddlers can carry the basket to a dedicated spot, practicing responsibility.
- Transition signals: Use a consistent phrase (e.g., “Basket time!”) and a short timer to help move from free play to the next activity.
Low-prep, time-saving basket ideas
- Theme weeks: Try “color week” with colored scarves and a matching board book, or “animals week” with small figures and animal sounds.
- Reuse household items: Measuring cups, wooden spoons, and scarves can be engaging and free.
- One-screen option: If you use a brief video, pair it with a tactile activity and limit length—there are curated picks that emphasize calm engagement and minimal stimulation for toddlers like low stimulation shows for toddlers.
Safety and cleanup
- Regularly check items for small parts, loose stitching, or broken pieces.
- Use washable or wipeable materials for easy cleanup.
- Teach a simple cleanup song or routine so putting items back becomes part of the ritual.
When things don’t go as planned
- If the child resists, reduce the choices and reintroduce favorites.
- If attention is very short, make the basket even smaller—one high-interest item plus one calming object.
- Keep expectations flexible; the goal is connection and calm, not perfection.
Quick starter list you can assemble today
- Sturdy picture book
- 3-piece wooden puzzle
- Small soft ball or beanbag
- Play dough with a rolling pin
- A muffin tin and colorful pom-poms for sorting
Conclusion
Morning baskets grow with your child; start simply, observe what captures attention, and rotate intentionally to keep mornings peaceful and engaging. For a detailed walkthrough and real-life examples, see Because I Said So Baby’s toddler morning basket guide, and if you’d like to pair the basket with a visual plan for the day, check out this practical guide to creating a morning menu.

15 fun and easy toddler activities to keep them busy for hours
15 Fun and Easy Toddler Activities to Keep Them Busy for Hours
Toddlers are curiosity engines — they learn through play, exploration, and repetition. Below are 15 simple, low-prep activities designed to entertain, teach, and tire out little ones while encouraging fine motor skills, sensory play, language, and creativity. If you like craft-based ideas, take a look at this collection of fun and easy crafts for kids to expand your at-home options.
Sensory Rice Bin
Fill a shallow bin with colored rice and hide small toys or spoons for scooping. Use cups, funnels, and measuring spoons to promote fine motor skills and imaginative play.Bubble Wrap Stomp
Lay out bubble wrap and let your toddler stomp or crawl across it. It’s great for balance, cause-and-effect learning, and satisfying popping sounds.DIY Playdough Shapes
Make quick playdough (flour, salt, water, oil) and give cookie cutters and rolling pins. Talk about colors and shapes as they press and squish.Sticker Collage Board
Provide a sheet of paper and a selection of stickers. This improves pincer grip and lets them practice placing items with intent.Water Transfer Station
Set up two bowls and a sponge or turkey baster for transferring water between them. Perfect for warm days and developing hand coordination.Color Hunt Walk
Name a color and go on a hunt around the house or yard to find objects matching that color. This builds vocabulary and observational skills.Simple Obstacle Course
Use cushions, low boxes, and tape to create tunnels, stepping stones, and balance paths. It boosts gross motor skills and problem-solving.Toy Parade with Music
Line up stuffed animals or cars and march to music. Add scarves or small instruments for rhythm and language practice. For more calm indoor ideas, see this list of indoor activities for toddlers.Magnet Play on a Tray
Give a cookie sheet and some child-safe magnets with magnetic-safe objects to explore attraction and sorting.Painted Sponge Stamps
Cut sponges into simple shapes, dip in washable paint, and stamp on paper. It’s messy in the best way and encourages creativity.Treasure Basket Exploration
Fill a basket with safe household items of different textures and materials for free exploration and vocabulary building.Rolling Ball Run
Use cardboard tubes or paper towel rolls taped to a wall or set on the floor to make a ramp system for rolling balls. Great for cause and effect and engineering curiosity.Puppet Storytime
Use socks or simple puppets to act out a short story. Encourage your toddler to name characters or add sounds — terrific for language development.Edible Finger Painting
Make edible paint from yogurt mixed with food coloring for safe, sensory art that can be tasted and explored without worry.Sorting Snack Activity
Use cereal or fruit pieces for sorting by color, size, or shape into muffin tins — combines snack time with early math skills.
Tips to keep activities smooth
- Rotate activities to keep novelty.
- Prep easy clean-ups: use drop cloths, washable materials, and a small dustpan.
- Follow your toddler’s lead — if they love one activity, let them explore longer.
- Short sessions (10–20 minutes each) usually match toddler attention spans.
Conclusion
For a quick roundup of low-prep ideas you can try this afternoon, check out these Quick Easy Activities for Toddlers that are perfect when you need fast inspiration. If you travel with little ones, this guide on airplane activities for toddlers has practical tips to keep them entertained on long journeys.

Big Emotions in Toddlers: Why Punishment Doesn’t Work (and What To Do Instead)
Big Emotions in Toddlers: Why Punishment Doesn’t Work (and What To Do Instead)
Toddlers are small humans with huge feelings. A dropped cup, a denied cookie, or a tired brain can trigger tears, screams, or flailing limbs that feel out of proportion to adults. Before we blame willfulness or character, it helps to remember that toddlers are still learning to regulate their bodies, attention, and emotions. Parenting questions can range from everyday logistics to discipline approaches—even things tangentially related to family routines like bringing a gift to a gender reveal—but when it comes to big emotions, the approach you choose shapes a child’s sense of safety and their future emotional toolbox.
Why punishment — especially physical punishment or harsh shaming — fails with toddlers, and what to do instead, are the focus here. This is practical, evidence-informed guidance you can use the next time your child melts down in aisle three.
Why punishment doesn’t work
- Brain development and emotional flooding
- Toddlers’ prefrontal cortex (the thinking and self-control center) is immature. When upset, their “thinking brain” goes offline and the reactive, survival-oriented parts of the brain take over. Punishment delivered during a meltdown arrives when the child can’t reason with it or connect the consequence to the behavior.
- Punishment escalates stress
- Harsh responses increase cortisol and adrenaline, which deepen the emotional state. That makes learning and memory harder and reinforces the association: big feeling → threat. Over time this can create chronic anxiety or distrust, not better behavior.
- Modeling aggression and coercion
- If adults solve problems with threats, yelling, or physical discipline, children learn that force is an acceptable way to get needs met or to control others. That models the very behavior most parents want to prevent.
- Damage to attachment and cooperation
- Repeated punitive approaches can undermine the child’s sense of safety with caregivers. Children who don’t feel understood or protected are less likely to internalize rules and more likely to act out to get attention or regain control.
What to do instead: immediate responses for meltdowns
Stay calm and regulate first
- Your calm voice and steady presence help shift a child’s nervous system. If needed, pause, breathe, or ask another caregiver for help before engaging.
Validate and name the emotion
- “You’re so mad because you wanted that truck.” Naming feelings helps toddlers put experience into words and feel seen, which reduces intensity.
Use simple limits with empathy
- “I can’t let you hit. Your body is for gentle hands.” Combine clear boundaries with understanding so the child learns limits without shame.
Offer choices to restore agency
- “You can choose the blue cup or the red one” lets toddlers feel in control and can prevent power struggles.
Provide a safe, predictable calm-down space
- A cozy corner with a soft blanket, books, or a stuffed animal can help children self-soothe when they’re ready.
Redirect and distract (when appropriate)
- For younger toddlers, redirecting attention to a new activity or toy can stop an escalation before it becomes a meltdown.
Teaching skills between crises
Build emotional vocabulary
- Use storytime and daily routines to teach words like frustrated, sad, tired, and proud. The more words children have, the better they can express themselves.
Practice problem solving together
- Role-play simpler versions of conflicts: “The doll is on the block. What can we do?” Practicing solutions when calm makes them available when stressed.
Establish routines and predictable transitions
- Many meltdowns follow hunger, tiredness, or unexpected changes. Clear routines and warnings (“In five minutes we’ll put on shoes”) reduce surprises.
Use play to teach regulation
- Games that require waiting, turn-taking, or gentle touches teach control in a low-stakes way.
Keep toddlers engaged with appropriate activities
- Regular, developmentally appropriate play reduces boredom and frustration; for rainy days, try creative indoor activities for toddlers that channel energy and curiosity.
Scripts and phrases that help
- “I see you’re upset. I’m here with you.”
- “You can be mad, but hitting is not okay. Let’s use our words.”
- “Do you want to hold my hand or sit in the calm corner?”
- “You’re feeling frustrated. Let’s take three big breaths together.”
These short, consistent messages are easier for toddlers to absorb than long lectures.
Handling public meltdowns
- Prioritize safety and connection over performance
- If your child is breaking something or hurting themselves, intervene safely. Otherwise, find a quieter spot to help them calm down.
- Keep explanations simple
- A brief “We can’t do that here” followed by support is more effective than prolonged arguments in public.
- Consider preemptive strategies
- Bring snacks, a favorite toy, or a quick game for transitions to lessen the chances of a crash.
When to get extra help
- Seek professional input if tantrums are extreme, last very long, involve self-injury, or your child’s development seems off track. Pediatricians, child psychologists, and early intervention services can assess for sensory issues, language delays, or other underlying causes.
Caregiver self-care and boundaries
- Set realistic expectations: toddlers are learning and will make mistakes.
- Create a plan for breaks: ask a friend or partner for short time-outs to recharge.
- Join a parenting group or talk to a professional when discipline strategies feel overwhelming.
Final tips
- Consistency and compassion are the combination that teaches better than punishment.
- Aim to be the regulating presence that helps your toddler move from big emotion to learning.
- Celebrate small gains: more words, fewer hits, a quicker calm-down—these are real progress.
Conclusion
Punishment, especially physical discipline or shaming, increases stress and trauma risk without teaching emotional skills; for evidence on the harms of hitting children, see Hitting Children Leads to Trauma, Not Better Behavior. For practical, developmentally informed guidance on what helps with challenging behavior and what doesn’t, consult this resource from Zero to Three: Challenging Behavior: What Helps and What Doesn’t – Zero to Three.

15 very important things to teach your toddler – The Mummy Bubble
15 Essential Things to Teach Your Toddler
Toddlers are curious, busy, and soaking up everything around them. Teaching the right skills now helps them grow confident, compassionate, and capable. If you’re thinking about rules and consequences, remember there are kinder options to punitive measures — for helpful ideas on limits that work without harsh punishment, explore gentle discipline alternatives.
Below are 15 practical, developmentally appropriate things to teach your toddler, with simple ways to practice each one every day.
- Name basic emotions
- Teach words for happy, sad, angry, and scared. Label emotions during moments together (“You’re smiling — you’re happy!”). Reading picture books about feelings helps too.
- Follow simple instructions
- Practice one- or two-step directions like “Please pick up the ball and give it to me.” Use games that reward listening, such as Simon Says.
- Share and take turns
- Model sharing and use turn-taking games with toys. Praise attempts and narrate the process: “You gave Maria the block — how kind!”
- Use polite words
- Teach “please,” “thank you,” and “excuse me” through repetition and modelling. Make it fun with role-play or puppet conversations.
- Self-feeding skills
- Encourage use of a spoon or fork and drinking from a cup. Offer finger foods and let them practice — messy is part of learning.
- Basic independence with dressing
- Let them try simple parts of dressing: pulling socks on, pushing arms through sleeves, or choosing between two shirts to build autonomy.
- Safe boundaries and body awareness
- Teach which body parts are private and that they can say “no” to unwanted touch. Practice safe boundaries with clear, calm language.
- Problem-solving through choices
- Offer two acceptable options when disagreements arise (“Do you want the red cup or the blue cup?”) so they learn to decide and cope.
- Basic hygiene habits
- Make brushing teeth, handwashing, and wiping their face part of routines. Sing a short song to mark the two-minute brushing and make it predictable.
- Gross and fine motor skills
- Climbing, kicking, stacking blocks, and scribbling are all practice. Provide safe spaces and materials to move and create.
- Recognize colors and simple shapes
- Scan the environment and name colors and shapes during play and walks. Use puzzles and sorting toys to reinforce learning.
- Early counting and language
- Count steps, snacks, or toys aloud. Read daily and encourage repeating simple rhymes to build vocabulary and number sense.
- Express frustration with words
- Teach phrases like “I don’t like that” or “I need help” and model calm responses when they are upset. Name the feeling and offer choices.
- Bedtime routine and sleep habits
- A consistent bedtime routine (bath, book, song) helps signal sleep. To check whether your child might be too warm at night and how to adjust sleepwear, see signs your baby is too hot while sleeping.
- Creativity and pretend play
- Provide open-ended toys (blocks, dolls, costumes) and follow their lead in imaginative play — it strengthens language, empathy, and flexible thinking.
Quick practice tips
- Short, frequent moments beat long lectures: 3–5 minute practice bursts during the day help toddlers learn.
- Praise specific behavior (“You waited your turn!”) rather than using general praise to reinforce what you want repeated.
- Model calmness and routines; toddlers learn more from what you do than what you say.
Conclusion
If your toddler is sensitive to textures or tastes, these 15 strategies to encourage SPD toddlers to eat offer targeted ideas to make mealtimes less stressful. For ways to practice social skills and burn off energy over the summer, check local listings like Summer @ PVLD Kids Events for activity inspiration.
40 Fun Bargain Activities For Toddlers to Do At Home
40 Fun Bargain Activities For Toddlers to Do At Home
Keeping toddlers entertained at home doesn’t have to be expensive or complicated. With a little creativity and everyday items, you can create dozens of engaging, developmentally appropriate activities that build motor skills, language, and curiosity. For more ideas focused on simple setups, check out this collection of indoor activities for toddlers that complement many of the suggestions below.
Below are 40 budget-friendly activities, grouped by type so you can pick what fits your child’s mood and your available supplies.
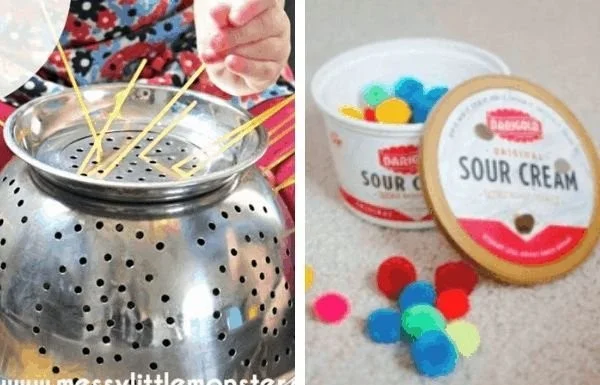
Sensory Play (simple materials, big learning)
- Rice bin exploration — hide small cups and spoons in a shallow bin of rice for scooping practice.
- Oatmeal play dough — mix oats and water to form a simple, squishy dough.
- Water pouring station — set nested bowls and cups by the sink or a shallow tray.
- Ice cube discovery — freeze small toys in ice and let toddlers melt them with warm water.
- Bubble foam — mix gentle soap and water in a bowl and let little hands dive into foamy bubbles.
Creative & Art Activities (messy but cheap)
6. Finger painting with yogurt-based paints.
7. Nature collage — gather leaves, petals, and twigs to glue onto cardboard.
8. Sticker scenes — give a sheet of stickers and a large paper for story-making.
9. Chalk murals on a patio or washable floor tiles.
10. Recycled stamp art — use bottle caps and sponges as stamps.
Gross Motor & Active Play (burn energy safely)
11. Indoor obstacle course — cushions, boxes, and a taped finish line.
12. Pillow mountain climb for safe scrambling.
13. Dance party with scarves to wave around.
14. Tunnel crawl using chairs and blankets.
15. Balloon volley — keep the balloon off the floor.
Fine Motor & Skill-Building (tiny hands, big gains)
16. Threading cereal loops on string for hand-eye coordination.
17. Sorting buttons or pom-poms by color into egg cartons.
18. Simple puzzles made from cut-up photos glued onto cardstock.
19. Cup stacking towers to build and topple.
20. Clothespin transfer — pinch clothespins to move items from one container to another.
Language & Pretend Play (grow vocabulary and imagination)
21. Puppet shows using socks and felt scraps.
22. Mini grocery shop using empty boxes and play money.
23. Storytelling with a "mystery bag" of 5 small items.
24. Dress-up bin for role-playing different characters.
25. Animal sound matching games with toy animals.
Quiet Time & Focused Play (calm and restorative)
26. Sensory bottles filled with water, glitter, and sequins.
27. Board books and interactive reading nook.
28. Quiet matching games (shapes, colors).
29. Felt story boards that let toddlers build scenes.
30. Play-dough mats (homemade printable templates) for focused molding.
Outdoor-at-Home Activities (use the yard or balcony)
31. Sidewalk treasure hunt — simple scavenger checklist to tick off.
32. Water play with cups and funnels in a kiddie pool.
33. Chalk hopscotch adapted to toddler steps.
34. Planting seeds in small pots to watch things grow.
35. Shadow tracing on sunny days using toys.
Low-Prep Activities for Busy Parents
36. Song-and-action routines like “If You’re Happy and You Know It.”
37. Mirror play for faces and expression copying.
38. Follow-the-leader walks around the house.
39. Simple matching trays using everyday objects.
40. Rotate a “surprise box” of 3–4 new items to renew interest.
Tips for Success
- Rotate activities in small batches so toys feel fresh.
- Use a timer for transitions to help toddlers anticipate the next activity.
- Adapt complexity: make tasks easier or harder based on your child’s interest and ability.
- Involve household items creatively — cardboard, tape, yarn, and empty containers are gold.
- For more structured ideas that grow with your child, consult this ultimate guide to fun for children which offers themed project suggestions and seasonal tweaks.
Conclusion
These 40 bargain activities can keep toddlers engaged, learning, and moving without costly toys or fancy equipment. For hands-on science play ideas that pair well with sensory and discovery activities, try these engaging magnet experiments for kids that are simple and safe at home. If you’re also looking for playful movement routines to combine with indoor activity days, explore these kid-friendly fun conditioning workouts for kids to add energy-burning routines to your rotation.
7 Fun & Easy Masking Tape Activities for Toddlers
7 Fun & Easy Masking Tape Activities for Toddlers
Masking tape is one of the simplest supplies with the biggest payoffs for toddler play: it’s inexpensive, low-mess, and sparks creativity, gross- and fine-motor practice, and early problem-solving. If you’re looking for fresh, quick activities you can set up in minutes, this list has seven toddler-friendly masking tape ideas. For more craft inspiration that pairs well with these activities, see this collection of easy crafts for kids.
Materials you’ll need (basic)
- Masking tape or painter’s tape (different widths if available)
- Scissors (adult use)
- Large sheet of paper or butcher paper, washable floor space, or a tabletop surface
- A few props: toy cars, blocks, washable markers, sticker dots, or small soft balls
Activity 1 — Tape Roads and Train Tracks
- Lay tape lines on the floor to make winding roads, intersections, and parking spaces.
- Add toy cars, trucks, and trains for open-ended driving play.
Why it works: promotes imaginative play, spatial awareness, and bilateral coordination.
Activity 2 — Color & Shape Tape Puzzles
- Make large geometric shapes on paper or the floor with tape, then cut colored paper to fit (or have toddlers place matching-color objects inside each shape).
- For older toddlers, remove a section and let them match the missing piece back in.
Why it works: introduces colors and shapes, matching skills, and early problem solving.
Activity 3 — Tape Letters and Numbers
- Form simple letters or numbers on the floor with tape and have toddlers trace them with a finger or a toy vehicle.
- Turn it into a scavenger hunt: “Drive to the A!” or “Find number 3.”
Why it works: tactile letter/number recognition and pre-writing practice.
Activity 4 — Masking Tape Obstacle Course
- Create lines to follow, small steps, and “stop” squares using tape. Add sensory challenges like hopping over a tape line.
- Adjust complexity based on your child’s age and mobility.
Why it works: gross-motor exercise, balance, and following multi-step directions.
Activity 5 — Sticker Targets and Fine-Motor Stations
- Make small taped squares or circles as targets and give toddlers stickers, pom-poms, or clothespins to place inside each target.
- Challenge: place three stickers in each square, or sort stickers by color into different taped zones.
Why it works: refines pincer grasp and hand-eye coordination.
Activity 6 — Tape Tunnel & Fort Outlines
- Use long strips of tape to outline a crawling tunnel, a tent footprint, or a “boat” on the floor where kids can pretend and crawl inside.
- Add pillows or a sheet over chairs for more enclosure (supervise closely).
Why it works: encourages imaginative social play and body awareness.
Activity 7 — Tape Art Frames and Collage Boards
- Create a taped frame on heavy paper or cardboard and let toddlers glue or stick loose parts inside the frame: leaves, paper scraps, foam shapes, or sticker circles.
- Peel the frame at the end for a clean edge to display.
Why it works: supports creative expression and early cutting/pasting experience.
Setup and safety tips
- Use low-adhesive painter’s tape if your surface is delicate; masking tape works fine on most floors and paper.
- Always supervise toddlers to prevent tape ingestion and to help remove tape gently from skin or hair.
- Limit session length to keep engagement high and rotate activities to maintain novelty. For more ideas you can use indoors on busy days, check this page of indoor activities for toddlers.
Developmental benefits (quick summary)
- Fine motor skills: picking up stickers, pressing tape pieces, and placing small items.
- Gross motor skills: hopping, crawling, balancing along lines.
- Cognitive skills: following sequences, comparing shapes/colors, and imaginative play.
- Language skills: narrating play, following directions, and naming shapes or colors.
Variations and extensions
- Multi-sensory: add textured tape, fabric scraps, or scented stickers.
- Themed weeks: create transportation, farm, or ocean tape layouts and bring related books and toys.
- Group play: set up relay races or cooperative tape projects for siblings or playdates.
Clean-up and storage
- Keep a small “tape kit” with a roll of tape, a few scissors, and a stack of butcher paper.
- Most tape peels up easily; for sticky residue try a little warm soapy water or a baby oil wipe on affected surfaces.
Conclusion
These masking tape activities are a low-cost, high-reward way to keep toddlers engaged while supporting key developmental skills. For additional step-by-step masking tape ideas and inspiration, you can explore this roundup of 7 Fun & Easy Masking Tape Activities for Toddlers – Kids Kubby, and if you want variations using painter’s tape specifically, see this helpful guide to 7 Painter’s Tape Toddler Activities: Babies to Big Kids – DC Area Moms.
