

High-Protein Foods for Picky Eaters – Kid-Friendly Meal Ideas!
High-Protein Foods for Picky Eaters — Kid-Friendly Meal Ideas!
Introduction
Children who are picky eaters can make mealtimes stressful, but focusing on high-protein foods helps support growth, concentration, and stable energy. Small changes and playful presentation can make a big difference. If you’re packing lunches, our roundup of school lunch ideas for picky eaters has practical, protein-forward options that kids tend to accept.
Why Protein Matters for Kids
Protein builds muscles, supports immune function, and helps children feel full longer—reducing snacking on low-nutrient foods. For picky eaters, concentrate on protein sources that can be disguised, mixed into favorites, or served in familiar formats.
Smart strategies
- Start small: Offer a spoonful of a new protein with a well-liked side.
- Mix textures: If a child dislikes chunky textures, try purees, dips, or finely chopped versions.
- Flavor lightly: Mild-flavored proteins (like chicken, turkey, or plain yogurt) are easier to introduce than strongly flavored options.
- Keep portions kid-sized: A few bites of protein per meal is better than overwhelming a child with a large serving.
Kid-friendly high-protein foods (and how to serve them)
- Greek yogurt: Serve with a swirl of honey and fruit, or freeze into smoothie pops.
- Cottage cheese: Mix with fruit, or blend into pancakes for a protein boost.
- Nut butters: Spread thinly on toast, apples, or rolled into a tortilla with banana.
- Eggs: Scrambled, omelet muffins, or hard-boiled slices for lunchboxes.
- Lean meats: Ground turkey or chicken formed into slider patties or meatballs.
- Fish: Mild white fish or canned tuna mixed into a creamy pasta.
- Cheese: Cubes, string cheese, or melted on whole-grain crackers.
- Beans and lentils: Puree into soups, stews, or pasta sauces.
- Tofu and tempeh: Marinated and baked into crispy bites that kids can dip.
- Edamame: Shelled and lightly salted as a snack or salad topper.
Quick, kid-tested meal ideas
- Breakfast: Greek yogurt parfait layered with granola and berries.
- Snack: Apple slices with almond butter and a sprinkle of chia seeds.
- Lunch: Mini whole-wheat wraps with shredded rotisserie chicken, avocado, and mild salsa.
- Dinner: Turkey meatball sliders with steamed carrots and a side of cottage cheese.
- Smoothie: Spinach, banana, peanut butter, and milk (dairy or fortified plant milk) blended until creamy.
Mini recipes you can try
- Protein Pancakes: Blend oats, egg, cottage cheese, and a banana; cook like regular pancakes.
- Hidden Veggie Meatballs: Finely shred zucchini and carrots into turkey meatball mixture, bake and serve with dipping sauce.
- Cheesy Bean Quesadilla: Mash black beans with a little salsa, spread on a tortilla, top with cheese, fold and grill until melty.
Using convenience wisely
Keep sliced cheeses, yogurt tubes, hard-boiled eggs, and canned tuna on hand for fast, protein-rich fixes. Rotisserie chicken can be shredded into multiple meals all week. For hands-off dinners that are often kid-approved, consider slow-cooker recipes to make tender, mild-flavored proteins; our collection of kid-friendly crock pot meals includes simple, slow-cooked protein ideas that are easy to customize.
Dealing with refusals
- Offer choices: “Do you want chicken or eggs for protein tonight?” gives control without removing the protein.
- Pair with favorites: Serve a new protein beside a beloved food so the plate feels familiar.
- Reintroduce often: It can take many exposures before a child accepts a food.
Sample one-day high-protein menu for a picky eater
- Breakfast: Scrambled egg and a slice of whole-grain toast with a smear of peanut butter.
- Snack: Yogurt tube and a few graham crackers.
- Lunch: Turkey and cheese roll-ups, cucumber slices, and a small cup of edamame.
- Snack: Cottage cheese with pineapple.
- Dinner: Baked mild fish sticks, sweet potato fries, and steamed peas.
Practical tips for success
- Keep portions small and celebrations big for trying new things.
- Rotate proteins weekly to expose kids to variety without overwhelming them.
- Use dips—they’re a favorite for encouraging tasting (yogurt, hummus, or mild salsa).
- Make meals visually fun: shapes, colorful plates, or themed dinners can help.
Conclusion
For more inspiration and a larger list of meal ideas tailored to selective eaters, see this helpful roundup of 19 high-protein meals for picky eaters from Tinybeans. If you want an extended collection of snack and meal suggestions emphasizing protein, this guide to 30 high protein foods and meal ideas from Nutrition2Nourish is a useful resource.
No-Cook Snack Ideas
No-Cook Snack Ideas
No-cook snacks are perfect for busy days, hot weather, or when you want something quick and healthy without turning on the stove. For simple, kid-friendly combinations that highlight fruit and minimal prep, check out these kid fruit snack ideas to inspire colorful, nutritious options that children love.
Why Choose No-Cook Snacks
No-cook snacks save time, cut energy use, and often require fewer ingredients. They make it easy to control portions and include fresh produce, whole grains, and proteins. These snacks are also great for teaching kids basic food assembly and safe handling without involving heat.
Savory No-Cook Ideas
- Veggie roll-ups: Spread hummus on a large lettuce leaf or tortilla, add thinly sliced bell pepper, cucumber, and shredded carrot, then roll and slice.
- Cheese and whole-grain crackers with grape tomatoes and olives on the side.
- Tuna or chickpea salad-stuffed avocado halves: mix canned tuna or mashed chickpeas with a little Greek yogurt or mayo and seasonings, then spoon into avocado.
- Ready-to-eat deli turkey roll-ups: wrap turkey slices around string cheese or cucumber sticks for a protein-packed bite.
Sweet and No-Bake Treats
- Yogurt parfaits: layer Greek yogurt with granola and fresh berries or sliced bananas.
- Banana "ice cream": freeze banana slices, then blend until creamy and top with a drizzle of nut butter.
- Energy balls: combine oats, nut butter, honey, and mix-ins like mini chocolate chips or dried fruit, then roll into bite-sized balls (no baking required).
- Apple sandwich slices: core and slice an apple into rounds, spread nut butter between two slices, and sprinkle with granola.
Snacks Specifically for Little Ones
When preparing snacks for toddlers, emphasize easy-to-chew textures, small portions, and minimal choking hazards. Simple combos like soft fruit chunks with mashed avocado or whole-grain mini pancakes topped with fruit puree work well; for more toddler-focused inspiration, see these helpful toddler snack ideas that balance nutrition and convenience.
Packing and Serving Tips
- Use bento-style containers or small reusable silicone cups to separate flavors and keep textures crisp.
- Pre-portion single servings for grab-and-go mornings.
- Rotate flavors and colors each day to keep snacks appealing and varied.
Conclusion
For a wider variety of no-cook recipes, including desserts and meal ideas you can prepare without turning on the stove, explore this collection of easy no-cook recipes from Our Best Bites. If you want more kid-friendly, no-bake snack ideas specifically geared toward children, check out this roundup of no-bake snack ideas for kids on Bucket List Tummy.
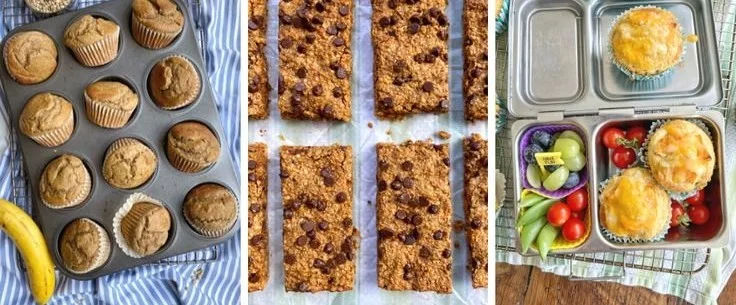
Banana Oatmeal Bars
Banana Oatmeal Bars
Banana oatmeal bars are a simple, wholesome snack that turns overripe bananas into handheld goodness. They’re naturally sweetened, packed with fiber, and flexible enough to fit breakfast, a lunchbox treat, or a post-playtime bite. If you’re introducing bananas to little ones and want complementary ideas, see this guide on banana pancakes for baby for other banana-forward options.
Why these bars work
- Ripe bananas add moisture and sweetness without refined sugar.
- Oats provide texture, slow-release energy, and keep you full.
- The recipe adapts to gluten-free, nut-free, and vegan diets with simple swaps.
Ingredients (makes about 12 bars)
- 2 large overripe bananas, mashed
- 2 cups rolled oats (use certified gluten-free if needed)
- 1 large egg (or flax egg for vegan: 1 tbsp flax + 3 tbsp water, rested)
- 1/4 cup nut or seed butter (optional for binding and flavor)
- 1 tsp vanilla extract
- 1/2 tsp cinnamon
- 1/2 tsp baking powder
- Pinch of salt
- Optional add-ins: chocolate chips, raisins, chopped nuts, or shredded coconut
Instructions
- Preheat the oven to 350°F (175°C). Line an 8×8-inch baking pan with parchment or lightly grease it.
- In a large bowl, mash the bananas until mostly smooth.
- Stir in the egg (or flax egg), vanilla, and nut butter until combined.
- Add oats, cinnamon, baking powder, and salt. Mix until the batter comes together—thicker than pancake batter but moist.
- Fold in any optional add-ins.
- Press the mixture evenly into the prepared pan.
- Bake for 18–25 minutes, until the top is set and edges are lightly golden.
- Allow to cool in the pan for 10 minutes, then lift out using the parchment and cool completely on a rack before slicing into bars.
Storage
- At room temperature: store in an airtight container for up to 2 days.
- Refrigerated: keeps 5–7 days.
- Frozen: wrap bars individually and freeze up to 3 months; thaw at room temperature or warm briefly.
Variations and swaps
- Chocolate banana: stir in 1/4 cup cocoa powder and increase a little sweetener or banana for balance.
- Apple-cinnamon: replace half the banana with 1/2 cup grated apple.
- Protein boost: add a scoop of protein powder or 1/4 cup hemp seeds.
- Baby-friendly texture: reduce add-ins and cut into smaller, softer pieces; for more ideas on serving banana-based baked goods safely to infants, consult how to serve banana bread to baby.
Tips for success
- Use very ripe bananas for best sweetness and binding.
- If the batter seems dry, add a tablespoon or two of milk; if too wet, add a few extra tablespoons of oats.
- Press batter firmly into the pan to create cohesive bars that slice cleanly.
- Keep portions small for toddlers and always watch for potential choking hazards from nuts or large add-ins.
Conclusion
If you’d like a similar take with variations and extra notes, check out this detailed recipe for Banana Oatmeal Bars – Carmy. For an even simpler, minimal-ingredient approach, see the straightforward version at 4-Ingredient Banana Oatmeal Bars – The Roasted Root.

50 Budget-Friendly Snack Ideas for the Family
50 Budget-Friendly Snack Ideas for the Family
Feeding a family on a budget doesn’t mean sacrificing flavor or variety. Whether you need quick after-school bites, something to serve at a weekend get-together, or easy snacks to pack for trips, this list gives 50 simple, affordable ideas your whole family will enjoy. If you’re planning a themed playdate or nursery reveal, these playful Winnie-the-Pooh nursery ideas might inspire snack presentation and decor.
No-Cook & Assembly Snacks (10)
- Veggie sticks with hummus — carrot, cucumber, bell pepper.
- Apple slices with peanut butter and a sprinkle of oats.
- Yogurt parfaits: yogurt, cereal or granola, and berries.
- Cheese cubes and whole-grain crackers.
- Cold-cut roll-ups: turkey or ham rolled with cheese and spinach.
- Rice cake smears: cream cheese and jam or avocado and salt.
- Cottage cheese with pineapple or sliced peaches.
- Ants on a log: celery, peanut butter, and raisins.
- Nut-free trail mix: pretzels, dried fruit, sunflower seeds, and cereal.
- Caprese skewers: cherry tomato, basil leaf, and mozzarella.
Make-Ahead & Reheatable Snacks (10)
- Mini frittatas or egg muffins baked in a muffin tin.
- Slow-cooker salsa chicken — shred and serve on chips or sliders.
- Baked sweet potato fries with a yogurt dip.
- Pancake or waffle batter frozen into single servings; toast when needed.
- Cheesy spinach and rice patties — reheat in a skillet.
- Baked zucchini chips seasoned with parmesan.
- Bean burrito roll-ups — assemble, freeze, and warm as needed.
- Homemade granola bars or energy bites.
- Oven-baked meatballs that double as dinner and snack.
- Mini quiches made in a muffin tin and frozen.
Healthy & Protein-Rich Snacks (10)
- Hard-boiled eggs with a dash of paprika.
- Edamame sprinkled with sea salt.
- Turkey or chicken salad lettuce wraps.
- Greek yogurt mixed with nut butter and sliced banana.
- Tofu cubes pan-fried with a soy-honey glaze.
- Cottage cheese and cucumber rounds.
- Peanut-butter banana roll-ups on whole-wheat tortillas.
- Smoked salmon on whole-grain crackers with cream cheese.
- Roasted chickpeas seasoned with chili powder.
- Smoothie popsicles made from blended fruit and spinach.
Kid-Approved Finger Foods (8)
- Mini grilled cheese sandwiches cut into fun shapes.
- Pita pizzas with tomato sauce and shredded mozzarella.
- Fruit kabobs with a honey-yogurt dip.
- Homemade mini corn dogs using turkey hot dogs.
- Cheese quesadillas cut into triangles.
- Banana slices topped with mini chocolate chips (quick "s’more" bites).
- Mini bagel pizzas with pepperoni or veggies.
- Veggie muffins packed with grated carrots and zucchini.
Sweet Treats & Simple Desserts (6)
- Baked cinnamon apple chips.
- Peanut butter and jam thumbprint cookies.
- Yogurt bark: spread yogurt, top with fruit, freeze, and break.
- Rice krispie treats made with butter and marshmallows.
- Baked banana boats: split banana, add chocolate chips, and broil.
- Mini fruit crumbles using oats and a touch of brown sugar.
Party & Batch-Friendly Snacks (6)
- Popcorn bar with seasonings like cinnamon sugar, nutritional yeast, or chili-lime.
- Party sliders with pulled chicken or black bean patties.
- Layered dip with chips — refried beans, salsa, guacamole, sour cream.
- Veggie or fruit platters with themed shapes for special events.
- Nacho station with melted cheese, beans, and veggies for topping.
- Sheet-pan savory bites like roasted sausage and peppers.
If you want to stretch ingredients further, think cross-purpose: roasted chickpeas as a snack or salad topper, leftover rice turned into patties, or fruit slices repurposed into compotes for pancakes.
Tips to Keep Costs Low
- Buy seasonal produce and freeze extras for smoothies or baking.
- Shop store brands for basics like oats, flour, and canned beans.
- Use coupons and weekly flyers to buy proteins on sale and freeze for later.
- Make big batches and portion them into reusable containers to avoid waste.
- Get kids involved in assembly — it’s cheaper (and less messy) when they help.
Conclusion
For more inspiration on simple, practical options you can prep in advance, consult this collection of easy meal prep snack ideas that covers a wide range of situations. And if you’d like to pair these snacks with affordable dinners, this roundup of cheap meal ideas that actually taste good can help keep your weekly grocery budget under control.

30 Kids School Lunch Ideas for Picky Eaters
30 Kids School Lunch Ideas for Picky Eaters
Packing school lunches for picky eaters can feel like a daily puzzle. With a mix of familiar favorites, small taste tests, and fun presentation, you can increase the chances your child will eat and enjoy their meal. For additional themed ideas and printable notes, you might find this school lunch ideas for picky eaters resource helpful as a companion to the suggestions below.
Tips before you pack
- Keep items bite-sized and easy to eat; little forks, skewers, or compartmentalized boxes make food more appealing.
- Offer one “must-eat” item and one “try” item to reduce pressure.
- Rotate textures and colors—crunchy, creamy, sweet, and savory—to maintain interest.
- Get kids involved: let them choose between two options so they feel in control.
Sandwiches & wraps (easy swaps)
- Turkey and cheese roll-ups (slice turkey, roll with cheese).
- Sunbutter and banana sandwich on whole-grain bread.
- Mini pita pockets with chicken salad.
- Cream cheese and cucumber pinwheels.
- Pizza bagels — toast briefly and top with sauce and shredded cheese.
Warm thermos ideas
6. Macaroni and cheese with hidden pureed veggies.
7. Chicken noodle or tomato soup (packed hot in the morning).
8. Mini meatballs with pasta and marinara.
9. Rice and beans with a mild seasoning.
10. Breakfast-for-lunch: scrambled eggs and diced potatoes.
Mix-and-match bento box combos
11. Hummus with pita triangles, carrot sticks, and grapes.
12. Cheese cubes, whole-grain crackers, and apple slices.
13. Edamame, cherry tomatoes, and a few pretzels.
14. Yogurt cup, granola on the side, and berries.
15. Cold pasta salad with mild dressing and chopped veggies.
Snackable proteins & finger foods
16. Hard-boiled eggs with a sprinkle of salt.
17. Mini turkey or veggie sliders.
18. Quesadilla wedges with mild cheese and beans.
19. Smoked salmon and cream cheese on a bagel thin (if accepted).
20. Cottage cheese with pineapple chunks.
Fruit, veggies & dips
21. Apple slices with a small container of peanut butter or sunbutter.
22. Frozen grapes (thaw slightly by lunchtime).
23. Cucumber coins with ranch dressing.
24. Bell pepper strips and guacamole.
25. Fruit kabobs with melon, berries, and marshmallows for fun.
Sweet treats that aren’t junk
26. Oatmeal cookie made with banana and raisins.
27. Homemade granola bars with less sugar.
28. Chia pudding topped with fruit.
29. Mini fruit muffins made with whole wheat.
30. Dark chocolate square tucked into the snack compartment as a surprise.
Strategy ideas to keep progress steady
- Introduce one new item at a time alongside favorites.
- Use familiar shapes—cookie cutters for sandwiches—to make foods more inviting.
- Label sections with encouraging notes or use themed silicone cups to separate items.
- If you want ready-to-pack combinations and sample packing lists, check a collection of kids lunch ideas for school that pairs mains, sides, and snacks.
Allergies and school rules
Always confirm ingredient rules for your child’s school and adjust for common allergens like nuts. Swap nut spreads for seed butters or yogurt-based dips when necessary.
Conclusion
For a larger gallery of quick recipes and visual lunch combos that kids are likely to accept, see Cubby’s 72 easy school lunch ideas for more inspiration. If you’d like a different set of picky-eater friendly recipes and creative packing tips, explore Happiness Is Homemade’s 30+ school lunch ideas for picky eaters.

Struggling with Breakfast? Try These 15 Breakfast Ideas for Kids
Struggling with Breakfast? Try These 15 Breakfast Ideas for Kids
Mornings can be chaotic, but a quick, nutritious breakfast sets kids up for a better day. Whether your child is a picky eater or you need something you can make in five minutes, these 15 ideas mix nutrition, flavor, and simplicity. If you’re caring for a younger toddler, check our suggestions for breakfast ideas for 1-year-olds for age-appropriate swaps and texture tips.
Banana Oat Pancakes
- Cooked batter of mashed banana, oats, and an egg makes soft, naturally sweet pancakes.
- Tip: Freeze individual pancakes and reheat quickly for busy mornings.
Yogurt Parfait Jar
- Layer Greek yogurt, fruit, and a small sprinkle of granola or seeds in a jar.
- Tip: Use unsweetened yogurt and let kids add toppings to get them involved.
Peanut Butter and Apple Slices
- Apple wedges with a thin spread of peanut or almond butter provide fiber and protein.
- Tip: Swap seeds or tahini for nut-free classrooms.
Veggie-Packed Scrambled Eggs
- Whisk eggs with finely chopped spinach, tomatoes, and a little cheese.
- Tip: Cook slowly for soft curds that kids prefer.
Smoothie Bowl
- Thick smoothie (banana + berries + spinach + milk) topped with chopped fruit and cereal.
- Tip: Keep the base thick so toppings don’t sink.
Mini Frittatas
- Bake eggs with diced veggies and ham or beans in a muffin tin for grab-and-go portions.
- Tip: Freeze extras and warm in the microwave for 30–45 seconds.
Whole-Grain Toast with Avocado and Egg
- Mashed avocado and a soft-boiled or fried egg make a filling, nutrient-rich bite.
- Tip: Cut into fingers for easier handling by younger kids.
Cottage Cheese and Fruit Plate
- Cottage cheese paired with fresh fruit offers a mild, protein-rich option.
- Tip: Add a small drizzle of honey for older kids (not for infants under 1).
Berry Chia Pudding
- Prepare chia seeds soaked overnight in milk with mashed berries for natural sweetness.
- Tip: Make a big batch on Sunday for weekday breakfasts.
Breakfast Quesadilla
- Whole-wheat tortilla with scrambled eggs and cheese, folded and toasted.
- Tip: Add finely diced peppers or black beans for extra nutrients.
Oatmeal Bar
- Cook oats and offer toppings like cinnamon, nut butter, diced fruit, and chopped nuts.
- Tip: Pre-measure toppings into small containers to speed assembly.
Fruit and Cheese Kabobs
- Alternate cubes of cheese and fruit on short skewers (or toothpicks for older kids).
- Tip: Add whole-grain crackers for a crunch.
Mini Bagel Pizzas
- Half a whole-grain bagel topped with tomato sauce and cheese, broiled until melty.
- Tip: Let kids choose toppings so they’re more likely to eat them.
Cottage Cheese Pancakes (Blender)
- Blend cottage cheese, oats, and eggs for high-protein pancakes that are light and fluffy.
- Tip: Serve with fresh berries or a smear of nut butter.
Savory Oatmeal with Cheese and Veggies
- Prepare oats with broth, stir in grated cheese and finely chopped veggies for a warm savory bowl.
- Tip: Season lightly with herbs instead of salt for younger kids.
Make-ahead ideas and shortcuts
- Mix batter, chopped fruit, or frittata filling the night before to shave minutes off breakfast prep.
- Keep a selection of ready-to-eat items in the fridge (cheese cubes, pre-sliced fruit, boiled eggs).
- If you pack school meals, these techniques overlap well with portable options; for more midday inspiration, see these cold lunch ideas for kids that can double as handheld breakfasts.
Quick tips for picky eaters
- Serve new foods alongside trusted favorites.
- Make food fun: cookie cutters, colorful plates, and creative names help.
- Offer small portions of new items so a refusal doesn’t waste a whole meal.
Conclusion
For a bright, colorful muffin that sneaks in spice and health, try the Turmeric Breakfast Muffins recipe on Green Kitchen Stories as a weekend bake-and-freeze option. If you need baby-friendly, quick breakfast ideas tailored to a young toddler, check these quick and nutritious breakfast ideas for your 15-month-old on Lemon8 for additional age-specific suggestions.

Healthy, Kid-Approved Dinner Ideas Your Whole Family Will Love
Healthy, Kid-Approved Dinner Ideas Your Whole Family Will Love
Feeding three kids every night is a balancing act between speed, nutrition, and flavor. Over time I learned that simple swaps, familiar textures, and a few fun presentation tricks keep everyone at the table — and happy. If you need quick options for hot days or snacks that require no cooking, try this roundup of no-heat choices to save time and keep kids satisfied: no-heat recipes for kids.
This article gives easy weeknight recipes, fast healthy dinners, and strategies to make vegetables and new foods more appealing — all adaptable to toddlers through tweens.
Weeknight Winners (15–30 minutes)
- Veggie-packed turkey meatballs
- Lean turkey, grated carrot and zucchini, a little grated onion, an egg, and panko. Mix, form small meatballs, bake at 400°F for 12–15 minutes. Serve with whole-wheat pasta and a mild tomato sauce or tucked into pita pockets.
- Rainbow quesadillas
- Whole-wheat tortillas, shredded cheese, black beans, finely chopped bell peppers, and corn. Cook in a skillet until golden and cut into wedges. Offer mild salsa and plain yogurt for dipping.
- Sheet-pan salmon fingers and sweet potato
- Cut salmon into strips, coat lightly with olive oil and whole-grain breadcrumbs, roast alongside diced sweet potato for 15–18 minutes. Serve with lemon-yogurt sauce and steamed peas.
- One-pan chicken and veggie stir
- Slice chicken breasts thin, quickly sauté with broccoli florets, snap peas, and carrots; finish with a splash of low-sodium soy sauce and a teaspoon of honey. Serve over brown rice.
Make-Ahead Mini Meals (Great for Busy Nights)
- Mini frittatas
- Whisk eggs with a splash of milk, add tiny bits of ham, spinach, or mushrooms, and pour into muffin tins. Bake and refrigerate. Reheat for breakfasts or dinners with a side salad.
- DIY lunchbox bowls
- Roast a big tray of seasoned chickpeas, quinoa, and assorted roasted vegetables. Assemble bowls from the fridge for speedy dinners that feel special.
Healthy Swaps That Don’t Sacrifice Taste
- Swap half the ground beef with finely chopped mushrooms or lentils in meat sauces or burgers to cut fat and add fiber without changing flavor.
- Use Greek yogurt instead of sour cream for dips and dressings to increase protein.
- When introducing whole grains, mix them with a familiar favorite (e.g., half white rice, half brown rice) and increase the whole-grain portion gradually.
Getting Kids to Eat New Foods
Presentation and autonomy matter. Let kids build their own plates from components — this empowers picky eaters to try small bites without pressure. Turn veggies into fun shapes or serve them with a favorite dip. If you’re working on morning routines too, those make-ahead mini frittatas or parfaits can be lifesavers; for practical infant-to-toddler breakfast ideas, consider these helpful suggestions: breakfast ideas for a 1-year-old.
Other small tactics: pair new foods with consistently loved items, keep portions tiny at first, and celebrate any progress rather than demand full servings.
Fast, Healthy Dinner Templates
These templates let you mix and match ingredients based on what’s on hand:
- Base (1 cup): brown rice, quinoa, whole-grain pasta, or mashed potatoes
- Protein (3–4 oz): grilled fish, shredded chicken, tofu cubes, beans, or lean beef
- Veggies (½–1 cup): roasted, steamed, or raw sliced with a dip
- Sauce: low-sodium tomato, yogurt-herb, or a simple olive oil-lemon drizzle
Combine quickly for dinners like grain bowls, tacos, pita pizzas, or loaded baked potatoes.
Snack and Side Ideas Kids Love
- Cucumber rounds topped with hummus and cherry tomato halves
- Apple slices with nut butter and a sprinkle of granola
- Air-popped popcorn with a light dusting of parmesan
- Steamed edamame lightly salted
Small, frequent meals and snacks help maintain energy and reduce mealtime meltdowns.
Tips for Successful Family Meals
- Involve kids in meal prep: stirring, washing produce, or arranging plates builds ownership.
- Keep a rotating two-week meal plan so shopping and prep are predictable.
- Batch-cook staples like grains and roasted veggies on weekends to speed weekday assembly.
- Use leftovers creatively — yesterday’s roasted chicken becomes today’s quesadilla filling or soup base.
Conclusion
For creative strategies to help kids enjoy more vegetables and make veggies a regular part of family meals, check out 19 Ways to Get Kids to Eat (and Love) More Vegetables. If you want an extended compilation of family-friendly, kid-approved dinner ideas to rotate through your meal plan, see the Master List of Healthy Family Meals (Kid-Approved).
Homemade School Snacks (Nut-free and Nutritious)
Homemade School Snacks (Nut-free and Nutritious)
Packing snacks for school can be a daily challenge — you want items that are safe, satisfying, and simple to prepare. Whether your child has a nut allergy or you’re trying to avoid bringing nuts into the classroom, there are plenty of wholesome, appealing options that kids will eat and parents can feel good about. For ideas tailored to younger children, see preschool snack suggestions for 3-year-olds.
In this article you’ll find practical snack ideas, quick recipes, storage tips, and packing strategies that keep nutrition and allergy-safety front and center.
Principles for Nut-free Snack Planning
- Prioritize whole foods: fruits, vegetables, whole grains, seeds, dairy or dairy alternatives, and lean proteins give steady energy and nutrients.
- Keep it portable: choose items that travel well and don’t require reheating.
- Make it balanced: combine a carbohydrate with a protein or healthy fat to help curb hunger between meals.
- Label and communicate: if your child’s school requires nut-free packaging or allergy notes, include a short label and let teachers know about substitutions.
Simple, Nut-free Snack Ideas
- Fresh fruit: apple slices (tossed in a little lemon juice to prevent browning), banana, grapes, or clementine segments.
- Veggie sticks + dip: carrot, cucumber, and bell pepper strips paired with hummus (check sesame-free if needed) or yogurt-based ranch.
- Whole-grain crackers + cheese: small portions of sliced cheddar or string cheese are easy to eat and filling.
- Yogurt parfait: plain or lightly sweetened yogurt layered with berries and a sprinkle of toasted oats or sunflower seeds.
- Hard-boiled eggs: an inexpensive protein source that holds up well in an insulated lunch bag.
- Seed-based energy bites: use sunflower or pumpkin seeds blended with oats, dried fruit, and a little honey or maple syrup to form bites (nut-free alternative to nut butter snacks).
- Mini sandwiches or wraps: turkey and avocado, cream cheese and cucumber, or hummus and shredded veggies on whole-grain bread or tortillas.
- Homemade muffins or oat bars: bake with apple sauce, mashed banana, or seed butters for binding and moisture instead of nut butters.
Quick Recipes to Try
- Sunflower Seed Energy Bites: Pulse 1 cup sunflower seeds, 1 cup rolled oats, 1/2 cup dried cranberries, 2 tbsp chia seeds, and 1/4 cup honey until combined. Roll into bite-size balls and chill.
- Cheesy Veg Muffins: Mix grated zucchini, shredded cheddar, 2 eggs, 1 cup whole-wheat flour, 1 tsp baking powder, and a splash of milk. Spoon into a mini muffin tin and bake 15–18 minutes at 350°F.
- Apple & Yogurt Cups: Layer plain Greek yogurt with finely chopped apples and a little cinnamon. Sprinkle with toasted oats or pumpkin seeds before sealing.
Packing, Storage, and Timing
- Use small containers: Portion snacks into small reusable containers so kids have manageable servings and less waste.
- Pack cold items with a frozen gel pack to keep yogurt, cheese, and eggs safe until lunchtime.
- Prep ahead: Many snacks keep well for several days — bake muffins or energy bites on the weekend and store in an airtight container for grab-and-go mornings.
- Rotate options: Keep a list of go-to snacks and rotate through them to prevent boredom and ensure a range of nutrients.
- Check labels: If you buy packaged items, read ingredient lists for “may contain” warnings about tree nuts or peanuts.
Making Snacks Appealing to Kids
- Presentation matters: Use cookie cutters to make sandwiches fun shapes, or create fruit kabobs for an easy, colorful treat.
- Let kids help: Invite them to assemble their own snack boxes the night before — children are more likely to eat what they helped make.
- Keep it familiar: Pair new items with something you know they already like to increase acceptance of new flavors.
Allergy-Safe Habits for Schools
- Communicate with the school: Share your child’s allergy status and preferred emergency procedures if applicable.
- Avoid high-risk cross-contamination: Wash cutting boards and utensils thoroughly after preparing items that could have touched nuts, and store nut-free snacks separately.
- Teach children about their snacks: Age-appropriate education about not sharing food and recognizing safe foods empowers kids to manage their own safety.
Where to Find More Ideas
For a broader range of easy-to-pack choices suited to different ages and preferences, you might find this roundup useful: school snack ideas for busy families.
Conclusion
If you want ready-made inspiration and more nut-free recipes, check out the curated collection of allergy-conscious options from Happy Kids Kitchen’s nut-free school snacks, and for portable, allergy-friendly recipes with vegan and gluten-free choices, see the selection at Oh She Glows’ back-to-school snack ideas.

Meals and recipes kids can make for lunch or dinner
Easy Meals and Recipes Kids Can Make for Lunch or Dinner
Getting kids involved in making their own lunch or dinner boosts confidence, teaches kitchen skills, and often leads to healthier eating. Start with simple, fun recipes that use a few ingredients and clear steps. For ideas that help kids eat more vegetables while learning to cook, try these healthy veggie-forward recipes.
Kid-Friendly Recipes (Simple Steps)
Below are easy recipes organized by skill level. Each one uses basic tools and minimal heat so kids can either do most of the work themselves or help an adult.
Mini Pita Pizzas (age 5+ with supervision)
- Ingredients: whole-wheat pita rounds, tomato sauce, shredded cheese, sliced veggies or pepperoni.
- Steps: Spread sauce on pita, sprinkle cheese, add toppings. Bake 5–8 minutes at 375°F (adult handles oven) or use toaster oven. Let cool slightly before eating.
Quesadilla Critters (age 4+)
- Ingredients: tortilla, shredded cheese, beans or chicken, bell pepper slices for decoration.
- Steps: Place tortilla in skillet over low heat (adult), add cheese and fillings, fold and cook until cheese melts. Cut into shapes and use bell pepper strips for eyes or smiles.
No-Cook Bean Wraps (age 6+)
- Ingredients: canned beans (rinsed), mashed avocado or hummus, grated carrot, whole-grain tortilla.
- Steps: Mix beans with a little salt and lemon juice, spread hummus on tortilla, layer filling, roll and slice. This recipe builds simple mash-and-assemble skills.
Cold Pasta Salad (age 7+)
- Ingredients: cooked pasta (cooled), cubed cheese, chopped cucumber, cherry tomatoes, Italian dressing.
- Steps: Toss everything together in a bowl. This is great for letting kids practice measuring and mixing.
Smoothie Bowl (age 5+)
- Ingredients: frozen banana, berries, yogurt or milk, granola, sliced fruit for topping.
- Steps: Blend fruit and yogurt until thick, pour into a bowl and let kids add fun toppings with spoons and hands.
Egg Muffins (age 8+ with adult help)
- Ingredients: beaten eggs, chopped spinach, cheese, diced ham, muffin tin.
- Steps: Adults preheat oven. Kids pour mixture into muffin tins and help sprinkle toppings. Bake until set. These are great for batch lunches.
Build-Your-Own Stations (No Heat Needed)
Set up a make-your-own station to encourage creativity and independence:
- Sandwich station: assorted breads, spreads, sliced cheese, deli meats, lettuce, and grated veggies.
- Snack plate station: crackers, cheese cubes, grapes, cherry tomatoes, and hummus.
- Salad jars: layers of dressing, sturdy veggies, proteins, and greens — kids can assemble and shake before eating.
For more ideas specifically focused on assembling lunches that don’t need heating, check out these practical cold lunch ideas for kids.
Safety and Skill Tips
- Knife safety: Start with a child-safe knife and teach the “claw” grip. Supervise until dexterity improves.
- Hot surfaces: Young children should not handle ovens or stovetops. Assign an adult for the cooking step and let kids do prep and plating.
- Hygiene: Make hand-washing a habit before cooking and after handling raw ingredients.
- Portioning: Teach kids to balance a plate — half fruits/vegetables, a quarter protein, and a quarter grains.
- Cleanup: Make cleanup part of the recipe — measuring, mixing, and washing a bowl are all helpful tasks.
Meal Planning and Time Savers
- Batch cook staples like pasta and roasted chicken to speed assembly later.
- Use leftovers creatively: roast chicken becomes chicken salad, steamed veggies are great in wraps.
- Keep a small box of kid-friendly seasonings and sauces to let kids personalize flavors without messy experiments.
Conclusion
If you want a larger set of protein-rich ideas that are easy to adapt for kids, the collection of 42 bean recipes kids and families will love offers many simple, family-friendly options. For inspiration on super-simple lunch projects children can make on their own, see this roundup of super easy lockdown lunch recipes kids can make by themselves.
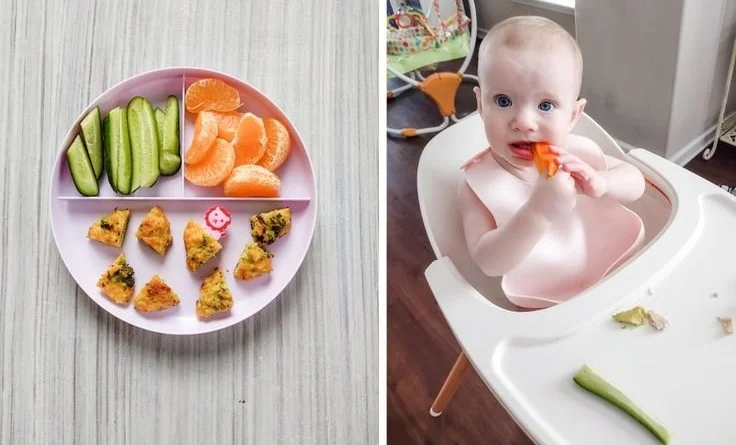
Freezer-Friendly Finger Foods 9-12 Months
Freezer-Friendly Finger Foods for Babies 9–12 Months
Feeding a mobile 9–12 month old can feel like a full-time job, but a few smart freezer-prep strategies make mealtimes calmer and more varied. For a starter list of safe choices and age-appropriate textures, see the comprehensive baby finger-foods guide, which helps you match foods to your baby’s skills.
This article covers why freezing works, safety and texture tips, practical recipe ideas you can batch-cook and freeze, storage guidelines, reheating and serving advice, and a simple weekly plan to keep variety on the table.
Why Freeze Finger Foods?
- Saves time: Cook once and eat multiple times.
- Improves variety: Rotate flavors and textures without daily prep.
- Reduces waste: Freeze leftovers in portion sizes that suit your baby’s appetite.
- Encourages self-feeding: Ready-to-thaw finger foods support independence at the highchair.
Safety and Texture Guidelines
- Size and shape: Offer pieces about the size of a large grape or toddler finger—easy for pincer grasp and safe for chewing. Soft-cooked vegetable sticks, small cubes of cheese, and flattened mini patties work well.
- Softness first: Foods should mash easily between two fingers. If it holds shape against gentle pressure, it’s likely safe to offer.
- Avoid choking risks: Don’t offer whole grapes, large chunks of raw apple, hard candies, nuts, or uncut hot dogs. Always supervise.
- Allergies: Introduce allergenic foods one at a time at home; consult your pediatrician if there’s a family history of severe allergies.
If your baby is transitioning from purees to pieces, review some ideas for earlier-stage meals to bridge that gap, such as recipes tailored to the 6–8 month window in this baby food recipes for 6–8 months resource.
Batch-Cooking Recipes That Freeze Well
Below are simple, freezer-friendly finger-food recipes and how to portion and store them. Each recipe is written to be adaptable to taste and dietary needs.
Mini Veggie Muffins
- Ingredients: mashed banana or applesauce for moisture, grated carrot/zucchini, whole-wheat flour or oats, egg (or flax egg), mild grated cheese (optional).
- Method: Mix, spoon into mini muffin tin, bake until set. Cool, then freeze in single layers on a tray before transferring to labeled bags.
- Serving: Thaw at room temp or warm briefly; serve whole or halved.
Sweet Potato & Pea Cakes
- Ingredients: mashed sweet potato, cooked peas (pureed or lightly mashed), a binder like oat flour or egg, pinch of mild spices.
- Method: Form small patties, lightly pan-fry until golden, cool and freeze flat.
- Serving: Reheat in a toaster oven or skillet until warmed through.
Salmon or White Fish Bites
- Ingredients: cooked flaked fish, mashed potato or cooked quinoa, finely chopped soft herbs, egg to bind.
- Method: Mix, shape into small patties, bake or pan-sear, then freeze between layers of parchment.
- Serving: Fully reheat and flake into manageable pieces for baby to pick up.
Lentil & Veggie Fritters
- Ingredients: cooked red lentils, grated carrot, onion cooked very soft, a little flour, mild curry powder optional.
- Method: Blend slightly for cohesion, form mini fritters, bake or shallow-fry, cool and freeze.
- Serving: Slightly crisp on reheat or softened depending on your child’s chewing stage.
Banana & Oat Pancake Bites
- Ingredients: mashed banana, oats or oat flour, egg or yogurt.
- Method: Spoon small rounds on a griddle, cool and freeze flat.
- Serving: Thaw briefly and cut into strips for easy grabbing.
Freezing, Storing, and Labeling
- Portion sizes: Use silicone molds, mini muffin tins, or ice cube trays to create uniform portions (1–3 tablespoon sizes work well).
- Flash-freeze: Freeze items on a tray until solid to avoid clumping, then move to airtight containers or freezer bags.
- Labeling: Date and name each container. Most shelf-stable homemade baby finger foods are best used within 1–3 months for quality.
- Storage safety: Keep freezer at 0°F (-18°C) or below. Thawed foods should be kept in the fridge and used within 24–48 hours; avoid refreezing thawed baby food.
Reheating and Serving Tips
- Gentle reheating: Microwave briefly at reduced power, steam, or warm in an oven. Stir and check temperature to avoid hot spots.
- Texture adjust: Add a splash of breast milk, formula, or unsalted stock when reheating to soften and make items easier to gum.
- Presentation: Cut larger pieces into finger-friendly shapes; offer a small amount at a time to reduce choking risk.
Sample Weekly Plan (for busy caregivers)
- Sunday: Bake a batch of veggie muffins and banana oat bites; freeze.
- Wednesday: Make fish or lentil fritters; refrigerate some for immediate use and freeze the rest.
- Friday: Roast sweet potatoes and prep sweet potato cakes for the weekend.
Rotate flavors so your baby experiences a variety of tastes and textures through the week.
Troubleshooting and Common Questions
- Baby refuses new textures: Try combining a frozen item with a favored food (e.g., mashed with a bit of familiar puree) and offer repeatedly without pressure.
- Too crumbly after freezing: Increase the binder (egg or flour) slightly or steam before serving to rehydrate.
- Concerns about sodium or sugar: Use whole-food ingredients and avoid added salt or sugar; rely on natural sweetness from fruits and mild spices for flavor.
Feeding While Out and About
- Pack frozen pieces in an insulated lunchbox with an ice pack to thaw by mealtime.
- Keep a small cooler bag for longer trips and offer finger foods that don’t require reheating when supervision is steady.
Conclusion
For more recipe ideas and step-by-step freezer-friendly meal plans tailored to babies 9–12 months, explore the curated collection titled Freezer-Friendly Finger Food Recipes for Babies (9-12 months), which includes portioning and freezing tips. If you’re following baby-led weaning or want a broad list of freezer options to suit self-feeding, see The Ultimate List of Baby Led Weaning Freezer Recipes for inspiration and practical ideas.
