
Preschool Lunch Ideas and Easy Meals for Little Ones
It’s not hard to make healthy and fun lunches for your preschoolers. Whether it’s for daycare, preschool, or a fun outing, we’ve got you covered. This article shares preschool lunch ideas that are easy to prepare and loved by kids. You’ll find toddler meal prep, picky eater recipes, and kid-friendly meals to make lunchtime a joy.
Toddlers, aged 1-3, can be picky, so watch their eating habits over a week. When packing nutritious lunchbox fillers, think about what they like. Try freezing sandwiches, muffins, and yogurt tubes to keep them fresh and cool.
Key Takeaways
- Focus on easy-to-pack, no-reheat preschool lunch ideas for toddlers
- Include a balance of protein, fats, and varied textures to keep little ones energized
- Get creative with fun shapes and presentations to make meals more appealing
- Observe eating patterns over a week to plan balanced meals
- Freeze certain items to keep them fresh and cold until lunchtime
Table of Contents
Healthy Toddler Lunch Ideas
Packing a healthy lunch for your little one is easy. You can choose from many options like nutritious sandwiches and small snacks. These healthy toddler lunch ideas will keep your child full and happy all day.
Food Ideas for 1 to 3 Year Olds
For toddlers, meals should have fats, proteins, carbs, and fruits or veggies. Fats help the brain grow, while proteins keep them full. Carbs give energy, and fruits and veggies add fiber and vitamins.
Make mealtime fun by serving dishes in parts. Let your toddler pick what they like. Try new foods in small amounts and use fun shapes to make eating exciting.
- Hummus sandwiches with whole-grain bread or wraps
- Pizza rolls with marinara sauce for dipping
- Egg muffin snack boxes with cheese and veggies
- Toddler taco salads with ground turkey, avocado, and black beans
It’s important to offer a variety of food ideas for 1 to 3 year olds. These should be easy to pack and don’t need to be hot. With a bit of creativity, you can make healthy toddler lunches that taste great.
When packing daycare or preschool lunches, think about your child’s age, hunger, and likes. Include foods they know, but also try new things. The amount to pack for toddler lunches should match their needs.
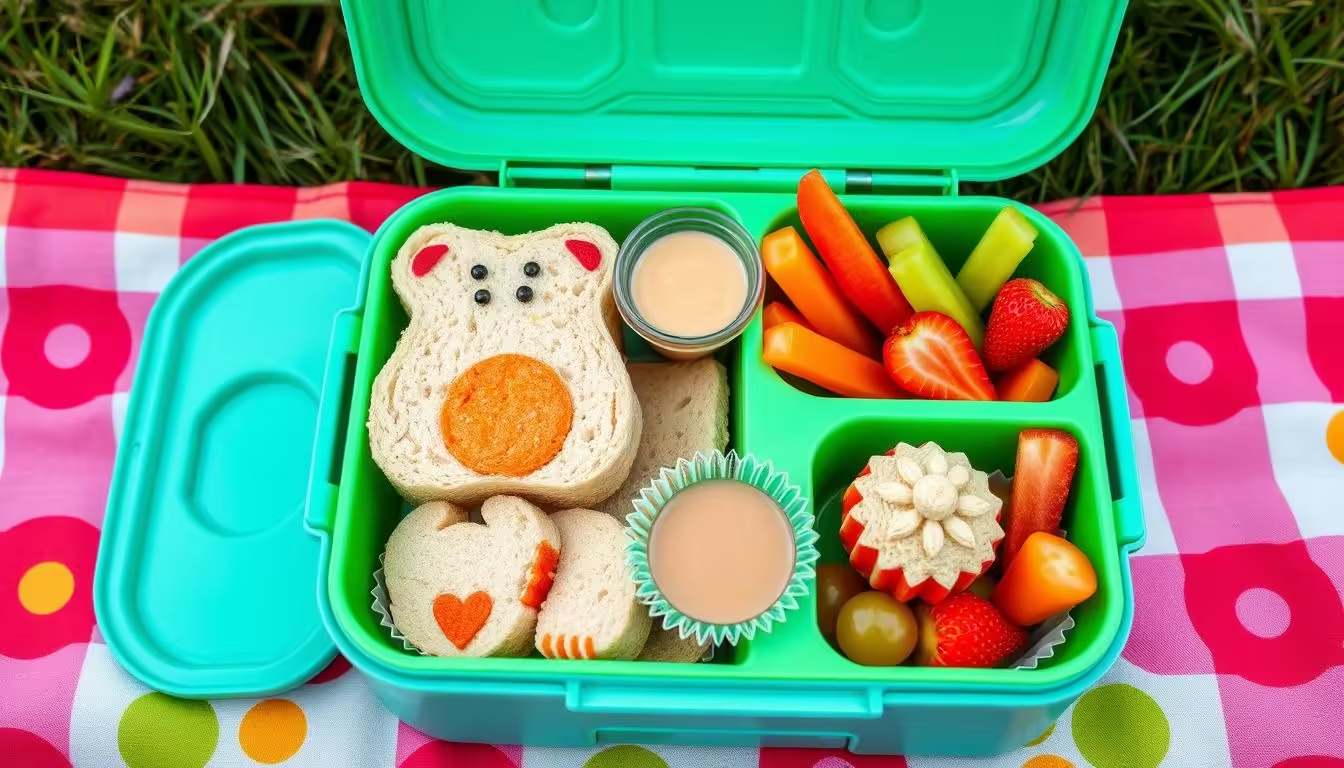
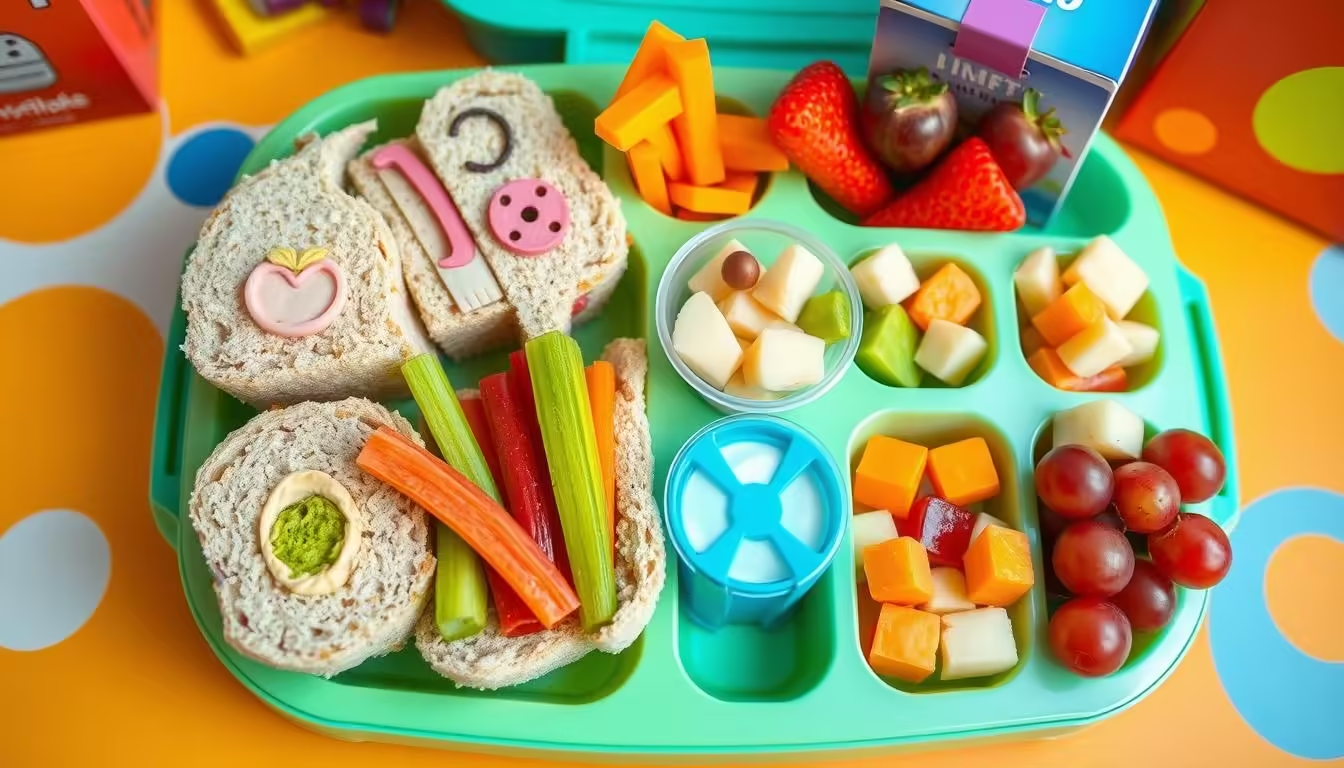
Sandwich Pinwheels and Sushi Rolls
Exploring new lunch ideas can make mealtime fun for kids. Sandwich pinwheels and sushi rolls are great for little ones. Spread hummus, nut butter, or cream cheese on soft bread or tortillas. Roll it up and slice into pinwheels. For a twist, use a banana and nut butter to make “banana sushi.”
These lunches are easy to eat and can be filled with healthy ingredients. This makes for a balanced meal.
The ingredients for these sandwich pinwheels and sushi rolls include:
- Whipped cream cheese
- Sharp cheddar cheese slices
- Cucumbers
- Sliced deli turkey
- Sliced deli ham
- Mustard
- Sandwich bread
- Ranch dressing
- Potato chips
These sandwich sushi rolls are nutritious. Each serving has:
| Nutrient | Amount |
|---|---|
| Calories | 107 kcal |
| Carbohydrates | 2 g |
| Protein | 0.5 g |
| Fat | 11 g |
| Saturated Fat | 2 g |
| Polyunsaturated Fat | 6 g |
| Monounsaturated Fat | 2 g |
| Cholesterol | 6 mg |
| Sodium | 218 mg |
| Potassium | 54 mg |
| Fiber | 0.2 g |
| Sugar | 2 g |
| Vitamin A | 31 IU |
| Vitamin C | 1 mg |
| Calcium | 11 mg |
| Iron | 0.1 mg |
These sandwich pinwheels and sushi rolls are perfect for parties and snacks. They’re a fun twist on traditional sushi. Kids and adults love them, making them great for any event.

For a healthier option, try Horizon Organic’s Colby Cheese Sticks. Organic dairy is better for you and the cows. With only 6% of US milk being organic, these ingredients can make your sandwich pinwheels and sushi rolls even better.
Mini Pizzas and Pancake Sandwiches
Mini-sized foods are a big hit with preschoolers. These mini pizzas and pancake sandwiches are tasty and simple to make.
To make a quick mini pizza, just put pizza sauce and cheese on small English muffins or tortillas. You can add veggies or pepperoni for extra fun.
Broccoli Bites and Veggie Omelettes
Want something healthier? Broccoli bites and veggie-packed omelettes are great choices. They’re full of vitamins and minerals. You can bake or sauté broccoli for a tasty snack.
For a protein-rich lunch, try making a veggie omelette with your child’s favorite veggies.
“The key to a successful preschool lunch is finding the right balance of flavors and textures that appeal to your child’s taste buds.”
Pizza Eggs and Pasta with Pesto
Pizza eggs and pasta with pesto are great for easy toddler lunches. They’re simple and full of flavor that kids love.
To make pizza eggs, cook them as usual and fill sandwiches or wraps with them. The mix of egg and pizza taste is a hit. For pasta, mix cooked noodles with pesto, add veggies and proteins. The pesto adds a fresh basil taste that kids adore.
These meals are quick and healthy, perfect for busy days. With a bit of prep, you can have pizza eggs and pasta with pesto ready fast. It makes parenting a bit easier.
“These meals are a lifesaver on busy weekdays. My toddler gobbles them up every time!”
The pesto recipe makes 2 cups, serving 16, and lasts up to 5 days in the fridge or 6 months in the freezer. For a nut-free option, use sunflower seeds. For dairy-free, try nutritional yeast instead of Parmesan.

With these pizza egg and pasta with pesto lunches, your toddler gets a tasty and healthy meal, even on the busiest days.
Muffins and Quesadillas Galore
Muffins and quesadillas are top picks for toddler meals. They’re tasty and easy to hold, perfect for preschoolers.
Begin your child’s day with veggie-packed muffins, like our Applesauce Cranberry Muffins. They bake in 20 minutes and make 3-4 dozen, great for lunchboxes. For a sweet option, our Chocolate Zucchini Cupcakes are quick to bake and fun to decorate for Easter.
Quesadillas offer endless fillings. Choose classic cheese or try beans, veggies, or shredded protein. They’re quick to make and can be served warm or cold, loved by toddlers.
| Muffin Recipe | Yield | Baking Time |
|---|---|---|
| Applesauce Cranberry Muffins | 11-12 muffins | 20 minutes for mini, 28-30 minutes for regular |
| Chocolate Zucchini Cupcakes | Cupcakes: 30 minutes, Cakes: 35-45 minutes | Cupcakes: 30 minutes, Cakes: 35-45 minutes |
| Easter Cupcakes | Provides suggestions for decorating | N/A |
| Butter Frosting | N/A | 5-minute beating time |
Whether it’s muffins or quesadillas, these meals are a hit with kids. They make packing a healthy lunch easy.
Nuggets, Tots, and Veggie Patties
Baked chicken nuggets, sweet potato tater tots, and veggie patties are great for toddler lunches. They are nutritious and easy to eat. Serve them with dips, veggies, and fruits for a balanced meal.
Snack Trays and Freezer Trays
For more convenience, make snack trays or freezer trays with finger foods, dips, and healthy snacks. These options make packing preschool lunches easy.
| Nuggets | Tater Tots | Veggie Patties |
|---|---|---|
|
|
|

“These baked nuggets, tater tots, and veggie patties are a game-changer for busy parents. They’re packed with nutrition and so easy to prepare!”
preschool lunch ideas
Packing a nutritious and delightful lunch for your preschooler is a fun challenge. While classic sandwiches are always a hit, try something new like savory French toast and chickpea cookie dough dip.
Savory French Toast
Turn leftover veggies into a tasty finger food your little one will enjoy. Mix eggs, milk, and herbs and spices. Dip whole-grain bread in this mix and fry until golden.
Serve it with your child’s favorite sauce. This breakfast-for-lunch idea is packed with protein and nutrients.
Cookie Dough Dip
Try a chickpea-based cookie dough dip for a sweet treat with protein. Blend chickpeas, nut butter, maple syrup, and vanilla extract. It’s creamy and indulgent.
Serve it with apple slices, graham crackers, or pretzels. Your preschooler will love this healthier cookie dough dip.
By adding these unique and tasty items to your preschooler’s lunch, you make mealtime fun. Try savory French toast and cookie dough dip for lunch ideas that will make your child happy.
Zucchini Fritters and Dinner Leftovers
Looking for a convenient and nutritious option for your toddler’s lunch? Zucchini fritters and dinner leftovers are great choices. They’re easy to make and can be served cold or at room temperature. This makes them perfect for packing in your little one’s lunchbox.
To make these tasty fritters, grate 1 cup of zucchini and mix it with 1 cup of corn, 1/4 cup of cheese, and 1/3 cup of all-purpose flour. Form the mixture into patties and pan-fry until golden brown. This recipe is packed with nutrients and flavor, making it a hit with kids.
Don’t be afraid to send dinner leftovers too! Roasted vegetables, pasta dishes, and other meals from last night can be enjoyed without reheating. This introduces your toddler to different flavors and textures, helping them try new foods.
With zucchini fritters and dinner leftovers, you can create delicious and toddler lunches easily. Using what you already have, you can give your little one a satisfying midday meal.

Lunch Box Tips and Tricks
Packing a healthy lunch for your toddler can be tough. But, with some smart tips, you can keep their lunch fresh and safe. These ideas help from stopping fruit from browning to keeping food at the right temperature.
Keeping Fruit Fresh
A quick lemon juice spritz can stop sliced fruit from turning brown. Slice apples and pears thinly. Then, wrap them tightly in plastic wrap or use an airtight container. The lemon juice keeps their color and texture fresh until lunch.
Packing Safe Foods
- Get an insulated lunch box and ice packs for yogurt, cheese, and meat.
- Freeze yogurt tubes or applesauce to keep them cool until lunch.
- Choose foods your toddler likes, not just for looks.
With a bit of planning and these tips, your toddler’s lunch will be tasty, safe, and fresh. This makes mealtime easier for both of you.
Conclusion
Packing a healthy and tasty lunch for your toddler is easy. This article has given you many simple, no-cook meal ideas. These are great for busy mornings and include preschool lunch ideas, toddler meal prep, and picky eater recipes. They will help you create lunchbox inspiration that your child will love.
Think about what your child likes, keep food safe, and be creative with how you present the food. This way, your child will be ready for a fun day at preschool or daycare. Packing preschool lunch ideas becomes easy with a bit of planning.
The tips and recipes in this guide help make meals that are good for your child’s body and mind. Adding different fruits, veggies, and protein snacks can help your child try new foods. This can help them develop healthy eating habits for life. Whether you’re making meals for the month or just a quick lunch, this article has everything you need for lunchbox inspiration.
So, start looking at the preschool lunch ideas and get ready to send your child off to school with a healthy, tasty meal. With a little creativity and planning ahead, your toddler will enjoy a healthy, satisfying lunch every day.
FAQ
What are some easy and nutritious preschool lunch ideas?
This article offers many healthy and simple lunch ideas for preschoolers. You can make sandwich pinwheels, mini pizzas, and muffins. Quesadillas, nuggets, and tots are also great options. These lunches are perfect for daycare or any outing.
What are some healthy toddler lunch ideas for 1 to 3 year olds?
For toddlers, try hummus sandwiches, pizza rolls, and egg muffin snack boxes. Toddler taco salads are also a hit. These lunches are easy to pack and don’t need to be reheated. You can adjust them to fit your child’s taste and age.
What are some fun and portable lunch ideas for toddlers?
For fun lunches, consider sandwich pinwheels, sushi rolls, and mini pizzas. Pancake sandwiches are also a great choice. These meals are small, easy to eat, and can be filled with healthy ingredients.
What are some quick and flavorful toddler lunch ideas?
For quick lunches, try pizza eggs, pasta with pesto, and muffins. Quesadillas are another tasty option. These meals are simple, don’t need to be reheated, and are loved by toddlers.
What are some tips for packing safe and fresh preschool lunches?
To keep fruit fresh, use lemon juice, slice thinly, and wrap in plastic. An insulated lunchbox with ice packs is key for keeping food safe. Freezing items like yogurt tubes or applesauce is also a good idea.
External Resources for Further Reading
Healthy School Snacks for School Quick and Easy Ideas for Kids
Whether your toddler is off to daycare or your big kid needs a snack at school, giving them snacks for school is key. Making your own healthy snack options like muffins and bars is a great idea. It’s a way to add extra energy-boosting snacks to their day. Plus, homemade snacks can be frozen and packed easily for school.
Key Takeaways
- Homemade snacks offer more nutrition and customization for your child’s dietary needs.
- Freezing and storing homemade snacks makes it easy to have healthy options on hand.
- Mini muffins and easy-to-pack snacks are perfect for kids’ lunchboxes and after-school.
- Involving kids in snack preparation can be educational and fun.
- A variety of flavors and ingredients can prevent snack boredom.
Table of Contents
Homemade School Snacks: Muffins
Kids love muffins, and they can be a healthy choice for school snacks. By cutting down on sugar and adding good stuff like veggies, seeds, and protein, you can make tasty muffins. Try making savory muffins, healthy corndog muffins, and savory 3-veggie muffins for a fun snack or meal.
Savory Muffins
Savory muffins are great for school snacks, lunch boxes, or breakfast. Mix up flavors like cheddar and chives or sun-dried tomato and basil. It keeps things exciting.
Healthy Corndog Muffins
These Healthy Corndog Muffins are perfect for lunch boxes, snacks, or quick meals. Use vegetarian hot dogs, turkey dogs, or salmon dogs. They’re a hit with kids!
Savory 3-Veggie Muffins
These Savory 3-Veggie Muffins are packed with carrot, broccoli, and zucchini. They’re great for breakfast, lunch boxes, or as a snack or side. They’re a tasty way to get more veggies in your diet.
“Muffins are a great option for school snacks because they can be made ahead of time, are easy to pack, and provide a balance of nutrients to keep kids energized throughout the day.”
Snacks for School: Cookies and Bars
Looking for healthy cookies for school, lunchbox cookies, or toddler snack cookies? You want them to taste great and be good for you. Try our Mini Chocolate Chip Snack Cookies and Oatmeal To-Go Bars for a tasty, nutritious choice.
Mini Chocolate Chip Snack Cookies
These healthy cookies for school are great for lunchbox cookies or toddler snack cookies. They’re easy to make in one bowl. They’re nut-free, whole grain, and have hemp seeds for extra protein.
The mini size lets kids enjoy chocolate chips without too much sugar.
Oatmeal To-Go Bars
Want the taste of portable oatmeal but in a bar? Our oatmeal snack bars are perfect. They’re made quickly in one bowl. They’re full of fiber, protein, and good stuff like rolled oats and almond butter.
They’re great for breakfast bars for school or a quick toddler snack cookies.

Both snacks are easy to make and loved by kids. Whether for lunchbox cookies or a quick snack, these treats are a hit.
Homemade School Snacks: No-Bake Bites and Balls
Snack time becomes exciting with these no-bake energy bites. They’re simple to make and fun to customize. Kids can easily make these homemade energy balls again and again. Use sunflower seed butter for a nut-free option.
Monster Cookies Energy Balls
These no-bake energy bites are full of good stuff like oats, nuts, seeds, and dried fruit. Just mix together:
- 1/2 cup peanut butter or sunbutter
- 1/3 cup honey
- 1 teaspoon vanilla
- 1 cup oats
- 2/3 cup unsweetened coconut flakes
- 1/2 cup flax seeds or chopped walnuts
- 1/2 cup chocolate chips (regular or mini)
- 1/2 cup raisins (optional)
Chill the mix for 30 minutes, then shape into balls. Keep these homemade energy balls in the fridge for up to 7 days. For a nut-free option, use sunflower seed butter and skip the nuts.
These kid-friendly snack balls are a great choice for school snacks. They’re packed with protein, healthy fats, and complex carbs. This keeps kids energized until lunchtime.
Quick and Healthy Packaged Snacks for School
Packing healthy snacks for school can be overwhelming. But, there are many nutritious and tasty options. From protein bars to whole grain crackers, these healthy store-bought snacks will keep your child energized all day.
Larabars
Larabars are loved for their simple ingredients like nuts, dates, and dried fruit. They come in many flavors, making them a great healthy pre-packaged school snack. Add a few to your child’s lunchbox for a quick, healthy choice.
Whole Grain Goldfish
The Whole Grain Goldfish are a must-have for school snacks. They’re made with whole grains and offer a fun crunch. Serve them with hummus or cheese for a complete pre-packaged school snack.
| Healthy Packaged Snack | Protein (g) | Fiber (g) | Added Sugar (g) |
|---|---|---|---|
| Mozzarella String Cheese | 7 | 0 | 0 |
| Siete Tortilla Chips | 2 | 3 | 0 |
| MadeGood Granola Minis | 2 | 2 | 5 |
| Stonyfield Yogurt Pouches | 5 | 0 | 12 |

These are just a few examples of healthy store-bought snacks and pre-packaged school snacks out there. Choose snacks with protein, fiber, and little sugar. With a bit of creativity, you can fill your child’s lunchbox with tasty and healthy options like Larabars, whole grain crackers, and more!
Tips for Packing Snacks for School
Packing homemade snacks for your kids’ school lunches can be a game-changer. You control the ingredients and ensure they get the nutrition they need. Using the right containers and choosing easy snacks makes packing a breeze.
Use the Right Containers
Investing in quality, leak-proof containers is crucial. Use reusable silicone bags or snack boxes with compartments. These keep different items separate and prevent spills. They’re durable and eco-friendly, reducing single-use plastics.
Easy-to-Pack Snacks
When packing snacks, the easier the better. Choose grab-and-go options like crackers with peanut butter, chopped veggies and fruit, and pre-portioned muffins or energy balls. These snacks are simple to pack and mess-free.
Remember, finding a balance between nutrition and convenience is key. With the right containers and easy-to-pack options, your kids will have healthy and delicious snacks for school.
After-School Snack Ideas by Timing
The timing of your child’s dinner affects the snacks you choose. For an early dinner, snacks like veggies with hummus or apple slices with peanut butter are good. Hard-boiled eggs with raisins and healthy muffins or bars also work well.
Early Dinner
For an early dinner, pick healthy pre-dinner snacks that are filling but won’t make them too full. Here are some ideas:
- Veggie sticks with creamy hummus
- Apple slices with all-natural peanut butter
- Hard-boiled eggs paired with dried fruit like raisins
- Nutrient-dense muffins or energy bars
Late Dinner
For kids with a late dinner, try store-bought snack ideas like smoothies or egg sandwiches. Oatmeal, mini pizzas, and waffles with peanut butter are also good. These snacks are more filling to last until dinner.
| Snack Idea | Nutrition Info | Prep Time |
|---|---|---|
| Creamy Hummus with Veggie Sticks | 100 calories, 5g fat, 3g protein | 5 minutes |
| Apple Slices with Peanut Butter | 200 calories, 12g fat, 7g protein | 2 minutes |
| Hard-Boiled Eggs with Raisins | 150 calories, 10g fat, 12g protein | 10 minutes |

The NHS suggests 100 calorie snacks and no more than two a day. Watch your kids’ salt, sugar, and fat intake, especially with homemade snacks.
Snacks for School: Car-Friendly Ideas
Snack time doesn’t have to be messy, even when you’re on the go. When packing car snacks or portable snacks for your kids, focus on mess-free school snacks and no-spill car snacks. These snacks are easy to enjoy during the ride.
Keep a Trash Can Handy
Always keep a small trash can or bag in the car. This is to contain any wrappers or packaging from your easy grab-and-go snacks. It helps prevent a sticky, cluttered car interior. And ensures a mess-free school snack experience.
Portable, Low-Mess Snack Ideas
- Yogurt tube + banana
- Cheese stick + That’s It fruit bar
- Egg wrap + apple
These snack pairings are car-friendly and portable. They let your kids enjoy a nutritious treat without making a mess in the car. The mix of protein, healthy fats, and carbs gives them energy for the drive.
Remember, when snacking in the car, choose options that are easy to eat. They shouldn’t make a sticky mess. With a little planning, you can give your kids mess-free school snacks for on-the-go adventures.
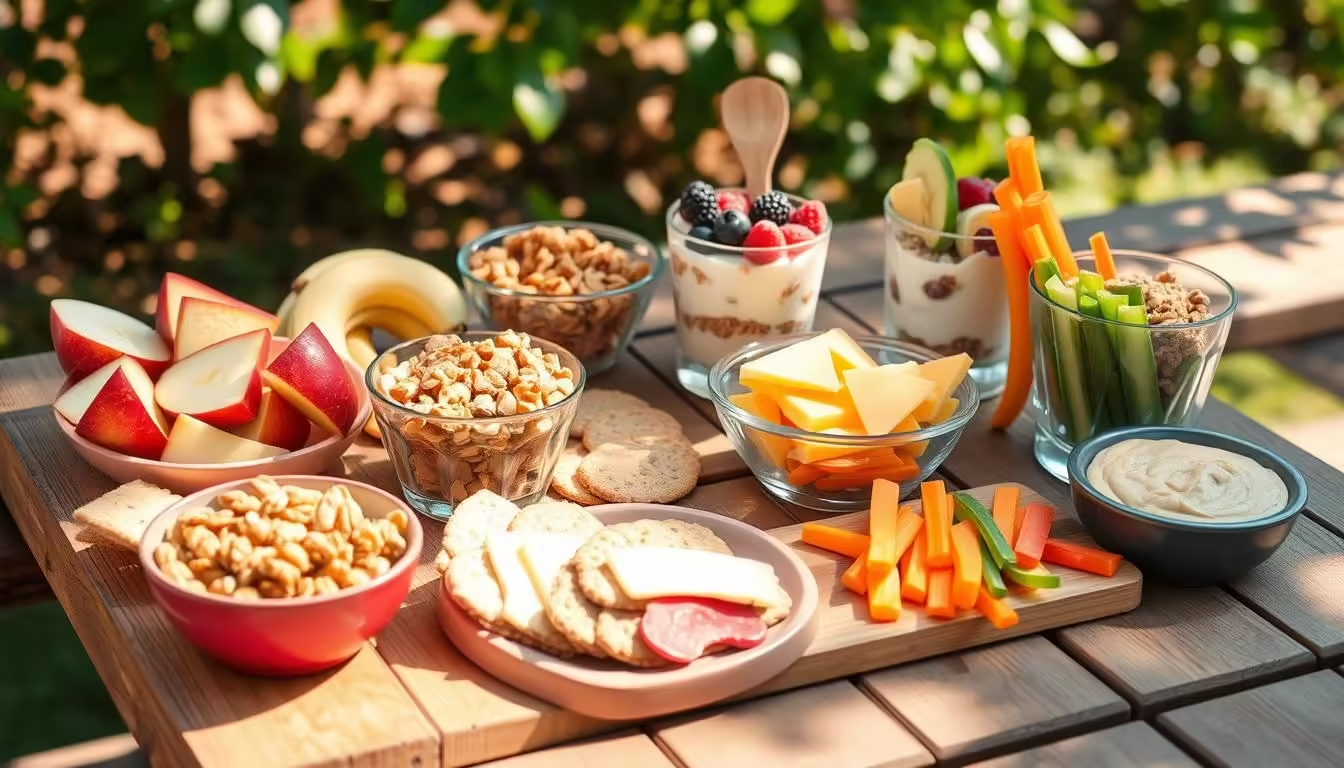
Non-Perishable Snacks for School
Non-perishable snacks are a great choice for school lunches. They don’t need to be refrigerated and stay fresh all day. You can find many types, from crunchy to chewy, and sweet to savory.
Pantry-Friendly Snack Ideas
- Trail mix – A mix of nuts, seeds, dried fruit, and sometimes chocolate chips or pretzels. It’s a protein-rich snack that’s easy to take on the go.
- Popcorn – Choose pre-popped or individual bags for a tasty, whole grain snack.
- Granola or protein bars – Look for ones with less sugar and a good mix of carbs, protein, and fats.
- Dried fruit – Options like apricots, mango, and raisins are great for a quick, healthy snack.
- Crackers – Pair whole grain crackers with nut butter or cheese for a filling snack.
- Nut butter pouches – Single-serve packets of peanut, almond, or sunflower seed butter are easy to pack and enjoy.
These snacks are not only easy to pack, but they also give your child the energy they need for a busy day. Having a variety of shelf-stable snacks ensures your child always has a healthy option.
| Snack | Nutrition Info | Shelf Life |
|---|---|---|
| Welch’s® Fruit ‘n Yogurt™ Snacks | 60-70 calories, 7-8g sugar per pack | 6-12 months |
| Beef Jerky Sticks | 70-100 calories, 6-12g protein per stick | 6-12 months |
| Roasted Seaweed Snacks | 30-50 calories, 3-5g protein per pack | 6-12 months |
| Veggie Chips | 100-140 calories, 2-4g fiber per serving | 6-12 months |
With so many tasty and healthy options, you can easily find shelf-stable snacks that your kids will enjoy.

Snacks for School: Teens and Older Kids
As teenagers and older kids grow, their snack needs change. They need more substantial, nutrient-dense snacks to fuel their active lifestyles. Options like tuna salad, sandwiches, smoothies, oatmeal, and yogurt parfaits are great. These high school snacks and snacks for older kids are perfect for teen-friendly school snacks.
Protein-Packed Bites
Protein is key for teens, as they need 20-60% more than adults. Deviled eggs, Greek yogurt parfaits, and tuna and cheddar bites are great high school snacks for a protein boost. Edamame, chickpea, and feta salad is also a good choice, offering plant-based protein and calcium.
Wholesome Homemade Snacks
Homemade snacks are quick and easy to make. They provide essential vitamins, minerals, and nutrients for growing teens. Nut-free banana oatmeal muffins and cheese, apple, and grape skewers are tasty and healthy snacks for older kids.
Convenient Packaged Options
When time is tight, teen-friendly school snacks can be pre-made. Trail mix, granola bars, cheese sticks, and turkey sticks are protein-rich high school snacks that are easy to grab. Brands like Thunderbird, RXBAR, and Lärabar offer bars with low added sugar, making them good for teens.
By focusing on protein, healthy fats, complex carbs, and essential vitamins and minerals, parents can provide snacks for older kids that support their growth. With a bit of creativity, it’s simple to make or pack high school snacks that teens will enjoy.
Conclusion
It’s key to give kids healthy snacks that are easy to pack. Options like homemade muffins and energy balls are great. So are store-bought items like Larabars and whole grain crackers. These snacks keep kids energized and focused.
When packing snacks, whether for little kids or teens, there are many good choices. This article has lots of school snack ideas, healthy snacks for kids, and lunchbox snacks. Mixing homemade and store-bought snacks ensures your child stays energized all day.
Offering nutritious snacks is crucial for student success. With a bit of creativity and planning, your child will stay energized and ready to learn.
FAQ
What are some healthy and easy-to-make homemade school snacks?
Making your own snacks is a great idea. Try making muffins, energy balls, bars, and cookies. Options like Savory 3-Veggie Muffins and Healthy Corndog Muffins are tasty and nutritious. Mini Chocolate Chip Snack Cookies and Oatmeal To-Go Bars are also excellent choices.
What are some good store-bought snack options for school?
For easy, healthy snacks, consider Larabars and whole grain Goldfish crackers. They’re both tasty and convenient.
What are some tips for packing homemade snacks for school?
Use the right containers to pack snacks like muffins and chopped veggies. This helps avoid mess. Choose snacks that are easy to pack and won’t spoil quickly.
What are some good after-school snack ideas for older kids and teens?
For older kids, try snacks like tuna salad and sandwiches. Smoothies, oatmeal, and yogurt parfaits are also great. Charcuterie plates can be a fun and satisfying option.
What are some car-friendly snack ideas for school?
Keep a trash bag handy in the car. Opt for snacks like yogurt tubes and cheese sticks. Fruit bars and egg wraps are also good choices for quick, mess-free snacks.
What are some non-perishable snack options for school?
Non-perishable snacks are perfect for school. Try trail mix, popcorn, and granola or protein bars. Dried fruit, crackers, and nut butter pouches are also great options.
External Resources for Further Reading
Deez Nuts Baby Mix Cereal Nutritious Infant Food
Introducing Deez Nuts Baby Mix Cereal, a top choice for your baby’s diet. It’s full of organic, gluten-free goodness. This cereal is made with healthy ingredients to help your baby grow strong.
It’s packed with iron, vitamins, and minerals. These nutrients are easy for your baby to digest. This makes it perfect for meeting their dietary needs during important growth times.
Key Takeaways
- Deez Nuts Baby Mix Cereal is a nutrient-dense, organic, and gluten-free cereal for infants and toddlers.
- It is packed with essential vitamins, minerals, and other beneficial nutrients to support healthy growth and development.
- The cereal is versatile and can be a convenient part of a balanced diet for babies.
- Organic and non-GMO ingredients make Deez Nuts Baby Mix Cereal a wholesome choice for your child.
- The cereal is formulated to be easy to digest, ensuring optimal nutrient absorption for your little one.
Table of Contents
Understanding the Importance of Nutrient-Dense Foods for Infants
When your baby starts eating solid foods, it’s key to give them nutrient-rich options. Breast milk is full of everything they need, but solid foods become important too. They help meet your baby’s nutritional needs.
Breast Milk vs. Solid Foods: Providing Optimal Nutrition
The American Academy of Pediatrics suggests waiting until about 6 months to start solid foods. This lets your baby’s body and immune system grow strong. Breast milk is still the main food source, giving all the nutrients your baby needs.
Signs of Readiness for Starting Solid Foods
- Ability to sit up well without support
- Showing a readiness to chew
- Using a “pincer” grasp to pick up small objects
- Demonstrating an interest in the food you’re eating
When your baby shows these signs, usually around 6 months, it’s time to start solid foods. These foods should be full of nutrients to help your baby grow and develop well.
“Introducing solids at the right time and providing nutrient-dense options are crucial for your baby’s health and well-being.”
Choosing the Best First Foods for Baby
Introducing solid foods to your baby can feel overwhelming. The goal is to choose foods that are full of nutrients. This helps your baby’s body and mind grow strong. Many parents use a mix of baby-led weaning and traditional purees for the best results.
The Debate: Baby-Led Weaning vs. Traditional Purees
Baby-led weaning lets your baby feed themselves. This helps with hand-eye coordination and learning to chew. But, it might not be right for every baby, especially those with feeding issues.
Traditional purees are smooth and easy to swallow. They can be good for some babies.
Why I’m Not a BLW Purist
Baby-led weaning is popular, but it’s not for everyone. About 75% of parents choose this method. But, some babies do better with a mix of BLW and purees. It’s important to find what works best for your child and family.

The best first foods for your baby are nutrient-rich and easy to digest. They should match your child’s needs and likes. By offering a variety, you ensure your baby gets all the nutrients they need to grow well.
The Benefits of Oatmeal-Based Baby Cereals
Oatmeal-based baby cereals are a great first food for babies. They are easy to digest and have less arsenic than rice-based cereals. This makes them a safer and healthier choice for your baby.
Addressing Concerns: Heavy Metals in Baby Cereals
Some baby cereals have been criticized for high levels of heavy metals like arsenic. But, the U.S. Food and Drug Administration (FDA) has set new rules. These rules make sure baby foods are safe for our little ones.
Oatmeal-based cereals are now safer than rice-based ones. They have less heavy metals. This is good news for parents who want to give their babies a healthy start with solid foods.
| Nutrient | Oatmeal-Based Cereals | Rice-Based Cereals |
|---|---|---|
| Arsenic Content | Lower | Higher |
| Fiber Content | Higher | Lower |
| Nutrient Density | Higher | Lower |
Choosing oatmeal-based baby cereals means you’re giving your baby a safe and nutritious first food. It helps them grow and develop well.
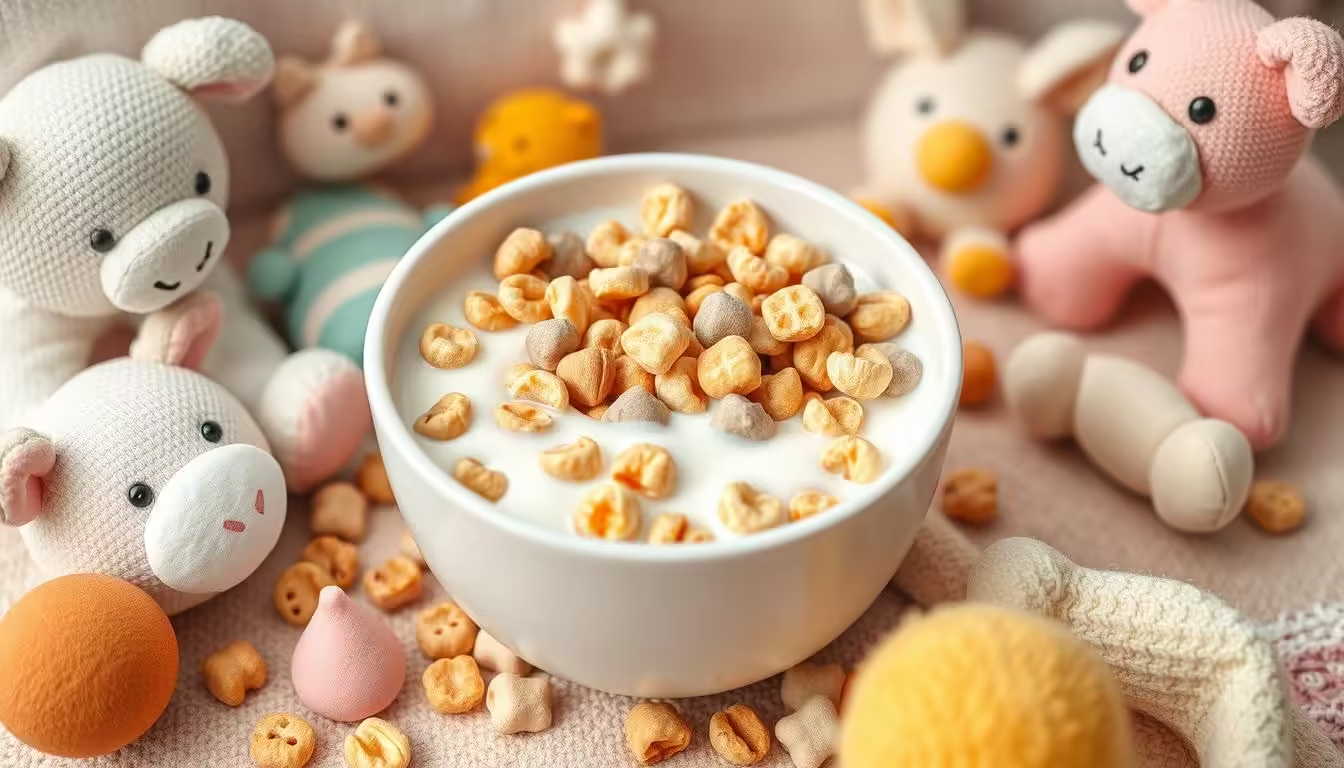
Introducing Deez Nuts Baby Mix Cereal
Deez Nuts Baby Mix Cereal is a great choice for starting solid foods with your baby. It’s organic and gluten-free, made with healthy ingredients for your baby’s growth.
This cereal combines oats, chia seeds, and other grains for a mix of vitamins, minerals, and fiber. It’s perfect for baby-led weaning or traditional purees, adding variety to mealtime.
Prices start at $19.99 for a 15-day subscription and go up to $179.99 for a 180-day subscription. This range helps you find the right fit for your family’s needs. You can choose a subscription length that works for you, ensuring a steady supply of this nutritious cereal.
“Deez Nuts Baby Mix Cereal is a game-changer for parents looking to provide their little ones with a wholesome, organic start to solid foods. The convenience of the subscription model and the quality of the ingredients make it a must-try for any family.”
When introducing solid foods, start with small amounts and watch for allergies. Deez Nuts Baby Mix Cereal offers pre-measured packets for introducing common allergens like peanuts and eggs.

By 4 to 6 months, babies are ready for solid foods. Deez Nuts Baby Mix Cereal is a great first food, offering a nutritious start to your baby’s food journey. Mix 1 tablespoon of cereal with 4 tablespoons of breast milk or formula for a tasty, healthy meal.
Fortifying for Optimal Nutrition
Deez Nuts Baby Mix Cereal is packed with essential nutrients for your baby’s growth. These vitamins and minerals are key in the early years of life.
Essential Nutrients for Infant Growth and Development
Our cereal is rich in iron, B vitamins, zinc, and vitamin E. These are crucial for your baby’s physical and mental growth. Iron helps make red blood cells and supports brain function. B vitamins help with energy and keep the nervous system healthy.
- Iron: Supports red blood cell formation and brain development
- B Vitamins: Promote energy metabolism and nervous system function
- Zinc: Contributes to immune system health and wound healing
- Vitamin E: Acts as an antioxidant to protect cells from damage
By adding these nutrients to our cereal, we make sure your baby gets the best nutrition. This is vital for their growth and development.
“Proper nutrition during infancy is essential for supporting optimal growth and development. Fortified baby cereals can be an excellent source of these vital nutrients.”
The Dietary Guidelines for Americans 2020-2025 suggest starting complementary foods at 6 months. Deez Nuts Baby Mix Cereal is a nutrient-rich choice for this important step.
Preparing and Serving Deez Nuts Baby Mix Cereal
Making Deez Nuts Baby Mix Cereal is easy! Just mix the dry cereal with breastmilk, formula, or water. This makes it smooth and ready for your baby. You can also mix it with other foods for more flavors and textures.
Start by measuring the right amount of cereal for your baby. Use 1-2 tablespoons for little ones and more as they grow. This helps match the cereal to their hunger and age.
Add the liquid of your choice to the cereal. Breastmilk or formula adds extra nutrition. Water makes it lighter. Stir well until it’s smooth and creamy.
You can serve Deez Nuts Baby Mix Cereal in many ways. Try it alone for your baby to discover new tastes and textures. Or mix it with pureed fruits or veggies for a healthy meal. The options are endless!
Always check the cereal’s temperature before serving. It should be just right for your baby’s mouth. Start with small amounts and be patient as they get used to eating solids.
| Preparation Tips | Serving Suggestions |
|---|---|
|
|

“Introducing solid foods is an exciting milestone in your baby’s development. Deez Nuts Baby Mix Cereal makes the process easy and nutritious.”
Incorporating Variety: Mixing and Combining with Other Foods
Deez Nuts Baby Mix Cereal is more than just a single food. It can be mixed with many other nutritious ingredients. This exposes your baby to new flavors and textures. It helps them develop a diverse and healthy taste as they start eating solid foods.
Exploring Flavors and Textures
Begin by mixing Deez Nuts Baby Mix Cereal with mashed or puréed fruits and veggies. Some excellent choices include:
- Ripe bananas
- Sweet potatoes
- Avocado
- Applesauce
- Pumpkin purée
As your baby gets older, you can add more textured foods. These include:
- Finely chopped soft-cooked meats
- Cottage cheese or plain yogurt
- Shredded or mashed cooked veggies
- Smooth nut or seed butters
This variety helps them practice chewing and swallowing. Always introduce new foods one at a time. Wait a few days before adding another to watch for any allergic reactions.
“Variety in a baby’s diet helps expose them to different flavors and textures, aiding in developing their palate and food preferences.”
Mixing Deez Nuts Baby Mix Cereal with various nutritious ingredients is key. It ensures your baby gets to experience mixing baby cereals, combining baby cereals with other foods, and exploring new flavors and textures. These are essential for their growth and development.
Addressing Common Concerns: Allergies and Intolerances
Feeding your baby is a big responsibility. You need to watch out for allergies and intolerances. Deez Nuts Baby Mix Cereal is organic and non-GMO, but some babies might still react to it. Always talk to a doctor before trying new foods, especially if your baby has allergies.
Food allergies in kids have gone up a lot lately. About 1 to 2 in 20 kids have them. The main culprits are peanuts, tree nuts, eggs, wheat, fish, shellfish, dairy, and soy. Most kids grow out of allergies to milk, soy, egg, and wheat by their teens. But allergies to fish, shellfish, peanuts, and tree nuts often stick around longer.
Introducing foods like peanut butter and egg early can help prevent allergies. Studies show that introducing these foods before 12 months can lower the risk of allergies by age 3. Doctors recommend starting these foods around 6 months for most kids. But for kids with severe eczema or egg allergies, it’s even earlier.
Watch for signs of an allergic reaction like red skin, upset stomach, vomiting, or diarrhea. If your baby shows these signs after trying a new food, see a doctor fast. In rare cases, a severe reaction called anaphylaxis can happen, which is a serious emergency.
Being careful with your baby’s food is key. Working with your doctor helps make sure your baby eats well without any bad reactions.

| Key Allergy Facts | Statistics |
|---|---|
| Food allergies in kids | Increased from about 3% in the late 1990s to more than 5% in the early 2000s |
| Major food allergens (the “big 8”) | Peanuts, tree nuts, eggs, wheat, fish, shellfish, dairy, and soy |
| Allergies that often persist into adulthood | Fish, shellfish, peanut, and tree nut allergies |
| Likelihood of developing peanut allergy by age 3 if introduced after 12 months | More likely |
| Recommended age range for introducing allergenic foods | Around 6 months for children without risk factors, earlier for those with severe eczema or known egg allergies |
| Prevalence of food allergies in children | Affects about 1 to 2 in every 20 children |
Choosing Organic and Non-GMO Options
As parents, we all want the best for our little ones. Choosing organic and non-GMO baby foods gives us peace of mind. Deez Nuts Baby Mix Cereal is made with USDA Organic and non-GMO ingredients. This ensures your child gets high-quality, minimally processed nutrients.
Choosing organic baby foods and non-GMO baby products has many benefits. These options limit your child’s exposure to harmful substances. This includes pesticides, synthetic fertilizers, and GMOs found in traditional baby foods.
By choosing organic and non-GMO baby foods, you give your child the purest ingredients. This supports their health and development. It also meets the growing demand for clean label baby products that value transparency and quality.
| Brand | Organic Status | Non-GMO | Key Nutrients | Price (per serving) |
|---|---|---|---|---|
| Else Nutrition Cereal | Organic | Non-GMO | 20+ vitamins and minerals, 1.5 mg iron | $0.40 |
| Earth’s Best Organic Multi-Grain Infant Cereal | Organic | Non-GMO | Almost 50% daily iron needs | $0.50 |
| Beech-Nut Organic Oatmeal Baby Cereal | Organic | Non-GMO | 2g fiber per serving | $0.35 |
| Ready Set Food Organic Baby Oatmeal | Organic | Non-GMO | Allergen introduction program | $0.60 |
| Earth’s Best Whole Grain Baby Oatmeal Cereal | Organic | Non-GMO | 45% daily iron, B vitamins, zinc, vitamin E, calcium | $0.55 |
Choosing organic baby foods and non-GMO baby products ensures quality. This commitment to clean ingredients supports your child’s health and well-being for life.
Conclusion
Deez Nuts Baby Mix Cereal is great for your baby’s growth. It’s organic and gluten-free, packed with vitamins and minerals. This cereal gives your baby the best nutrition at the start of their eating journey.
It’s perfect for introducing your baby to solid foods or adding variety. The cereal is made from high-quality organic ingredients. It’s great for homemade recipes or as a meal on its own.
When starting your baby on solids, follow the AAP and EFSA’s advice. Deez Nuts Baby Mix Cereal is a nutritious and tasty choice. It supports your baby’s growth and development.
FAQ
What is Deez Nuts Baby Mix Cereal?
Deez Nuts Baby Mix Cereal is a healthy choice for your baby. It’s organic, gluten-free, and full of nutrients. It helps your baby grow strong and healthy.
When is the best time to introduce solid foods to my baby?
Start solid foods around 6 months. This lets their body and immune system get ready. Look for signs like sitting up, chewing, and showing interest in food.
What are the differences between baby-led weaning and traditional purees?
Baby-led weaning lets babies feed themselves. But, it might not work for everyone. Mixing both methods can be a good idea.
Are there any concerns about heavy metals in baby cereals?
Baby cereals used to have heavy metal worries. But, new FDA rules have made them safer. Now, they meet strict safety levels.
What are the key nutrients in Deez Nuts Baby Mix Cereal?
Deez Nuts Baby Mix Cereal has important nutrients. It has iron, B vitamins, zinc, and vitamin E. These help your baby grow and develop.
How do I prepare and serve Deez Nuts Baby Mix Cereal?
Mix Deez Nuts Baby Mix Cereal with breastmilk, formula, or water. It’s great on its own or with other foods. This introduces new tastes and textures to your baby.
Can my baby have any allergies or sensitivities to Deez Nuts Baby Mix Cereal?
If your baby has allergies, talk to a doctor first. This is important before trying new foods like Deez Nuts Baby Mix Cereal.
Why should I choose organic and non-GMO baby foods?
Organic and non-GMO foods are better for your baby. They are high-quality and less processed. This gives you peace of mind.
External Resources for Further Reading
Healthy Lunch Ideas for 1 Year Old: Easy Toddler Meals
When your little one turns 1, it’s a big deal. It’s a time for new tastes and fun in the kitchen. Giving your toddler a balanced lunch is key for their health and growth. We’ve got lots of tasty and simple lunch ideas for 1-year-olds.
Key Takeaways
- Offer a variety of fruits, vegetables, proteins, and whole grains for a balanced toddler diet.
- Introduce diverse food options to expose your child to a wide range of nutrients.
- Incorporate homemade and store-bought items for convenient yet nutritious lunches.
- Tailor meals to your toddler’s age and developmental stage.
- Encourage a relaxed mealtime environment to foster healthy eating habits.
Table of Contents
Introduction to Toddler Lunches
Starting your toddler on solid foods is both fun and tough. As they grow, they begin to enjoy eating on their own. It’s key to offer toddler-friendly lunch ideas and plan nutritious meals for 1 year olds. This helps their bodies grow and introduces new tastes.
Importance of Nutritious Meals for 1 Year Olds
At 1 year, toddlers are learning to eat more independently. They can try different foods and textures. But, their eating habits change as they grow. It’s vital to keep their toddler nutrition balanced for their fast growth.
Challenges of Planning Toddler Lunches
Creating toddler-friendly lunch ideas can be challenging. Toddlers often change their food likes and dislikes. They also have limited chewing skills. Meal planning for toddlers must consider their tastes and needs for a nutritious and satisfying meal.
“Providing a balanced and varied diet is crucial for the healthy growth and development of your 1-year-old.”
Finger Foods for 1 Year Olds
When your little one turns one, finger foods are a great way to introduce new tastes and textures. They help your 1-year-old learn to feed themselves. These soft, easy-to-chew foods are perfect for toddler lunches.
Soft and Easy-to-Chew Options
Ripe, soft fruits like bananas, peaches, and berries are great for 1-year-olds. Gently cooked veggies, such as broccoli, carrots, and squash, are also good. They’re easy to chew and full of nutrients. Whole grains like brown rice, oatmeal, and quinoa offer healthy carbs.
Nutritious Finger Food Combinations
- Diced chicken or turkey with soft-cooked veggies and whole grain crackers
- Cottage cheese or shredded cheese with sliced pear or apple
- Mashed avocado with diced cucumber and whole wheat toast
- Scrambled eggs with cooked, diced sweet potato and spinach
Always cut finger foods into small pieces to avoid choking. Talking to your pediatrician can help with portion sizes and what’s best for your 1-year-old.

Offering a variety of soft, nutritious finger foods helps your 1-year-old try new tastes and textures. It also supports their growing independence and health.
Meal Prepping for Toddler Lunches
Preparing parts of toddler lunches ahead of time saves a lot of time. It makes sure your child gets healthy meals. You can make different items like muffins, roasted veggies, and proteins in advance. These can make packing lunches easier and give your toddler a tasty, balanced meal.
Make-Ahead Lunch Box Components
Start meal prepping for toddler lunches with these ideas:
- Muffins: Bake healthy muffins like zucchini or banana oat ones. Freeze them for a quick snack or side.
- Roasted Vegetables: Roast veggies like sweet potatoes, broccoli, or bell peppers. Store them in the fridge for easy lunch additions.
- Cooked Proteins: Cook extra lean proteins like chicken, fish, or eggs. Refrigerate or freeze them for sandwiches or lunch items.
When making lunch box items, aim for a balanced meal. Include protein, fruit, veggie, and whole grain. This ensures your toddler gets all the nutrients they need.
“78% of parents prefer to engage in meal prepping for toddler lunches due to time constraints.”
Meal prepping saves time in the morning. It gives your toddler a nutritious and tasty lunch they’ll love.
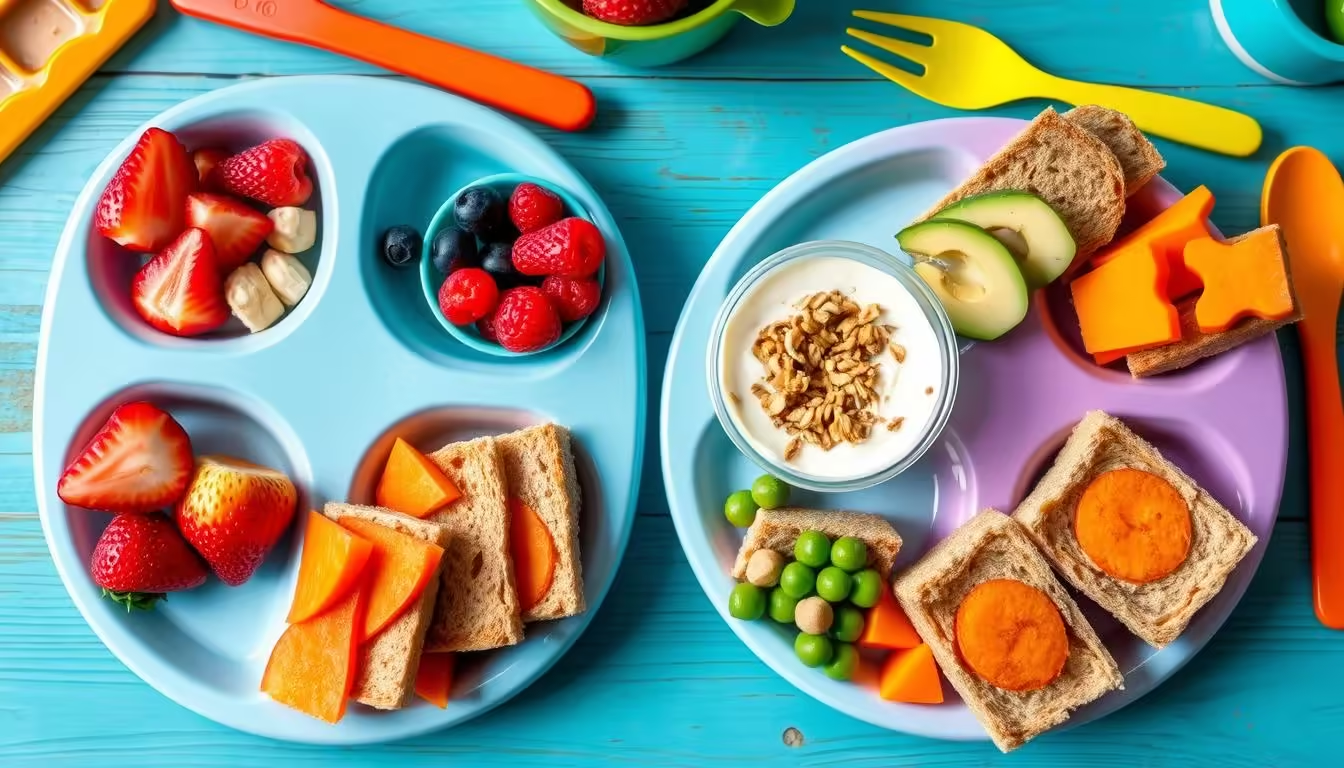
Balanced Toddler Lunch Ideas
Creating a nutritious lunch for your 1-year-old is all about variety. You should include protein, fruits, vegetables, and grains. This mix is key for your toddler’s growth and health.
Protein-Packed Lunches
Lean proteins help your toddler’s muscles grow and keep them full of energy. Here are some toddler lunch ideas with protein:
- Shredded chicken or turkey mixed with diced avocado and whole-grain crackers
- Cubes of grilled or baked tofu with roasted sweet potato wedges
- Hard-boiled egg slices paired with steamed broccoli florets and whole-wheat toast
Fruit and Veggie-Filled Lunches
Fruits and veggies are packed with vitamins, minerals, and fiber. They’re essential for your toddler’s health. Try these colorful and tasty lunch ideas:
- Mashed black beans, diced mango, and roasted zucchini spears on a whole-grain tortilla
- Shredded chicken salad with diced cucumbers, cherry tomatoes, and a side of grapes
- Hummus with sliced bell peppers, carrot sticks, and cubes of melon
Offering a variety of textures and flavors encourages your toddler to try new things. This helps with balanced toddler meals.
“Introducing a wide range of foods early on can help prevent picky eating later on.”
By mixing protein, fruits, veggies, and grains into your toddler’s lunches, you ensure they get the nutrients they need to grow strong.

lunch ideas for 1 year old
Lunchtime is key for your 1 year old’s growth. You’ll find many healthy, easy lunch ideas. These meals are tasty and full of nutrients your toddler needs.
From pasta to sandwiches, these options are balanced. They have protein, fruits, veggies, and grains. This supports your child’s growth. Mealtime will be fun with these ideas.
Pasta Perfection
Pasta is great for 1 year olds because it’s soft and easy to chew. Try mac and cheese with spinach or carrots. Or, use whole wheat pasta with butternut squash or tomato sauce.
Sandwich Swaps
Traditional sandwiches can be hard for little hands. But, you can make fun alternatives. Cut whole wheat bread into cubes for dipping in hummus. Or, use a mini waffle with avocado, chicken, or cheese.
Grain-Based Goodness
Whole grains like quinoa and brown rice are great for lunch. Add steamed veggies, chicken, and cheese for a complete meal.
Finger Food Favorites
Finger foods are perfect for 1 year olds. They encourage independence and try new tastes. Try a platter with sweet potato, cucumber, edamame, and soft cheese or chicken.
Introduce many flavors and textures to your 1 year old. These lunch ideas will nourish your child with tasty, healthy meals.
| Lunch Idea | Ingredients | Nutrition Highlights |
|---|---|---|
| Pasta with Veggie Sauce | Whole wheat pasta, pureed butternut squash or tomatoes, shredded chicken | Carbohydrates, protein, vegetables |
| Toasted Bread Cubes with Hummus | Whole wheat bread, hummus | Complex carbohydrates, protein, healthy fats |
| Quinoa Bowl with Veggies and Cheese | Quinoa, steamed broccoli, diced cucumber, shredded cheddar cheese | Whole grains, vegetables, protein, calcium |
| Finger Food Platter | Roasted sweet potato, cucumber slices, cooked edamame, cubed cheese or chicken | Variety of nutrients, textures, and flavors |
Lunchbox Packing Tips
Packing a healthy lunch for your 1-year-old can be tough. But, the right lunchbox and packing tips can make it easy. Choose a lunchbox that’s both useful and safe for toddlers.
Best Lunchboxes and Containers for Toddlers
For lunchbox ideas for 1 year olds, look for leak-proof, easy-to-open, and insulated options. Some top picks for best lunch boxes for toddlers are:
- Bentgo Kids Lunch Box: A bento-style box with multiple compartments to separate foods.
- Easy Lunchboxes: A three-compartment container with a leak-proof seal.
- PlanetBox Rover: A stainless steel lunchbox with compartments for a well-balanced meal.
Use small, airtight containers to prevent spills and keep food fresh. Reusable silicone bags or leak-proof compartments are great for dips and sauces. Always label containers with your child’s name to avoid mix-ups.

Use an insulated lunchbox and ice packs to keep food at the right temperature. This keeps yogurt, cheese, and proteins cool and safe. Arrange food so the most sensitive items are near the ice packs.
Toddler-Friendly Dips and Sauces
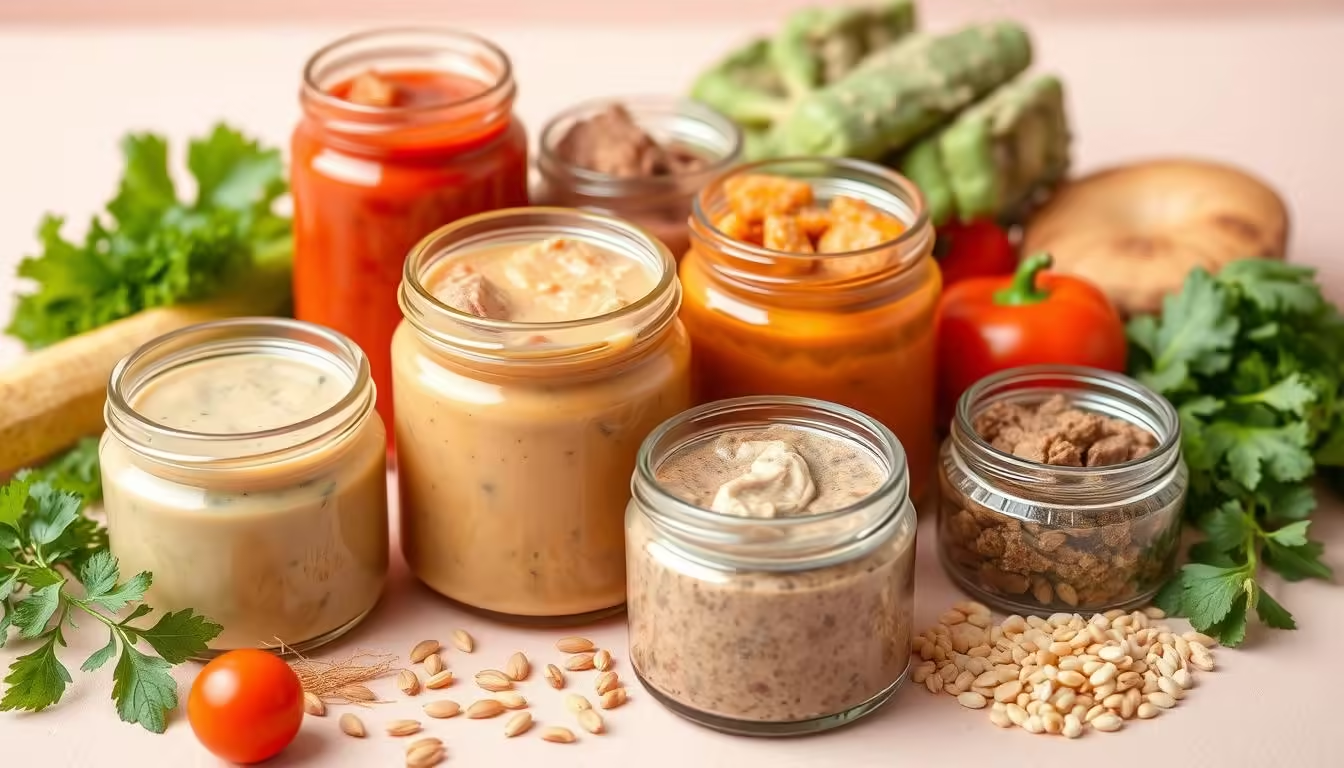
Introducing new flavors and textures to your toddler’s meals can be fun. Dips and sauces make healthy foods more appealing. They encourage your little one to try different tastes. Options like homemade hummus and creamy yogurt-based dressings are nutritious and easy to make.
Homemade Hummus
Hummus is full of protein, fiber, and vitamins and minerals. Our homemade version has no added salt. Chickpeas in hummus are rich in iron, important for toddlers. Serve it with soft veggies like roasted sweet potato or steamed broccoli.
Sunflower Seed Butter
Sunflower seed butter is great for families with peanut allergies. It’s smooth and creamy, perfect with apple slices or whole-grain crackers. Making it at home is also more affordable than buying pre-made sun butter.
Creamy Pesto Dip
Pesto is versatile and delicious. Our creamy pesto dip combines basil, garlic, and Parmesan with Greek yogurt. It’s a tasty topping for roasted chicken, steamed veggies, or whole-grain toast.
Berry Protein Dip
| Nutrient | Amount per Serving |
|---|---|
| Calories | 126 kcal |
| Carbohydrates | 9 g |
| Protein | 7 g |
| Fat | 7 g |
| Saturated Fat | 4 g |
| Cholesterol | 25 mg |
| Sodium | 238 mg |
| Potassium | 55 mg |
| Fiber | 1 g |
| Sugar | 6 g |
| Vitamin A | 268 IU |
| Vitamin C | 4 mg |
| Calcium | 58 mg |
This berry dip is a tasty way to add protein to your toddler’s lunch. It’s made with berries, Greek yogurt, and honey. It’s great for dipping fruit, crackers, or roasted veggies.
Discover the fun of toddler dips and sauces to make meals exciting and nutritious. These healthy toddler condiments not only add flavor but also encourage trying new foods and textures.
Allergen-Free Lunch Options
Packing a safe and nutritious lunch for toddlers with food allergies or sensitivities can be tough. But, it’s definitely doable. Here are some nut-free and dairy-free lunch ideas that are full of nutrients. They will keep your 1 year old healthy and happy.
Nut-Free and Dairy-Free Ideas
It’s crucial to watch the ingredients in your child’s food when dealing with allergies. Avoid nuts and dairy products. Instead, choose these safe options:
- Avocado chicken salad served with gluten-free crackers and fresh raspberries
- Bean and corn quesadilla made with dairy-free cheese and sliced bell peppers
- Grilled chicken with homemade dairy-free BBQ sauce, steamed broccoli, and quinoa
- Gluten and dairy-free chicken nuggets with roasted sweet potato fries and carrot sticks
- Sunflower seed butter and banana sandwich on allergy-friendly bread
These choices meet your child’s dietary needs. They also offer a good balance of protein, fruits, veggies, and whole grains. This supports their growth and development.
| Allergen-Free Lunch Item | Nutrition Benefits |
|---|---|
| Avocado Chicken Salad | Protein from the chicken, healthy fats from the avocado, and essential vitamins and minerals |
| Bean and Corn Quesadilla | Fiber and complex carbohydrates from the beans and corn, plus dairy-free cheese for calcium |
| Grilled Chicken with BBQ Sauce | Lean protein from the chicken, and the homemade BBQ sauce is a source of antioxidants |
Always talk to your child’s healthcare provider about their diet. This is especially important when dealing with food allergies.

Seasonal Lunch Ideas for 1 Year Olds
Adding seasonal fruits and veggies to your toddler’s lunch is a smart move. It brings variety, flavor, and important nutrients to their meals. As the seasons change, use the freshest produce to make healthy and fitting lunches for your 1 year old.
In spring, fill their lunchbox with crunchy veggie sticks like steamed asparagus or snap peas. Serve them with creamy hummus or Greek yogurt dip. For sweetness, add sliced strawberries or mandarin orange segments. As it gets warmer, try chilled soups with zucchini or pea purée.
Summer brings hydrating foods like watermelon cubes or frozen grapes. Pair them with cheese cubes or nut/seed butters on whole-grain crackers. Roasted sweet potato wedges or corn on the cob are also great for summer lunches.
Autumn brings pumpkin, butternut squash, or apple into your toddler’s meals. Bake mini pumpkin muffins, serve applesauce with cinnamon, or blend a creamy pumpkin soup. Include seasonal veggies like Brussels sprouts or cauliflower for a colorful lunch.
Winter warms your little one’s belly with hearty stews or soups. Use root veggies like carrots, parsnips, or potatoes. Serve with whole-grain bread or crackers. Add slices of citrus fruits like clementines or oranges for vitamin C.
Using seasonal produce makes sure your toddler’s lunches are full of nutrients. It also introduces them to new flavors and textures, making meals fun and exciting.
| Season | Seasonal Lunch Ideas for 1 Year Olds |
|---|---|
| Spring |
|
| Summer |
|
| Autumn |
|
| Winter |
|
By embracing seasonal produce, you can not only ensure your toddler’s lunches are packed with essential nutrients, but also introduce them to a variety of flavors and textures that will keep mealtimes exciting and enjoyable.
Picky Eater Strategies
Dealing with picky eating can be tough for parents of toddlers. But, with the right approach, you can help your child try new foods. It’s all about being patient, creative, and understanding their needs.
Repeated Exposure to New Foods
Studies say it can take up to 10 tries for a child to like a new food. If your picky eater toddler doesn’t like something at first, don’t worry. Keep offering it gently, and they might start to like it. Letting them help with meal prep can also spark their interest.
Fostering a Positive Relationship with Food
Don’t force your child to eat something they don’t want to. This can make them even more hesitant to try new foods. Let them pick what they want in their meal. This gives them a sense of control.
Interactive meals, like Muffin Tin Eggs or Tex-Mex Pizza, can make eating fun. This can help toddlers trying new foods feel less scared.
Showing them healthy eating habits and offering nutritious snacks can also help. Try Homemade Apple-Strawberry Butter or Veggies and hummus dip. These can make your child more open to trying new foods and view food in a positive way.
Every child is different, and it takes time and effort. But, with patience and persistence, your picky eater toddler can become more adventurous and confident with food.
Conclusion
As you’ve learned, giving your 1 year old nutritious lunches is key for their health. You can do this by offering a mix of finger foods, prepped meals, and balanced options. This ensures they get the nutrients they need to grow well.
Planning and preparing are the secrets to great toddler lunches. Use the tips from this article to pack meals that are both tasty and good for your child. Don’t worry if they’re picky sometimes. It’s just part of their growth.
With the right recipes and a bit of creativity, you can make toddler lunches that are both healthy and fun. These meals will give your 1 year old the energy they need to stay active. Enjoy the process of feeding your child!
FAQ
What are some healthy and easy lunch ideas for my 1 year old?
This article offers many nutritious and simple lunch ideas for 1 year olds. You’ll find finger foods, balanced meals, and tips for picky eaters.
Why is it important to provide a balanced diet for my 1 year old?
A balanced diet is key for 1 year olds’ growth. It’s important for their bodies and brains. This article talks about why and the challenges of packing lunches.
What are good finger food options for my 1 year old’s lunch?
Finger foods help 1 year olds learn to feed themselves. They’re great for trying new tastes and textures. Try soft veggies, ripe fruits, and soft proteins.
How can I meal prep for my 1 year old’s lunches?
Meal prepping saves time and ensures healthy meals. This article shares tips on prepping muffins, roasted veggies, and proteins. These can be mixed into many toddler lunches.
What should a balanced 1 year old lunch include?
A balanced lunch has protein, fruits, veggies, and grains. This article gives examples of how to mix these into fun and easy meals for 1 year olds.
What are some easy and nutritious lunch ideas specifically for 1 year olds?
This article has a variety of easy and healthy lunch ideas for 1 year olds. You’ll find pasta dishes, sandwich alternatives, and finger food platters.
What are the best lunchboxes and containers for packing 1 year old lunches?
The right lunchbox and containers are essential for a good toddler lunch. This article recommends the best options, considering insulation, leak-proof design, and ease of use.
What are some toddler-friendly dip and sauce recipes I can use to enhance my 1 year old’s lunches?
Dips and sauces can add flavor and encourage trying new foods. This article has easy recipes for dips and sauces that make 1 year old lunches more appealing and nutritious.
What are some nut-free and dairy-free lunch ideas for my 1 year old with food allergies or sensitivities?
For toddlers with allergies, this article has nut-free and dairy-free lunch ideas. It suggests substitutions and highlights safe ingredients for 1 year olds’ lunches.
How can I incorporate seasonal fruits and vegetables into my 1 year old’s lunches?
Adding seasonal fruits and veggies makes lunches more varied and nutritious. This article suggests using the best produce for each season to create healthy meals for 1 year olds.
How can I deal with a picky eater when packing my 1 year old’s lunch?
Dealing with picky eaters can be tough. This article offers tips like exposing them to new foods, involving them in cooking, and using familiar flavors and textures.
External Resources for Further Reading
School Lunch Ideas for Picky Eaters Easy Solutions
Packing lunches for picky eaters can be tough. It’s especially challenging when you’re dealing with kids in school. But, with some creativity and smart strategies, you can make lunchtime better for your child.
Key Takeaways
- Discover easy and kid-friendly school lunch ideas that picky eaters will love
- Learn strategies for feeding picky eaters at school, including gradually introducing new foods
- Explore the benefits of planning school lunches ahead and ensuring a healthy lunch box
- Find the right lunch box for your kindergartener and get inspired by real-life lunch box ideas
- Optimize your lunch packing routine with efficient organization and preparation hacks
Table of Contents
Strategies for Feeding Picky Eaters at School
Feeding a picky eater at school can be tough. But, with the right approach, you can make sure your child gets a balanced meal. Registered Dietitian Sarah Remmer says the key is to pack foods your child likes to eat and slowly introduce new ones.
Pack Foods They Like to Eat
Remmer stresses the importance of the Division of Responsibility in Feeding (sDOR). Parents choose the foods, and kids decide how much they eat. Packing foods your child likes can help them enjoy their lunch and feel good about eating.
Introduce New Foods Gradually
Children’s eating habits can be unpredictable. To get your picky eater to try new foods, Remmer suggests using a bento-box and practicing opening containers. Also, involve your child in making lunch. The “rule of 5” is a good guide, aiming for one vegetable, one fruit, two proteins, and one whole grain in each lunch.
It might take 10 to 20 tries for a child to like a new food. So, be patient and don’t punish them for not eating. Instead, keep mealtime positive and show them good eating habits yourself.
| Tip | Benefit |
|---|---|
| Use a bento-box for varied food presentation | Encourages trying new foods and keeps familiar favorites separate |
| Involve your child in lunch preparations | Children are more likely to eat something they helped make |
| Follow the “rule of 5” for balanced lunches | Ensures a variety of essential nutrients in each meal |

By using these strategies, you can make school lunches easier for picky eaters. This helps your child develop a healthy relationship with food.
The Benefits of Planning School Lunches Ahead
Preparing school lunches in advance is a big help for parents. It saves time and reduces stress. Plus, it makes sure your child gets a healthy meal every day, even if they’re picky.
Planning lunches ahead saves a lot of time. You can cook meals in batches or prepare them early. This makes packing lunches easier, even on busy mornings or evenings.
An organized lunch system is great for your child’s health. Homemade meals are better than pre-packaged snacks. They give your child the energy they need all day.
It’s also good for their brain and mood. Foods with omega-3s, antioxidants, and vitamins help with learning and feeling good at school.
It can be hard to plan meals for kids who are picky. But, with a good plan, you can introduce new foods. Letting your child help with lunch can make them more open to trying new things.
In short, planning school lunches ahead has many benefits. It saves time and makes sure your child eats well. Try this simple strategy and see how it helps your child do well in school.

Essential Components of a Healthy Lunch Box
Packing a healthy lunch for your picky eater can be tough. But it’s key for their health and growth. Focus on protein sources, carbohydrates, and fruits and vegetables. This way, you make meals that are good for them and fun to eat.
Protein Sources
Protein is vital for growth, muscles, and energy. Great protein sources for lunch include:
- Lean meats like turkey or chicken
- Hard-boiled eggs
- Greek yogurt
- Nut butters
- Beans or lentils
Carbohydrates
Carbs give us energy. Choose complex carbohydrates like:
- Whole-grain breads or crackers
- Brown rice or quinoa
- Oatmeal or whole-grain cereal
- Homemade granola bars
Fruits and Vegetables
Fruits and veggies are full of vitamins, minerals, and fiber. Make them fun for picky eaters by:
- Trying different colors like raspberries or cherry tomatoes
- Using dips like hummus or guacamole
- Blending veggies into smoothies
Adding these key parts to your child’s lunch box makes meals balanced and healthy. They’ll enjoy eating them too.
| Lunch Box Component | Healthy Options |
|---|---|
| Protein | Lean meats, hard-boiled eggs, Greek yogurt, nut butters, beans, lentils |
| Carbohydrates | Whole-grain breads or crackers, brown rice, quinoa, oatmeal, homemade granola bars |
| Fruits and Vegetables | Raspberries, cherry tomatoes, carrots, celery, cucumber, bell peppers, smoothies, hummus, guacamole |

Choosing the Right Lunch Box for Kindergarten
Finding the right lunch box for your kindergartener is key. Bento boxes are popular for their practicality and appeal. They’re great for kids who are picky. Let’s look at the good and bad of popular bento boxes to find the best one for your child.
Pros and Cons of Popular Bento Boxes
The Bentgo Kids lunch box is a top pick for parents. It’s tough and easy for kids to use. It has five parts, perfect for different foods. The Bentgo Pop is for bigger kids, and the Bentgo Steel is for those who don’t like plastic.
The Bentgo Chill is great for keeping food cold. It’s perfect for lunches that need to stay cool. This makes it a smart choice for cold meals.
The Bentgo Steel is easy to clean because it’s dishwasher-safe. This is a big help for busy parents. You can also buy extra parts for Bentgo boxes, making them more flexible.
But, think about what your child likes and needs. Some kids might not like the organized layout of bento boxes. Others might love it. The best lunch box for your child depends on their eating habits and what you and your family want.
“85% of picky eaters eat more when they use a bento-style lunch box. Also, 62% of parents say their kids eat more of their lunch with a bento box.”
Looking at the good and bad of bento boxes helps you choose wisely. You can pick a lunch box that fits your child’s needs and makes them excited for school meals.
20 Real-Life Kindergarten Lunch Box Ideas
Packing a balanced and appealing lunch box for your kindergartener can be tough, especially with picky eaters. But don’t worry! We’ve got 20 real-life lunch box ideas that are both nutritious and fun for even the fussiest young eaters.
- Sesame Noodles: Cold sesame noodles with julienned veggies, grilled tofu, and a sprinkle of sesame seeds make for a protein-packed and flavorful lunch.
- Parmesan Noodles with Peas: Warm pasta tossed with Parmesan cheese, peas, and a touch of olive oil is a comforting and easy-to-eat option.
- Sunflower Seed Butter and Jelly Sandwich: A classic with a twist – swap peanut butter for sunflower seed butter to accommodate any nut allergies.
- Banana “Sushi”: Spread sunflower seed butter on a whole-wheat tortilla, top with a banana, and roll up for a fun and portable lunch.

From sandwich roll-ups and bagel sandwiches to hummus and pita, pesto pasta salad, and even a “snack lunch” with cheese, crackers, and dried fruit, these 20 real-life lunch box ideas offer a diverse range of flavors and textures. They keep your little one’s taste buds engaged and satisfied.
Remember, including a variety of proteins, carbohydrates, fruits, and vegetables can help ensure a balanced and nutritious lunch. And don’t forget to get creative with fun compartments, utensils, and presentation. This makes the lunch box experience even more enjoyable for your kindergartener.
So, get inspired and start packing those lunch boxes with confidence. Know your child will be enjoying a delicious and well-rounded meal at school.
Tips for Packing Lunch Boxes Efficiently
Streamlining lunch packing can be a big help for busy parents. A few simple hacks can make mornings easier. You’ll save time and reduce stress.
Preparation and Organization Hacks
Designate a “lunch-making zone” in your fridge and pantry. Keep all essentials within reach. Use transparent bins or labeled containers for snacks and proteins like hard-boiled eggs or hummus.
Batch-preparing 2-3 lunches at once can save a lot of time. Try making lunches for Mondays, Tuesdays, and Wednesdays, then focus on the rest of the week. This can cut down your weekly time by up to 5 hours.
- Get your kids involved in packing their lunches. It makes them excited and more likely to try new foods.
- Make sandwiches a staple. They’re easy to customize with different fillings and breads.
- Freeze food items like grapes or berries to keep them fresh longer. It’s a great time-saver on busy mornings.
By using these tips for packing lunch boxes, efficient lunch box preparation, and organization hacks for lunch packing, you’ll make mornings easier. You’ll have more time for other important things.
school lunch ideas for picky eaters
Packing a healthy and tasty school lunch for a picky eater can be tough. But, with a little creativity and these tips, you can make school lunch ideas for picky eaters that taste great and are easy for kids to eat.
Start by using lunch box meals for selective kids that they already like. This might mean sausages, sandwiches, or their favorite snacks. Slowly adding nutritious and kid-friendly lunch options can help them try new things.
For appealing lunches for fussy eaters, think about how things look and feel. Try cutting fruits and veggies into fun shapes or serving them with dips. Using bento-style lunch boxes with different sections can also make meals look fun and encourage trying new foods.
| Lunch Idea | Ingredients |
|---|---|
| Ham and Cheese Roll-Ups | Whole-grain tortilla, sliced ham, cheddar cheese |
| Peanut Butter and Jelly Sandwiches | Whole-wheat bread, peanut butter, jelly |
| Veggie Dippers with Hummus | Baby carrots, cucumber slices, bell pepper strips, hummus |
Remember, simple and satisfying school lunch solutions for picky eaters mix foods they know with new ones. With time and effort, you can help your child enjoy a wider variety of healthy foods.
By using these tips and thinking about what your child likes, you can make sure their lunchbox is full of school lunch ideas for picky eaters that are both healthy and fun.
Creative Ways to Introduce New Foods
Getting picky eaters to try new foods can be tough. But, with the right strategies, you can make lunchtime more fun. One good way is to use peer influence. Have your child eat with friends who love trying new foods.
Positive feedback is also key. When your child tries something new, be sure to praise them. This builds their confidence and encourages them to try more.
Peer Influence and Positive Reinforcement
- Encourage your child to eat lunch with friends who are open to trying new foods. Peer influence can be a powerful motivator.
- When your child takes a bite of a new food, offer genuine praise and positive feedback. This will reinforce the behavior and make them more likely to try new things in the future.
- Involve your child in the meal planning and preparation process. Allow them to help choose and prepare new foods, giving them a sense of ownership and investment.
- Gradually introduce new foods by pairing them with familiar favorites. This can help ease the transition and make the experience less intimidating.
By using peer influence and positive feedback, you can make your picky eater more adventurous. With a bit of creativity and patience, you can open up a world of new foods for their lunchbox.
Conclusion
As we wrap up this guide on school lunch ideas for picky eaters, it’s clear that tasty and healthy meals are possible. The main points from this article highlight the need to know what your child likes, slowly introduce new foods, and pack a balanced lunch. This way, their lunch can be both appealing and nutritious.
By using the tips and ideas shared, like packing foods they love and making healthy options fun, lunchtime can be easier. Remember, starting small and being consistent is key to helping your child try new foods and develop good eating habits.
In the end, it’s all about giving your child meals that are both healthy and enjoyable. By focusing on their nutritional needs and what they like, you help them stay focused and healthy. Start using the strategies from this article and begin a fun journey of exploring new foods together, one lunchbox at a time.
FAQ
What are some effective strategies for feeding picky eaters at school?
Packing foods your kids already like is a good start. Also, try introducing new foods slowly and without stress. This way, picky eaters get balanced and healthy lunches.
What are the benefits of planning school lunches ahead of time?
Planning lunches early saves time and reduces stress. It ensures your kids eat nutritious meals all week. It makes packing lunches more organized and efficient.
What are the essential components of a healthy lunch box?
A healthy lunch box should have protein, carbs, and fruits and veggies. These ingredients make sure your kids get balanced meals.
What are some tips for choosing the right lunch box for kindergarten?
When picking a lunch box for kindergarten, think about what works best. Look at the pros and cons of different bento boxes. Choose one that’s easy to use and fits your child’s needs.
What are some real-life examples of kindergarten lunch box ideas for picky eaters?
The article shares 20 lunch box ideas. These are nutritious and fun for picky eaters. They’re also easy to make and look good.
What are some tips for packing lunch boxes efficiently?
The article gives tips to make packing lunches easier. It includes hacks for preparation and organization. These help parents of picky eaters pack healthy and fun lunches.
How can parents introduce new foods to picky eaters?
Introducing new foods can be creative. Use peer pressure and positive feedback to encourage kids. This helps them try new things and enjoy different foods.
External Resources for Further Reading
Meat Baby Food Nutritious Options for Your Little One
Meat might not be the first thing you think of for baby food. But, meat for babies has real benefits. It’s full of nutrients like fat, iron, vitamin B12, and zinc. These help with healthy growth.
Meat is also easy for babies to digest. It adds savory flavors to their diet. This helps shape their taste preferences during a key time.
You can start giving meat to your baby when you start solid foods. This is usually around six months. You can serve it as a puree, with baby-led weaning, or both.
Key Takeaways
- Meat is a nutrient-dense food with benefits for baby’s growth and development.
- Meat can be introduced between 4-6 months as a puree or with baby-led weaning.
- Organic, grass-fed meat offers more nutrients than conventional meat.
- Proper preparation and cooking techniques are important for safe and easy-to-eat meat for babies.
- Meat is not essential for protein, but can be a great source of iron and other key nutrients.
Table of Contents
The Benefits of Meat for Babies
Meat is a nutritious food that helps your baby grow and develop. Babies need more nutrients because they grow fast. Meat gives them protein, iron, zinc, and vitamins and minerals they need.
Digestibility and Nutrient Density
Meat is easy for babies to digest. It has better quality protein than grains and beans. Meat is also full of nutrients like fat, iron, and zinc, which are important for your baby’s growth.
Flavor Exposure and Palate Development
Starting with meat baby food introduces your baby to new flavors. This helps them develop a taste for different foods. It’s good to offer a variety of tastes, including nutrient-dense meat, from 6 to 18 months.
| Nutrient | Infant Daily Requirement | Adult Daily Requirement |
|---|---|---|
| Iron | 11 mg | 8 mg (males), 18 mg (females) |
| Zinc | 3 mg | 11 mg (males), 8 mg (females) |
| Vitamin B12 | 0.5 mcg | 2.4 mcg |
Meat, especially iron-rich baby meals like beef and liver, meets your baby’s high nutrient needs. It’s especially good for iron, which is key for growth and brain development. Animal sources of iron are better absorbed than plant sources.

“Meat is a highly nutritious food that provides numerous benefits for your little one’s growth and development.”
When to Introduce Meat to Your Baby
Meat is a great addition to your baby’s diet. It offers important nutrients like iron, zinc, and protein. The best time to introduce meat is around 6 months, when you start other solid foods.
Experts say to introduce meat and other protein-rich foods early. This is because they are key for your baby’s growth. Babies on a baby-led weaning diet can also start meat at 6 months. Just make sure the pieces are soft and easy to hold.
- Ground beef, turkey, chicken, or pork are good choices. They can be shaped into pieces that babies can hold and gum.
- Meat should be tender and soft for babies doing baby-led weaning. This prevents choking hazards.
- Processed meats, tough cuts, and those with visible fat should be avoided. They can be hard for babies to gum and may pose a choking hazard.
Some babies might be allergic to certain meats, like beef. So, introduce one type of meat at a time. Watch for signs of an allergic reaction like hives, itching, swelling, sneezing, and trouble breathing.
“Meat is easier to digest for babies compared to other food groups and provides complete proteins, vitamins, antioxidants, and essential nutrients for babies’ growth.”
Before 6 months, breast milk or formula should be your baby’s main food. When you start solid foods, including meat, make sure to follow safe preparation and serving guidelines. This keeps your little one healthy and safe.

Choosing the Best Meats for Your Baby
The quality of meat you choose for your baby is very important. Go for grass-fed and pasture-raised meats. They are full of nutrients that help your baby grow and develop well. These meats are better than others because they have more nutrients and taste better.
Nutrient-rich Meat Varieties
Try different meats that are good for your baby. Here are some:
- Beef – It has protein, B vitamins, iron, and zinc. These are key for brain and muscle growth.
- Chicken – It’s lean and packed with B vitamins, selenium, and other important nutrients.
- Turkey – It’s full of B vitamins, selenium, zinc, and phosphorus. These help your baby’s immune system and growth.
- Bison – It’s rich in B vitamins, iron, selenium, zinc, and CLA, a healthy fat.
- Lamb – It has B12, selenium, iron, and zinc. These are good for red blood cells and brain health.
- Pork – It’s a good source of B vitamins, iron, phosphorus, and zinc. These support overall development.
- Salmon – It’s great for DHA, an omega-3 fatty acid. This is important for brain and eye development.
- Liver – It’s a nutrient powerhouse. It has lots of vitamin A, iron, and B vitamins.
By giving your baby different meats, you make sure they get all the nutrients they need. This helps them grow and develop well.
“Meat is recognized as one of the most nutrient-dense foods on the planet, ideal for baby nutrition where Every Bite Counts®.”
When choosing meat for your baby, always go for the best. Choose grass-fed meat for babies and pasture-raised meat for babies. This way, you give your baby the most nutrient-dense meat for infants and organic meat puree options.
Preparing and Serving Meat for Your Baby
Introducing meat to your baby’s diet needs careful preparation and handling. Beef, pork, chicken, turkey, and lamb are great choices. They are full of protein, fat, iron, zinc, and other nutrients your baby needs.
Cutting and Cooking Techniques
Make sure the meat is cooked well and has no pink spots. You can bake it in the oven or slow-cook it in a crockpot with some water. After cooking, blend or mash the meat into a smooth puree.
For older babies, you can serve the meat in soft, bite-sized pieces or strips.
Storage and Handling
- Cooked meat can be refrigerated for up to 4 days or frozen for up to 2 months. This makes it easy to prepare how to prepare meat for babies and storing meat baby food.
- When cutting meat for babies, remove any bones or tough parts to avoid choking hazards.
- Stay away from processed meats like sausages and bacon. They are too salty and not good for cooking meat for infants.
By following these tips, you can safely add a variety of nutritious meats to your baby’s diet. This supports their growth and development.

meat baby food Purees and Blends
Meat can be easily added to homemade baby food purees. This makes it easy and affordable to introduce meat to your baby. By mixing meat with fruits, veggies, and broths, you create meals that are both nutritious and tasty.
Making your own meat-based purees lets you choose what goes in. You can use chicken, turkey, beef, or lamb. Pair these with fruits like bananas or veggies like carrots for a delicious mix.
To start, blend cooked and chopped meat with:
- Soft, cooked veggies like sweet potatoes or green beans
- Ripe, soft fruits like bananas or pears
- Broths or water for a smooth texture
These homemade purees are a great way to introduce your baby to different tastes and textures. They’re also a cost-effective option compared to store-bought pouches.
Always check with your pediatrician before trying new foods. And make sure to follow safe food handling and storage when making these purees.

“Introducing your baby to a variety of flavors, including meat, can help them develop a diverse palate and a healthy relationship with food.”
Dealing with a Meat Strike
As your little one grows, they might refuse to eat meat. This is a common phase for kids. But, with patience and persistence, you can help them start eating meat again.
Getting your toddler involved in cooking can help. Let them pick out meat at the store or help cook. This makes them feel more connected to the food.
- Try different meat textures and flavors, like shredded chicken or ground beef. This might help them find new favorites.
- Add meat to foods they like, like pasta or rice bowls. This makes it easier for them to try.
- Be patient and keep trying. It might take a few attempts for them to like meat.
Every child is unique, and their tastes can change. With creativity and encouragement, you can help your toddler enjoy meat. This brings many health benefits.
Homemade Meat Baby Food Recipes
It’s great to make your own meat baby food. You can try Beef and Applesauce Puree or Pasture-Raised Pork and Uncured Bacon Puree. These recipes are full of nutrients and let your baby try new tastes and textures.
Simple and Delicious Combinations
Our Chicken and Tropical Mango Puree is a tasty choice. It has chicken, mango, and lots of vitamins and protein. Another favorite is Turkey with Pumpkin Puree. It’s made with turkey and pumpkin, offering a mix of flavors and nutrients.
Ethnic and Unique Flavors
Try homemade meat baby food recipes with global flavors. The Pasture-Raised Pork and Uncured Bacon Puree is a savory treat. The Lamb and Apricot Puree offers lamb’s earthy taste with apricot’s sweetness.
These homemade meat baby food recipes use top-quality meats and fresh ingredients. They’re a tasty start for your baby’s food adventures. Try different mixes to see what your baby likes best.
“Introducing a variety of flavors and textures early on can help your baby develop a diverse palate and healthy eating habits for life.”
The Convenience of Pouched Meat Purees
As a busy parent, pouched meat purees are a lifesaver. They’re pre-made and packed with protein, making mealtime easy. No need to worry about cooking or cleaning up.
These purees, like those from Serenity Kids, use organic, grass-fed meats. They offer a variety of flavors like Grass-Fed Beef with Organic Kale & Sweet Potato. Your baby can try different tastes and textures.
These pouched meat baby food options are both healthy and easy to use. They can stay good for 18 months without refrigeration. After opening, you can store them in the fridge or freezer for up to 24 hours.
The organic meat purees are perfect for room temperature. But you can also warm them up if your baby likes it hot. The pouches are BPA-free and recyclable, helping the environment.
With these convenient meat baby food options, you can be sure your baby is eating well. Pouched meat purees are a great choice for busy parents. They’re easy to use and nutritious.
“At Serenity Kids, we’re passionate about providing parents with the best possible nutrition for their babies. Our pouched meat purees are made with the highest-quality, ethically sourced meats to ensure your little one gets the nutrients they need to thrive.”
– Serenity Carr, Co-Founder of Serenity Kids
Conclusion
Adding meat to your baby’s diet can be very beneficial. Meat is packed with nutrients like protein, fat, iron, and vitamins. These help your baby grow strong and healthy.
Introducing meat early can also make your baby more open to trying new foods. This can help them become adventurous eaters.
When it comes to meat, you have choices. You can make your own meat purees or use pre-made pouches. Both options are good for your baby.
Meat is better for your baby’s growth than dairy. It also helps prevent iron deficiency, a big problem for toddlers in the U.S.
Start adding meat to your baby’s meals regularly. With the right preparation and variety, you’ll help your baby develop healthy eating habits for life.
FAQ
What are the benefits of feeding meat to my baby?
Meat is full of nutrients like fat, iron, vitamin B12, and zinc. It’s also easy for babies to digest. Plus, it introduces new flavors to help grow their taste buds.
When can I start introducing meat to my baby?
You can start giving meat to your baby when you introduce solid foods. This is usually around six months old.
What types of meat are best for my baby?
All meats are good for babies, but choose grass-fed and pasture-raised ones. They have more nutrients than regular meat. Good choices include beef, chicken, turkey, bison, lamb, pork, salmon, and liver.
How do I prepare and serve meat for my baby?
Make sure the meat is fully cooked and has no pink parts. You can bake it or cook it in a slow cooker. Then, blend it into a smooth puree or chop it into strips for older babies.
Can I incorporate meat into homemade baby food purees and blends?
Yes, you can mix meat into homemade baby food. Try blending it with fruits, veggies, and broths. This makes tasty and nutritious meals for your baby.
What do I do if my toddler goes through a “meat strike” and refuses to eat it?
Stay patient and keep offering different meat dishes. Try different textures and involve your toddler in cooking. This might make them more interested in trying new foods.
What are some delicious homemade meat baby food recipes to try?
Try Beef and Applesauce Puree, Chicken and Tropical Mango Puree, or Turkey with Pumpkin Puree. You can also try Pasture-Raised Pork and Uncured Bacon Puree for something unique.
Are pouched meat purees a convenient option for my baby?
Yes, pouched meat purees are a simple way to add protein to your baby’s diet. They’re made with organic, grass-fed, and pasture-raised meats, making them a convenient choice.
External Resources for Further Reading

Your Baby’s First Birthday Cake: Sweet Memories
The first birthday is a big deal, marking your baby’s move from babyhood to toddlerhood. A special cake can make this day unforgettable for you and your child. Find the perfect first birthday cake that will make your little one’s day even more special.
When your baby turns one, you might wonder how to celebrate. Serving a delightful cake is a cherished tradition. It could be a classic frosted cake or a fun smash cake for your little one to enjoy. The right cake can make the celebration even more special and a keepsake to hold onto for years.
Key Takeaways
- The first birthday is a significant milestone, marking your baby’s transition from infancy to toddlerhood.
- Celebrating this occasion with a special cake can create lasting memories for both you and your child.
- Discover the perfect first birthday cake, whether it’s a classic frosted design or a playful smash cake.
- The choice of cake can set the tone for the celebration and become a cherished keepsake.
- Explore a variety of options to make your baby’s first birthday cake truly memorable.
Table of Contents
Importance of Baby’s First Birthday
Your baby’s first birthday is a big deal, marking their move from a newborn to a one-year-old. It’s a chance to celebrate their growth and the year they’ve lived. By starting special birthday traditions, like a memorable first birthday cake, you create lasting memories.
Milestone Celebration
The first birthday is a big milestone in your baby’s life. It’s a time to look back on the past year. You’ll remember the challenges and joys of being new parents.
This celebration honors your baby’s strength and progress. From their first steps to learning new words, it’s a big achievement.
Creating Lasting Memories
A baby’s first birthday is a special time to make memories that last. By adding special traditions, like a personalized smash cake or a themed party, you capture the moment. These memories will help shape future birthday celebrations, creating a sense of tradition in your family.
“Celebrating your baby’s first birthday is a cherished moment that marks the end of the newborn stage and the beginning of a new chapter in their life. It’s a time to reflect on the incredible growth and development you’ve witnessed over the past year.”
What is a Smash Cake?
A smash cake is a special treat for your baby’s first birthday. It’s a small cake made just for them to explore and “smash” on their big day. These cakes are simple, without fancy decorations, so your baby can enjoy them with all their senses.
Definition and Purpose
The main goal of a smash cake is to make your baby’s first birthday fun and interactive. It’s a way to capture a special moment in photos. Smash cakes let your child enjoy their own cake, making it a memorable part of their day.

Smash cakes are smaller than regular birthday cakes. They’re baked in pans that are 4 or 6 inches, perfect for your baby to handle. Their simple design lets your baby focus on the fun of their first cake-smashing experience.
“Smash cakes are a traditional way to celebrate a baby’s first birthday, emphasizing messiness and fun, often providing a delightful photo session opportunity.”
Why is it Called a Smash Cake?
The term “smash cake” comes from a fun tradition. It lets your baby play with their first birthday cake in a messy way. This tradition has become very popular, with many families enjoying cake smash sessions.
The idea of cake smashing might have started in Mexico. There, it’s called “La Mordida” and the birthday child takes a bite. But in America, it’s more about letting the baby explore the cake with their hands and feet.
Cake smash sessions are like messy play. They let babies discover new things like textures and tastes. It’s more about the fun of exploring than eating the cake.
Because of its popularity, professional cake makers now make special cakes for these sessions. Some parents even set up the cake smash in a studio to capture the messy moments.
To keep things tidy, you can use a plastic sheet and have baby wipes ready. A bubble bath can also help clean up after. With some planning, the cake smash can be a memorable part of your baby’s first birthday.
Does My Baby Even Eat the Smash Cake?
At your baby’s first birthday, the smash cake is a big deal. It’s a tradition that’s become very popular. But, many parents wonder if their baby will even eat it.
About 60% of babies really enjoy their smash cake. The other 40% might not be so excited. This is because the cake and frosting are new to them.
Introducing New Tastes and Textures
The smash cake is more about exploring new things than eating. It lets your baby touch, feel, and even taste the cake. This helps them learn about different flavors and textures.
Even if your baby doesn’t eat much, the smash cake photos are special. 75% of parents celebrate with a smash cake. And 85% take pictures or videos to remember the day.
So, even if your baby doesn’t eat the whole cake, it’s still a special moment. It’s a way to celebrate their first year and introduce new experiences.
Can My Baby Have Cake for Her First Birthday?
As your baby’s first birthday approaches, you might wonder if they can have cake. The answer is yes, most babies can have a small piece of cake. It’s safe for them physically and nutritionally.
Nutritional Considerations
It’s true that babies shouldn’t have too much sugar. But, a little cake on their birthday won’t hurt them. In fact, 83% of parents think it’s fine for one-year-olds to have a small slice.
Fostering a Healthy Relationship with Food
Offering cake can also teach your baby about food. It introduces new tastes and textures in a fun way. This helps them learn to enjoy treats in moderation.
Also, 65% of parents share photos of their babies with cake. It shows the joy and specialness of the moment.

So, while watching their diet is key, a small cake on their birthday is a great way to celebrate. It creates lasting memories for your child.
Healthy Smash Cake Alternatives
Planning your baby’s first birthday? You might want a healthier smash cake option. Luckily, there are tasty and nutritious choices that make the day special for your little one.
No-Added-Sugar Options
Choosing a no-added-sugar smash cake is a great idea. These cakes use fruits, veggies, and a bit of natural sweetener. This way, your baby can enjoy the celebration without too much sugar. Experts say waiting until 2 years old to introduce sweets helps shape good taste habits.
Wholesome Ingredients
For a healthy smash cake, pick recipes with good ingredients. Beets are great in flour-free cakes, and coconut flour cakes have lauric acid, like in breastmilk. These ingredients make the cake look and taste good while keeping it healthy.
“More and more parents are skipping added sugar for their baby’s birthday cakes, as it is recommended to avoid added sugars before age two.”
Whether you bake a cake at home or buy one, choose ingredients that are good for you. This way, your baby’s first birthday is both fun and healthy, teaching them to love food in a positive way.
first birthday cake
Choosing the right first birthday cake is all about knowing your baby’s tastes. You might pick a classic cake or a healthier smash cake. It’s important to know what flavors, textures, and ingredients your little one likes.
Think about adding your baby’s favorite fruits to the cake. Bananas, strawberries, or blueberries are great choices. You can also use oat or almond flour for a healthier option. If your baby loves sweet things, a little maple syrup or honey can make the cake special.
Texture matters too. Some babies like soft cakes, while others prefer a crunchier smash cake. Make sure the cake is easy for your baby to hold and explore.
Customizing your baby’s first birthday cake makes it extra special. It shows you care about their tastes and helps them enjoy food. This can help them develop good eating habits for life.

“The best first birthday cakes are the ones that reflect your baby’s unique personality and preferences. Get creative and have fun with it!”
Smash Cake Photo Sessions
Your baby’s first birthday is a special moment. A smash cake photo session is a great way to capture it. These sessions focus on the cake-smashing, keeping the messy and adorable moments for years.
Capturing Precious Moments
A 6-inch cake with 2-3 tiers is ideal for smash cake sessions. It fits on a cake stand and is easy for your baby. Scheduling the session when your baby is 10 1/2-11 months old is best.
Local favorites like Coccadotts Cake Shop and Publix are great for the cake. Booking 2-3 months in advance lets you customize the theme and props. This makes the session truly personal.
The photographer suggests avoiding chocolate cakes and red icing. This is for looks and to prevent baby reactions. Bringing a cake from a professional bakery is recommended for quality and safety.
The studio provides baby soaps and towels for the mess. This makes the smash cake photo session even more fun. Parents should encourage their babies to enjoy the cake, but let them explore at their own pace.
Styling the smash cake set to match the birthday theme is a good idea. This ensures a cohesive and visually appealing experience.
Remember, your baby’s first birthday photo shoot is about capturing those special moments. Embrace the mess and let your little one have fun with their smash cake!
Party Treats for Guests
Planning your baby’s first birthday party means thinking about treats for guests. The smash cake is special for your little one. But, offering both traditional and healthy treats makes everyone happy. This way, you ensure your party is welcoming to all.
Offering Traditional and Healthy Options
Traditional birthday cake or cupcakes are a hit. But, you can also have healthier treats. Here are some ideas:
- Fruit skewers or veggie trays with dip
- Whole grain crackers and cheese
- Mini muffins or energy bites made with natural sweeteners
- Homemade trail mix with nuts, seeds, and dried fruit
This mix lets guests enjoy a treat and get some good stuff too. It makes your party a hit with everyone.
For drinks, offer milk, juice boxes, and water bottles. Don’t forget coffee, tea, or a special mocktail for adults. Make sure the drinks are safe and fun for all.
With some planning, your first birthday party will be tasty and welcoming. It lets your guests celebrate in a way that feels right for them.

Planning the Perfect First Birthday Party
Planning your baby’s first birthday party is exciting and rewarding. You’ll need to pick the perfect cake, choose decorations, plan activities, and make a guest list. With careful planning, you can create a special day your family will always remember.
Timing is key when planning the party. Experts say to hold it between 1 PM and 4 PM. This time works well for young guests. But, not all guests will stay for the whole time.
Thinking about adult drinks at the party is a good idea. About 50% of first birthday parties have alcohol, depending on the guests and time of day. This adds to the fun for adults.
- Plan the party about two months in advance to allow time for preparation.
- Send out invitations four to six weeks before the event, especially if it’s during a busy season.
- Keep the party duration short, around 1.5 to 2 hours, particularly if older siblings are attending.
- Consider digital invitations to save time and money on postage.
Decorations should be light to avoid overwhelming the baby. Choose a theme that matches your child’s interests. Themes like Rainbow/Sprinkles/Confetti, Fruit, Jungle/Animals/Farm, Nautical/Beach/Ocean, or color-based themes like blue or purple work well.
| Theme | Decor Ideas |
|---|---|
| Rainbow/Sprinkles/Confetti | Colorful balloons, streamers, and confetti |
| Fruit | Fruit-shaped decorations, floral arrangements |
| Jungle/Animals/Farm | Animal-themed plates, cups, and napkins |
| Nautical/Beach/Ocean | Seashells, starfish, and ocean-inspired elements |
| Color-based (blue or purple) | Monochromatic decorations in the chosen color |
Choosing the right party favors is important. Bubbles, mini board books, and sand toys are great for one-year-olds. They match their interests.
The key to a perfect first birthday party is a warm, intimate celebration. It should reflect your child’s personality and let them enjoy the moment. By carefully planning, you’ll create a memorable and joyful experience for everyone.
Conclusion
Your baby’s first birthday is a big deal and should be celebrated. You can pick a traditional cake or a healthier smash cake. The key is to make memories that will last forever.
Birthdays with cakes have been a tradition for centuries. First birthday cakes are especially important in many cultures. Today, there are many ways to make a first birthday cake special, including healthier options.
Planning a first birthday cake can be fun but also a bit stressful. Adding personal touches like the child’s name makes it special. Having a “smash cake” for the birthday child is also popular. It lets them try new tastes and makes memories.
FAQ
What is a smash cake?
A smash cake is a small cake made just for a baby’s first birthday. It’s designed for the baby to “smash” and explore. These cakes have simple designs, letting the baby enjoy them through touch, sight, and taste.
Why is it called a “smash cake”?
Smash cakes are called that because babies get to smash them on their first birthday. They use their hands, fists, and sometimes feet to play with the cake. This makes a fun mess of frosting and crumbs.
Does my baby actually eat the smash cake?
Many babies don’t eat much of the smash cake, especially if it’s new to them. But the smash cake is more about the fun and celebration than eating it. It’s a chance to introduce new tastes and textures to your baby.
Can my baby have cake for their first birthday?
Yes, babies can safely have cake on their first birthday. Most babies can handle cake without problems. But remember, it’s good to teach your child to enjoy treats in moderation.
What are some healthy smash cake alternatives?
For a healthier smash cake, try ones made with fruit, veggies, and little sugar. These cakes are nutritious and tasty for your baby’s first birthday.
How can I customize my baby’s first birthday cake?
Think about what your baby likes when choosing a birthday cake. Use flavors, textures, and ingredients they enjoy. This way, your baby is more likely to love their special birthday cake.
What should I consider when planning my baby’s first birthday party?
Plan your baby’s party with both the smash cake and treats for guests in mind. Offer a mix of traditional and healthier options. This makes sure everyone has something they like, making the party fun for all.
External Resources for Further Reading
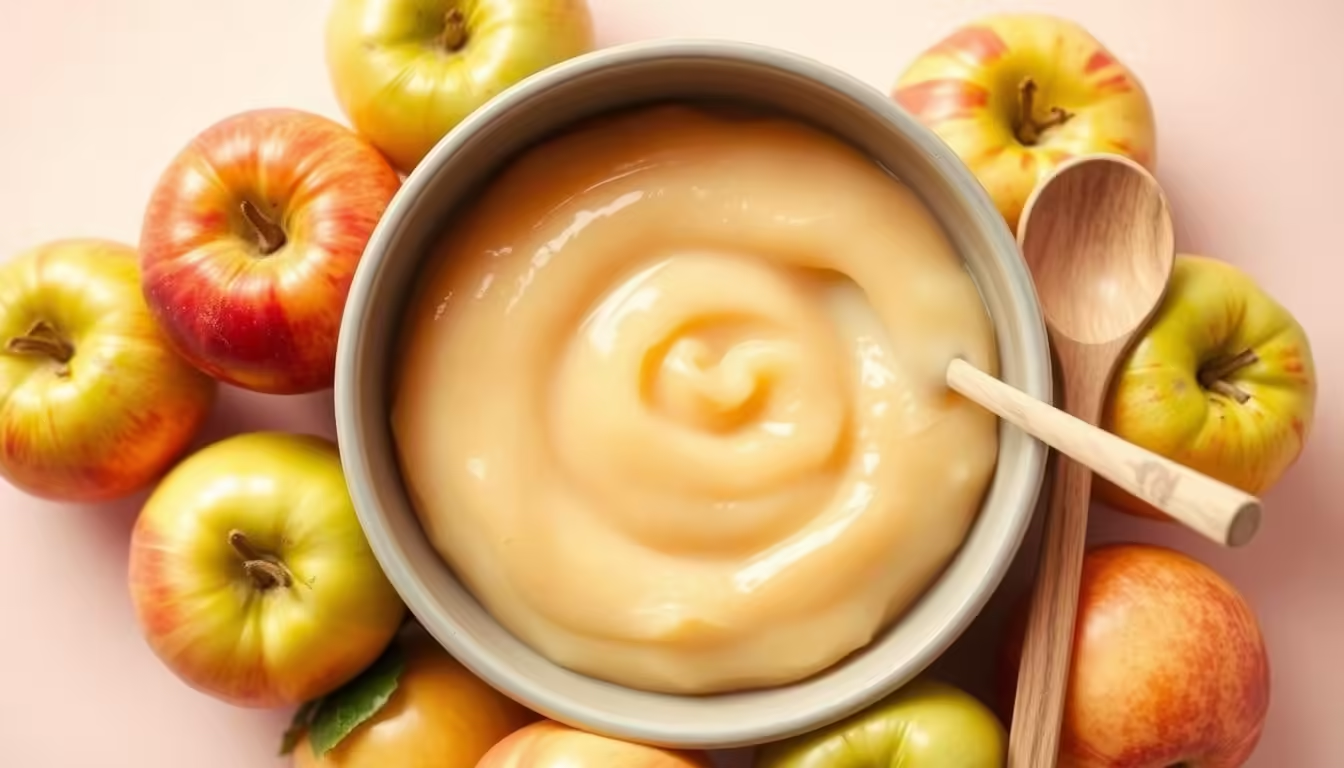
Homemade Apple Baby Food Nutritious & Easy Recipes
Starting your baby on solid foods is both thrilling and nerve-wracking. You aim to give them the healthiest and tastiest meals. Homemade apple baby food is a fantastic choice. This guide will show you how to make nutritious apple purees that are full of vitamins, minerals, and fiber.
Key Takeaways
- Homemade apple baby food is a nutritious and easy-to-prepare first food for your little one.
- Apples are a great source of fiber, vitamin C, antioxidants, and hydration for your baby.
- You can store homemade apple baby food in the fridge for up to 4 days or freeze it for up to 4 months.
- The recipe requires just 6 apples, 1/2 cup of water, and 1/4 teaspoon of cinnamon.
- Cooking time for tender apples is approximately 10-15 minutes.
Table of Contents
Introduction to Homemade Apple Baby Food
Homemade apple baby food is a great first food for babies. Making it at home lets you control what goes into it. This way, you can be sure your baby gets only the best.
Apples are full of fiber, vitamin C, and antioxidants. These nutrients make apples a perfect choice for introducing solids to your baby.
Why Make Homemade Apple Puree for Your Baby?
Homemade apple puree has many benefits over store-bought options. It avoids heavy metals and arsenic found in some commercial baby foods. Making it yourself also lets you adjust the texture to your baby’s liking.
Benefits of Apples for Babies
Apples are packed with nutrients, making them a great first food. They’re full of dietary fiber for healthy digestion. They also have vitamin C for immune and skin health.
Apples are also good for a baby’s gut health. They contain polyphenols that help increase good bacteria. Plus, apples can be mixed with other fruits and veggies for tasty, nutritious purees.
By adding homemade apple puree to your baby’s diet, you’re giving them a delicious and healthy start to eating solids.
“Apples are the second most consumed fruit in the US after bananas, and they’re a fantastic choice for a baby’s first foods.”
Ingredients Needed for Apple Baby Food
To make delicious homemade apple baby food, you need apples, water, and a bit of cinnamon if you like. The key is picking the right apples.
Types of Apples to Use
Choose sweet and firm apples that are easy to digest for your baby. Here are some great options:
- Gala apples: Sweet, mild flavor and crisp texture make them perfect for baby food.
- Honeycrisp apples: Juicy, slightly tart, and sweet, Honeycrisps are a favorite for apple baby food.
- Fuji apples: Natural sweetness and soft flesh make Fujis great for smooth, creamy puree.
- Pink Lady apples: Balanced, slightly tart flavor is great for baby food recipes.
Avoid tart apples as they might be too acidic for babies. Sweet, mild apples are best for taste and digestion.
| Apple Variety | Sweetness Level | Texture | Recommended for Baby Food |
|---|---|---|---|
| Gala | Sweet | Crisp | Yes |
| Honeycrisp | Sweet, Slightly Tart | Juicy | Yes |
| Fuji | Sweet | Soft | Yes |
| Pink Lady | Balanced, Slightly Tart | Crisp | Yes |
| Granny Smith | Tart | Firm | No |
Using the right apples makes a smooth, tasty, and healthy apple puree your baby will enjoy.

Step-by-Step Instructions for Making Apple Baby Food
Making homemade apple baby food is easy and rewarding. It lets you give your baby a healthy, preservative-free snack. Here’s how to make tasty apple puree for your baby:
- First, wash and peel 2-3 medium apples. This will give you about 5 ounces of puree.
- Then, cut the apples into 1-inch pieces. Put them in a steamer basket or saucepan.
- Steam the apple chunks for 10 minutes, or until they’re soft. Or, boil them in a little water until they’re tender.
- After cooking, blend the apples in a blender or food processor. Add a bit of water for a smooth texture. You might need more water to get the right consistency.
- For extra taste and color, squeeze a bit of lemon juice into the mix.
This recipe makes about 3/4 cup of apple puree. You can keep it in the fridge for up to 4 days or freeze it for 4 months. To thaw frozen puree, just place the cubes in a bowl with hot water.
| Preparation Time | Recommended Equipment | Ratio of Apples to Water |
|---|---|---|
| 25 minutes | Vitamix Blender | Start with a few tablespoons of water, add more as needed |
When introducing new foods to your baby, start with one at a time. Wait a few days before trying another. This helps spot any allergies. Enjoy making your own how to make homemade apple baby food, apple puree recipe, and easy baby food recipes!
Cooking Methods for Apple Baby Puree
When making homemade apple puree for your baby, you have a few different cooking methods to choose from. Let’s explore the pros and cons of the two most common techniques – steaming and boiling.
Steaming Apples for Baby Food
Steaming apples is often considered the superior method for preserving the fruit’s natural nutrients and flavors. By gently cooking the apples above simmering water, you can create a smooth, creamy puree. This method helps the apples retain more of their vitamins and minerals compared to boiling.
The steaming process also helps the apples maintain their color and appealing texture.
- Wash, peel, and core the apples.
- Place the apple slices in a steamer basket and set over a pot of simmering water.
- Steam the apples for 12-15 minutes, or until very soft.
- Transfer the cooked apples to a blender or food processor and puree until smooth.
- Add a small amount of the steaming liquid if needed to reach your desired consistency.
Boiling Apples for Baby Food
While not quite as nutrient-preserving as steaming, boiling apples is a simple and straightforward method. It still produces a delicious and nutritious puree. The key is to carefully monitor the cooking time to avoid overcooking, which can lead to some nutrient loss.
- Peel, core, and dice the apples into 1-inch pieces.
- Place the apple pieces in a saucepan and cover with water.
- Bring the water to a boil, then reduce heat and simmer for 10-12 minutes, until the apples are very soft.
- Drain the apples, reserving some of the cooking liquid.
- Mash or blend the apples, adding the reserved liquid as needed to achieve your desired consistency.
Whichever cooking method you choose, homemade apple puree is a wonderfully nutritious and easy-to-make first food for your baby. Enjoy the process and savor the delicious results!

Storing and Freezing Apple Baby Food
Homemade apple baby food is a great choice for your baby. But, it’s important to store it right to keep it fresh and safe. Here’s how to store and freeze your apple puree:
Refrigerator Storage
You can keep apple baby food in the fridge for up to 4 days. Use airtight containers or jars to keep it fresh. Always check the food for any signs of spoilage before serving.
Freezing Apple Puree
Freezing is a good option for longer storage. You can freeze apple baby food for up to 3 months. Pour the puree into ice cube trays or small containers before freezing.
When you’re ready to serve, thaw the frozen puree in the fridge overnight. You can also thaw it faster by running the container under cold water. Never refreeze thawed baby food to keep it safe and quality.
Labeling and Organization
Label your containers with the date and what’s inside. This helps you keep track of your freezer contents. Portion the puree into small servings for easier feeding and thawing.
By following these tips, you can enjoy homemade apple baby food. This ensures your baby gets the best nutrition safely.
| Storage Method | Shelf Life |
|---|---|
| Refrigerator | Up to 4 days |
| Freezer | Up to 3 months |
“Proper storage and freezing of homemade apple baby food is essential for maintaining its quality and safety.”
Introducing Solids and Feeding Tips
Timing is everything when introducing solid foods to your baby. Experts say start around 6 months. Your baby should be able to sit up and hold their head steady. Look for signs like losing the tongue-thrust reflex.
At first, breast milk or formula will still be the main food. But, solid foods add important nutrients like iron and zinc. Start with one new food at a time. Give 8 to 10 tries before deciding if your baby likes it.
Choose foods without added sugars, high sodium, or honey. Avoid unpasteurized dairy and foods that could choke your baby. Start with single-ingredient purées and then mix them as your baby gets older.
Make sure to cook homemade baby foods to keep nutrients in. Freeze any leftovers. Don’t feed from baby food jars to avoid contamination. Use a spoon to feed your baby. Introduce a cup around 6 months, starting with water. Wait until your baby is 12 months old before giving juice.
By following these baby food feeding guidelines and signs baby is ready for solids, you can ensure a smooth and nutritious when to introduce solids experience for your little one.
| Feeding Recommendation | Guideline |
|---|---|
| Starting Solid Foods | Around 6 months of age |
| Breast Milk or Formula | Still provide majority of nutrition during transition |
| Nutrient-Rich Solid Foods | Offer essential nutrients like iron and zinc |
| New Food Introduction | One at a time, allowing 8-10 tries |
| Food Restrictions | Avoid added sugars, high sodium, honey, unpasteurized dairy, choking hazards |
| Food Progression | Start with purees, then mixed purees, and finally a variety of textures |
| Homemade Baby Food | Cook to preserve nutrients, freeze portions for later |
| Feeding Method | Spoon food into bowl, avoid feeding directly from jars |
| Cup Introduction | Around 6 months, start with water, avoid juice until 12 months |

“Encouraging family meals from the first feeding can positively impact the development of children.”
Combining Apple Baby Food with Other Purees
Apple baby food is not only tasty alone but also great with other purees. Mixing it with other foods can introduce new tastes and textures. This makes mealtime exciting and nutritious for your baby.
Try apple puree with creamy avocado for a smooth treat. You can also mix it with roasted sweet potato or butternut squash. These combinations offer a mix of flavors and vitamins.
For a more filling meal, blend apple with peanut butter or cooked ground meat. These pairings keep your baby full and provide important nutrients for growth.
| Baby Food Combination | Nutritional Benefits |
|---|---|
| Apple + Butternut Squash | Vitamins A, C, and potassium |
| Apple + Sweet Potato | Vitamins A, C, and beta-carotene |
| Apple + Avocado | Healthy fats, vitamins C and E |
| Apple + Peanut Butter | Protein, healthy fats, and vitamin E |
Mixing apple baby food with other foods helps your baby try new tastes. This supports their health and development.
Apple Baby Food Variations and Add-Ins
Plain apple puree is great for babies, but you can make it even better. Try adding spices and herbs to change the flavor. This makes the taste more interesting and helps your baby get used to different tastes.
Spices and Herbs to Add Flavor
Spices like cinnamon, nutmeg, or ginger can make apple puree more exciting. They add a rich taste without being too strong. Herbs like mint or basil can also add a fresh, herbal flavor.
For instance, a little cinnamon or nutmeg can make apples taste sweeter. Ginger adds a nice zing. Mint or basil can cool down the apple’s tartness with their earthy taste.
| Spice/Herb | Suggested Amount (per 1 cup of apple puree) | Age Recommendation |
|---|---|---|
| Cinnamon | 1/4 teaspoon | 6 months+ |
| Nutmeg | 1/8 teaspoon | 6 months+ |
| Ginger | 1/4 teaspoon | 8 months+ |
| Mint | 1 tablespoon, finely chopped | 8 months+ |
| Basil | 1 tablespoon, finely chopped | 8 months+ |
Start with small amounts of new flavors and watch how your baby reacts. With a bit of trying, you can make many tasty apple baby food variations. These not only feed your baby but also help them discover new tastes.

Baby-Led Weaning with Apples
Apples are a great choice for babies starting solid foods through baby-led weaning. This method lets babies feed themselves whole, soft foods. It helps them learn to eat on their own and improves their motor skills.
When you start apples for baby-led weaning, safety is key. Start with soft apple pieces or thin, grated slices. As your baby gets older, you can give them bigger, raw apple slices. Always watch them closely while they eat.
- Apples can generally be introduced around 6 months of age, as long as they are deseeded and cooked until soft.
- Offer grated, shredded, or boiled apple pieces for 6-9 month old babies to help develop their oral-motor skills.
- For babies 9 months and older, you can serve matchstick-sized raw apple pieces or cooked apple slices.
- Avoid raw apple slices for younger babies, as they can pose a choking hazard due to the firm texture and slippery nature of the fruit.
Apples are a great pick for baby-led weaning. They’re sweet, full of fiber, and packed with vitamin C. This vitamin helps your baby absorb iron from plant-based foods. With the right preparation and watching them closely, you can introduce this healthy fruit to your baby.
“Apples are a fantastic finger food for babies exploring the world of solids through baby-led weaning. Just remember to start with soft-cooked pieces and gradually introduce larger, raw slices as your little one’s skills develop.”
Conclusion
Homemade apple baby food is tasty, healthy, and simple to make. It’s a great first food for babies. By making it at home, parents can give their babies the best ingredients without allergens.
Apples are full of fiber, vitamins, and antioxidants. These nutrients help babies grow and develop well. This article gives you recipes, tips, and advice on storing apple puree.
Apples are a great food for babies, starting around four months. Cooking them takes about 20 minutes on low heat. Don’t refrigerate leftover puree to avoid bacteria.
Joining groups like BabyNama WhatsApp can help too. You get quick advice from pediatricians there.
Starting your baby’s apple journey is exciting. Apples are among the world’s top fruits, with over 2,500 types. Mixing sweet and sour apples helps babies get used to different tastes.
With the right preparation, apples can be safe for your baby. They’re a great addition to their diet.
FAQ
Why should I make homemade apple baby food?
Making your own apple baby food lets you pick the ingredients. This way, you know your baby is getting only the best. Apples are full of fiber, vitamin C, and antioxidants. They’re perfect for introducing solids to your baby.
What types of apples are best for baby food?
Choose sweet, firm apples like Gala, Honeycrisp, Fuji, or Pink Lady. Stay away from tart apples. They might be too acidic for your baby’s taste.
How do I make homemade apple baby food?
First, wash, peel, and chop the apples. Then, cook them until soft using steam or boil. After, blend them into a smooth puree with a blender or food processor.
How should I store homemade apple baby food?
Store it in the fridge for up to 4 days or freeze for longer. Use airtight containers or freeze in cubes for easy use.
When can I introduce apple baby food to my baby?
Always check with your pediatrician first. They’ll tell you when your baby is ready. Usually, it’s around 4-6 months.
Can I combine apple baby food with other purees?
Yes, apple puree goes well with many other purees. Try it with butternut squash, sweet potato, avocado, or peanut butter. It makes for tasty and healthy meals.
Can I add spices or herbs to apple baby food?
Yes, adding spices like cinnamon, nutmeg, or ginger, and herbs like mint or basil, can enhance the flavor. It adds depth without being too much for your baby.
Can I offer apple as a finger food for baby-led weaning?
Yes, apples are great for baby-led weaning. Serve soft apple slices or pieces. It helps your baby practice eating on their own.
External Resources for Further Reading
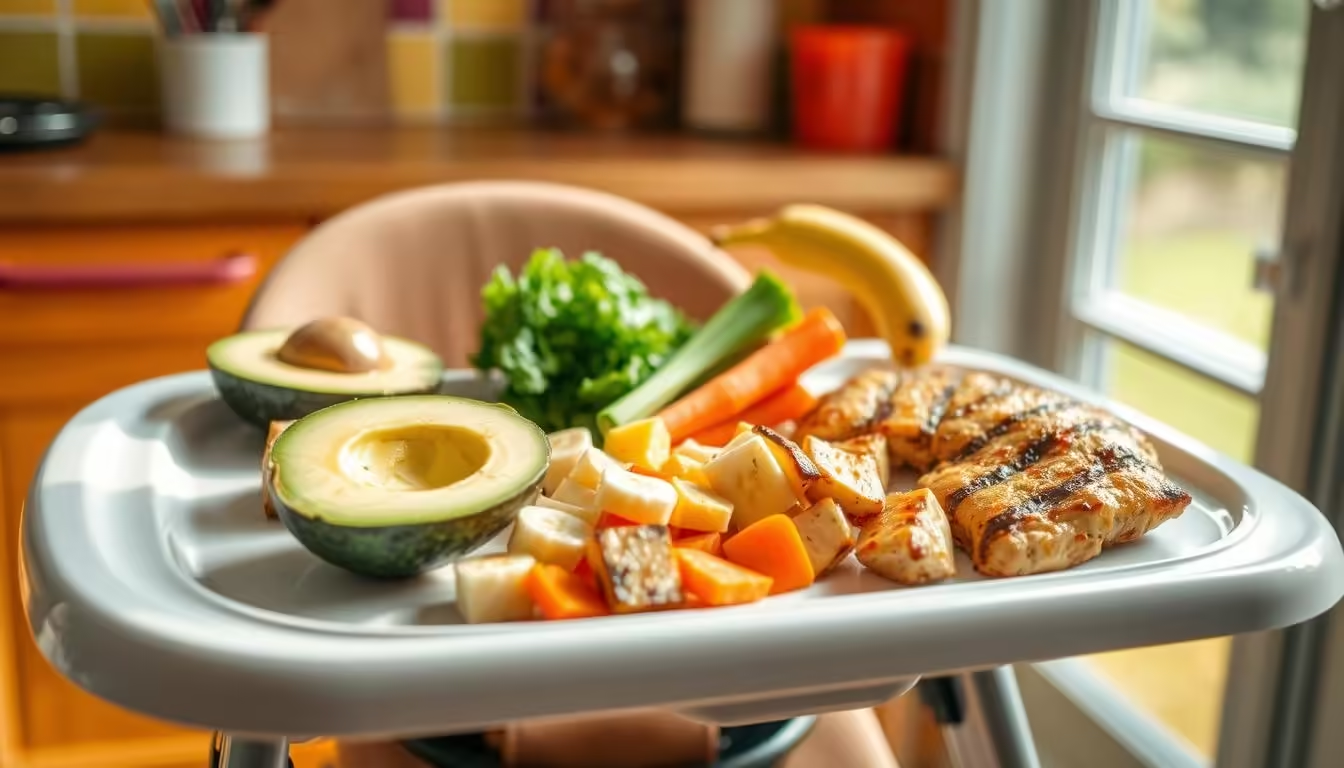
Baby Led Weaning Recipes Easy Ideas
Starting your baby’s weaning journey is both exciting and challenging. If you’re into baby-led weaning (BLW), where your baby picks their own food, you’re in the right spot. This article will share tasty and simple BLW recipes to help your baby grow and learn.
Key Takeaways
- Baby-led weaning lets babies explore food at their own pace, learning important skills.
- BLW helps babies control their eating and builds a healthier food relationship.
- BLW makes family meals easier for parents, as babies can join in.
- It’s crucial to offer a variety of finger foods full of nutrients for successful BLW.
- Being patient and watching your baby closely during BLW is key for a good experience.
Table of Contents
What is Baby-Led Weaning?
Baby-led weaning lets babies feed themselves with finger foods, not spoon-fed purees. This method helps them learn about different foods at their own pace. It also improves their fine motor skills and hand-eye coordination.
Gill Rapley and Tracey Murkett made baby-led weaning popular in 2009. Many use a mix of baby-led and traditional weaning. Always remember, breastmilk or formula should be the main food until they are one year old.
When to Start Baby-Led Weaning
Start baby-led weaning when your baby can sit up on their own and shows interest in food. This is usually around 6 months or older. Studies show BLW babies might have a lower BMI and less obesity than spoon-fed ones.
“Families using baby-led weaning may expose their infants to a wider range of foods, textures, and flavors compared to traditional weaning.”
Self-feeding in baby-led weaning boosts both gross and fine motor skills. Moms find it simple and less stressful. Research shows it can lead to healthier eating habits, like not restricting foods.
Using baby-led weaning can save money on baby foods. It’s a safe and effective way to introduce solids. There’s no higher risk of choking or nutrient deficiency than traditional weaning.
Benefits of Baby-Led Weaning
Using baby-led weaning can bring many benefits for your baby’s growth and your family’s meal times. It lets babies control how much they eat, unlike spoon-feeding purees. This can lead to a healthier food relationship later on.
It also boosts fine motor skills as babies learn to handle finger foods. This hands-on experience with different textures and shapes helps their physical growth. Plus, it makes meal times easier for parents, as there’s no need for a lot of prep or spoon-feeding.
“Current research indicates that babies who start on solids with finger foods are not more likely to choke than spoon-fed babies.”
Research shows that babies who self-feed are less likely to be picky eaters later. Introducing them to various flavors and textures early can broaden their palate. This helps them have a positive view of food.
Adopting baby-led weaning can also be a fun and engaging experience for you and your baby. They get to enjoy discovering new tastes and textures at their own pace.

Signs of Readiness for Baby-Led Weaning
Deciding when to start baby led weaning is crucial. The World Health Organization (WHO) suggests introducing solid foods at about 6 months. This is when a baby’s needs for energy and nutrients go beyond what breastmilk or formula can offer.
Here are some common signs your baby is ready for baby led weaning:
- Ability to sit up with or without support
- Good head and neck control
- Loss of the tongue-thrust reflex, which pushes food out of the mouth
- Showing interest in food by leaning forward and opening their mouth
These signs usually appear together around 6 months. Starting solids before 4 months can lead to weight gain and obesity in childhood. So, it’s wise to wait until your baby is truly ready.
When you see these readiness signs, talk to your pediatrician. They can check if your baby is ready for baby led weaning. Your doctor will guide you on the best time to start and ensure your baby’s nutritional needs are met.
Tips for Successful Baby-Led Weaning
Starting baby-led weaning can be both thrilling and scary for new parents. But with the right steps and tips, you can make it a great experience for you and your baby. Here’s what you need to know to help your baby succeed with tips for baby led weaning:
Start When Your Baby is Ready
The American Academy of Pediatrics suggests starting baby led weaning when your baby has doubled their birth weight. They should also be able to hold their head up well, show interest in food, and move food around in their mouth. Wait for these important milestones before introducing solids.
Be Patient and Offer Variety
Baby-led weaning is all about exploring and learning. Be patient as your baby learns to pick up, chew, and swallow solid foods. Give your baby a wide range of starting solids with baby led weaning to introduce them to different tastes, textures, and nutrients.
Keep a Close Eye
Always watch your baby during meals when using introducing new foods with blw. Make sure they are sitting up straight and safely strapped into a highchair. Watch for any signs of choking or gagging, which are normal as they learn to handle solid foods.
Don’t Stress About Nutrients
In the first year, solid foods are mainly for exploration and learning. Don’t worry too much about your baby’s nutrient intake at this stage. Focus on offering a variety of healthy foods and let your baby enjoy the process of self-feeding.

By following these tips, you can help your baby have a positive and successful baby led weaning experience. Enjoy the journey, be patient, and watch as your baby develops important skills and a healthy relationship with food.
When and How Often to Offer Solid Foods
Starting your baby-led weaning journey? Begin by offering solid foods once a day. Do this after your baby has had their regular breastmilk or formula. This slow start helps your baby get used to new tastes and textures.
As your baby grows more interested in solids, you can increase meals to two or three a day. The exact timing depends on your baby’s cues and readiness. Here are some general guidelines for introducing solids:
- 4 to 6 months: Start with 1 to 4 tablespoons of rice cereal, fruit, and veggies once or twice a day. Make sure they get 24 to 36 ounces of formula or breastmilk.
- 6 to 8 months: Increase to 4 to 9 tablespoons of cereal, fruit, and veggies in two to three meals. Add 1 to 6 tablespoons of meat or protein. Still, aim for 24 to 36 ounces of formula or breastmilk.
- 9 to 12 months: Offer varying amounts of grains, fruits, veggies, dairy, and proteins. Also, ensure 16 to 30 ounces of formula or breastmilk.
Always listen to your baby’s cues to adjust when and how often to offer solids. With patience and flexibility, you’ll find the right baby led weaning feeding schedule for your family.
“Around 6 months is considered the best time to start solid foods, as per recommendations from the American Academy of Pediatrics for when babies have developed the necessary digestive enzymes to absorb solid food.”
Easy First Foods for Baby-Led Weaning
Starting your baby on solid foods can seem daunting. But, some foods are perfect for baby-led weaning. They’re easy to pick up and full of nutrients. They also help your baby’s fine motor skills and hand-eye coordination.
Some great first foods for baby-led weaning include:
- Sweet potato: Soft, easy to grasp, and packed with vitamin A.
- Avocado: Creamy texture and high in healthy fats and vitamins.
- Banana: Soft, sweet, and a good source of potassium.
- Mango: Juicy, flavorful, and rich in vitamins C and A.
- Salmon: Provides omega-3s and other important nutrients.
- Apple: Crisp texture and versatile for different preparations.
- Egg: A complete protein and a common allergen to introduce early.
- Strawberry: Soft, sweet, and high in vitamin C.
- Beef: An excellent source of iron and other minerals.
- Broccoli: Soft florets that are easy to pick up and chew.
- Mashed beans: Nutrient-dense and easy to grasp.
- Zucchini: Soft, mild-tasting, and versatile for different preparations.
These foods are not just tasty and easy to handle. They also give your baby the nutrients they need to grow. By offering different textures and flavors, you help your baby develop a good relationship with food early on.

baby led weaning recipes
Embracing baby-led weaning means you have many tasty, healthy meal options for your baby. You can make everything from simple breakfasts to tasty lunches and dinners. There are endless ways to make baby-led weaning recipes.
One guide lists 7 breakfast, 7 lunch, and 7 dinner ideas for baby-led weaning. These recipes use foods like avocado, sweet potato, salmon, eggs, and many fruits and veggies.
The Breakfast Bake recipe has 1 lb of sausage, 8-10 eggs, milk, cheese, salt, and pepper. The Overnight Oats recipe needs 1 cup of oats, 1 cup of milk, 1/2 Tbsp of maple syrup, 1/4 tsp of vanilla, and cinnamon.
For lunch and dinner, try the Homemade Tuna Salad with tuna, red pepper, onion, and celery. The Deconstructed Tacos have taco meat, white rice, cheese, and tortillas. The Beef & Pork Meatloaf comes with mashed potatoes, mozzarella, and grape tomatoes.
Another source stresses the need for different textures and flavors in baby-led weaning. With over 125 foods and 45 recipes, you’ll find lots of homemade baby meals and easy baby food ideas.
“Baby-led weaning is a great way to introduce your baby to a variety of flavors and textures, and these recipes make it easy to create delicious, nutritious meals at home.”
Meal Ideas for Baby-Led Weaning
Starting your baby-led weaning journey opens up a world of tasty, healthy meals. Your baby can enjoy everything from breakfast to dinner. There are countless ways to make meals that are fun and good for your baby.
Breakfast Bliss
Begin your baby’s day with these yummy breakfast ideas:
- Hard-boiled egg with whole-grain toast and fresh fruit
- Baby cereal mixed with peanut butter and blueberries
- Three-ingredient pancakes with mashed banana and cinnamon
- Cheesy scrambled eggs paired with avocado toast
- PB-banana yogurt boats with coconut flakes
- Cinnamon-spiced ricotta and apple plate
- Simplest berry smoothie with spinach and nut butter
Lunchtime Delights
For lunch, try these baby-led weaning ideas:
- Hummus plate with soft-cooked veggies and whole-grain crackers
- Tortilla melt with shredded cheese and diced avocado
- Baby-friendly falafel with tzatziki dip and cucumber spears
- Broccoli fritters served with shredded chicken and roasted sweet potato
- Apple-cheddar mini frittata and steamed green beans
- Leftover salmon cakes with mashed butternut squash
- Savory veggie and cheese muffins with a side of fresh fruit
Delectable Dinners
End the day with these tasty dinner options:
- Mini meatballs with melted mozzarella and roasted zucchini
- Veggie pizza thin with pesto, cherry tomatoes, and spinach
- Shredded chicken quesadilla with diced avocado and salsa
- Easy chicken-sweet potato nuggets with steamed broccoli
- Cheesy pasta with peas and shredded carrots
- Quick rice and beans with sautéed spinach and diced mango
- Slow-cooked pork and coleslaw on whole-grain buns
The secret to baby-led weaning is to offer a variety of healthy foods. Let your baby explore and find their favorite foods at their own pace. Enjoy the journey!
Foods to Avoid with Baby-Led Weaning
When starting solids with baby-led weaning, watch out for certain foods. Honey, added sugars, and too much salt can harm your baby’s stomach and growth.
Also, avoid hard, raw, or crunchy foods that could choke your baby. Always watch your baby while they eat to keep them safe.
- Foods to Avoid:
- Honey
- Added sugars
- Large amounts of salt
- Hard, raw, or crunchy foods (choking hazards)
| Unsafe Foods for Babies | Potential Choking Hazards |
|---|---|
|
|
For baby-led weaning to work, offer soft, easy-to-grasp foods. Always watch your baby while they eat. This way, you ensure a safe and fun eating time for your baby.
Combining Baby-Led Weaning with Purees
You don’t have to pick between baby-led weaning (BLW) and purees when introducing solid foods. Many parents mix both, letting their baby try different textures and tastes at their own speed.
Begin with stage 1 purees for babies 4-6 months old, offering 1-2 oz per serving. As they grow, move to stage 2 purees and soft foods by 6-8 months. Serve 2-4 oz of purees and small strips of soft foods.
By 8-10 months, switch to stage 3 purees and more solid foods, serving 4 oz of purees and smaller solid pieces. By 10-12 months, most babies drop purees and focus on solid foods, eating as much as they want.
| Stage | Age | Puree Serving Size | Solid Food Serving |
|---|---|---|---|
| 1 | 4-6 months | 1-2 oz | – |
| 2 | 6-8 months | 2-4 oz | Small strips |
| 3 | 8-10 months | 4 oz | Smaller pieces |
| Solid Foods | 10-12 months | – | Follow appetite |
Mixing blw and purees introduces your baby to various textures and tastes. Offer purees with finger foods, letting them explore and try new things. This method also makes the switch from purees to transitioning from purees to blw easier.
Every baby is different, and choosing both methods depends on your child’s likes and readiness. Focus on a balanced diet, considering your baby’s needs and letting them lead the way.

Choking vs. Gagging
Understanding the difference between choking and gagging is key in baby-led weaning. Gagging is a natural reflex that helps babies handle different foods. Choking, however, is a serious issue that needs quick action.
Gagging is a protective reflex that helps prevent choking. It makes the throat contract, pushing food out. Babies usually outgrow this reflex after trying various foods. Gagging teaches them to take smaller bites and avoid choking.
Choking, on the other hand, blocks the airway, stopping breathing. It happens in about 13% to 35% of babies. But, the risk is the same whether they’re spoon-fed or eating on their own.
What to Do If Your Baby Chokes
If your baby chokes, act fast. Start with 5 back blows between the shoulder blades. If that doesn’t work, do 5 chest thrusts in the middle of the chest. Keep doing these steps until the object is out or the baby loses consciousness. Then, call 911 right away.
Learning CPR can prepare you for choking emergencies. Knowing the difference between choking and gagging makes baby-led weaning safer.
Conclusion
Baby-led weaning (BLW) is a great way to introduce solid foods to babies. It helps them learn to feed themselves and develop good eating habits. This method also boosts their fine motor skills and self-confidence.
While it’s crucial to watch out for choking hazards, the tips in this article can help. They guide parents in making BLW safe and fun for their babies. This way, babies can enjoy a variety of tasty and healthy foods.
Starting BLW when your baby is ready is key. Offer a variety of finger foods and be patient as they learn. Following these tips can help your baby develop healthy eating habits for life.
Research shows BLW can be safe and effective if parents are careful. It’s not about sticking strictly to BLW. The goal is to make sure it fits your baby’s needs and preferences.
FAQ
What is baby-led weaning?
Baby-led weaning means letting babies feed themselves with finger foods. This method lets them explore food at their own pace. It helps them develop fine motor skills and hand-eye coordination.
What are the benefits of baby-led weaning?
Baby-led weaning can help babies learn to eat well. It can also improve their fine motor skills. Plus, it makes mealtime easier for parents.
How do I know if my baby is ready for baby-led weaning?
Look for signs like sitting up and having good head control. Your baby should also show interest in food. Always check with a pediatrician to make sure your baby is ready.
What tips can help me with successful baby-led weaning?
Start when your baby is truly ready. Be patient as they learn. Offer a variety of foods and watch them closely during meals. Don’t worry too much about nutrients before they’re 1 year old.
When and how often should I offer solid foods with baby-led weaning?
Start with one meal a day after breastmilk or formula. As they get more comfortable, you can add more meals. The timing depends on your baby’s cues and readiness.
What are some easy and nutritious first foods for baby-led weaning?
Sweet potato, avocado, and banana are great first foods. So are mango, salmon, and apple. Egg, strawberry, beef, broccoli, mashed beans, and zucchini are also good. These foods are soft and full of nutrients.
Can I combine baby-led weaning with the use of purees?
Yes, you can mix baby-led weaning with purees. Some parents start with purees and then add finger foods. It’s up to your baby’s preferences and readiness.
What’s the difference between choking and gagging in baby-led weaning?
Gagging is normal and helps babies learn about food. Choking is serious and needs immediate action. Knowing the difference is crucial. Take a CPR class to be ready.
External Resources for Further Reading

When Do Toddlers Start Daycare? A Parent’s Guide
Deciding when to start your toddler in daycare is both thrilling and nerve-wracking. In the U.S., daycare centers can take babies as young as 6 weeks. Yet, many parents prefer to wait a bit longer. In fact, 32% of American parents choose center-based daycare for their babies.
Choosing the right time for toddler daycare depends on several things. These include your personal views, budget, and other child care options. Some parents might wait until their child is a bit older. Research shows that starting daycare at 6 weeks can help with secure attachments. But, the best age for preschool age daycare really depends on your child’s growth and your family’s situation.
Key Takeaways
- Many child care centers accept infants as young as 6 weeks old for daycare for young children.
- 32% of American parents who require regular child care use center-based toddler daycare.
- The “ideal age” for when do toddlers start daycare can vary depending on your child’s development and your family’s needs.
- Research suggests that starting daycare for young children as early as 6 weeks can offer benefits, but waiting a bit longer may also be beneficial.
- Factors like parental leave, finances, and alternative child care options can influence the decision of when do toddlers start daycare.
Table of Contents
What is Toddler Daycare?
Toddler daycare is a childcare option for kids aged 12 months to 3 years. It offers supervision, education, and fun activities. There are different types, each with its own benefits and things to think about for parents.
Definition of Toddler Daycare
The first source says toddler daycare can be different. It can be child care centers, in-home daycares, or nannies. Each has its own good points and things to consider.
Types of Daycare for Toddlers
- Child care centers: These places care for groups of kids, divided by age.
- In-home daycares: These are homes where providers care for kids in a cozy setting.
- Nannies: Nannies watch kids at home, giving them personal care.
| Type of Daycare | Benefits | Drawbacks |
|---|---|---|
| Child care centers |
|
|
| In-home daycares |
|
|
| Nannies |
|
|
Parents should think about the pros and cons of each daycare type. This helps find the best fit for their family.

When is the Right Time to Start Toddler Daycare?
Deciding when to start your toddler in daycare is tough for many parents. Some centers take infants at 6 weeks, but experts say wait a bit. This lets your baby bond, heal, and adjust to a new schedule.
But, for working parents, waiting isn’t always possible. Starting daycare early, like 6 weeks, can be good. It offers structured learning and chances to grow.
Finding the right age for toddler daycare varies by family. It depends on your situation, your child’s needs, and what you prefer. The goal is to choose what’s best for your toddler and family.
Start looking and planning for when to start toddler daycare early. Quality child care spots fill up fast. Begin your search and apply early, often in spring or summer for a fall start.
| Typical Enrollment Seasons | Factors to Consider |
|---|---|
|
|
By thinking about these points and planning early, you boost your chances. You’ll find a top-notch daycare for your toddler.

Signs Your Toddler is Ready for Daycare
Wondering when to start your toddler in daycare is normal. Every child grows at their own pace. Yet, some signs show when they’re ready for daycare. Knowing these signs helps make the transition easier and ensures a good daycare experience.
Developmental Milestones for Daycare Readiness
One key sign is when your toddler can clearly tell you what they need. By 18 months, they should use simple words or sentences. This helps them talk to caregivers and friends.
Another sign is better fine motor skills. Toddlers are usually ready for daycare between 18 and 30 months. They can hold crayons or feed themselves with a spoon.
Also, around 18 months, toddlers start to play with others. They play side-by-side but not together. By 2-3 years, they can follow simple directions. This is important for daycare.
Separation Anxiety and How to Cope
Separation anxiety is a big challenge for parents. Toddlers often feel anxious when parents leave between 12 and 18 months. But, this usually gets better between 18 to 24 months as they become more confident.
To help with separation anxiety, the first source suggests that babies thrive in daycare with lots of one-on-one attention from a single caregiver, like in-home daycare. It’s also important to build a strong bond with caregivers, especially for babies under 18 months. The second source recommends practicing short separations before preschool to help a child get used to being away from home.
Understanding your toddler’s growth and helping with separation anxiety makes daycare easier. This way, your child can enjoy the new world of daycare.

Benefits of Starting Daycare for Toddlers
Putting your toddler in daycare can be very beneficial. It helps with their social, emotional, cognitive, and language skills. Studies show that good daycare can make a child ready for school and happy.
Social and Emotional Development
A 2017 study found that toddlers in daycare do better socially and emotionally. They become more confident and friendly, no matter how many days they go. It’s the quality of care that matters, not how often they go.
Cognitive and Language Development
Daycare also boosts toddlers’ thinking and speaking skills. By age five, most of a child’s brain is already formed. Daycare gives them a chance to learn and grow, preparing them for school.
| Age Range | Daycare Benefits | Potential Drawbacks |
|---|---|---|
| 0-12 months | None | Damage to cognitive skills, worse behavior in school |
| 12-24 months | Slight cognitive skill improvement | Larger negative effects on later behavior in school |
| 24-36 months | Beneficial for later cognitive skills | Children more likely to act out and be angry upon reaching school |
| 3+ years | Boost in cognitive and social skills | Few downsides |
The stats show daycare can really help toddlers. But, it’s important to think about when and how long to start. This helps your child grow in the best way.

Choosing the Right Daycare for Your Toddler
Choosing the right daycare for your toddler can be tough. But, by looking at key factors, you can find a daycare that fits your child’s needs and your family’s wishes. When choosing a toddler daycare, remember a few important things.
Factors to Consider When Selecting a Daycare
- Staff Qualifications: Find a daycare with staff who are experienced and passionate about early childhood education.
- Caregiver-to-Child Ratio: Make sure the daycare has a good staff-to-child ratio for your toddler to get the attention they need.
- Daily Structure and Curriculum: Check the daycare’s daily schedule and educational approach to see if it meets your child’s needs.
- Licensing and Accreditation: Choose daycares that are licensed and accredited. This shows they follow safety and quality standards.
- Facility and Environment: Look at the daycare’s physical space, cleanliness, and atmosphere. It should be safe, nurturing, and stimulating.
- Communication and Collaboration: Find a daycare that values open communication and works well with parents.
- Cost and Availability: Consider the tuition fees and if there are spots available. These can affect your family’s childcare choices.
By carefully evaluating these factors when selecting the best daycare for your toddler, you can make sure your child gets the quality care and early learning they need.
“The type of care matters less than the quality of care. What’s most important is a healthy, safe, consistent, and emotionally supportive environment.”
Preparing Your Toddler for the First Day of Daycare
Starting daycare can be both thrilling and scary for your toddler. But with the right steps, you can make it easier for them. Here are some tips to help your toddler get ready for their first day:
Creating a Routine and Easing the Transition
Having a regular morning routine can really help your toddler adjust to daycare. Start practicing this routine a few weeks before, including getting dressed, eating breakfast, and leaving the house. This makes them feel more at ease and familiar with the process.
It’s also smart to visit the daycare with your toddler before the first day. This lets them get to know the place, meet the teachers, and understand the layout. It can help reduce their anxiety and make the first day less scary.
- Talk about daycare in a positive way, emphasizing the fun activities and new friends they’ll make
- Practice short separations at home to help your toddler feel more secure when you leave
- Develop a special goodbye routine, such as a hug, high-five, or secret handshake, to provide comfort and reassurance
- Encourage independence in self-care tasks like putting on shoes or washing hands to build their confidence
Remember, every child is unique, and it might take time for your toddler to adjust. Stay positive, be patient, and work closely with the daycare staff for a smooth transition.
when do toddlers start daycare
Deciding when to start toddlers in daycare is a big choice for parents. Some centers take infants as young as 6 weeks. But many parents wait until their toddlers are a bit older.
The average age for toddlers to start daycare is around 12 to 24 months. This age range is often seen as the best time.
Starting daycare at 12 months helps with emotional growth. Toddlers start forming strong bonds with their caregivers. They also learn important social skills like sharing and talking effectively.
Being in daycare early can also help toddlers fight off sicknesses better. This is because they get exposed to different germs.
However, starting daycare too early can be tough. Toddlers might feel anxious about leaving their parents. They might also struggle with forming a secure attachment to their caregivers.
Parents need to think about the pros and cons before deciding. The right time for daycare depends on the child’s emotional and social readiness. It also depends on other childcare options and the parents’ work and personal lives.
By considering these factors, parents can make a smooth transition. This ensures a positive daycare experience for their child.
“Starting daycare between the ages of 2 and 3 can enhance social skills, emotional development, and early learning experiences.”
Preparing for the first day of daycare is crucial. It’s important to create a supportive environment for the child. This can include talking positively about daycare, reading picture books, and visiting the center before the start date.
The age when toddlers typically start daycare can vary. But finding the right balance between the child’s needs and the family’s situation is key. By focusing on the child’s well-being and making a smooth transition, parents can ensure a successful daycare experience.
Transitioning from Home to Daycare
Switching your toddler from home to daycare can be tough for both of you. But, with the right steps, it can be a smooth and positive change. Here are some tips to help your toddler adjust to daycare:
- Talk about preschool ahead of time. Start talking about the change with your toddler. Share the fun new experiences and friends they’ll make.
- Visit the daycare together. Go to the daycare center before the first day. Let your child explore and meet the caregivers.
- Establish a consistent morning routine. Make a routine for mornings. This will help your child feel secure and know what to expect.
- Practice short separations. Start with short times away, like a babysitter for a few hours. This helps your child get used to being away from you.
On the first day, stay positive and calm. Your child will notice your mood. Let them bring a favorite toy or blanket for comfort. After the first day, celebrate their small wins and be patient as they adjust.
| Statistic | Value |
|---|---|
| Percentage of children aged 3 or younger in childcare | 53% |
| Average age to start daycare | 12 months |
| Percentage of children in center-based daycare | 73% |
| Average annual cost of daycare | $9,000 – $9,600 |
By following these steps and staying positive, you can help your toddler smoothly transition to daycare. This will prepare them for a fulfilling and enriching educational experience.
Dealing with Separation Anxiety
Starting daycare can be both exciting and sad for toddlers and their parents. Toddlers may feel scared or upset when they’re away from their loved ones. This feeling is common and can start as early as 6 months old.
Toddlers might cling to their caregivers, throw tantrums, or resist leaving. They might also feel scared or restless when they’re apart. These feelings usually go away when their caregiver is back, but they can last a long time.
To help cope with separation anxiety for toddlers starting daycare, have a consistent drop-off routine. Create a special goodbye ritual that your toddler looks forward to. Giving your child lots of love and attention during this time can help a lot. Remember, your child will feel your emotions, so stay calm and positive.
If your toddler’s anxiety is really affecting their daycare experience, get help from a child psychologist. They can offer strategies to help your child adjust. With the right support, you can handle toddler separation anxiety for daycare and help your child feel better.
Fostering Independence in Toddlers
When your toddler starts daycare, it’s key to help them grow independent. Studies show kids who learn to do things on their own feel more confident and capable. This independence helps them solve problems better and think critically.
Setting up a tidy play area is a great way to encourage independence. It makes it easier for kids to find and put away their toys. In daycare, giving kids choices and letting them explore helps them grow independent.
Montessori schools focus on letting kids learn at their own pace. This approach helps kids become more independent. Giving kids simple chores teaches them about responsibility and teamwork.
Good preschools offer choices and encourage kids to take the lead. This helps kids learn to make decisions and solve problems on their own. It’s important to praise their efforts, not just their results, to boost their confidence.
Parents often find it hard to know when to help and when to let go. It’s important to let kids try things on their own to build their confidence. Gradually giving them more independence helps them become more self-sufficient.
Challenging kids in a way that’s just right for them helps them learn to handle frustration. Activities like puzzles and crafts help kids focus and build self-esteem.
Letting kids play on their own is crucial for their creativity and problem-solving skills. Positive feedback and encouragement can help them feel good about themselves.
Quality childcare is essential for helping kids become independent. A structured and supportive environment helps kids feel secure and learn to do things on their own.
Recognizing and celebrating kids’ small achievements boosts their confidence. Giving them simple tasks, like picking up toys, helps them feel capable and proud of themselves.
By giving toddlers chances to learn how to encourage independence in toddlers for daycare and developing self-care skills for toddlers starting daycare, we help them grow into confident and self-reliant individuals.
“Fostering independence in children is crucial for their growth and development. It helps them become confident, capable, and self-reliant individuals.”
The Role of Parents in Toddler Daycare
When your toddler starts daycare, your role is key in their growth. How parents can support toddlers in daycare and parent involvement in toddler daycare are vital. They help make sure your child and you have a great experience.
Being positive and calm is crucial. Your toddler will feel your emotions. So, show confidence and reassurance. Celebrate small wins and be patient as they get used to the new place.
- Follow up with your toddler after the first day of daycare to discuss their experience and address any concerns they may have.
- Collaborate with the daycare staff to understand your child’s progress and any areas where they may need additional support.
- Encourage your toddler to share their experiences and feelings about daycare, fostering open communication and understanding.
Daycare centers often have resources for parents. They might have events, workshops, or help finding local services. Use these chances to support your toddler’s development and work well with the daycare.
| Percentage of Toddlers Starting Daycare at 6 Months Old | Percentage of Toddlers Starting Daycare Between 6-12 Months Old | Percentage of Toddlers Starting Daycare After 1 Year Old |
|---|---|---|
| 30% | 50% | 20% |
Being involved in your toddler’s daycare helps them adjust smoothly. It also helps their social, emotional, and cognitive development. Your support benefits your child and strengthens your partnership with the daycare team.
“The daycare staff have been amazing in helping my toddler adjust to the new environment. Their patience and dedication have made all the difference.”
Cost Considerations for Toddler Daycare
When looking at the average cost of toddler daycare, parents face many factors. Child care centers are often cheaper than nannies. But, prices change based on where you live, the type of care, and your child’s age.
The average monthly cost for center-based toddler child care in the U.S. is $1,096. Infant care costs about $1,324 a month. But, in places like Washington D.C., Massachusetts, and New York, costs can go up to $1,500 or more.
In states like Mississippi, Alabama, and South Carolina, toddler daycare costs can be as low as $800 per month. Some in-home providers offer part-time care, which can be more affordable for families.
Quality childcare centers have a low staff-to-infant ratio. This ensures babies get enough attention. But, it also means higher costs for the center.
Families might get help with the average cost of toddler daycare through tax credits. There are also special programs for Native Hawaiian, Native Alaskan, and American Indian families.
There are many factors that affect daycare costs for toddlers. Parents should look around and compare to find the best option for their budget and needs.
“Childcare expenses can surpass housing, food, or college tuition expenses for many families in the United States.”
Daycare vs. Nanny: Pros and Cons
Choosing childcare for your toddler is a big decision. You might consider daycare or a nanny. Each option has its own benefits and drawbacks. The best choice depends on your family’s needs and what you prefer.
Daycare for Toddlers
Pros:
- Consistent care with backup caregivers
- Chance to make friends and develop social skills
- Structured environment with skilled staff
- Generally cheaper than a nanny
- Helps build a strong immune system
Cons:
- More chance of getting sick from other kids
- Less personal attention than a nanny
- Can feel more like a school than home
Nanny for Toddlers
Pros:
- Personal care tailored to your child’s needs
- Flexible hours and off-hours care
- Help with household chores too
- Intimate setting compared to daycare
Cons:
- More expensive than daycare
- No backup caregivers when the nanny is out
- Less chance to make friends
- Can be less reliable
The choice between daycare and a nanny depends on your family’s budget and schedule. Think about what’s best for your child and your family’s lifestyle. It’s important to weigh the pros and cons carefully.
| Metric | Daycare | Nanny |
|---|---|---|
| Average Weekly Cost | $321 (Daycare Center) $230 (Family Care Center) | $766 |
| Social Interaction | More chances to make friends and learn social skills | More personal attention but less group interaction |
| Caregiver to Child Ratio | Higher than nanny care | One-on-one care |
| Backup Caregivers | Available for emergencies or teacher absences | No built-in backup |
Choosing between daycare and a nanny is not easy. Think about what’s best for your family. This way, you can make a choice that will give your toddler the best care.
Fostering a Positive Daycare Experience
It’s very important to make sure your toddler has a good time at daycare. Building strong bonds with the daycare staff is key. This helps create a caring place where your child can grow and do well.
Building Relationships with Daycare Staff
Get to know the people who will take care of your toddler. Say hello, ask about their teaching style, and tell them about your child’s special needs. This way, the staff can really understand and meet your child’s needs.
Also, help your child talk to the daycare staff. Encourage them to share their thoughts and feelings. This makes your child feel more at ease and builds a strong connection with the teachers.
Don’t just drop off your child and go. Be involved in their daycare life. Go to parent-teacher meetings, help out at events, and keep up with your child’s progress. Showing you care shows the staff you value your child’s happiness and growth.
“Positive relationships between children and their caregivers are the foundation for healthy social-emotional development.” – National Association for the Education of Young Children
By focusing on the bond between your toddler and the daycare staff, you help create a caring space. This is where your child can have a great daycare experience.
Conclusion
Deciding when to start a toddler in daycare depends on many things. These include your family’s needs, your child’s readiness, and the quality of care nearby. Many centers take infants from 6 weeks, but some parents wait longer. This allows the child to adjust and form strong bonds.
The quality of daycare and the relationships with caregivers are crucial. They help your toddler grow and learn during a key time. Preparing your child and yourself for daycare can make the transition smooth. This sets a good foundation for your toddler’s future growth and learning.
Key points about starting toddlers in daycare include the average maternity leave and the best time to start childcare. There are various daycare options, and it’s important to consider separation anxiety. Establishing routines and strong bonds with caregivers is also vital. By making an informed decision, you can support your toddler’s development every step of the way.
FAQ
When do toddlers typically start daycare?
Many child care centers start accepting infants at 6 weeks old. But, parents often wait a bit longer. This allows the baby to bond and adjust to a new routine.
The best time to start daycare is early, like 6 weeks old. This helps with structured learning and early programs. But, the decision depends on many factors like parental leave and finances.
What are the signs that a toddler is ready for daycare?
Babies do well in daycare with one-on-one care from a single caregiver. This is especially true for babies 18 months and younger. Continuity of care is key at this stage.
Practicing short separations before preschool helps a child get used to being away from home.
What are the benefits of starting toddlers in daycare?
A 2017 study found that young children in daycare showed better social skills a year later. This was true even if they only went a few days a week.
Daycare also boosts cognitive and language skills. By age five, 90% of a child’s brain is developed. This makes early years crucial for learning.
What factors should parents consider when choosing a toddler daycare?
Look for staff qualifications and the ratio of infants to caregivers. Also, consider the daily structure, hours, and licensing. The cost and availability of space are important too.
Quality matters more than the type of care. A healthy, safe, and supportive environment is key for development.
How can parents prepare their toddler for the first day of daycare?
Talk about daycare in advance and visit the school together. Establish a morning routine and encourage independence. Short separations and a special goodbye ritual help ease the transition.
What are the cost considerations for toddler daycare?
Child care centers are often more affordable than nannies. Some in-home providers offer part-time care, which can be cheaper. But, costs vary by location, type of care, and age.
It’s important to research and compare options in your area.
What are the key differences between daycare and nanny care for toddlers?
Child care centers offer structure and social opportunities. They are open even if a teacher is sick. But, they may have more illness risks.
In-home daycare feels more home-like but may lack structure. Hiring a nanny provides individual attention but is usually the most expensive option.
How can parents foster a positive daycare experience for their toddler?
Continuity of care and attachments with caregivers are crucial. A quality caregiver is sensitive to a baby’s needs and understands child development. Building relationships with daycare staff supports your child’s transition and experience.
External Resources for Further Reading
