
12 Breakfast Recipe Ideas for 1-Year-Olds
Feeding a 1-year-old can be fun, nutritious, and surprisingly creative. Below are 12 easy, baby-friendly breakfast recipes and variations that balance flavor, texture, and safety. If you want more general options and tips, check this helpful roundup of breakfast ideas for 1-year-old to spark additional meal planning inspiration.
General safety and serving notes
- Always supervise during meals and offer age-appropriate textures to reduce choking risk.
- Cut food into small, manageable pieces and avoid hard whole nuts, large grapes, or unmodified raw carrots.
- Introduce one new food at a time to watch for allergies.
- Offer water with meals; whole milk or breastmilk can still be a main drink at this age depending on your pediatrician’s guidance.
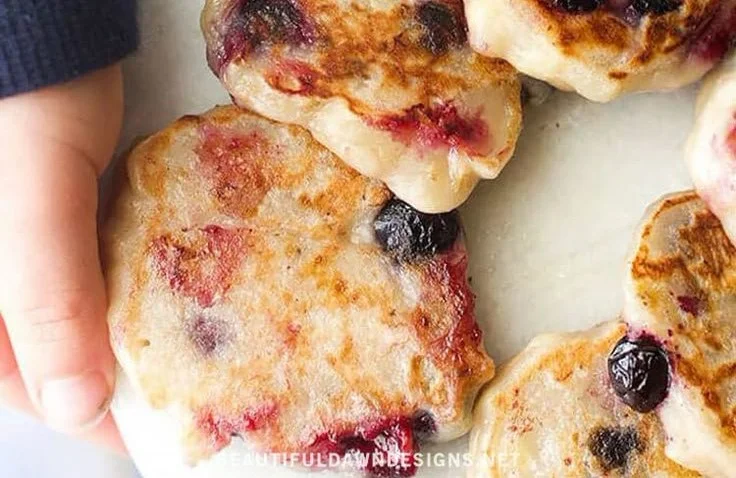
1. Banana Oat Pancake Bites
- Ingredients: 1 ripe banana, 1 egg, 3 tbsp oats, pinch cinnamon.
- Method: Mash banana, whisk in egg and oats, cook small dollops on a nonstick skillet until set, cool and cut into strips.
- Tip: Soft texture is easy for little hands and gums.
Gentle & Safe Feeding Tools Parents Trust
These are popular, parent-approved items that make this easier and less stressful.
Grownsy Baby Food Maker
Makes smooth purees fast and saves cleanup time. Check Price on Amazon
Squeeze Station for Homemade Baby Food
Perfect for storing meals safely in the fridge or freezer. See on Amazon
Glass Baby Food Storage Jars
Gentle on gums and easy for first feeds. View on Amazon
2. Soft Scrambled Eggs with Spinach
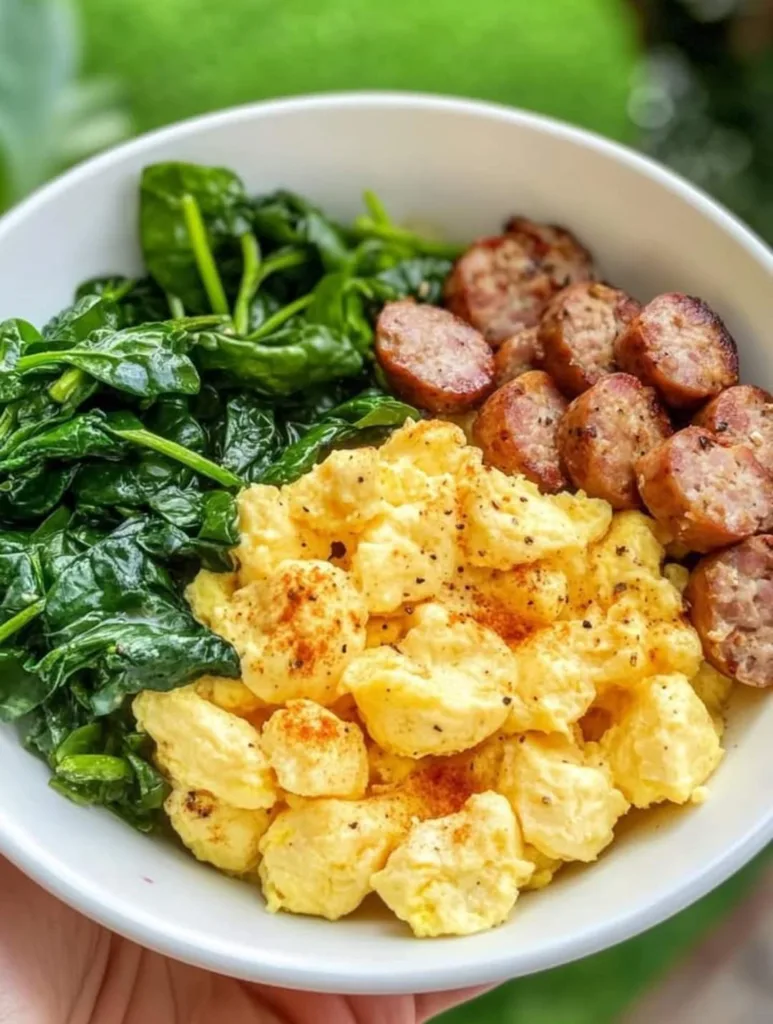
- Ingredients: 1 egg, splash of milk, finely chopped cooked spinach.
- Method: Whisk egg and milk, cook gently stirring to keep curds soft. Stir in spinach just before finishing.
- Tip: Serve in small pieces; ensure eggs are fully cooked.
3. Yogurt and Fruit Mash
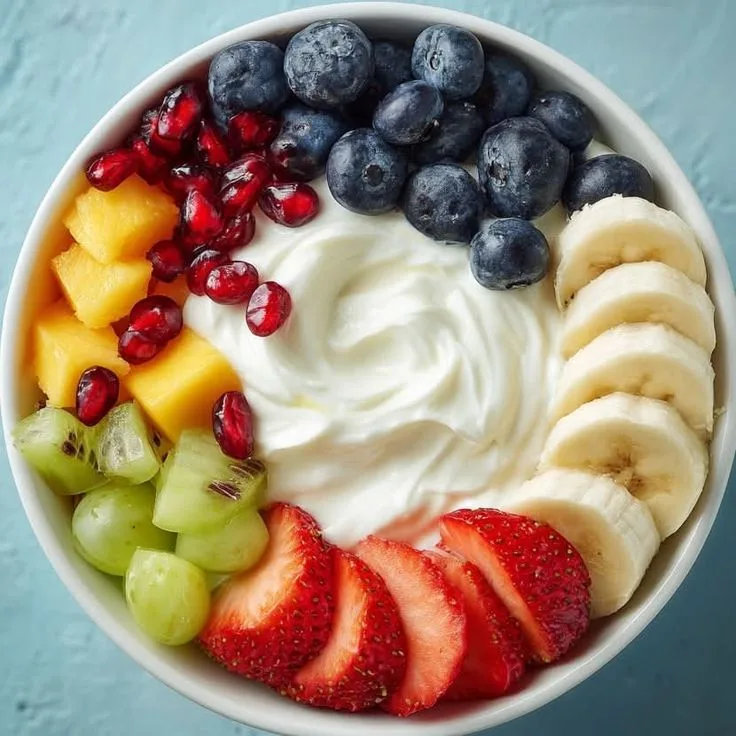
- Ingredients: Plain full-fat yogurt, mashed berries or soft pear.
- Method: Stir mashed fruit into yogurt; avoid added sugars.
- Tip: Use unsweetened yogurt and offer in a small bowl for spoon-feeding.
4. Mini Whole-Grain Waffles

- Ingredients: Whole-grain waffle batter or frozen whole-grain waffles.
- Method: Toast lightly and cut into sticks for easy grasping.
- Tip: Top with mashed banana or a thin smear of nut butter if no allergy history.
5. Avocado Egg Salad on Soft Toast
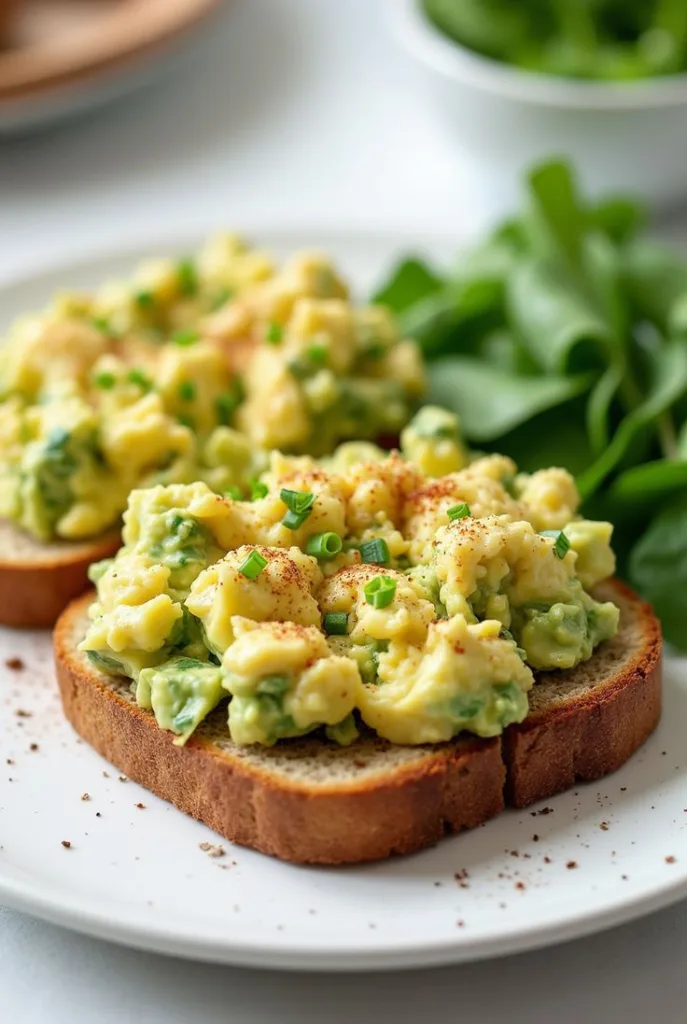
- Ingredients: 1 hard-boiled egg, 1/4 ripe avocado, small piece of soft whole-grain toast.
- Method: Mash egg and avocado together and spread on toast cut into strips.
- Tip: For a full recipe and variations suitable for babies, see this avocado egg salad recipe for babies.
6. Cottage Cheese and Peach Cubes
- Ingredients: Full-fat cottage cheese, soft ripe peach cut into tiny pieces.
- Method: Spoon cottage cheese and top with small peach cubes.
- Tip: Cottage cheese is high in protein and easy to chew.
Gentle & Safe Feeding Tools Parents Trust
These are popular, parent-approved items that make this easier and less stressful.
Grownsy Baby Food Maker
Makes smooth purees fast and saves cleanup time. Check Price on Amazon
Squeeze Station for Homemade Baby Food
Perfect for storing meals safely in the fridge or freezer. See on Amazon
Glass Baby Food Storage Jars
Gentle on gums and easy for first feeds. View on Amazon
7. Baked Apple Oat Cups
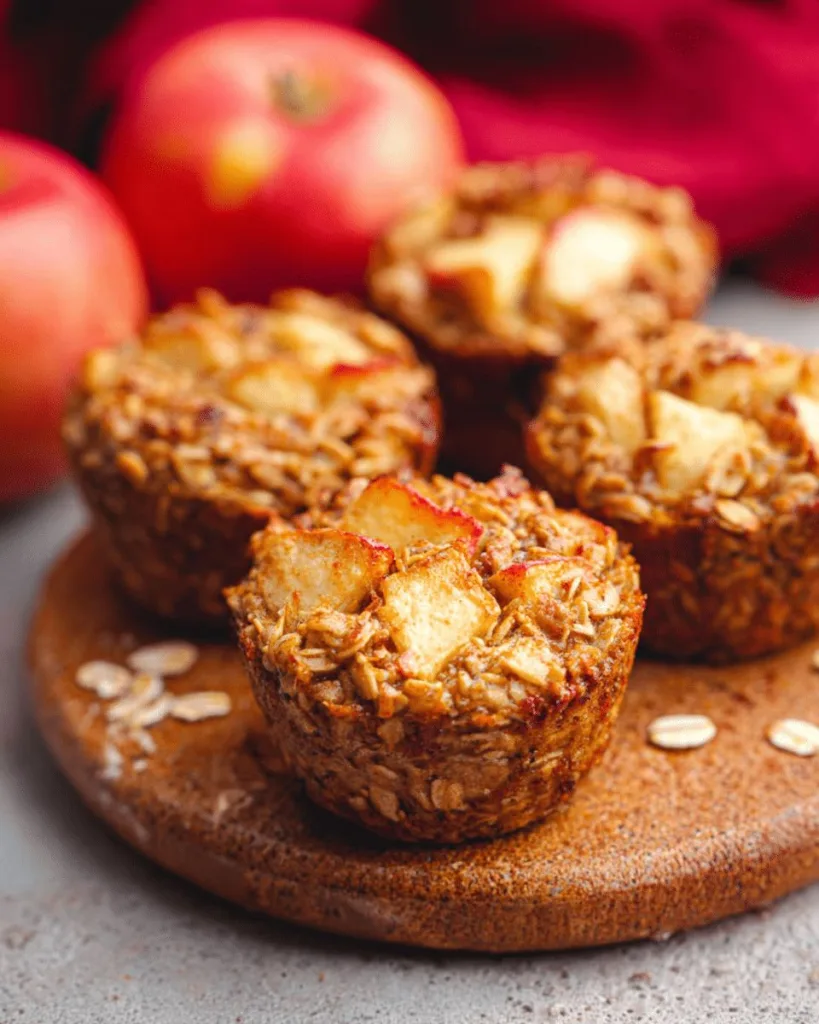
- Ingredients: 1 cup oats, 1 grated apple, 1 egg, cinnamon.
- Method: Mix and spoon into mini muffin tins; bake until set. Cool and serve bite-sized.
- Tip: These freeze well — thaw and reheat briefly.
8. Sweet Potato Mash with a Dollop of Yogurt

- Ingredients: Cooked sweet potato, plain yogurt.
- Method: Mash sweet potato and stir in a small spoon of yogurt to add creaminess.
- Tip: Serve warm but not hot; sweet potato is nutrient-dense and filling.
9. Cottage Pancake (Soufflé-style)
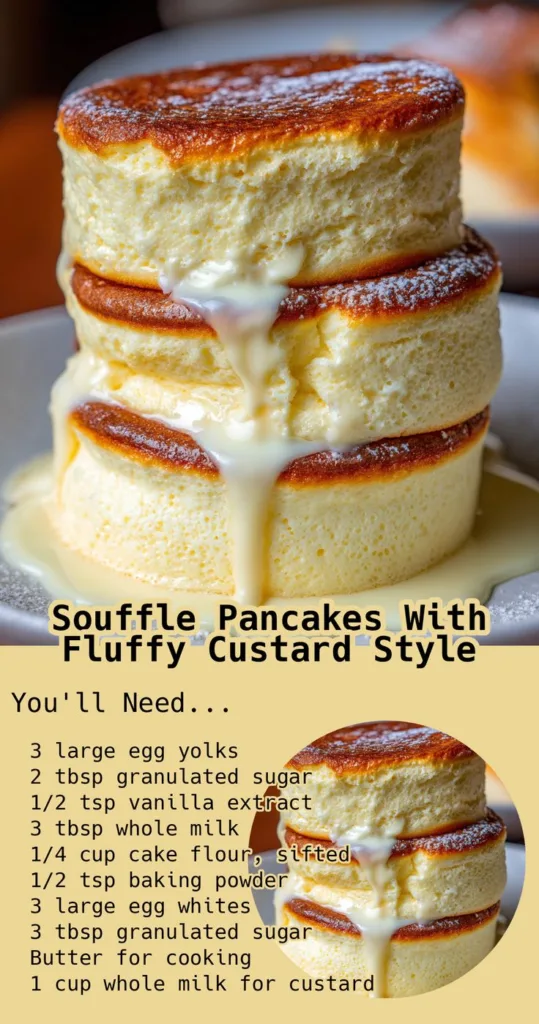
- Ingredients: 1 egg yolk + 1 egg white (whipped), mashed banana, small spoon flour.
- Method: Fold whipped white into banana and yolk mix; cook gentle pancakes for fluffy texture.
- Tip: Light, airy texture is easy to gum and swallow.
10. Veggie and Cheese Muffin
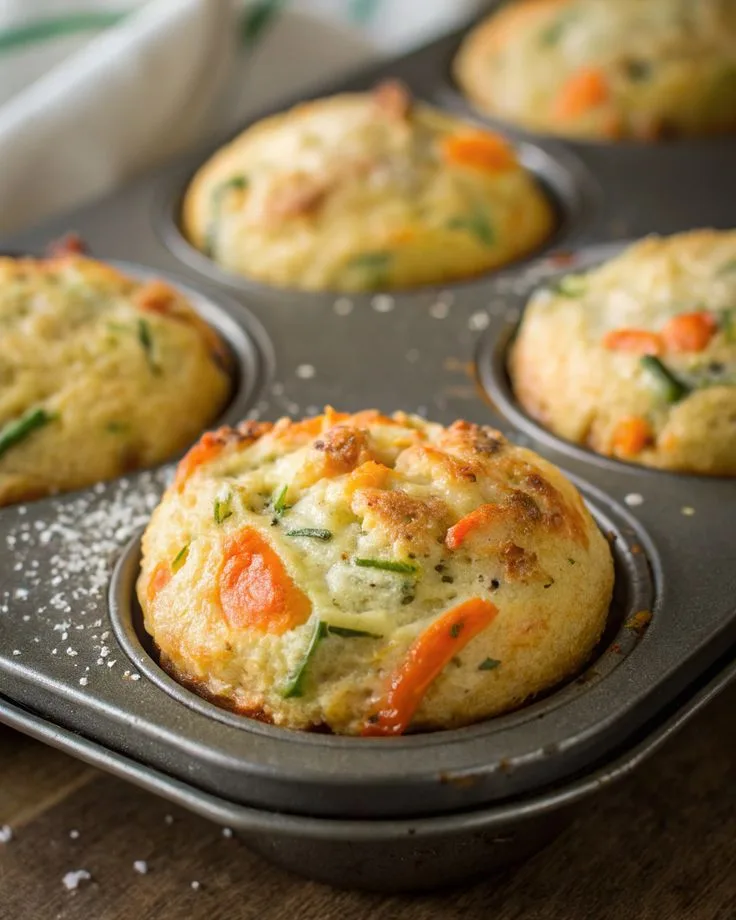
- Ingredients: Finely shredded zucchini or carrot, grated mild cheese, egg, a bit of flour.
- Method: Mix and bake in mini muffin tins; cool and serve small pieces.
- Tip: Keep vegetable shreds small and soft-cooked before baking if needed.
11. Pear and Ricotta Toast

- Ingredients: Soft whole-grain bread, ricotta cheese, thinly sliced ripe pear.
- Method: Lightly toast, spread ricotta, and top with very thin pear slices.
- Tip: Cut into fingers and remove crusts if your child prefers.
12. Soft Fruit and Quinoa Breakfast Bowl
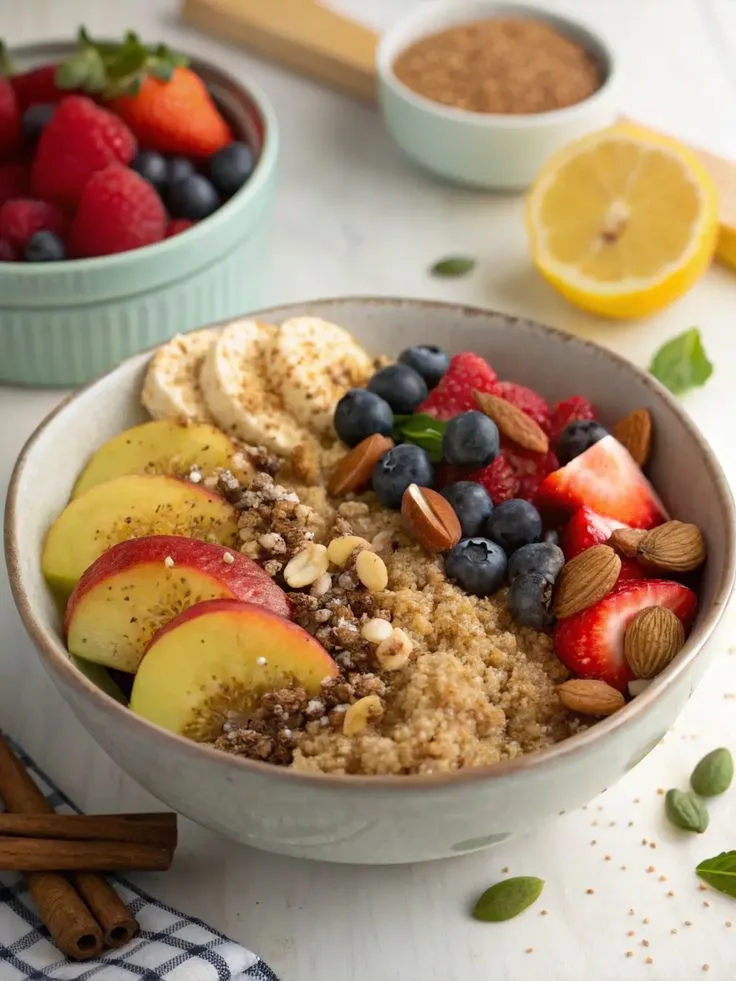
- Ingredients: Cooked quinoa, mashed banana or stewed apple, little milk or yogurt.
- Method: Mix warm quinoa with fruit and a splash of milk/yogurt until creamy.
- Tip: Quinoa adds protein and texture without being hard.
Meal prep and variation ideas
- Double or triple batches of pancakes, muffins, and baked oat cups and freeze in portion sizes.
- Swap fruits seasonally and change grains (oats, quinoa, whole-grain bread) to vary textures and nutrients.
- Keep seasonings mild; a pinch of cinnamon or a tiny dash of mild cheese can add flavor without overpowering.

Gentle & Safe Feeding Tools Parents Trust
These are popular, parent-approved items that make this easier and less stressful.
Grownsy Baby Food Maker
Makes smooth purees fast and saves cleanup time. Check Price on Amazon
Squeeze Station for Homemade Baby Food
Perfect for storing meals safely in the fridge or freezer. See on Amazon
Glass Baby Food Storage Jars
Gentle on gums and easy for first feeds. View on Amazon
Conclusion
For a hands-on finger-food twist, try the detailed method for Baby French Toast Sticks (Great for Baby Led Weaning) that many parents find works well for self-feeding toddlers. For more broad toddler breakfast inspiration and variations beyond these 12 recipes, this roundup of 12 Toddler Breakfast Ideas – Culinary Hill can help you rotate new options through your week.

Breakfast Ideas For Toddlers And Babies (Freezer Friendly) – Feeding Tiny Bellies
Freezer-Friendly Breakfast Ideas for Babies and Toddlers
Busy mornings with little ones can feel chaotic, but a small bit of planning and a well-stocked freezer turns breakfast into a stress-free routine. Below are practical, safe, and baby-friendly breakfast ideas that freeze and reheat well, plus tips on batch-making, storage, and serving sizes so you can feed tiny bellies quickly and confidently.
If you’d like more age-targeted inspiration, see this roundup of breakfast ideas for 1-year-olds for additional portion ideas and textures.
Why freeze breakfast?
- Saves time: cook once, eat all week.
- Reduces waste: freeze leftovers in toddler-sized portions.
- Encourages variety: rotate different frozen options so meals don’t get boring.
- Supports independence: many frozen items are easy for toddlers to self-feed after reheating.
Freezer-friendly breakfast ideas
- Banana oat muffins
- Ingredients: mashed banana, oats or oat flour, an egg, a little baking powder, and cinnamon.
- Freeze: cool completely, then freeze individually on a tray before transferring to a labeled bag.
- Reheat: microwave for 20–30 seconds or warm in a toaster oven.
- Savory egg muffins
- Ingredients: whisked eggs, finely chopped soft vegetables (spinach, red pepper), mild cheese.
- Freeze: bake in muffin tins, cool, then freeze flat in a single layer before bagging.
- Reheat: steam briefly or microwave until warm; check consistency before giving to baby.
- Pancake/pancake discs
- Make batter with mashed fruit and oats or whole-grain flour.
- Freeze: stack cooled pancakes with parchment between layers and store in a freezer bag.
- Reheat: toaster or microwave; break into smaller pieces for babies working on finger feeding.
- Oat and fruit bars
- Combine oats, softened fruit, and a binder (egg or mashed banana). Press into a pan and bake.
- Freeze: cut into individual bars and freeze between parchment.
- Reheat: briefly in the oven or microwave; cut into toddler-friendly sticks.
- Smoothie packets
- Pre-portion fruit, spinach, and oats into freezer bags. Add yogurt or milk when blending.
- Freeze: keep packets flat for easy storage.
- Prepare: blend frozen packet contents with liquid for a nutrient-packed smoothie.
- Mini french toast bites
- Use day-old bread, dip in egg-milk mixture, and bake until set.
- Freeze: cool then freeze in single layers with parchment.
- Reheat: warm in the oven or toaster oven to keep edges slightly crisp.
- Breakfast bowls (meat/veg/grain combos)
- Cook grains (quinoa, rice), soft veg, and mild protein (tofu, shredded chicken) and portion into small containers.
- Freeze: cool fully, portion, then freeze.
- Reheat: microwave thoroughly and check temperature before serving.
Portioning and safety tips
- Age-appropriate sizes: for babies just starting solids, mash or cut into tiny, manageable pieces. For older toddlers, serve larger finger foods.
- Labeling: always date and label containers with contents and portion size.
- Storage time: generally, most items keep well for 1–3 months. For best flavor, consume within 1 month.
- Avoid choking hazards: remove skins, seeds, and whole nuts; cut grapes and cherry tomatoes into quarters or smaller.
- Watch for added sugar and salt: keep recipes low in salt and added sugars; use fruit and spices for sweetness.
- Reheat safely: reheat thoroughly and test temperature before serving. Never refreeze once thawed.
Batch-cooking workflow
- Plan two to three breakfast types per week.
- Shop and prep ingredients on one day (chop, mash, mix).
- Cook in bulk using sheet pans and muffin tins.
- Cool completely on racks (important to prevent extra condensation).
- Freeze flat on trays, then transfer to labeled, date-stamped bags.
- Rotate: use older items first; keep a simple checklist on the freezer door.
Texture progression and feeding cues
- Start with soft, mashed, or pureed textures for younger babies, then increase chunkiness as chewing skills develop.
- Let toddlers explore finger foods to build autonomy; frozen options that reheat into firm-but-soft textures are ideal.
- Follow baby-led cues—if they gag (a reflex), it’s often a learning response; if choking is suspected, follow first-aid steps and consult guidance.
Simple reheating and serving ideas
- Microwave for short bursts, stirring between intervals to prevent hot spots.
- Use toaster oven for crisping pancakes and french toast.
- Warm on the stovetop in a little milk or water for cereal-like dishes.
- Combine a frozen savory muffin with a small scoop of yogurt for a balanced plate.
For a creamy, protein-rich option that freezes and thaws well, try an avocado-based egg spread at home which can be portioned and frozen for quick breakfasts or snack times—see a detailed version here: avocado egg salad recipe for babies.
Troubleshooting common issues
- Soggy reheated items: crisp briefly in a toaster oven or use a nonstick skillet.
- Strong freezer flavors: package tightly and remove as much air as possible.
- Dry or crumbly batches: add a splash of milk or mashed fruit to the batter next time.
Conclusion
If you want printable recipes and step-by-step freezer tips inspired by a popular roundup, check the original collection of Breakfast Ideas For Toddlers And Babies (Freezer Friendly) for more ideas. For a specific pancake recipe that’s toddler-approved and freezer-friendly, see the Blueberry Oat Pancakes with Greek Yogurt recipe for a tasty batch-cooking option.

Grilled Cheese Roll-Ups
Grilled Cheese Roll-Ups: A Simple, Fun Twist on a Classic
Grilled cheese roll-ups are a playful and compact variation of the traditional grilled cheese sandwich. They transform sliced bread and melted cheese into bite-sized, hand-held delights that are perfect for lunchboxes, appetizers, or a quick snack. Crisp on the outside and gooey inside, these roll-ups are fast to make and endlessly customizable.
Why you’ll love them
- Quick to prepare—ready in about 10 minutes.
- Kid-friendly and portable.
- Easily adaptable to different cheeses, breads, and fillings.
- Great for using up leftover deli meats, veggies, or spreads.
Ingredients (serves 2–4)
- 6–8 slices of sandwich bread (white, whole wheat, or sandwich loaf)
- 4–6 slices of your favorite cheese (American, cheddar, mozzarella, etc.)
- 1–2 tablespoons butter or margarine, softened
- Optional fillings: thinly sliced ham, turkey, cooked bacon, spinach, tomato slices, or a light smear of mustard/mayo
Equipment
- Rolling pin or glass bottle
- Skillet or griddle
- Spatula
- Knife and cutting board
Method
- Prepare the bread: Use a rolling pin or a glass bottle to flatten each slice of bread into a thin square. This makes rolling easier and helps the bread crisp up.
- Add the cheese and fillings: Place a slice of cheese on each flattened bread slice. Add any optional fillings in a thin layer—avoid overstuffing to prevent bursting.
- Roll: Starting from one edge, tightly roll each slice into a neat cylinder. Seal the edge by pressing gently so it stays closed during cooking.
- Butter the outside: Spread a thin layer of softened butter over the outside of each roll-up for golden crisping.
- Cook: Heat a skillet over medium heat. Place roll-ups seam-side down and cook, turning occasionally, until all sides are golden brown and the cheese is melted—about 2–3 minutes per side.
- Slice and serve: Let roll-ups rest for a minute, then slice in half or serve whole. They pair well with ketchup, marinara, ranch, or a simple mustard dip.
Variations and flavor ideas
- Caprese: Fresh mozzarella, basil leaves, and a thin slice of tomato with a drizzle of balsamic.
- Pepperoni pizza: Shredded mozzarella, sliced pepperoni, and a smear of pizza sauce.
- Mediterranean: Feta, roasted red pepper, and a sprinkle of oregano.
- Sweet: Cream cheese with a thin layer of fruit jam for a dessert roll-up.
Tips for success
- Use thin fillings and evenly distribute them to avoid soggy or burst roll-ups.
- If you want extra crunch, brush with a mixture of melted butter and a pinch of garlic powder before cooking.
- For even melting, cover the skillet with a lid for the first minute to trap heat, then remove to crisp the exterior.
- To make ahead: assemble roll-ups and store them uncooked in the fridge for a few hours. Cook right before serving for best texture.
Serving suggestions
- Serve as a snack platter with several dipping sauces.
- Pair with a simple soup or salad for a light meal.
- Pack them warm or allow to cool for convenient lunchbox additions.
Conclusion
For a reliable, kid-approved twist on a classic, check out the original inspiration at Grilled Cheese Roll Ups – The BakerMama for recipe variations and step-by-step photos. If you’re looking for more creative fillings and presentation ideas, explore the helpful suggestions at Grilled Cheese Roll Ups | Something About Sandwiches.

Broccoli Cheese Bites
Broccoli Cheese Bites
Broccoli cheese bites are little golden nuggets of comfort: crisp on the outside, tender and cheesy inside, and packed with vegetables. They make an ideal snack, appetizer, or kid-friendly side dish. This article walks through a straightforward, flexible recipe and offers variations and tips so you can make them your own.
Why you’ll love them
- Quick to assemble and easy to freeze.
- Versatile—baked or pan-fried, dairy-forward or dairy-free adaptations available.
- Great way to sneak vegetables into picky eaters’ plates.
- Perfect for parties, lunchboxes, or a simple weeknight side.
Ingredients (makes ~24 bites)
- 2 cups finely chopped broccoli florets (steam briefly, then chop)
- 1 cup shredded cheddar cheese (or cheddar blend)
- 1/2 cup breadcrumbs (panko gives extra crispness)
- 1/4 cup finely grated Parmesan (optional, for savory depth)
- 2 large eggs, lightly beaten
- 1/4 cup finely chopped onion or 1 tsp onion powder
- 1–2 garlic cloves, minced (or 1/2 tsp garlic powder)
- 1/2 tsp salt and 1/4 tsp black pepper
- 1/4 tsp smoked paprika or cayenne (optional, for warmth)
- 1–2 tbsp olive oil (for pan-frying) or cooking spray (for baking)
Optional: 1–2 tbsp plain Greek yogurt or cream cheese for extra creaminess; 1/4 cup cooked bacon bits or chopped ham for a meatier version.
Equipment
- Mixing bowl
- Baking sheet or skillet
- Parchment paper or silicone mat (for baking)
- Small cookie scoop or spoon for forming bites
Method — Basic Baked Version
- Preheat oven to 400°F (200°C). Line a baking sheet with parchment paper.
- Steam broccoli for 3–4 minutes until bright green and slightly tender. Drain well and let cool slightly, then finely chop.
- In a large bowl combine chopped broccoli, shredded cheddar, Parmesan (if using), breadcrumbs, onion, garlic, salt, pepper, and spices.
- Add the beaten eggs (and Greek yogurt/cream cheese if using). Mix until ingredients hold together when pressed. If mixture is too wet, add a tablespoon or two more breadcrumbs.
- Scoop heaping tablespoons of mixture and form into small rounds or patties. Place on the prepared baking sheet.
- Lightly spray or brush each bite with oil to encourage browning.
- Bake for 15–20 minutes, flipping once halfway, until edges are golden and cheese is melted.
- Serve warm with a dipping sauce (ranch, marinara, or a mustard-yogurt dip).
Pan-Fried Option
- Heat 1–2 tbsp olive oil in a nonstick skillet over medium heat.
- Form bites slightly flatter than the baked version. Place in the skillet and cook 3–4 minutes per side until crisp and golden and heated through.
- Drain on a paper towel and serve.
Variations and flavor ideas
- Broccoli-Cheddar Herb: Add 1 tbsp chopped fresh chives or parsley and 1 tsp Dijon mustard.
- Spicy Kick: Mix in 1–2 tbsp finely chopped pickled jalapeños or 1/4 tsp cayenne.
- Cheesy Vegan: Replace cheese with vegan cheese shreds and eggs with a flax egg (1 tbsp ground flax + 2.5 tbsp water per egg) and increase breadcrumbs slightly.
- Gluten-Free: Use gluten-free breadcrumbs or almond flour in place of breadcrumbs.
- Loaded: Stir in corn kernels, cooked diced ham, or chopped sun-dried tomatoes for extra texture.
Dips and Serving Suggestions
- Classic ranch or blue cheese dressing.
- Marinara or spicy arrabbiata for an Italian twist.
- Lemon-garlic yogurt dip: Greek yogurt + lemon zest + minced garlic + salt.
- Serve as an appetizer with toothpicks, or add to grain bowls and salads for extra protein and veg.
Make-ahead and storage
- Refrigerate: Store cooked bites in an airtight container for up to 3 days.
- Freeze: Flash-freeze on a tray, then transfer to a freezer bag for up to 3 months. Reheat from frozen in a 375°F (190°C) oven for 10–12 minutes or until heated through.
- Prep ahead: Form uncooked bites and freeze on a tray; bake from frozen, adding a few minutes to the baking time.
Nutrition (approximate per bite)
Values will vary by ingredients and size, but expect roughly:
- Calories: 50–80
- Protein: 3–5 g
- Fat: 3–6 g
- Carbs: 3–6 g
- Fiber: 0.5–1.5 g
Troubleshooting
- Mixture too wet: Add more breadcrumbs or a tablespoon of flour. Chill for 10–15 minutes to firm up before shaping.
- Bites falling apart: Ensure the mixture is well-combined and the broccoli is well-drained. Eggs act as a binder—don’t skip them unless using a suitable substitute.
- Not crispy: Broil for 1–2 minutes at the end of baking or pan-fry instead of baking.
Kid-Friendly Tips
- Make mini bites sized for little hands.
- Hide finely grated carrot or sweet potato in the mix for added nutrition and sweetness.
- Let kids help press the mixture into balls (supervision recommended around ovens/stoves).
Serving occasions
- Kid’s lunchboxes (cool completely before packing)
- Party appetizers or potlucks
- Tailgating/game day finger food
- Weeknight vegetable side for any dinner
Conclusion
For a family-friendly, versatile snack or side, these broccoli cheese bites are hard to beat—easy to customize and simple to make in large batches. For another kid-tested take on a similar recipe, see Broccoli and Cheese Bites – Feeding Tiny Bellies. If you want a game-day–focused spin with bold flavors, check out Broccoli Cheddar Bites (A Delicious Game Day Recipe).

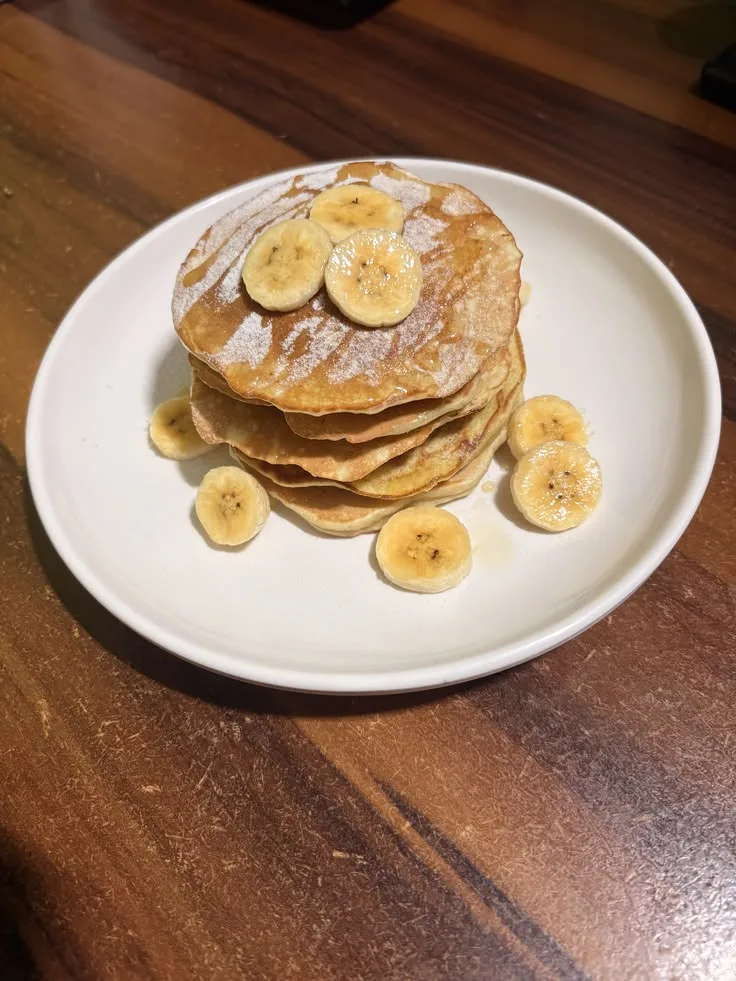
3-Ingredient Banana Pancakes (Baby-Led Weaning) | Baby weaning foods, Baby led weaning recipes, Weaning foods
These simple banana pancakes are a go-to option for parents starting baby-led weaning. Made with only three ingredients, they’re soft, mildly sweet, and easy for small hands to grasp — a great way to introduce texture and self-feeding. For more inspiration and variations on finger-friendly meals, check this helpful baby-led weaning recipes collection.
Why these pancakes work for BLW
- Minimal ingredients reduce the chance of added sugars or allergens.
- Soft texture makes them safe for babies who are still learning to chew.
- Size and shape can be adjusted to encourage grasping and independent feeding.
Ingredients (yields ~8 small pancakes)
- 1 ripe banana
- 2 eggs
- 3–4 tablespoons rolled oats (or oat flour)
Optional: pinch of cinnamon for flavor once baby has tried basic tastes.
Equipment
- Non-stick skillet or griddle
- Mixing bowl and fork or blender
- Spatula
Method
- Mash the banana well in a bowl until mostly smooth, or blend briefly for an extra-smooth batter.
- Whisk in the eggs until combined. Add the oats and let the mixture rest 2–3 minutes so the oats soften. If batter is too thin, add another tablespoon of oats.
- Warm a non-stick skillet over low–medium heat and lightly grease with a small amount of oil or butter. Low heat helps pancakes cook through without burning.
- Spoon small rounds (about 1–2 tablespoons each) onto the skillet. Cook 2–3 minutes per side, or until golden and set. Flip gently.
- Let cool to lukewarm before serving to baby.
Tips for baby-led weaning success
- Cut pancakes into strips or small rounds that are easy for your baby to hold.
- Serve plain first to let baby explore the texture and flavor; you can offer a tiny smear of unsweetened yogurt for dipping later.
- Supervise all meals and avoid offering any pancake pieces smaller than a safe grasp or that could present a choking risk.
For more suggestions on portion sizes and stage-appropriate textures, see these additional more baby-led weaning ideas that pair well with pancakes.
Variations
- Fruit-swapped: replace banana with cooked and mashed apple or pear.
- Grain-free: use almond flour in place of oats if baby has no nut allergy and you’ve introduced nuts.
- Add-ins: tiny grated carrot or zucchini can be stirred in for extra nutrients (ensure pieces are small and batter stays cohesive).
Serving and storing
- Serve pancakes at room temperature or slightly warm.
- Refrigerate leftovers in an airtight container up to 48 hours; reheat briefly and cool to a safe temperature before serving.
- Freeze pancakes separated by parchment paper in a single layer, then transfer to a bag; reheat from frozen until warmed through.
Safety reminders
- Always stay with your baby while they eat.
- Offer water alongside solids to help with swallowing.
- If you have concerns about allergies or swallowing, consult your pediatrician before introducing new foods.
Conclusion
For an easy starter recipe, this 3-ingredient version is both practical and nutritious — a classic for baby-led weaning parents. For a step-by-step version and photos from the original creator, see 3-Ingredient Banana Pancakes (Baby-Led Weaning) – Winnie Kison, and for additional tips and variations geared specifically to infants, check out The Best 3-Ingredient Banana Pancakes for Baby.

10 Baby Food Purees (Stage 1)
Introducing solids is an exciting milestone. Stage 1 purees are single-ingredient, smooth, and easy to digest—perfect for babies just starting on solids. If you want a simple fruit to begin with, check this helpful apple baby food guide that covers preparation and feeding tips.
Below are ten gentle, nutritious Stage 1 purees, with quick how-to notes and feeding suggestions.
1. Carrot Puree
Why Carrots Make a Perfect First Food
Carrots are one of the most recommended first vegetables for good reason. Their natural sweetness makes them highly acceptable to babies who are brand new to solid flavors, and they are nutritionally impressive — rich in beta-carotene, which the body converts to vitamin A to support healthy vision, immune function, and skin development.
What You Need
- 3 to 4 medium carrots
- Water for steaming
- Breast milk, formula, or cooled boiled water for thinning
How to Make It
Step 1 — Prepare the carrots. Wash thoroughly, peel, and chop into evenly sized rounds roughly one inch thick. Even sizing ensures everything cooks at the same rate.
Step 2 — Steam until very soft. Place carrot pieces in a steamer basket over boiling water. Cover and steam for 15 to 20 minutes until a fork slides through with absolutely no resistance. Do not rush this step — undercooked carrot will not blend smoothly.
Step 3 — Reserve the cooking water. Set aside a cup of the water from the steamer pot before you blend. This water contains water-soluble nutrients from the carrots and makes a better thinning liquid than plain tap water.
Step 4 — Blend. Transfer the soft carrots to a blender or food processor. Add two to three tablespoons of the reserved cooking water and blend on high until completely smooth — at least 60 seconds. Scrape down the sides and blend again.
Step 5 — Strain if needed. Pour the puree through a fine mesh sieve for an extra-silky Stage 1 finish. Press through with the back of a spoon. This step is optional but makes a noticeable difference in texture.
Step 6 — Cool completely before serving. Never offer warm puree directly from the blender without checking the temperature first.
Storage
Refrigerate in an airtight container for up to 48 hours. Freeze in ice-cube trays, then transfer frozen cubes to a labeled freezer bag. Keeps frozen for up to three months. Thaw overnight in the fridge or place the frozen cube in a small bowl of warm water.
Feeding Tip
Start with just one or two teaspoons at the very first sitting. Your baby is learning to move food from the front of the tongue to the back — it takes practice. Do not worry if most of it comes straight back out. That is completely normal.
Gentle & Safe Feeding Tools Parents Trust
These are popular, parent-approved items that make this easier and less stressful.
Grownsy Baby Food Maker
Makes smooth purees fast and saves cleanup time. Check Price on Amazon
Squeeze Station for Homemade Baby Food
Perfect for storing meals safely in the fridge or freezer. See on Amazon
Glass Baby Food Storage Jars
Gentle on gums and easy for first feeds. View on Amazon
2. Sweet Potato Puree
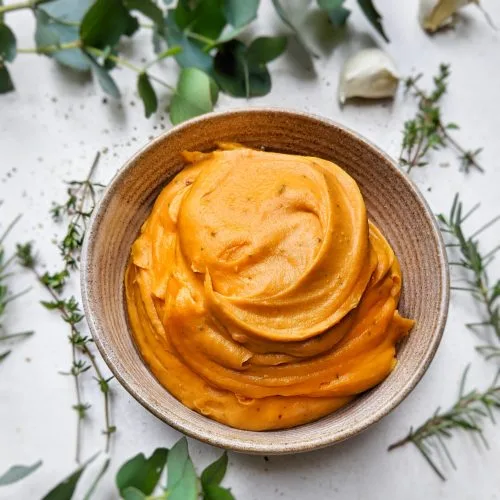
Why Sweet Potato Is a Stage 1 Superstar
Sweet potato consistently ranks as one of the most loved first foods among babies and parents alike. The naturally creamy texture blends into a velvety puree that is easy to manage, and nutritionally it delivers vitamins A and C, potassium, and fiber in every small serving.
What You Need
- 1 medium sweet potato
- Breast milk, formula, or water for thinning
How to Make It
Step 1 — Choose your cooking method. You have two great options here.
Roasting method: Preheat your oven to 200°C / 400°F. Pierce the sweet potato several times with a fork, place directly on the oven rack, and roast for 45 to 50 minutes until completely soft. Roasting concentrates the natural sugars and gives a slightly richer flavor.
Steaming method: Peel and chop into chunks, then steam for 20 to 25 minutes until completely tender. Steaming preserves slightly more of the water-soluble vitamins.
Step 2 — Scoop and blend. If roasted, let it cool slightly, slice open, and scoop the flesh into your blender. Discard the skin. If steamed, transfer the chunks directly.
Step 3 — Blend until smooth. Add two to four tablespoons of breast milk, formula, or warm water. Blend on high for at least 60 to 90 seconds until completely lump-free and creamy.
Step 4 — Check consistency. Stage 1 puree should be thin enough to drip slowly off a spoon. Add more liquid one tablespoon at a time until you reach the right texture.
Storage
Refrigerate for up to 48 hours. Freezes exceptionally well for up to three months. Sweet potato cubes thaw without losing their texture or color.
Feeding Tip
Sweet potato is a great second or third food after carrot because the flavor profile is similar — naturally sweet and familiar. Most babies who accept carrot take to sweet potato very
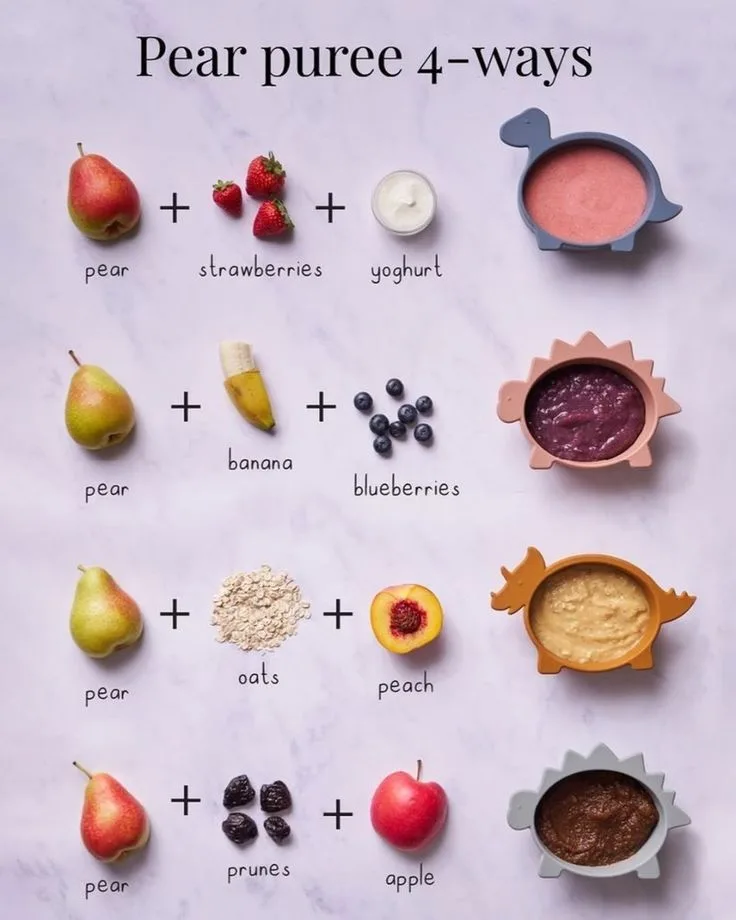
3. Pear Puree

Why Pear Is Gentle on Tiny Stomachs
Pear is one of the mildest, most easily digested first fruits you can offer. It is naturally low in acidity compared to apple or citrus, making it especially good for babies with sensitive digestive systems. It also has a light natural sweetness that most babies respond to immediately.
What You Need
- 2 ripe pears
- Small amount of water for cooking
How to Make It
Step 1 — Select very ripe pears. The riper the pear, the sweeter and smoother the result. A pear is ready when it yields slightly to gentle pressure near the stem.
Step 2 — Prepare the pears. Wash, peel, halve, and core. Remove any seeds and the stem. Cut into even chunks.
Step 3 — Choose your method.
Steam or poach: Place chunks in a steamer or small saucepan with just enough water to cover the base. Cook over medium heat for 8 to 10 minutes until completely soft.
Raw blend: If your pears are very ripe and soft, you can skip cooking entirely. Simply peel, core, chop, and blend raw. Raw pear puree has a slightly thinner, fresher texture that many babies love.
Step 4 — Blend until smooth. Add a tablespoon or two of the cooking liquid if needed. Blend until completely silky. No added sugar, ever — ripe pears are naturally sweet enough.
Step 5 — Strain if preferred for an ultra-smooth finish.
Storage
Refrigerate for up to 48 hours. Freeze for up to three months. Pear puree may discolor slightly after thawing — this is normal and safe.
Feeding Tip
Pear is a wonderful choice if your baby seems constipated in the early days of solids. The natural sorbitol in pear has a gentle, mild laxative effect that can help keep things moving comfortably.
4. Apple Puree
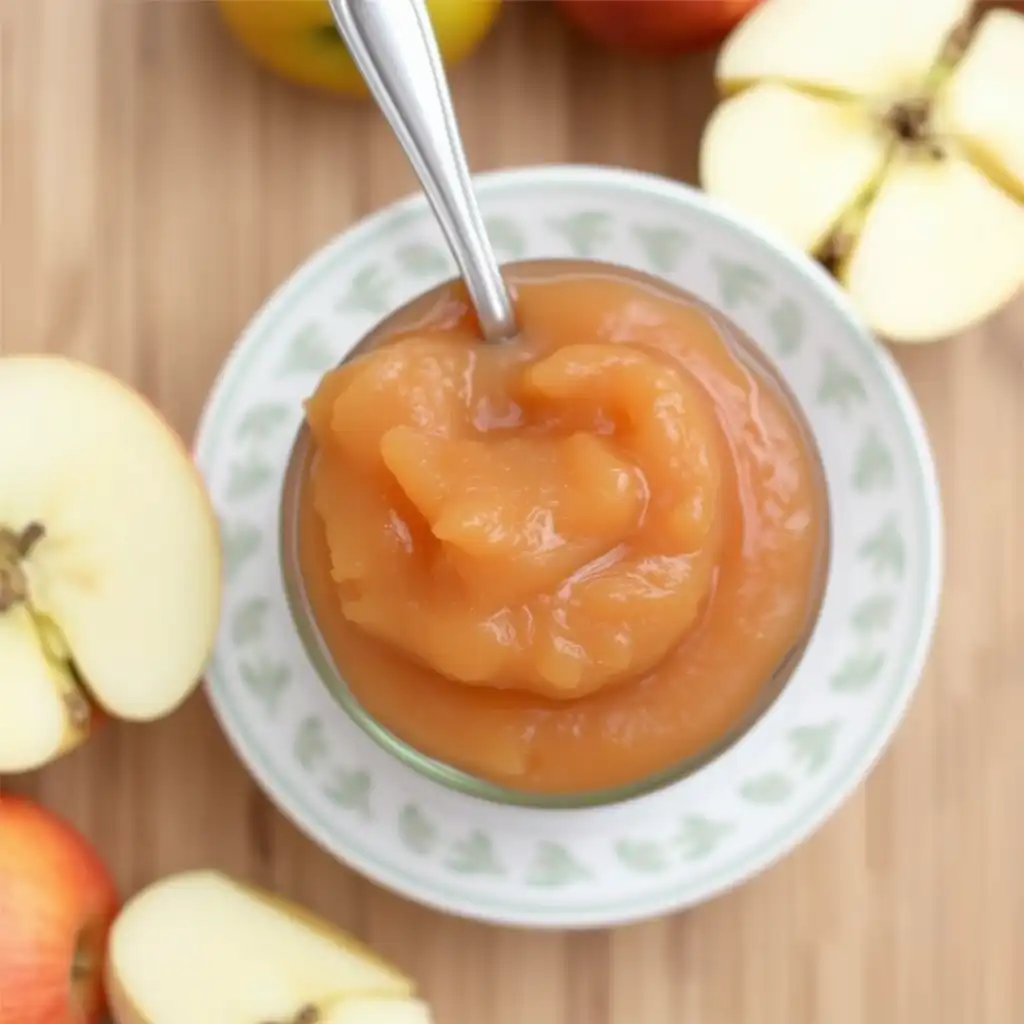
Why Apple Is a Classic First Fruit
Apple is one of the most universally accepted first foods across cultures and generations. It has a mild, familiar sweetness, blends into a perfectly smooth puree, and pairs beautifully with almost every vegetable once your baby moves to Stage 2 combinations.
What You Need
- 2 medium apples — sweeter varieties like Fuji or Gala work well
- Small amount of water for simmering
How to Make It
Step 1 — Prepare the apples. Wash, peel, core, and cut into even chunks. Removing the peel is important at Stage 1 — apple skin can create an uneven texture even after blending.
Step 2 — Simmer until tender. Place chunks in a small saucepan with just enough water to cover the base — roughly a quarter cup. Cover and simmer over medium-low heat for 8 to 12 minutes, stirring occasionally, until completely soft.
Step 3 — Reserve the cooking liquid. This liquid is sweet and slightly nutrient-rich — use it for thinning rather than plain water.
Step 4 — Blend. Transfer the softened apple and a little cooking liquid to your blender. Blend on high until completely smooth — at least 60 seconds. The result should be a pale, creamy puree with no lumps whatsoever.
Step 5 — Cool and serve or portion into ice-cube trays for freezing.
Storage
Refrigerate for up to 48 hours. Freeze for up to three months. Apple puree may brown slightly — this is oxidation and is completely safe, though adding a few drops of cooled boiled water before blending can minimize it.
Feeding Tip
Apple is a wonderful palate cleanser between stronger-flavored purees. Many moms keep a batch frozen at all times as a reliable fallback on fussy days.
5. Banana Puree
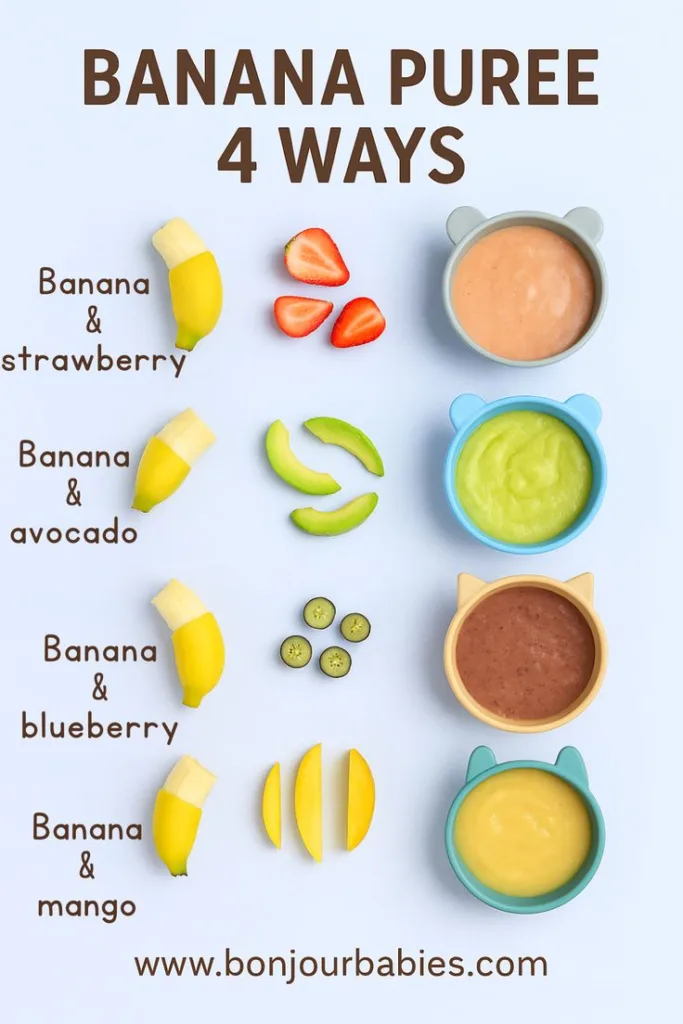
Why Banana Is the Ultimate Convenience Food
Banana is the one Stage 1 food that requires almost no preparation at all — no cooking, no steaming, no special equipment. It is naturally smooth, calorie-dense, and packed with potassium, vitamin B6, and quick-release energy that babies genuinely need.
What You Need
- 1 very ripe banana — the riper the better, look for plenty of brown spots on the skin
- Small splash of breast milk or formula (optional)
How to Make It
Step 1 — Choose the right banana. This step matters more than it sounds. An underripe banana is starchy, slightly bitter, and harder to digest. A very ripe banana — soft, sweet, with brown-spotted skin — is sweeter, smoother, and far gentler on your baby’s digestive system.
Step 2 — Peel and mash. Break the banana into chunks and mash thoroughly with a fork on a clean plate or in a small bowl. Press and fold until no lumps remain.
Step 3 — Blend for extra smoothness (optional). If you want a silkier, thinner texture, transfer to a blender and add a small splash of breast milk or formula. Blend for 20 to 30 seconds. This is particularly useful for very young babies just starting out.
Step 4 — Serve immediately. Banana discolors quickly once mashed. Prepare it fresh right before each feeding for the best color and flavor.
Storage
Banana puree does not freeze as well as other purees — the texture becomes slightly gluey after thawing. It is best prepared fresh each time. If you must freeze it, add a few drops of lemon juice first to slow browning, and use within four to six weeks.
Feeding Tip
Never add honey to banana puree or any other baby food for infants under twelve months. Honey — including raw, organic, and processed varieties — carries a genuine risk of infant botulism regardless of the form it comes in.
Gentle & Safe Feeding Tools Parents Trust
These are popular, parent-approved items that make this easier and less stressful.
Grownsy Baby Food Maker
Makes smooth purees fast and saves cleanup time. Check Price on Amazon
Squeeze Station for Homemade Baby Food
Perfect for storing meals safely in the fridge or freezer. See on Amazon
Glass Baby Food Storage Jars
Gentle on gums and easy for first feeds. View on Amazon
6. Avocado Puree
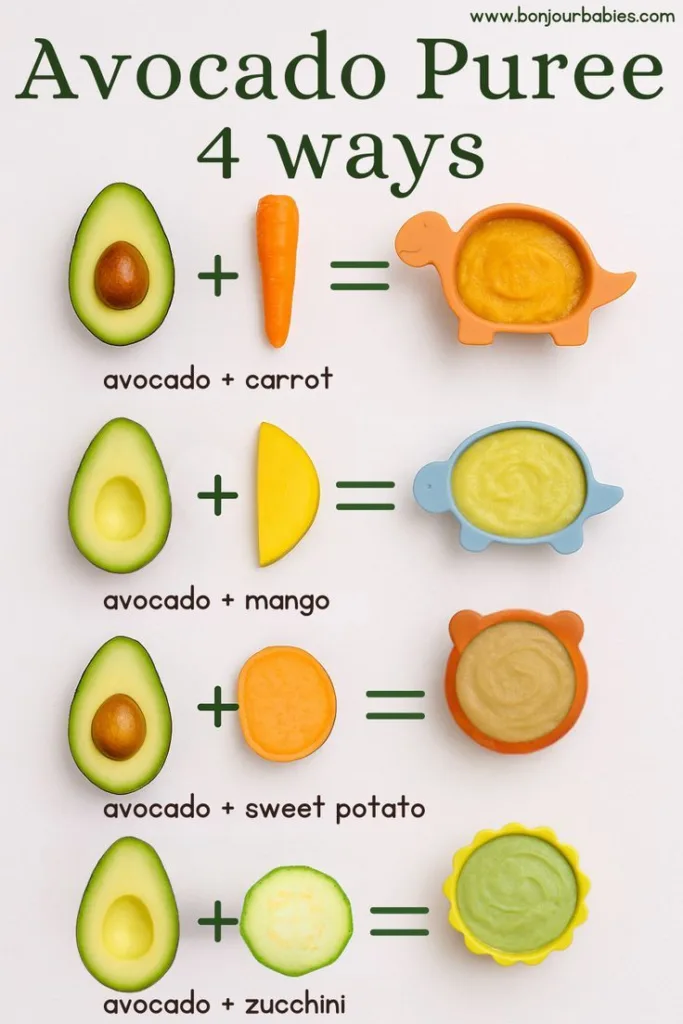
Why Avocado Is a Brain-Development Powerhouse
Avocado stands apart from almost every other Stage 1 food nutritionally. It is exceptionally rich in healthy monounsaturated fats — the same type found in olive oil — which are critical for brain development, nervous system growth, and the absorption of fat-soluble vitamins during the first year of life. For a food that requires almost zero preparation, the nutritional return is extraordinary.
What You Need
- 1 ripe avocado
- Small amount of breast milk, formula, or water (optional)
How to Make It
Step 1 — Choose a perfectly ripe avocado. This is the most important step. A ripe avocado yields gently to pressure when squeezed — it should feel soft but not mushy. The skin should be very dark, almost black. An underripe avocado will be bitter and difficult to mash smoothly.
Step 2 — Prepare the avocado. Slice in half lengthwise and remove the stone. Scoop the flesh out with a large spoon, keeping it as intact as possible.
Step 3 — Mash thoroughly. Place the flesh in a small bowl and mash with a fork, pressing firmly and folding until the texture is completely smooth and creamy. For most ripe avocados, this takes less than two minutes with a fork.
Step 4 — Blend if preferred. If you want an even silkier texture, transfer to a blender and blend briefly — 15 to 20 seconds is usually enough. Add a tablespoon of breast milk or formula if you need to thin it slightly.
Step 5 — Serve immediately. Avocado oxidizes and browns very quickly once cut and exposed to air. Prepare it fresh immediately before each feeding session and serve right away.
Storage
Avocado puree does not store or freeze well due to rapid browning and texture change. Always prepare it fresh. If you have leftover avocado, press plastic wrap directly against the cut surface, add a few drops of lemon juice, and refrigerate for no more than 24 hours.
Feeding Tip
Avocado has a rich, fatty texture that is quite different from fruit and vegetable purees. Some babies need a few introductions before they accept it enthusiastically. Do not give up after one refusal — offer it again a few days later.
7. Pea Puree
Why Peas Deserve a Place in Your Baby’s First Foods
Peas bring something genuinely different to the Stage 1 lineup. That vibrant green color alone makes mealtime more visually engaging, and nutritionally peas deliver fiber, vitamin C, vitamin K, and a small but meaningful amount of plant-based protein — more than most other Stage 1 vegetables.
What You Need
- 1 cup frozen or fresh peas
- Water for steaming
- Breast milk, formula, or cooking water for thinning
How to Make It
Step 1 — Use frozen peas if possible. Frozen peas are picked and frozen at peak ripeness, which actually preserves their nutrients better than fresh peas that have been sitting in a shop for several days. Either works perfectly well — frozen is simply more convenient and often more nutritious.
Step 2 — Steam until completely soft. Place peas in a steamer basket over boiling water. Steam fresh peas for 5 to 7 minutes, frozen peas for 3 to 5 minutes. You want them completely soft — slightly overcooked is fine at this stage.
Step 3 — Blend with liquid. Transfer to a blender with two to three tablespoons of cooking water or breast milk. Blend on high for at least 90 seconds — peas need more blending time than most other vegetables to achieve a smooth result.
Step 4 — Strain thoroughly. This step is essential for pea puree. Pour through a fine mesh sieve and press firmly with the back of a spoon. Pea skins and small fibrous pieces will be caught by the sieve, leaving you with a smooth, vivid green puree underneath. Do not skip straining for Stage 1.
Step 5 — Check consistency and thin further if needed before serving.
Storage
Refrigerate for up to 48 hours. Freeze for up to three months. Pea puree retains its vibrant color beautifully after freezing, making it one of the most visually appealing purees to have stocked in your freezer.
Feeding Tip
Peas are generally considered a low-allergen food, but the golden rule still applies: introduce one new food at a time and wait three to five days before adding anything new to your baby’s menu.
8. Butternut Squash Puree
Why Butternut Squash Is a Batch-Cooking Essential
Butternut squash produces one of the most naturally smooth, golden, and nutritious purees on this entire list. It has a gentle natural sweetness similar to sweet potato, and it is packed with vitamins A and C, potassium, and antioxidants. It also freezes flawlessly, making it one of the very best purees to make in large batches.
What You Need
- 1 small butternut squash
- Olive oil (for roasting method only)
- Water or breast milk for thinning
How to Make It
Step 1 — Choose your cooking method.
Roasting method (recommended for deeper flavor): Preheat oven to 200°C / 400°F. Slice the butternut squash in half lengthwise and scoop out the seeds. Brush the cut surfaces lightly with a tiny amount of olive oil. Place cut-side down on a lined baking tray. Roast for 40 to 50 minutes until completely soft and slightly caramelized.
Steaming method (faster and lighter): Peel the squash, remove seeds, and chop into even cubes. Steam over boiling water for 15 to 20 minutes until completely tender.
Step 2 — Scoop and blend. If roasted, scoop the flesh away from the skin. If steamed, transfer chunks directly to your blender.
Step 3 — Blend until silky smooth. Add two to three tablespoons of water, breast milk, or formula. Blend on high for 60 to 90 seconds. Butternut squash blends beautifully and rarely needs straining.
Step 4 — Adjust consistency by adding more liquid one tablespoon at a time until the puree reaches a smooth, flowing Stage 1 texture.
Storage
Refrigerate for up to 48 hours. Freeze for up to three months. Butternut squash is one of the best purees for freezing — it thaws evenly and the texture remains creamy and smooth.
Feeding Tip
Butternut squash is an excellent bridge food between sweet potato and more savory vegetables. Its mild sweetness makes it broadly acceptable while gently introducing a slightly different flavor profile.
9. Green Bean Puree
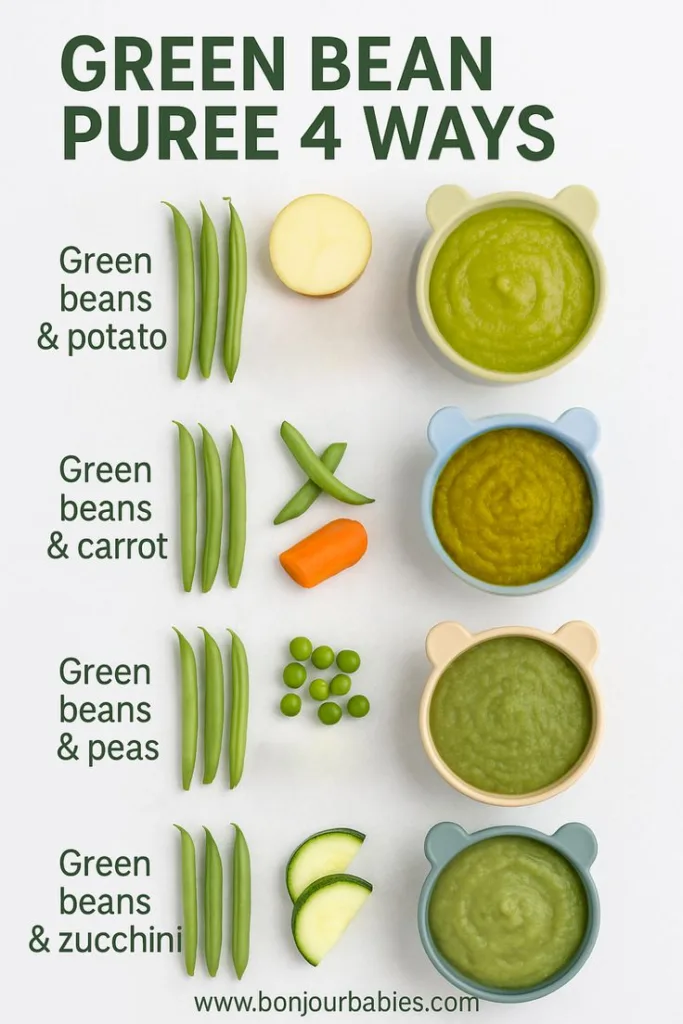
Why Green Beans Help Broaden Your Baby’s Palate
Green beans offer something genuinely valuable at Stage 1 — a mild, slightly savory flavor that begins moving your baby’s palate away from purely sweet foods. Research consistently shows that early exposure to a range of flavors, including mild savory ones, is associated with less fussy eating in toddlerhood. Green beans are also a good source of iron and vitamin K, two nutrients that become increasingly important as your baby grows.
What You Need
- 1 cup fresh or frozen green beans
- Water for steaming
- Breast milk, formula, or cooking water for thinning
How to Make It
Step 1 — Prepare the beans. If using fresh beans, wash thoroughly and trim both ends. Cut into roughly one-inch pieces for more even cooking. Frozen green beans can go straight into the steamer.
Step 2 — Steam until very tender. Place in a steamer basket over boiling water. Steam fresh beans for 10 to 12 minutes, frozen beans for 8 to 10 minutes. Green beans need to be significantly softer than you would cook them for adult meals — they should be completely limp and easy to press flat between your fingers.
Step 3 — Blend with liquid. Transfer to a blender with two to three tablespoons of the cooking water. Blend on high for at least 90 seconds to two minutes. Green beans require longer blending than most other vegetables.
Step 4 — Strain thoroughly. This step is critical for green bean puree. Press the blended mixture firmly through a fine mesh sieve using the back of a spoon. Green bean skins and fibrous strings will be caught in the sieve. The puree that passes through should be smooth and pale green. Repeat the straining process if needed.
Step 5 — Check and adjust. Green bean puree tends to be thicker than other purees. Thin with additional breast milk or water to achieve the right Stage 1 consistency.
Storage
Refrigerate for up to 48 hours. Freeze for up to three months in single-serving portions.
Feeding Tip
If your baby initially rejects green bean puree, do not give up. Research suggests babies may need to be offered a new flavor eight to fifteen times before accepting it. Keep portions very small and offer it alongside a puree your baby already loves.
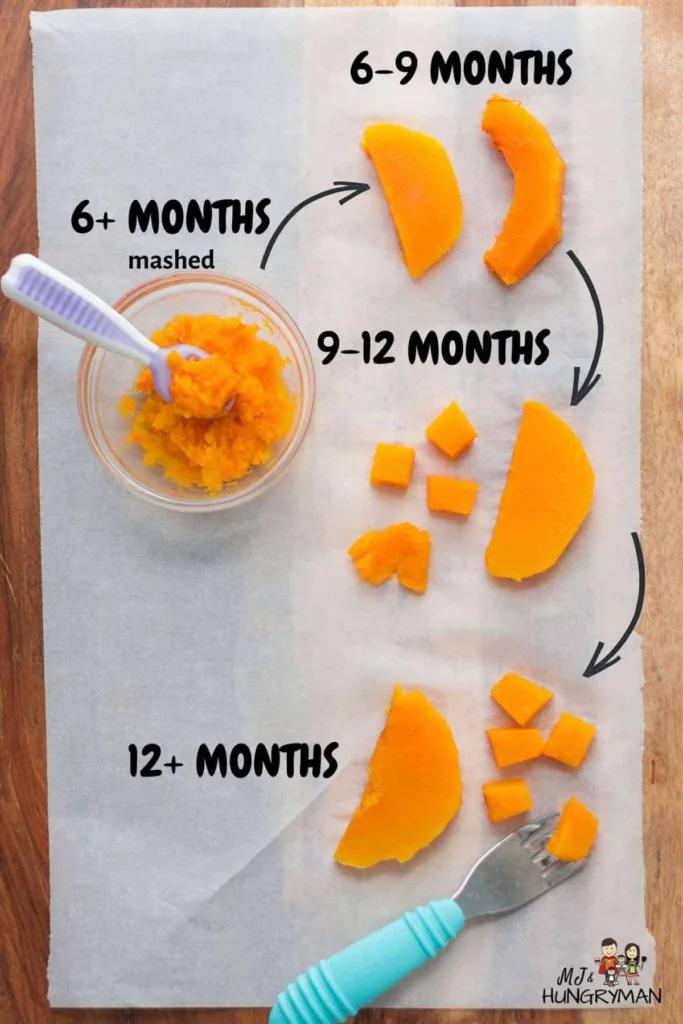
10. Pumpkin Puree
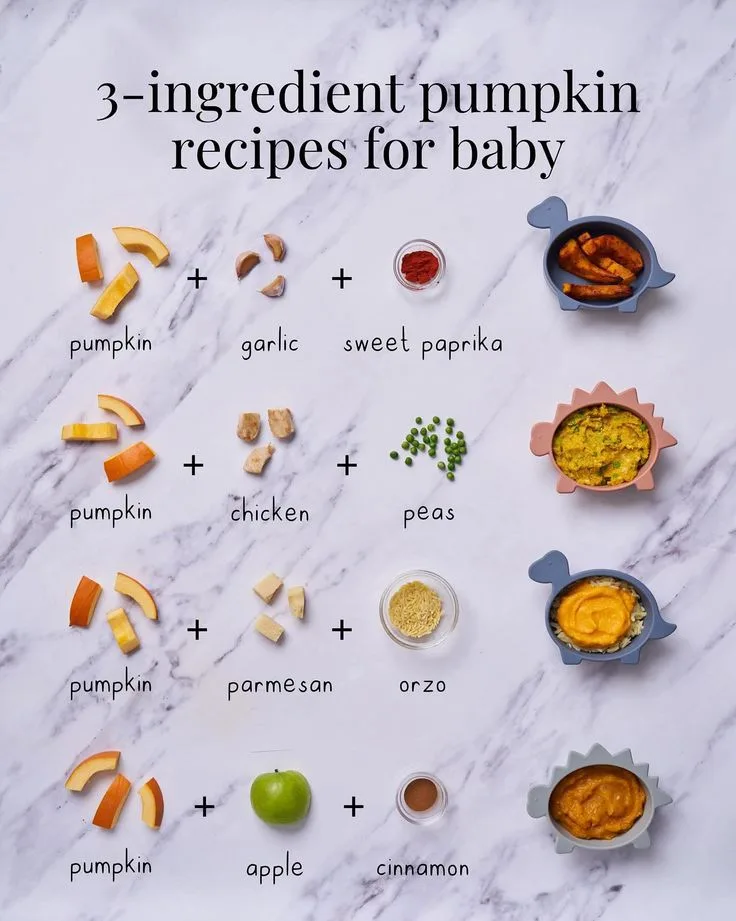
Why Pumpkin Is Gentle, Versatile, and Nutritious
Pumpkin rounds out this Stage 1 list beautifully. It has one of the mildest, most neutral flavors of any first vegetable, which makes it widely accepted even by cautious eaters. Nutritionally it delivers vitamins A and C, potassium, and fiber — and its naturally smooth texture blends into a perfectly silky puree with minimal effort.
What You Need
- A small piece of fresh pumpkin or one cup of pumpkin chunks
- Water or breast milk for thinning
How to Make It
Step 1 — Prepare the pumpkin. If using fresh pumpkin, remove the skin, seeds, and any fibrous strands from the inside. Cut into even chunks roughly one to two inches in size. Canned plain pumpkin puree (not pumpkin pie filling — check the label carefully) is a perfectly acceptable shortcut if fresh pumpkin is unavailable.
Step 2 — Choose your cooking method.
Roasting: Preheat oven to 200°C / 400°F. Spread chunks on a lined baking tray and roast for 25 to 30 minutes until completely tender and lightly golden. Roasting concentrates the flavor and produces a slightly richer result.
Steaming: Steam chunks over boiling water for 15 to 18 minutes until completely soft. Faster and more nutrient-preserving than roasting.
Step 3 — Blend until smooth. Transfer cooked pumpkin to a blender. Add two to three tablespoons of water or breast milk. Blend on high for 60 seconds until completely smooth. Pumpkin blends very easily and rarely needs straining.
Step 4 — Adjust consistency with additional liquid as needed. The final texture should be smooth, flowing, and easy to slide off a spoon.
Storage
Refrigerate for up to 48 hours. Freeze for up to three months. Pumpkin puree freezes and thaws exceptionally well — the texture and color remain largely unchanged.
Gentle & Safe Feeding Tools Parents Trust
These are popular, parent-approved items that make this easier and less stressful.
Grownsy Baby Food Maker
Makes smooth purees fast and saves cleanup time. Check Price on Amazon
Squeeze Station for Homemade Baby Food
Perfect for storing meals safely in the fridge or freezer. See on Amazon
Glass Baby Food Storage Jars
Gentle on gums and easy for first feeds. View on Amazon
Feeding Tip
Once your baby is comfortable with pumpkin as a standalone puree, it makes a wonderful base for gentle combinations. Mix a small amount with pear or apple puree for a naturally sweet, warming blend that introduces your baby to the idea of flavors working together.
Feeding and safety tips
- Introduce one new food every 3–5 days to monitor for reactions.
- Keep purees thin and smooth for Stage 1; avoid added salt, sugar, or honey.
- Use BPA-free containers or ice-cube trays for freezing single-serving portions.
- Always supervise your baby during feeding and check food temperature.
When to add protein or more texture
Once your baby tolerates several single-ingredient purees, you can gradually introduce proteins and thicker textures. For ideas on simple early-protein meals, see this collection of easy chicken baby food recipes that are suited for advancing stages.

Conclusion
If you prefer convenient, store-bought Stage 1 options, consider the Beech-Nut® Organics Jars Variety Pack Stage 1 Baby Food (16 ct) for a mix of single-ingredient jars. For more homemade inspiration and detailed recipes, browse this list of 20 Stage One Homemade Baby Food Recipes.

1st Stage Baby Food Recipes: 9 homemade purees!
1st Stage Baby Food Recipes: 9 Homemade Purees
Introduction
Starting solids is an exciting milestone — and simple, single-ingredient purees are the safest way to introduce new flavors. If you want a quick primer before you begin, check this helpful homemade baby food guide for basics on tools, timing, and safety. Below are nine easy Stage 1 puree recipes you can make with minimal equipment.
Puree 1 — Sweet Potato
Ingredients: 1 medium sweet potato, water or breastmilk/formula
Method: Pierce and roast or steam until very soft (about 20–30 minutes). Scoop flesh and blend with a little liquid until smooth. Strain if needed for thinner consistency.
Puree 2 — Carrot
Ingredients: 2 medium carrots, water or breastmilk/formula
Method: Peel and chop carrots; steam 10–15 minutes until tender. Puree with reserved cooking liquid to reach the desired thickness.
Puree 3 — Apple
Ingredients: 2 apples (Gala or Fuji), water
Method: Peel, core and chop apples. Simmer gently in a little water until soft (8–10 minutes), then puree. Cool before serving; no added sugar.
Puree 4 — Pear
Ingredients: 2 ripe pears, water
Method: Peel and core pears; steam or simmer until tender, then blend smooth. Pears are naturally sweet and gentle on tiny tummies.
Puree 5 — Banana
Ingredients: 1 ripe banana, breastmilk/formula or water (optional)
Method: Mash banana with a fork for a lumpier texture or blend with a tablespoon of liquid for silky smoothness. Serve fresh; bananas brown quickly.
Puree 6 — Avocado
Ingredients: 1 ripe avocado
Method: Scoop out flesh and mash until smooth. Add a teaspoon of breastmilk/formula to thin if needed. Avocado provides healthy fats for brain development.
Puree 7 — Butternut Squash
Ingredients: 1 small butternut squash, water or breastmilk/formula
Method: Roast or steam squash until very tender (25–30 minutes), scoop flesh and puree with liquid until smooth. Sweet and creamy.
Puree 8 — Peach
Ingredients: 2 ripe peaches, water
Method: Peel (blanch if needed), pit, and chop peaches. Simmer briefly if firm, then puree. Peaches offer a nice change of flavor and gentle sweetness.
Puree 9 — Green Peas
Ingredients: 1 cup frozen or fresh peas, water
Method: Steam peas until very soft, then puree with liquid and optionally push through a sieve for extra smoothness. Peas are a good iron source when paired with vitamin C-rich foods.
Tips for Making and Storing Purees
- Texture: Stage 1 purees should be smooth and runny enough to drip from a spoon. Add breastmilk, formula, or water to thin.
- Introduce single foods: Offer one new puree every 3–5 days to spot reactions.
- Batch cooking: Make larger batches and freeze flat in ice cube trays for single-serving portions.
- Storage: Refrigerate purees up to 48 hours; frozen purees last 1–3 months.
- Food safety: Always cool cooked food quickly and reheat to steam before serving; discard any leftover from a feeding.
- Protein ideas: If you plan to expand to savory proteins later, these easy chicken baby food recipes show how to introduce gentle, well-blended meat purees safely.
Conclusion
For more inspiration and a wider variety of stage-one options, check this comprehensive collection of stage-one baby purees that includes fruit and vegetable ideas. If you want quick, practical step-by-step recipes for early fruit and vegetable purees, this easy homemade stage 1 baby food guide offers clear instructions and helpful tips.
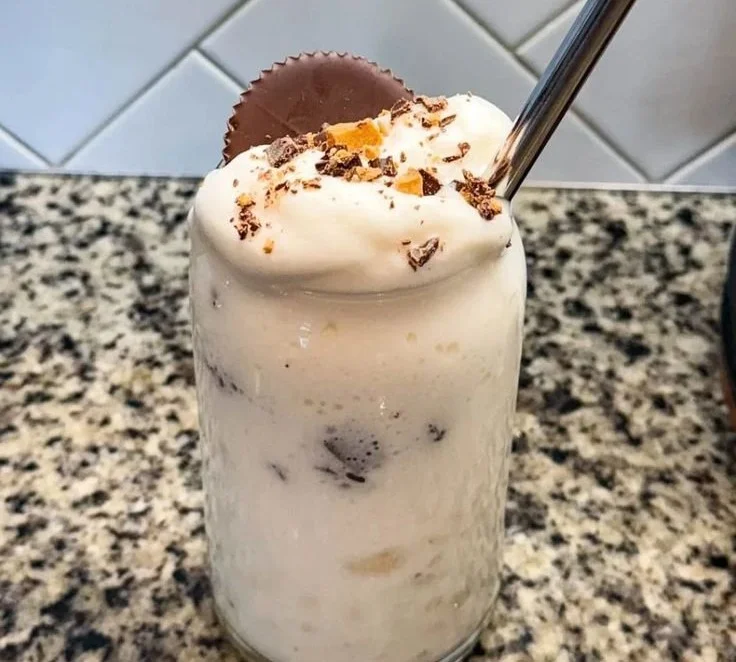
Ninja Slushie Peanut Butter Cup Protein Milkshake
Ninja Slushie Peanut Butter Cup Protein Milkshake
This creamy, frosty Ninja Slushie Peanut Butter Cup Protein Milkshake blends indulgence and nutrition into a single glass — think rich peanut butter, chocolatey chunks, and a protein boost that keeps you satisfied. It’s an ideal post-workout treat, an afternoon pick-me-up, or a lighter dessert option that still feels decadent. If you’re planning themed refreshments alongside this shake, our roundup of baby shower cupcakes offers inspiration for matching sweet presentations.
Why this recipe works:
- The Ninja Slushie (or any high-powered blender) creates a true slush texture that suspends mix-ins for a restaurant-style milkshake.
- Greek yogurt and a scoop of protein powder add creaminess and a protein hit without relying entirely on ice cream.
- Peanut butter and chocolate chips deliver classic peanut butter cup flavor in a more controlled, customizable form.
Ingredients (serves 1 large or 2 small)
- 1 cup unsweetened almond milk (or milk of choice)
- 1/2 cup plain Greek yogurt (for tang and creaminess)
- 1 frozen banana, chopped (adds sweetness and thickness)
- 2 tbsp creamy peanut butter
- 1 scoop chocolate or vanilla protein powder
- 1 tbsp unsweetened cocoa powder (optional for deeper chocolate flavor)
- 1 cup ice (adjust for desired slushiness)
- 2 tbsp mini chocolate chips or chopped dark chocolate
- Pinch of salt
- Optional garnish: whipped cream, extra peanut butter drizzle, a peanut butter cup half
Equipment
- High-powered blender (Ninja Slushie or equivalent recommended for best texture)
- Measuring spoons and cups
- Serving glass
Directions
- Prep frozen banana and ice so they’re ready to go. For an extra-thick shake, freeze banana slices overnight.
- In the blender pitcher add almond milk, Greek yogurt, peanut butter, protein powder, cocoa powder (if using), and a pinch of salt.
- Add frozen banana and ice on top. Secure lid and pulse a few times to break up the solids.
- Blend on high until the mixture reaches a smooth, slushy consistency. If the shake is too thick, add a splash more milk; if too thin, add a few more ice cubes or another small piece of frozen banana.
- Stir in the chocolate chips by hand or use a quick low-speed blend to distribute them without completely melting.
- Pour into a chilled glass and garnish with whipped cream, a drizzle of peanut butter, and a peanut butter cup half if desired.
Variations and swaps
- Vegan: Use plant-based yogurt and a vegan protein powder. Swap honey or whey protein for a plant-based sweetener if needed.
- Lower sugar: Use unflavored protein powder and omit added sweeteners; increase banana for natural sweetness.
- Kid-friendly swap: Turn this into a thicker spoonable shake by using less milk; you can pair it with soft pancakes for a fun breakfast twist — see our kid-friendly healthy protein pancakes for pairing ideas.
- Peanut-free option: Replace peanut butter with almond or sunflower seed butter for allergy-safe alternatives.
Nutrition (approximate per large serving)
- Calories: ~450–550 (varies with protein powder and milk choice)
- Protein: 25–35 g (dependent on protein powder)
- Fat: 18–25 g
- Carbs: 40–60 g (from banana and milk)
Adjust ingredient amounts to fit your dietary goals (e.g., lower-calorie milks or smaller peanut butter portions).
Tips for best texture
- Use frozen banana and crushed ice for a thick, frosty result.
- Pulse before full blending to prevent motor strain if your blender isn’t a high-powered model.
- Chill the serving glass for an extra-refreshing presentation.
- Add chocolate chips last to keep them from sinking or fully melting into the shake.
Serving suggestions
- Serve with a wide straw and a long spoon so your guests can enjoy the mix-ins.
- Pair with light salty snacks (like pretzels) to balance the sweetness.
- Make it party-friendly by preparing a peanut butter drizzle station and assorted toppings like crushed cookies, chopped nuts, or shredded coconut.
Storage
This shake is best enjoyed immediately. If you must store it, pour into an airtight container and refrigerate for up to 24 hours; expect some separation — simply stir or re-blend before serving.
Conclusion
For a chocolate-forward take similar to classic shake recipes, check the detailed breakdown in the Ninja Slushi Chocolate Milkshake – Stay Snatched review and recipe. If you want a broader look at the Ninja Slushi appliance and another tasty slushie idea, read Our Review of the Ninja SLUSHi + a Tasty Slushie Recipe for inspiration and troubleshooting tips.
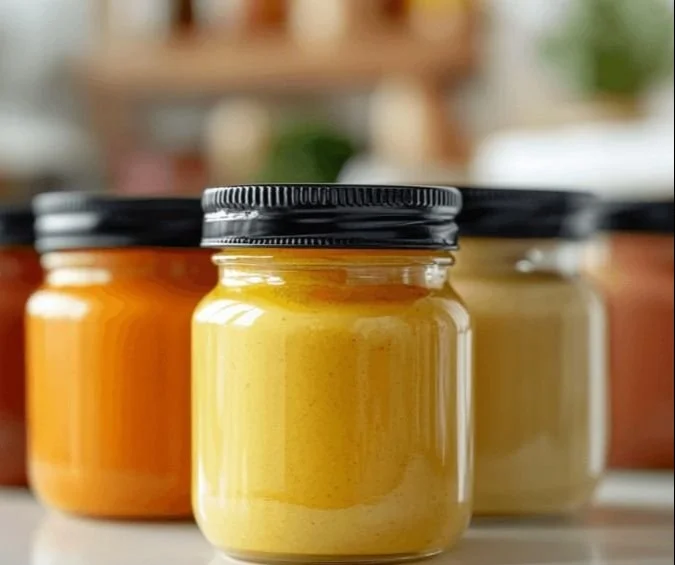
Easy Homemade Baby Food Recipes for Beginners
Easy Homemade Baby Food Recipes for Beginners
Starting homemade baby food can feel overwhelming, but it doesn’t have to be. With a few staples, simple techniques, and an understanding of stages and textures, you can prepare nutritious, tasty meals for your little one. If you’re also thinking about protein options as you introduce more variety, you might like these 10 chicken baby food easy recipes to add lean protein to your rotation.
Why make baby food at home?
Homemade baby food lets you control ingredients, textures, and portions. It can be gentler on sensitive tummies, cost-effective, and a great way to introduce real flavors (not added sugars or salt). Most single-ingredient purees are simply steamed and blended — perfect for beginners.
Basic equipment and safety
- Blender or food processor: A small personal blender works well for single servings; a larger blender or food processor is helpful for batch cooking.
- Steamer basket or pot with lid: Steaming preserves nutrients and keeps textures smooth.
- Freezer-safe trays or small containers: For portioning and freezing.
- Age-appropriate spoons and bowls.
- Food thermometer, if reheating, and good storage practices: label with date and use within recommended timeframes.
Always wash hands and sanitize utensils. Cool purees quickly before refrigerating, and discard any leftovers that have been in contact with a baby’s mouth.
Simple starter recipes (Stage 1)
These single-ingredient purees are gentle and easy:
- Banana puree: Mash ripe banana with a fork or blend with a little breast milk or formula for smoothness.
- Avocado mash: Smash ripe avocado; its creamy texture often needs no thinning.
- Sweet potato puree: Steam until tender and blend with a splash of water.
- Pear or apple puree: Peel, core, steam fruit pieces, then puree.
For steaming, cut produce into even pieces, steam until soft, then blend. Strain if needed for an ultra-smooth texture for younger infants.
Combining flavors and adding protein
Once your baby tolerates single foods, combine two familiar items (e.g., apple + carrot, pear + sweet potato). Start with mild combinations and introduce one new food at a time. When ready to add protein, consider pureed cooked chicken or lentils blended with vegetable puree; for ideas and chicken-specific recipes, explore these baby food recipes for 6–8 months to match your baby’s stage.
Batch cooking and freezing
- Cook larger quantities and cool quickly.
- Portion into ice cube trays (about 1–2 ounces per cube) for easy thawing.
- Store frozen cubes in labeled bags for up to 3 months.
- Thaw overnight in the fridge or warm gently; never refreeze thawed food.
Texture progression and feeding tips
- Stage 1 (4–6 months): Single-ingredient, smooth purees.
- Stage 2 (6–8+ months): Thicker purees, mashed foods, and soft lumps as oral skills develop.
- Stage 3 (8–10+ months): Finely chopped, mashed table foods and finger foods.
Introduce one new food every 3–5 days and watch for allergic reactions. Offer water in a cup once solids are established.
Troubleshooting and storage times
- If a baby refuses a food, wait a few days and try again; it can take multiple exposures before acceptance.
- Refrigerate purees for up to 48 hours and freeze for up to 3 months. Discard any reheated leftovers not eaten within two hours.
Quick no-cook ideas
For warm climates or busy days, some stage-appropriate no-cook recipes work well (e.g., mashed banana, yogurt mixed with pureed fruit). Always ensure ingredients are pasteurized and age-appropriate.
Final tips
Keep a simple rotation of favorites plus one new food each week. Use soft-cooked vegetables, ripe fruits, whole grains, and lean proteins. Trust your baby’s cues — they’ll guide the pace of progression.
Conclusion
For a wider variety of beginner-friendly recipes, check out this compilation of 20 easy homemade baby food recipes that covers fruits, veggies, and simple combos. If you prefer quick, no-cook stage 1 ideas to get started right away, these 10 easy homemade baby food ideas (no-cook, stage 1) are great for fast, nutritious options.

20-Minute Veggie-Loaded Pizza Muffins
20-Minute Veggie-Loaded Pizza Muffins
Light, savory, and bursting with vegetables, these pizza muffins are a fast way to satisfy pizza cravings without firing up the oven for a full pie. They’re perfect for weeknight dinners, lunches, snack time, or a crowd-pleasing appetizer. Ready in about 20 minutes, they pack familiar pizza flavors—tomato, mozzarella, oregano—into portable, kid-friendly bites.
Why you’ll love them
- Super quick: about 20 minutes from start to finish.
- Flexible: swap vegetables, cheeses, or add proteins like pepperoni or cooked sausage.
- Kid-approved: easy finger food that sneaks in vegetables.
- Make-ahead friendly: they reheat well for busy days.
Ingredients (makes ~12 muffins)
- 1 cup all-purpose flour (or whole wheat for extra fiber)
- 1 tsp baking powder
- 1/2 tsp salt
- 1/2 tsp dried oregano or Italian seasoning
- 1 large egg
- 3/4 cup milk (dairy or plant-based)
- 2 tbsp olive oil or melted butter
- 1/2 cup pizza sauce (plus extra for dipping)
- 3/4–1 cup shredded mozzarella cheese
- 1/2 cup finely diced bell pepper (any color)
- 1/4 cup finely diced red onion or scallions
- 1/2 cup finely chopped zucchini or spinach, squeezed dry if watery
- Optional: 1/4 cup sliced olives, chopped cooked bacon, or diced pepperoni
Notes: Dice vegetables small so the muffins hold together and bake evenly.
Quick method
- Preheat your oven to 375°F (190°C). Lightly grease a 12-cup muffin tin or line with paper liners.
- In a medium bowl, whisk together the flour, baking powder, salt, and dried oregano.
- In a separate bowl, beat the egg with the milk, olive oil, and pizza sauce until smooth.
- Pour the wet ingredients into the dry ingredients and stir just until combined—don’t overmix.
- Fold in the mozzarella, bell pepper, onion, and zucchini (plus any optional add-ins). The batter will be thicker than pancake batter but spoonable.
- Spoon the batter into the prepared muffin cups, filling each about 3/4 full. Sprinkle a little extra cheese on top if desired.
- Bake 14–18 minutes, or until golden on top and a toothpick inserted into the center comes out mostly clean with a few moist crumbs.
- Let the muffins cool in the pan for 5 minutes, then transfer to a rack. Serve warm with extra pizza sauce for dipping.
Total active time: ~10 minutes. Bake time: 14–18 minutes.
Tips for success
- Keep veggies small and evenly chopped so every bite gets a bit of vegetable.
- If using watery vegetables like zucchini or fresh mushrooms, squeeze out excess moisture before adding.
- For a crispier top, broil for 30–60 seconds at the end—watch closely to avoid burning.
- To make them dairy-free, use a plant-based mozzarella and substitute milk with an unsweetened plant milk.
- To add protein, stir in small diced cooked chicken, turkey pepperoni, or crumbled cooked sausage.
Variations
- Mediterranean: swap mozzarella for feta, add chopped sun-dried tomatoes, spinach, and olives.
- White pizza muffins: omit tomato sauce and add ricotta mixed with garlic and herbs plus shredded mozzarella.
- Gluten-free: use a 1:1 gluten-free baking flour and check consistency—may need an extra tablespoon of milk.
Make-ahead, storage & reheating
- Refrigerate in an airtight container for up to 4 days. Reheat in the oven at 350°F (175°C) for 8–10 minutes or microwave for 30–60 seconds.
- Freeze cooled muffins on a tray until solid, then transfer to a freezer bag for up to 3 months. Reheat from frozen in the oven at 350°F (175°C) for 12–18 minutes.
Serving suggestions
- Serve with a simple side salad or roasted vegetables for a light dinner.
- Pack cool muffins in a lunchbox with a small dipping container of pizza sauce.
- Offer a variety platter with different toppings (pepperoni, veggie, Mediterranean) for parties or potlucks.
Nutrition (approximate per muffin)
Calories: 120–180 (depending on cheese and add-ins)
Protein: 6–8 g
Fat: 6–10 g
Carbs: 12–18 g
Conclusion
For a quick, customizable snack or meal, these veggie-loaded pizza muffins are hard to beat—if you want the original inspiration and base recipe, check out the 20-Minute Veggie-Loaded Pizza Muffins recipe on The Natural Nurturer. If you prefer a flatbread-style take on veggie pizzas to serve whole instead of in muffin form, this Flatbread Pizza Recipe (Veggie Loaded!) from Thriving Home has great ideas and variations.
