
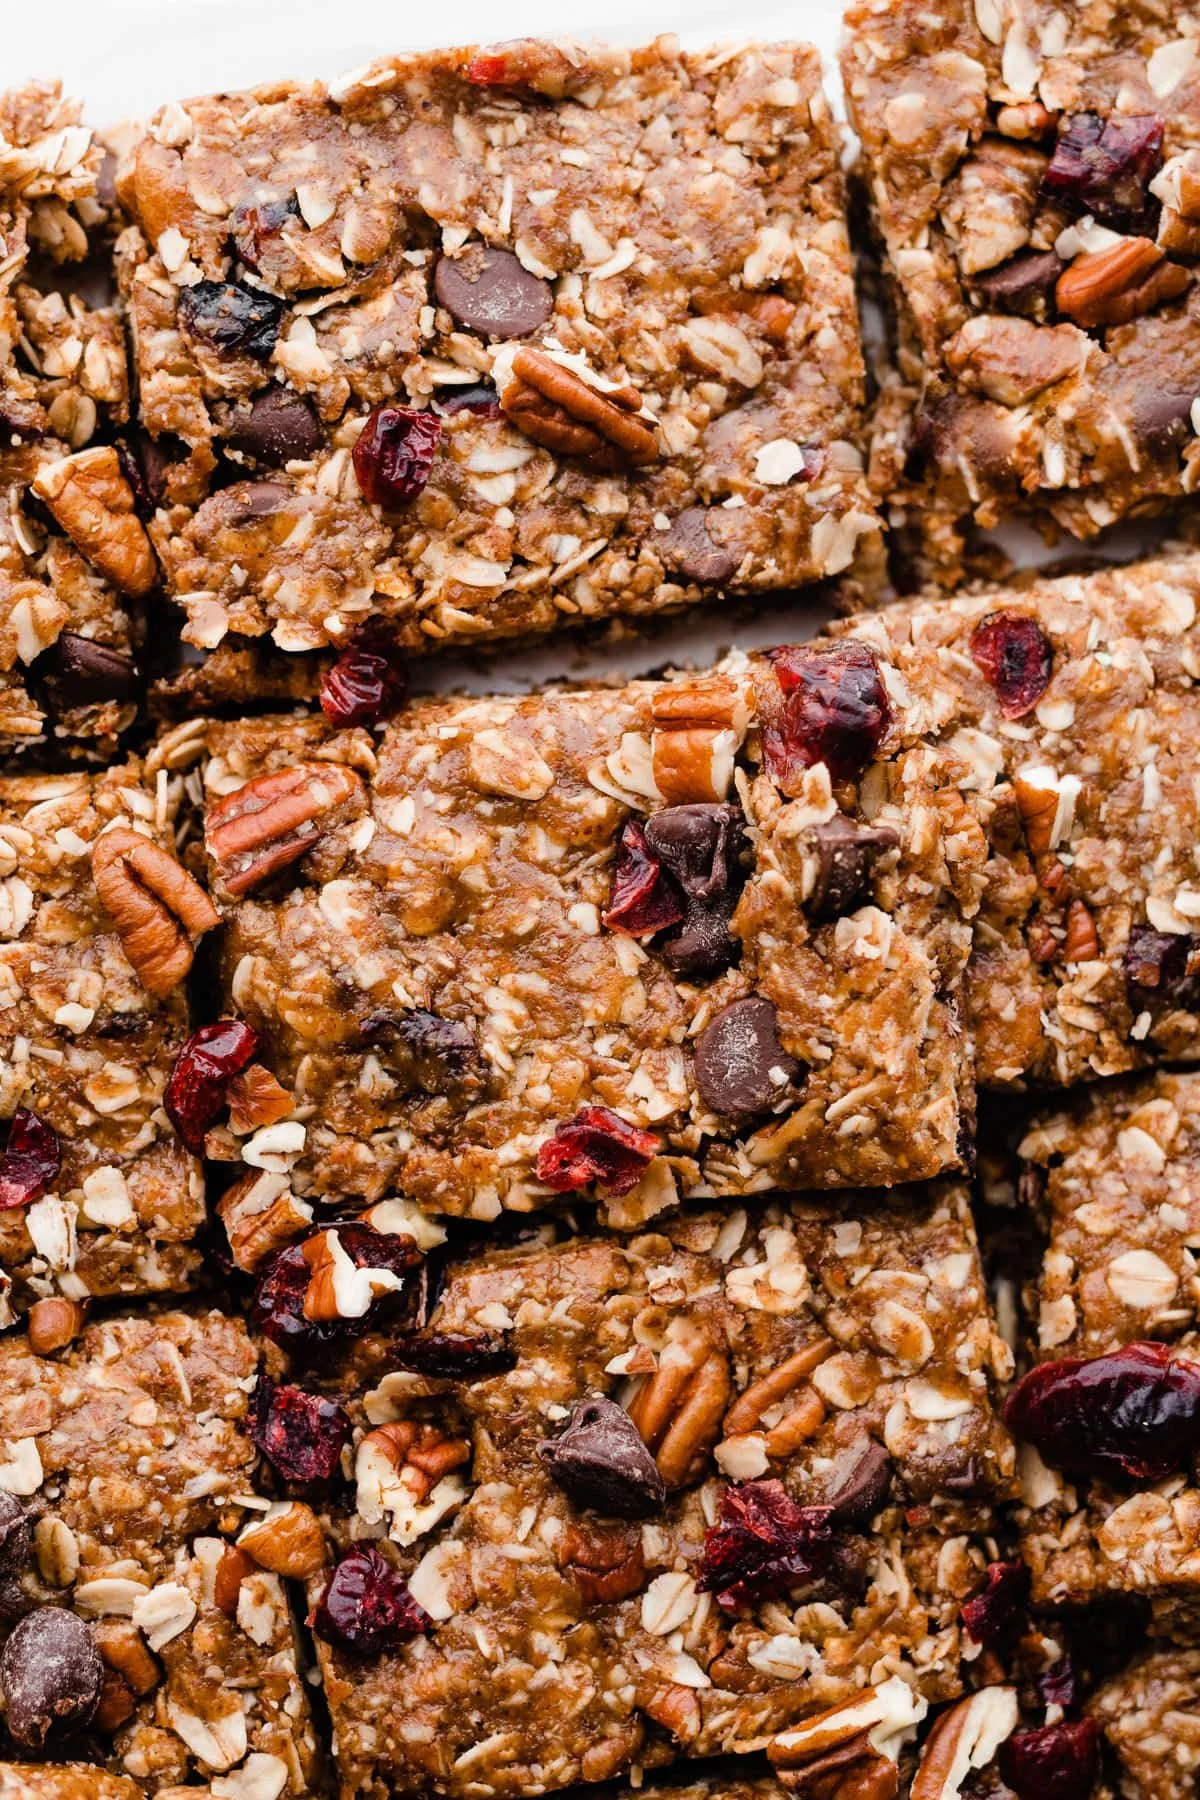
No Bake Cereal Bars You Can Make at Home in Minutes for Busy Moms
Imagine this: it’s mid-afternoon, your little one’s starting to show signs of the dreaded “hangry” state, and you’re running on empty after a whirlwind of parenting moments. You glance at the clock and think, “Where did the day go?” Finding a healthy snack that everyone will happily dive into can feel like searching for a needle in a haystack, right? Well, here’s the thing – quick, easy, and delicious no-bake cereal bars can save the day!
These homemade cereal bars are not only a snack but also a fun little project you can whip up with your kids in no time. They’re customizable, and let’s be honest, what parent doesn’t love a recipe that can be tweaked to fit what you have on hand? So gather your little helpers, and let’s dive into some delightful no-bake cereal bar recipes that’ll keep both smiles and energy levels high!
Why No-Bake Cereal Bars Are Perfect for Parents
I can’t tell you how many times I’ve found myself scrambling for a quick snack before heading to the next chaotic event. When you have small kids, life can feel like one big juggling act, and squeezing in a healthy food prep session often feels impossible. No-bake cereal bars are a game changer! Not only do they require minimal time and effort, but they also allow you to sneak in some nutrition without the fuss.
Let’s face it: we all want our kids to enjoy snacks that not only taste great but also pack a nutritional punch. So, why are these bars perfect for your little ones?
- Quick prep: Most recipes take around 10-15 minutes to prepare. That’s faster than most convenience store runs!
- No baking necessary: You can save on time and energy (because really, who has time to clean up a baking mess?).
- Customizable: You can use whatever cereals you have on hand, which means less waste and more creativity.
- Kid-approved: Kids love anything they can help make. It’ll be a hit not only because it’s tasty but also because they were part of the process!
Basic No-Bake Cereal Bar Recipe
Alright, let’s get to the good stuff! Here’s a simple recipe to get you started.
Ingredients
- 2 cups of cereal: Any kind you have (oatmeal, rice cereal, or even granola)
- 1 cup nut or seed butter: Peanut butter, almond butter – the sky’s the limit!
- 1/3 cup honey or maple syrup: For sweetness and binding.
- Mix-ins: Optional! Think chocolate chips, dried fruits, or nuts.
Instructions
- Prep your pan: Line an 8×8 inch pan with parchment paper for easy removal.
- Combine the ingredients: In a bowl, mix the nut butter and honey until smooth. Then stir in your chosen cereal and any optional mix-ins until everything is fully coated.
- Press the mixture into the pan: Using your hands or a spatula, press the mixture into your prepared pan. Make sure it’s compact!
- Chill: Place the pan in the refrigerator for at least an hour to set.
- Cut and enjoy: Once set, slice into bars and store in an airtight container for up to a week.
Bonus Mix-Ins to Consider
- Chocolate chips: Because who doesn’t love chocolate?
- Mini marshmallows: It adds a fun twist!
- Coconut flakes: For a tropical feel.
- Chia seeds: For added nutrition.
Things to Keep in Mind
As you whip up these tasty bars, there are a few tips and potential mistakes to watch out for.
Quick Tips
- Avoid Too Much Heat: When melting your nut butter and sweetener, keep the heat low to avoid separation.
- Use Fresh Ingredients: Old cereals or stale add-ins can lead to a less tasty outcome.
- Be Creative: Don’t feel restricted by the standard ingredients! Get the kids involved in picking flavors. What if you made a breakfast bar with banana chips and cinnamon for an extra punch?
Mistakes to Avoid
- Not Packing Enough: If you don’t press the mixture down firmly enough, you’ll end up with crumbly bars rather than a solid piece.
- Skipping the Chill: This step is crucial! Skipping it means your bars won’t hold their shape when you cut them.
- Overcomplicating: Stick with simple ingredients at first before venturing into more complicated creations.
Cool Variations You Can Try
Once you’ve mastered the basics, why not get a little adventurous? Here are some fun ideas to shake things up:
Chocolate Dipped Cereal Bars
Imagine the delight on your kids’ faces when they find out these bars can be dipped in melted chocolate! Simply melt some dark or milk chocolate, dip half of each bar, and set them back in the fridge to cool.
Rainbow Fruit Cereal Bars
For a festive touch, why not mix in colorful dried fruits? Dried cranberries, apricots, and raisins make these not only healthy but visually appealing. Your kids won’t be able to resist!
Savory Seed Bars
If your little ones are fans of a savory taste, consider making a mix that includes seeds like pumpkin and sunflower instead of sweet ingredients. A splash of salt can create a very different, enjoyable taste.
Chewy Protein Bars
Need a little boost? Mix in protein powder with your nut butter to create bars that are a great post-play snack. I’ve found they’re excellent for sports days or after long park outings.
Serving Suggestions
Now, let’s be real: what good is a delicious snack without some fun serving ideas? Here are a few options to try:
- Snack Time Platter: Slice the bars into different shapes and serve with yogurt and fresh fruits.
- On-The-Go: Wrap them individually in wax paper for easy grab-and-go snacks.
- Breakfast Bars: Pair them with a smoothie for an energy-packed breakfast option.
Encouraging Kids to Help
One of the best parts of making these no-bake cereal bars is involving your kids. From measuring to mixing, they can have a hands-on experience that’s both educational and fun.
Here’s a thought: What if you made a ‘snack-making day’ in your weekly routine? Just imagine them saying, “I helped make this! Can we try a new flavor next week?” It’s such a small activity that can foster a lifetime love of cooking and healthy eating.
Conclusion
So the next time your little one is looking for something to munch on, whip up a batch of these tasty no-bake cereal bars! With a little creativity and a bit of teamwork, you can craft snacks that are delicious, nutritious, and make your parenting journey just a little smoother.
For more delicious recipes, check out these so you can explore the world of no-bake delights: No Bake Peanut Butter Chocolate Cereal Bars and No Bake Almond Granola Bars. Remember, you’re not alone in this parenting adventure – let’s keep finding fun ways to nourish our kiddos together!

Kid Friendly Dinner Ideas for Picky Eaters That Actually Work
Imagine this: It’s 5 PM, and you’re already exhausted from a long day of playdates, snack time negotiations, and the constant battle of wills over broccoli. Your little one seems to have suddenly decided that the only food they’re interested in is the plain pasta from last week. Sound familiar? You’re not alone in this. Navigating mealtime with picky eaters can be a challenge, especially when you want to whip up something quick, healthy, and that your kids will actually eat.
The struggle is absolutely real, but let’s explore some kid-friendly dinner ideas that lean heavily on quick recipes with ground beef and chicken. You’ll also discover some hearty crockpot meals that can help make dinnertime less of a battlefield—and more of a happy gathering.
Easy and Quick Kid-Friendly Dinner Ideas
Ground Beef Recipes Your Kids Will Love
Cheesy Beef Quesadillas
- What you’ll need: Ground beef, tortillas, cheese, and any preferred toppings (like mild salsa).
- How to make them: Brown the ground beef and sprinkle it with cheese before folding it into a tortilla and warming it on a skillet. Cut into triangles for little hands to grab!
Beef and Veggie Mini Meatballs
- What you’ll need: Ground beef, breadcrumbs, grated carrot, and egg.
- How to make them: Mix all the ingredients, roll them into small balls, and bake until golden. Serve with a side of tomato sauce for dipping.
One-Pan Beef and Rice
- What you’ll need: Ground beef, rice, chicken broth, and canned vegetables.
- How to make it: Sauté the beef, stir in rice and broth, cover, and simmer until rice is tender. This can be a one-dish wonder, reducing cleanup time!
Taco Night
- What you’ll need: Ground beef, taco seasoning, and optional toppings (lettuce, cheese, salsa).
- How to make them: Cook the seasoned beef and let your kids assemble their own tacos. This is a great way to let them explore flavors while picking what they like!
Chicken Recipes for Picky Eaters
Honey Garlic Chicken Bites
- What you’ll need: Chicken breast, honey, soy sauce, and garlic.
- How to make them: Cut chicken into bite-sized pieces and sauté with a honey-soy mixture. Serve with steamed rice and veggies.
Chicken and Broccoli Alfredo
- What you’ll need: Chicken, broccoli, cream, and pasta.
- How to make it: Cook chicken and broccoli, mix in pasta and a creamy sauce, and watch the kids devour it (yes, even the broccoli!).
Crockpot Chicken Tacos
- What you’ll need: Chicken breasts, taco seasoning, and tortillas.
- How to make it: Place chicken in the crockpot with seasoning and cook on low for 6 hours. Shred and let the kids build their tacos! (Totally effortless and totally kid-approved.)
Pineapple Teriyaki Chicken
- What you’ll need: Chicken, teriyaki sauce, and pineapple chunks.
- How to make it: Combine chicken with teriyaki sauce and pineapple in the crockpot. Let it cook for about 4 hours on high or 6 on low. Serve over rice or noodles!
Creative Crockpot Meals for Busy Families
Beef Stew
- What you’ll need: Ground beef, potatoes, carrots, and beef broth.
- How to make it: Brown the beef, toss everything into the crockpot, and let it simmer. You’ll have a hearty meal ready when you walk in the door.
Chicken Chili
- What you’ll need: Chicken breasts, canned beans, corn, and spices.
- How to make it: Combine ingredients in your crockpot and let it cook. Serve with cornbread for a filling and warm meal!
Budget-Friendly Finds
In today’s economy, keeping meals affordable is crucial. Ground beef and chicken are often less pricey than other meats, and they’re super versatile. Buying in bulk or choosing store brands can save even more money. Pair them with seasonal vegetables to create nutrition-packed meals without breaking the bank.
Quick Tips for Picky Eaters
- Make Dinner Fun: Engage kids during meal prep. Let them sprinkle cheese or mix ingredients. Make it a fun activity!
- Presentation Counts: Sometimes, how food is presented makes all the difference. Try making food into fun shapes or vibrant colors.
- Involve Them in Grocery Shopping: Let them pick out a veggie or fruit. They’ll be more inclined to eat what they helped choose.
- Mix Sneaky Veggies: Blending veggies into sauces or mashing them into a meat mixture can often go unnoticed—sweet potato meatloaf, anyone?
Mistakes to Avoid
- Forcing Flavors: It’s tempting to make everything a battle, but pushing unfamiliar foods can often backfire. Keep introducing new options slowly!
- Making Two Meals: I’ve made this mistake before, and it gets tiring! Provide a variation in seasoning or dips without swapping out the whole meal.
Bonus Ideas
What if you tried some breakfast foods for dinner? Children usually love eggs, pancakes, or breakfast burritos.
- Egg Muffins: Mix eggs with veggies and cheese, pour into muffin tins, and bake for a delightful breakfast-for-dinner.
- Smoothie Bowls: Full of fruit, yogurt, and granola, these can be a fun way to end the day, especially on hot nights.
Conclusion
Finding quick and healthy dinners for picky eaters doesn’t have to feel overwhelming. With recipes like cheesy quesadillas and crockpot meals, you can create something your little ones will love without sacrificing nutrition. Remember, engaging your kids in the kitchen can sometimes lead to more adventurous eating habits.
If you’re looking for more ideas, you can check out 9 Kid-Friendly Dinners For Your Little Picky-Eaters for further elaboration. And if you need simple meal solutions, take a glance at 3-Ingredient Dinners Kids Will Actually Eat.
Planning meals for your picky eaters can be a journey, but with a little creativity and flexibility, you might find not just meals that work for them but ones that you love as well. Happy cooking!
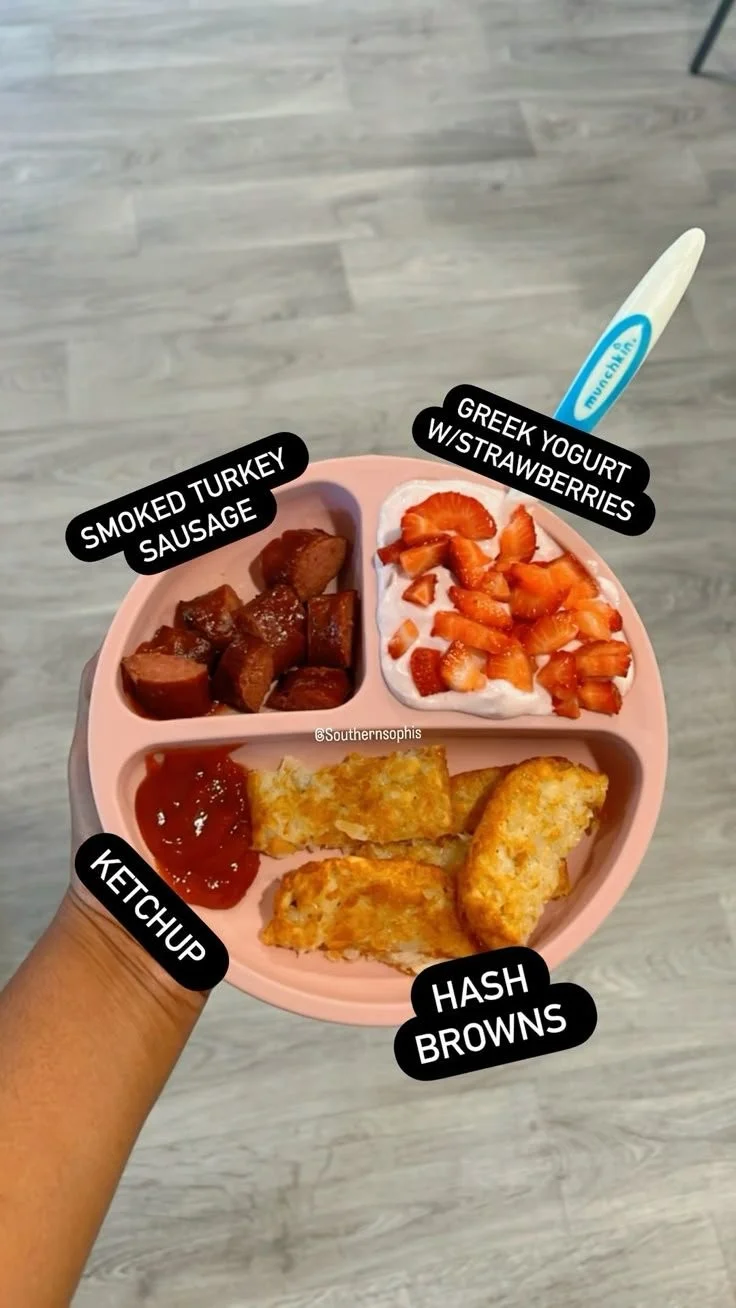
Breakfast ideas for Toddlers to fuel growth and happy mornings
Imagine it’s a Saturday morning, and you’re greeted by the sweet sounds of your toddler waking up. You’re feeling pretty optimistic about the day ahead, until you realize it’s time for breakfast. Oh, the breakfast battles. Sound familiar? We’ve all been there—trying to coax a sleepy little one into eating something that resembles nutrition rather than a sugary treat. Finding healthy breakfast ideas for toddlers can feel like navigating a minefield, but it doesn’t have to be so daunting.
The truth is, breakfast is the most important meal of the day—both for you and your toddler. It sets the tone for their energy levels, mood, and even their willingness to explore and learn throughout the day. So, what can you whip up that’s both nutritious and doesn’t take forever to prepare? Let’s dive into some fun and easy breakfast ideas that will make your little one excited to eat.
Breakfast Ideas That Are a Hit with Toddlers
Mini Pancake Stacks
These tiny stacks are a delightful way to start the day. You can use whole wheat flour or almond flour for a healthier twist. Top them with yogurt and fresh fruit, and you’re in business. What’s great is that you can make a big batch on the weekend and freeze them. Then, just pop them in the toaster on busy mornings (seriously, who doesn’t love saving time?).
Smoothie Bowls
Smoothies can easily become a toddler’s best friend when served in a bowl with toppings. Here’s the thing: Let them get creative! You can blend up spinach with mango and banana, then let your mini chef add toppings like chia seeds, granola, or even mini chocolate chips. They’ll love the hands-on aspect and you’ll appreciate the nutritional boost.
Avocado Toast
Now, this might just be one of my personal favorites. Mash up some ripe avocado and spread it on whole-grain toast. You could even add a scrambled egg on top for extra protein. Easy, quick, and super satisfying for both you and your toddler. Not to mention, it’s Insta-worthy!
Overnight Oats
If you’re looking for a breakfast idea you can prep the night before, overnight oats are your jam. Mix rolled oats with milk or yogurt, add fruits or a drizzle of honey to taste, and leave it in the fridge overnight. In the morning, it’s ready to go. I promise, it tastes way better than it sounds. Plus, you can customize it daily — with apples one morning and mashed banana the next.
Nut Butter Banana Wraps
Who doesn’t love a good wrap? Spread your favorite nut butter (or sunflower seed butter for allergy-friendly options) on a whole grain tortilla, place a banana in the middle, roll it up, and slice it into bite-sized pieces. It’s like a breakfast burrito that even toddlers can get behind.
Yogurt Parfaits
Layer some Greek yogurt with granola and berries in a cup. Let them choose their favorite toppings. Not only does this look great, but it’s also a fantastic way to sneak in protein and probiotics. Plus, you can always switch things up with seasonal fruits.
Egg Muffins
These are so easy to customize! Whisk some eggs, toss in their favorite veggies (like bell peppers or spinach), and bake them in a muffin tin. They’re bite-sized, fluffy, and super easy for little hands to manage. Bonus: They’re freezer-friendly!
Fruit and Cheese Kabobs
Here’s a fun and playful idea. Thread cubes of cheese and pieces of fruit onto skewers (just ensure the ends aren’t sharp). Not only is it a great way to get those vitamins and calcium in, but it also adds a fun twist to breakfast. Your toddler will feel like they’re having a party every morning.
Whole Wheat Bagels with Cream Cheese
You can’t go wrong with a classic. Use whole wheat bagels, spread a thin layer of cream cheese (or nut butter), and top with fruit slices. Don’t forget to let your toddler help with the toppings—making breakfast together can turn it from a chore into a fun activity.
Savory Oatmeal
If your toddler’s not into sweet breakfasts, savory oatmeal is worth a try. Cook oats and stir in shredded cheese, some veggies, and maybe even an egg on top. It might sound odd, but it’s filling and tasty!
Round It Out with Fresh Fruit
No matter what you choose as the main attraction for breakfast, rounding out the meal with fruit is a win. Sliced apples, berries, or even a banana can offer crucial vitamins and tastes great.
Quick Tips for Breakfast Success
- Prep Ahead: Whenever possible, prepare food the night before. As busy parents, we need all the help we can get.
- Involve Your Toddler: Engaging your child in the breakfast-making process can stir up excitement. Kids are more likely to eat what they helped create.
- Keep it Colorful: The more colors on the plate, the better! Bright fruits and veggies are not only visually appealing but also packed with nutrients.
- Be Flexible: If your toddler refuses traditional breakfast food, that’s totally normal. They may prefer a sandwich or leftovers. Don’t stress about sticking to cereal and eggs.
Mistakes to Avoid
- Forcing Choices: Trying to force a toddler to eat what you think is ‘good’ can lead to resistance. Offer choices but respect their preferences.
- Skipping Breakfast: It’s easy to forget breakfast in the chaos of getting out the door. But a good breakfast fuels your kids (and you!).
- Ignoring Allergies: Be mindful of any allergies your child might have when introducing new foods.
Conclusion
Finding the right breakfast ideas for toddlers can feel overwhelming, but with a little creativity and preparation, it’s absolutely doable. Remember, you don’t have to create a five-course meal every morning. Start simple, keep things fun, and let your child’s preferences guide you. By making breakfast a fun and engaging time, you’re not just filling their tummy—you’re setting a positive tone for the day ahead.
For even more options, you might find it helpful to check out this list of 30+ healthy toddler breakfast ideas or explore 12 days of unprocessed toddler breakfast ideas to keep things fresh and interesting. Here’s to happy, healthy breakfasts in your home!

Easy Kid Friendly Dinner Ideas for Picky Eaters and Busy Families
Imagine this: It’s the end of a long day, and you’re staring at the clock, realizing dinnertime is fast approaching. You open the fridge, hoping something will jump out at you that everyone in the family will enjoy. But then there’s that familiar sinking feeling—your child is a picky eater, and you’re not in the mood for another battle over broccoli or a food tantrum over the wrong pasta shape. Sound familiar? You’re definitely not alone in this parenting adventure.
Searching for dinner ideas picky eaters will finally enjoy can feel like searching for a needle in a haystack. But here’s the thing—what if you could whip up meals that not only satisfy your kids but also please your adult palate? I’ve rounded up 45 kid-friendly meals that will make family dinners less of a hassle and more of a joy. Let’s explore these ideas together!
Chicken Recipes Kids Will Love
Chicken is a versatile protein, and luckily, there are tons of ways to prepare it that your little ones will actually want to eat.
Crunchy Chicken Tenders
Who doesn’t love a good chicken tender? By coating chicken strips in crushed cornflakes or panko, you get that crunch kids adore. Serve them with a side of honey mustard or ketchup, and watch them disappear!
BBQ Chicken Sliders
These sliders can easily become a fun meal for kids. Shred some cooked chicken, mix it with barbecue sauce, and pile it onto mini buns. Add a slice of pickle on top, and there you have it—an easy dinner that’s just as fun to make as it is to eat.
Cheesy Chicken and Veggie Casserole
Sneaking in vegetables can be tricky, but mixing shredded chicken with broccoli, cheese, and a creamy sauce in a casserole can do the trick. Plus, those golden-brown crumbs on top? Totally irresistible.
Ground Beef Dinners
Ground beef is another crowd-pleaser and can be transformed into various meals that are easy to prepare.
Sloppy Joes
These messy sandwiches are sure to be a hit. Just mix ground beef with ketchup, mustard, and a dash of brown sugar. Spoon it onto a bun, and let the kids dig in! You might want to have some napkins handy for this one.
Beef Tacos
Tacos can be a fun way for kids to assemble their own meals. Lay out ground beef, cheese, lettuce, and tomatoes so they can customize their own creations. Who knew dinner could be so interactive?
Pasta Dishes That Kids Can’t Resist
Pasta is a universal favorite, and with a little creativity, it can become a delightful dinner choice.
Cheesy Mac and Cheese
Let’s be honest, you can’t go wrong with mac and cheese. Try adding some steamed broccoli or peas into the mix. They’re all about the cheese, and you’re getting some veggies in there too! Win-win.
Spaghetti with Hidden Veggie Sauce
If your child loves spaghetti, then you can sneak in pureed carrots or zucchini into the tomato sauce. Blend it up until smooth, and they’ll be none the wiser!
Pesto Pasta
Keeping it simple, toss cooked pasta with some store-bought pesto and set out toppings like cherry tomatoes or shredded cheese for them to personalize.
Pizza Delights
Let’s be real—who doesn’t love pizza? Giving kids a chance to help make their own can be a real game-changer.
DIY Mini Pizzas
Using English muffins or pita bread as the base, let the kids add sauce, cheese, and their favorite toppings. It’s a fun activity and a delicious dinner!
Veggie & Cheese Pizza Rolls
Roll out pizza dough, fill it with cheese and finely chopped veggies, then roll it up and bake. They taste amazing and look like something from a fancy restaurant!
Quick and Easy Rice Meals
Rice can be a fantastic base for all kinds of dishes, especially if you’re looking for something nutritious that kids will gobble up.
Chicken Fried Rice
Picture this: leftover chicken, rice, and a mix of frozen peas and carrots tossed in a soy sauce. It’s a one-pan meal that comes together in minutes, and it’s always a hit.
Cheesy Broccoli Rice
Mix cooked rice with broccoli and a generous amount of cheese. It’s creamy, comforting, and packed with flavor that even picky eaters will enjoy.
Fun Meal Ideas for Sleepover Parties
When hosting kids’ gatherings, it’s nice to have meals that are appealing for everyone.
Sliders Station
Set up a slider station with different fillings like turkey, beef, and veggies. Add toppings so kids can customize their tiny burgers. They’ll love creating their own tasty concoctions!
Air-Fryer Veggie Chips and Dip
Using an air fryer, you can create crispy veggie chips (think zucchini or sweet potatoes) that kids will munch on. Pair it with guacamole or yogurt dip, and they’ll be snacking in style.
Quick Tips for Family Dinner Success
- Involve your kids in cooking. They’re more likely to eat what they helped make.
- Be creative with presentation. Sometimes, cutting food into fun shapes can make all the difference!
- Set a comfortable atmosphere. Dim the lights a bit and make it feel special; kids will be less focused on what’s on the plate.
Mistakes to Avoid
- Pushing them to try everything at once. It can backfire; instead, introduce new foods gradually.
- Ignoring their preferences. While it’s important to encourage them to try new things, balancing it with their tastes can keep mealtime stress at bay.
Conclusion
Finding dinner ideas for picky eaters can feel exhausting, but it doesn’t have to be. With these 45 kid-friendly meals—from chicken recipes to easy rice dishes—you’ll serve up dinners that everyone in the family can enjoy, including the adults. Remember, it’s all about creativity and finding ways to make meals fun. You might even find that your kids will discover new favorites along the way!
If you’re looking for additional inspiration, check out more dinner ideas for picky eaters or think about trying some of the lazy dinner recipes that can save you time without compromising taste. Happy cooking!

Hidden Veggie Recipes For Toddlers That Make Veggies Fun and Easy
Imagine this: dinner time rolls around and you call your toddler to the table. You’ve got a colorful spread of food, everything looks appealing, but your little one’s expression says it all—disgust. They push their plate away, crossing their arms stubbornly, causing you to feel a mix of frustration and resignation. You’re not alone in this scenario; we’ve all been there, battling our little food critics. But what if I told you that you could transform those rejected veggies into delectable delights? Let’s dive into my master list of hidden veggie recipes that just might do the trick!
Sneaky Hidden Veggie Smoothies
Smoothies are like a magic potion for parents. They’re quick, easy to prepare, and almost always an instant hit.
Spinach Banana Smoothie: Blend together a ripe banana, a handful of spinach (trust me, they won’t see it), a cup of yogurt, and a splash of milk. It’s creamy, sweet, and the green is completely camouflaged.
Carrot Mango Smoothie: Combine diced fresh mango, shredded carrots, yogurt, and a bit of orange juice. You’ll have a tropical smoothie that’s as vibrant as a sunset!
Quick Tip
Add a tablespoon of peanut butter or protein powder to make these smoothies even more filling (and tasty). Your toddler won’t even know they’re drinking veggies!
Creative Breakfast Ideas
Breakfast is the perfect opportunity to sneak in some veggies while your little ones are still groggy and not paying too much attention.
Veggie Pancakes: Grate a zucchini or a carrot into your pancake batter. The addition of these veggies keeps the pancakes moist, and the syrup often masks any green hints.
Egg Muffins: Whisk a couple of eggs and mix in finely chopped spinach, bell peppers, or any leftover veggies from the fridge. Pour the mixture into muffin tins and bake. These little breakfast bites are as fun to eat as they are easy to make!
Lunchbox Wonders
Let’s be honest—lunch can often be an uphill battle. But these hidden veggie recipes can help you win the war against picky eaters.
Veggie-Loaded Mac and Cheese: Cook your macaroni as usual, but blend some cauliflower into the cheese sauce. They’ll think it’s cheesy goodness, while you know they just ate a serving of veggies!
Meatballs with Hidden Veggies: Add finely chopped mushrooms and carrots into your ground meat mix. Bake them up and serve them with spaghetti or on their own. Not only do they taste amazing, but the veggies add an extra dose of nutrients.
Snack Time Saviors
Snacks are when your toddler often craves something quick and crunchy. Try these ideas to ensure they’re getting some vegetables alongside those potato chips.
Veggie Chips: Make your own by thinly slicing sweet potatoes or beetroot, seasoning them lightly, and baking until crispy. They’ll be devoured in seconds without realizing how healthy they are.
Hummus with a Twist: Blend cooked chickpeas with steamed spinach or roasted red peppers for a colorful, nutritious dip. Serve it with pita bread or veggie sticks for a snack that packs a punch!
Evening Meals Made Easy
Dinner can be another challenge, especially when it’s met with heavy resistance. Here are some recipes that can sneak a good dose of veggies into your evening routine.
Hidden Veggie Chili: In your usual chili recipe, add in finely chopped zucchini, bell peppers, or even some diced carrots. Cook it all down until it’s thick and hearty. The robust flavors will mask the veggies beautifully.
Cauliflower Pizza Crust: Yes, cauliflower can be a pizza crust! Combine riced cauliflower with cheese and eggs, bake it until golden, then top with your favorite sauce and toppings. Your kids will love the pizza, and you get to feel good about the ingredients!
What If They Detect the Veggies?
If your toddler happens to notice something “funny” in their dinner, just turn it into a game. “Guess what I snuck in there!” Keep it lighthearted, and remind them that trying new things is an adventure.
Mistakes to Avoid
Now, let’s chat about a few pitfalls to steer clear of when introducing hidden veggie recipes.
Being too sneaky: It’s important not to trick kids too often. Sometimes, you want to show them what’s in their food. This builds trust and helps them understand the benefits of eating healthy.
Overcooking the veggies: Cooking them too much can lead to mushiness, which might be a turn-off. Try to keep a bit of texture; it makes veggies much more appealing.
Skipping plating: Presentation matters! Kids are visual eaters; if the plate looks tasty, they’re more likely to give it a try.
FAQs About Hidden Veggie Recipes
Can my toddler really taste the hidden veggies?
In most cases, as long as you blend or process them well, they shouldn’t taste a thing! Just don’t lose hope if they refuse something right away. Sometimes it takes a few tries before they accept it.
What’s the best way to introduce new hidden veggie recipes?
Start with old favorites! If your child loves pasta, try spaghetti with hidden sautéed veggies rather than presenting it in a brand new dish immediately. Comfort in familiarity can make new foods less intimidating.
Bonus Ideas for Getting Creative
Feeling inspired? Here are a couple of more ideas to try:
Create a veggie swap in your usual recipes! For example, replace half of the ground beef in your tacos with lentils.
Make a soup full of diced veggies that you can blend into a smooth texture—your toddler may love it and you can get creative with the flavors.
Conclusion
At the end of the day, finding ways to sneak in those nourishing veggies can be a game-changer on the parenting front. You’re not just feeding your little ones; you’re teaching them to enjoy a variety of foods. Remember that it’s completely normal for toddlers to be picky eaters, and introducing veggies in fun, hidden ways can make a huge difference. If you’re looking for more inspirations, check out these fantastic resources: 30 Hidden Veggie Recipes For Toddlers – Mommy Wonders and 30 Hidden Vegetable Recipes for Toddlers – Hello Spoonful. Keep trying, stay positive, and remember—you’ve got this!
Pool Noodle Activities That Teach Kids Through Play and Fun
Imagine it’s a sunny Saturday morning, and the kids are buzzing with energy. You’ve got the sunscreen out, the snack table filled, and you’re tempted to take them to the local pool. But wait—what if I told you there’s a way to bring the fun of the pool right into your backyard or living room with something as simple and colorful as pool noodles? I mean, who doesn’t love a good pool noodle, right? They’re light, versatile, and can be transformed into all sorts of exciting activities for our little ones.
Let’s dive into these 15 pool noodle activities that will have preschoolers, pre-k, and kindergarten students not only splashing around but also learning and developing important skills along the way! Trust me, you’ll want to hold on to these ideas for those long summer days.
Fun Swimming Pool Games for Learning
Build a Noodle Boat
Here’s the thing: kids love floating things! Cut a pool noodle into sections and attach a sturdy piece of cardboard to serve as a base. Kids can decorate their noodle boats with stickers or markers before testing them out in a kiddie pool. It’s a joy to watch their little faces light up when they see their creations float!
Noodle Jousting
Picture this: two kids, each armed with a pool noodle, on a balance beam or a playground beam! They can take turns trying to knock each other off while you simply provide some supervision. This activity helps improve balance and coordination, and let’s be real—it’s hilarious too!
Noodle Racing
Set up a noodle race where kids can push a pool noodle with their hands or feet across a specific distance. You could even mark the finish line. It’s a great way to have them practice their speed while ensuring they get some exercise, and it’s super fun to see whose noodle crosses the finish line first!
Water Balloon Noodle Toss
Nothing says summer like water balloons! Attach a small bucket filled with water balloons to one end of a pool noodle. Your little ones will love trying to toss the balloons to you while you stand a few feet away, dodging and laughing as they soak you. This is perfect to teach hand-eye coordination!
Noodle Napping
Now, you might be wondering how a pool noodle could possibly relate to napping. Simply lay a pool noodle on the floor and lay a blanket on top. Kids can practice their “naps” while lying over the noodle, which can help with their core strength. Plus, it’s a cozy setup.
Noodle Ring Toss
Grab some pool noodles and cut them into rings. You can make a simple target on the ground or even shape them into a tower. Kids can toss smaller rings onto the larger ones, honing their aiming skills and learning about distance.
Creative Arts with Pool Noodles
Noodle Painting
This one always brings out the inner artist. Simply cut the noodles into varying lengths, dip them in biodegradable paint, and let your kids stamp their creations on paper. This activity is a great way for them to explore textures and colors while getting a bit messy!
DIY Pool Noodle Sculptures
Hand your kids some scissors and let them create sculptures using their imagination! They can cut and piece together colors and shapes as they transform simple materials into works of art. The result can be a burst of summer creativity in your home!
Pool Noodle Obstacle Course
Set up an obstacle course in your yard using sliced pool noodle pieces as hurdles or tunnels. Kids can run, jump, and tumble their way through it while improving their agility. Make it exciting with a timer to see who can complete it the fastest!
Pool Noodle Sorting Game
Using different colors of noodles, you can cut them into various lengths. Then, ask your kids to sort them by color, size, or even shape. It’s a fabulous way to introduce basic math and sorting skills in a tactile way.
Learning Through Play
Pool Noodle Math
Want to make math a little more fun? Use cut-up pieces of pool noodle as counters for addition and subtraction problems. Kids can physically move the noodles as they solve problems, which can help them visualize concepts that might be tough for them otherwise.
Pool Noodle Letter Crafting
This activity can parallel the ones from our fluency-boosting activities. Have kids form letters or their names using long noodle pieces. This hands-on activity supports letter recognition and fine motor skills.
Noodle Number Race
Write numbers on paper plates and spread them in your yard. Place a noodle at the starting line. Call out a number and watch the kids race to find it! It’s a fantastic way to reinforce number recognition while getting them moving.
Water Play with Noodles
Cut the noodles lengthwise to create channels for water play. Kids can use cups or scoops to transfer water along the noodle channels, learning about flow and gravity—perfect for a hot summer day.
A Few Pool Noodle Hacks
- You can use pool noodles as soft bumpers on furniture edges, keeping those little explorers safe as they learn to navigate their surroundings.
- Tie small foam or water bombs to the end of noodles for amusing water fights—just be ready to get a little wet!
Conclusion
Isn’t it amazing how something as simple as a pool noodle can unlock a world of creativity, learning, and fun for our little ones? I hope these 15 pool noodle activities inspire you to embrace the joy of summer play while simultaneously nurturing important skills. Remember, it’s all about having fun and making lasting memories.
To dive deeper into creative play, check out these exciting resources: 15 Pool Noodle Activities that TEACH and All About Ramps – Science for Little Learners.
Let’s make this summer unforgettable! Enjoy getting messy, being silly, and watching your kids thrive in the process. You’ve got this, fellow parent!
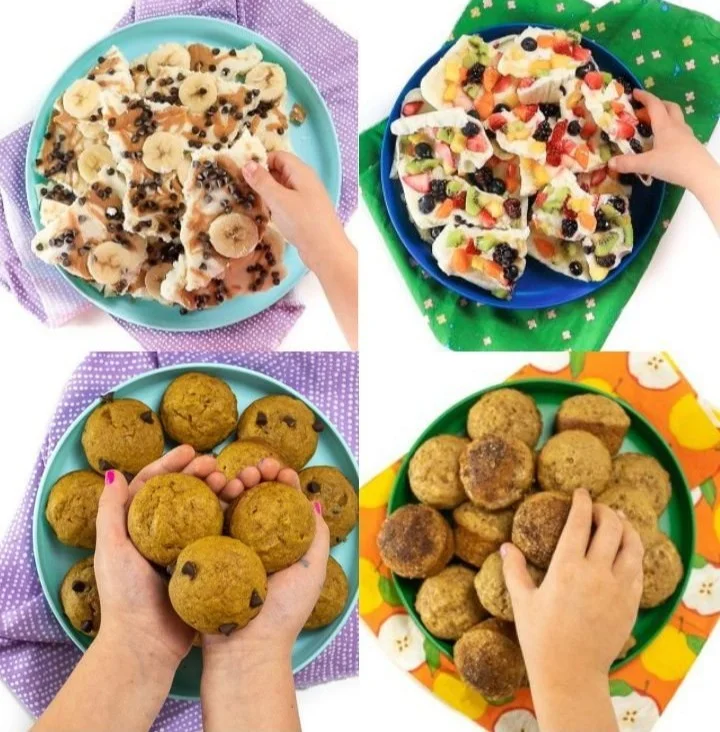
Cooking with Toddlers and Kids 50 Easy Recipes for Healthy, Fun Meals
Imagine this: it’s a rainy afternoon, and your toddler is bouncing off the walls. Sound familiar? You’ve exhausted every indoor game and art project, and now you’re feeling the creative burnout. Here’s the thing: the kitchen can be a magical place for both you and your child. Cooking together can not only keep little hands busy, but also create delightful memories that last a lifetime. Plus, you get the bonus of delicious food at the end! So, let’s dive into 50 easy recipes that your kids will actually want to help make and eat, no matter how old they are.
Wholesome Cookies and Desserts
Peanut Butter Cookies
These classic cookies are not only easy to make, but they require only three ingredients. Your kids will love rolling the dough into balls and pressing them down with a fork.Banana Oatmeal Cookies
If you’ve got some ripe bananas lying around, this is a great way to use them up. Just mash, mix, and bake. They’re healthy and a fun way for kids to practice mashing.No-Bake Chocolate Rice Crispy Treats
Kids can help melt the chocolate and mix in the crispy rice. Plus, they’ll love pressing the mixture into the pan.Fruit Kabobs
Let your kids choose their favorite fruits and help cut (with supervision, of course) before assembling them on skewers.Yogurt Parfaits
Layer yogurt with granola and fruits for a colorful treat. Your little ones can choose their layers, making each parfait unique!Mini Pizzas
Using English muffins or pita bread, let your kids spread sauce, sprinkle cheese, and add their favorite toppings.Chocolate Dipped Pretzels
Melt some chocolate, dip the pretzels, and let the kids sprinkle toppings. What’s not to love about chocolate?Frozen Yogurt Bark
Spread yogurt out on a baking sheet, top with fruits and nuts, and freeze. Kids can help choose their toppings, and everyone can have a hand in breaking it apart once it’s ready.Apple Nachos
Slice apples and drizzle with peanut butter or yogurt and a sprinkle of chocolate chips. It’s fun to assemble and eat!Muffin Tin Brownies
Bake brownies in a muffin tin for a fun twist on a classic. Kids will love pouring the batter into the cups!
No Sugar Added Recipes
Avocado Chocolate Mousse
Yes, it sounds odd, but trust me. Let your kiddos mix avocados with cocoa powder and a dash of honey. It’s creamy and delicious!Coconut Chia Seed Pudding
Mix chia seeds with coconut milk and let them soak. Kids will love watching the seeds transform into a pudding-like texture.Sweet Potato Pancakes
Use mashed sweet potatoes in your pancake batter. Your child can stir and flip (with your help), and they’ll love the sweet flavors.Fruit Smoothies
Let them pick which fruits to blend and watch as they create a colorful drink. You can toss in some spinach for added nutrition without them even noticing.Healthy Trail Mix
Together, pick out nuts, seeds, and dried fruits. Your kids will have fun measuring and pouring everything together.
Delicious Vegetable Recipes
Veggie Quesadillas
Let your kids fill the tortillas with cheese and their favorite veggies. They can help flip them too!Rainbow Vegetable Salad
Let your kiddos pick a variety of colorful vegetables for a fresh salad. A fun dressing makes it extra appealing!Zucchini Noodles
If you have a spiralizer, let your kids crank out the noodles. Just add their favorite sauce!Mini Veggie Frittatas
Kids love filling muffin tins with eggs and the vegetables of their choice. Once baked, they’ll have adorable mini frittatas.Sweet Potato Fries
Let your little ones help slice the sweet potatoes (safely!) and toss them in olive oil. They’ll love watching them transform in the oven.Stuffed Bell Peppers
Kids can help mix the stuffing ingredients and fill the peppers before they go into the oven.Corn on the Cob
Ask your kids to help shuck the corn and then let them pick their preferred seasoning for cooking.Baked Parmesan Carrots
Kids can dip carrot sticks in olive oil and then roll them in Parmesan cheese for a tasty side.Pasta Salad with Veggies
Let your child choose which pasta and veggies to add in. They’ll love stirring it all together.Broccoli Tots
Mix cooked broccoli with cheese and breadcrumbs to create fun, bite-sized snacks that they will want to help with!
Quick Snacks
Peanut Butter Banana Roll-Ups
Spread peanut butter on a tortilla, place a banana, roll it up, and slice it. Simple and fun for your little ones to make!Homemade Popcorn
Let your kids choose their toppings after popping the corn. It’s a fun movie night snack they can help prepare.Cheese and Crackers with a Twist
Have kids use cookie cutters to create fun shapes from cheese slices. They’ll love arranging them with crackers.Cucumber Sandwiches
They can spread cream cheese on whole grain bread and use a cookie cutter for fun shapes.Veggie Chips
Let them choose which vegetables to slice, season, and bake for a healthy snack.
Fun Breakfast Ideas
Pancake Art
Let your kids help make pancake batter and teach them how to create fun shapes on the griddle!Oatmeal Bar
Set up a buffet style oatmeal station with various toppings. Kids can build their own breakfasts!Breakfast Burritos
Involve your kids in scrambling eggs and rolling the burritos.Fruit and Yogurt Smoothie Bowls
Kids can decorate smoothie bowls with fruits, nuts, and seeds. Allow them to get creative!Egg Muffins
Another muffin-tin favorite! Let your kids mix eggs with veggies and cheese for a quick breakfast.
Creative Treats
Decorated Sugar Cookies
Kids can help roll out dough and decorate cookies with frosting and sprinkles. What kid doesn’t love this?Pineapple Boats
Cut a pineapple in half and let your kiddos fill it with yogurt and fruit for a tasty tropical treat.Chocolate Covered Bananas
Dip banana slices in chocolate, then top with nuts or sprinkles. Let them help arrange the slices on a tray.Homemade Ice Cream
All you need is a few ingredients and a little shaking. Let them mix or shake to create their favorite flavors!Cereal Treats
Mix cereal and marshmallows, and let your kids shape them into bars or fun shapes.
Special Occasion Ideas
Homemade Pizza Night
Set up a pizza-making night where your little chefs can choose their dough, sauce, and toppings.Cupcake Decorating Party
Bake and cool cupcakes ahead of time, and then let them decorate with icing and toppings for a fun activity.Taco Bar Night
Set up a taco station and let everyone build their own, mixing and matching fillings.Fruit-Pizza
Use a sugar cookie base with cream cheese frosting and a variety of fruits on top for a fun dessert.Seasonal Fruit Pops
Blend fruits with yogurt and freeze in molds for homemade popsicles.
Simple Dinner Ideas
One-Pan Chicken and Veggies
Let them help season and arrange the chicken and vegetables on a sheet pan for a low-stress dinner.Easy Stir-Fry
Your kids can choose their favorite proteins and vegetables to toss together in a stir-fry.Stuffed Shells
Involve them in filling the shells with cheese and sauce for a comforting meal.Homemade Sushi Rolls
Using simple fillings, allow your kids to roll their sushi. It’s fun and interactive!Vegetable Loaded Mac and Cheese
Let your kids pick vegetables and mix them into their mac and cheese for a healthy twist.
Cooking with your kids creates a foundation for a lifetime of skills, not to mention it’s a fantastic way to bond. So, as you dive into these recipes, remember: it’s not just about the final dish. It’s about the laughs, the mess, and the memories you’ll make along the way. And if you find yourself looking for more inspiration, you can check out Cooking with Toddlers + Kids (50 Easy Recipes) and 50 Easy Recipes for Kids for even more fun ideas!
Conclusion
In the end, cooking together can be a fun-filled adventure that cultivates creativity, learning, and memories. By introducing your toddlers and kids to the kitchen through these easy, delightful recipes, not only will they gain valuable skills, they’ll also develop a love for cooking that could last a lifetime. So grab those aprons, roll up those sleeves, and get ready to whip up something delicious! Remember, it’s perfectly normal for things to get a bit messy—it’s all part of the fun, and you’re not alone in this journey. Happy cooking!
Fun Bargain Toddler Activities to Do at Home for Busy Parents
Imagine it’s a rainy afternoon, and your toddler is bouncing off the walls. You’ve tried everything from coloring books to snacks, but nothing is holding their attention. Sound familiar? We’ve all been there! Keeping toddlers engaged, especially indoors, can feel like an impossible task, but it doesn’t have to drain your wallet or sanity.
Here’s the thing: there are countless ways to entertain your little one without breaking the bank. Today, I’m sharing 40 bargain toddler activities that will not only keep your child engaged, but also give you a moment of respite. These ideas are perfect for children from 18 months to 3 years, and trust me, whether your kiddos are girls or boys, they’ll have a blast!
Creative Arts and Crafts
Let’s dive into some super fun and simple arts and crafts ideas. DIY is the name of the game here, so gather those household items you usually toss away!
Paper Plate Animals
Grab some old paper plates, color them, and turn them into your child’s favorite animals. You can use markers, stickers, or even scraps of fabric.Homemade Playdough
You don’t need store-bought playdough to keep your kiddo entertained. Mix flour, salt, and water to create your own dough. Add food coloring for a fun twist!Nature Collage
If you’ve got some leaves or twigs lying around, help your child glue them onto cardboard. They can create their own mini forest!Egg Carton Crafting
Don’t throw out that egg carton! Cut it up, and let your toddler paint it to create cool bugs or flowers.DIY Stamps
Cut potatoes in half, dip them in paint, and let your child stamp away to make unique patterns and shapes.
Sensory Bins and Exploration
Sensory play is essential for toddlers. It encourages exploration and helps them learn about the world around them—plus, it’s super fun!
Rice Rainbow Bin
Dying some rice with food coloring can be a colorful base. Add small toys or spoons for digging and scooping.Water Beads
If you can manage the mess, water beads are a fantastic sensory activity! Let your toddler explore their textures and sizes.Sand Play
A large container filled with sand and some cups or small shovels will provide endless hours of fun, even indoors.Bubble Foam
Mix dish soap and water in a bowl until it’s frothy. Kids love the texture and squishing the foam!Ice Cream Play
Freeze some water with toys inside, and let them excavate the hidden treasures using tools.
Active Play
Let’s be honest, toddlers have an abundance of energy! Here are some indoor activities to help them burn off some steam.
Obstacle Course
Use cushions, blankets, and chairs to create a mini obstacle course in your living room. Toddlers love climbing and crawling!Dance Party
Blast some tunes, and have a spontaneous dance party. It’s a great way to get them moving and grooving!Balloon Volleyball
Blow up a balloon and let them bat it back and forth; just make sure your breakables are out of the way!Indoor Mini Golf
Set up a mini golf course using cups and a soft ball. It’s engaging, and you’ll have a lot of laughs.Teddy Bear Olympics
Let your child host a mini Olympics for their toys with fun challenges like tossing or racing.
Educational Fun
Who says learning can’t be fun? These activities blend play with education, and your toddlers will love them.
Shape Sorting
Use shapes cut from colored paper and have them sort by color or shape. This nurtures critical thinking!Color Hunt
Pick a color and have your toddler search the house for items that match. It’s a fun scavenger hunt!Alphabet Art
Help your child create art based on letters they recognize. For example, “A” for apple using collaged paper scraps.Number Game
You can create number cards and have them match socks to the right number. It’s a great way to teach counting!Story Time Bingo
Make a simple bingo card with pictures from books you read. As you read, they can check off the items.
Quiet Time Activities
Not every moment needs to be high-energy. Here are some relaxing yet engaging activities for quieter times.
Puzzle Play
Invest in some toddler puzzles, or make your own using cardboard. It’s a great brain workout!Sticker Books
Simple stickers can keep your child engaged while honing their fine motor skills and creativity.Coloring Hour
Settle down with some coloring books or print off free coloring pages. Add crayons or colored pencils for multicolored fun!Calming Jars
Fill a jar with water and glitter. When they shake it and watch the glitter settle, it’s both calming and mesmerizing.DIY Story Time
Create a simple story with pictures cut from old magazines. Encourage your child to tell the story back to you.
Food Fun
Cooking can be a fantastic activity for toddlers! Here’s how to get their little hands involved in the kitchen.
DIY Pizza
Lay out some toppings and let them create their own pizzas. Kids love personalized food!Nature Walk Snack
Take a small walk around your yard—or even a room—collecting items to create a “snack” platter using what you find in the house.Fruit Kabobs
Let your toddler skewer fruits onto sticks for a fun snack. Get creative with the shapes!Decorate Cookies
Bake some simple cookies, and set up a decorating station with icing and sprinkles.Pretend Play Bakery
Set up a play bakery using empty boxes for cakes or cupcakes. They can "sell" them to you!
Seasonal Activities
Make the most out of every season by engaging in seasonal-themed activities.
Snowflake Crafts
In winter, cut out snowflakes from paper. It’s easy and magical to see the designs unfold!Seashell Sorting
If you’re at the beach, let your toddler gather shells and sort them by color and size.Leaf Rubbing
In fall, collect leaves for a leaf rubbing activity using crayons. It’s a perfect mix of art and nature.Garden Exploration
In spring or summer, let them explore the different plants in your garden and learn how they grow.Holiday Decor Creating
With every holiday, create themed decorations together. Think paper hearts for Valentine’s or pumpkins for Halloween.
Bonus Ideas
Here are a few extra, engaging activities to keep on hand!
Cardboard Box Creations
Let your kiddo turn a cardboard box into whatever their imagination desires; a spaceship, a castle, or even a car!Animal Sounds Game
Test their knowledge of animals by making animal sounds. It can be both educational and hilarious!Story Stones
Get some pebbles and paint various images on them. They can use the stones to make up stories.Indoor Camping
Build a fort with blankets, grab some flashlights, and pretend you’re camping right in your living room!Treasure Hunt
Create a simple treasure map and have little clues leading to a fun treat or toy.
Conclusion
There you have it—40 bargain toddler activities to keep your little one entertained and engaged! Remember, parenting isn’t about perfection; it’s about finding joy in these little moments as your child learns and grows. These activities not only help keep your toddler busy indoors, but they also foster educational play and creativity.
While you may be looking for more ideas, check out 50 Low-Prep, Low-Mess Ideas to Engage Your Toddler for added inspiration. For a fun twist on activities, consider browsing through 21 Easy Activities for Babies & Toddlers. Happy playing!

Tips for Bringing Baby Home and Enjoying First Week With a Newborn
Imagine this: you’ve just brought your newborn home from the hospital. All those months of anticipation, and now you’re finally holding your little one in your arms. It’s both magical and overwhelming, isn’t it? The first few weeks with your newborn can often feel like a whirlwind of emotions, sleepless nights, and endless diaper changes. But guess what? You can absolutely soak in every precious moment. Here’s how to enjoy the new mom life while also navigating the challenges with your adorable bundle of joy.
Establish a Routine
Now, I know what you might be thinking—“A routine with a newborn? Is that even possible?” Here’s the thing: while flexibility is key with a baby, having some form of routine can help. It creates predictability in your day, which is comforting for both you and your little one.
Consider starting with simple routines for feeding, napping, and playtime. Babies thrive on consistency, and it makes life a tad easier for you. For instance, try to feed them around the same times each day. Not only will this help you anticipate their needs, but it also creates a sense of security.
Embrace the Power of Skin-to-Skin Contact
Picture this moment: you’re lounging on the couch, your baby snug against your chest, skin-to-skin. This is one of those experiences that can truly enhance your bond. Not to mention, it’s proven to help regulate your baby’s temperature, heart rate, and stress levels.
To enjoy this bonding time, carve out a few moments each day where it’s just you and your little one. This could be during a morning nap or while watching your favorite show. It’s entirely normal to feel a mix of emotions during these moments—joy, anxiety, and sometimes even frustration. Just remember, you’re not in this alone.
Get Support from Your Village
We’ve all been there—feeling overwhelmed and questioning our parenting skills. But here’s the honest truth: you don’t have to do this alone. Reach out to family and friends who want to help. Whether that means bringing over food or offering to watch the baby while you take a shower, any assistance goes a long way.
Don’t hesitate to ask for help when you need it. Finding a local new moms’ group can also provide emotional support and a sense of community. Sharing experiences with others is immensely reassuring.
Prioritize Self-Care
Now, let’s be honest—self-care can feel nearly impossible when you have a newborn, but it’s so crucial. You can’t pour from an empty cup. Even small acts of self-care can make a big difference, whether it’s a long hot shower, reading a few pages of a book, or enjoying a cup of coffee without interruption (a miracle in itself, right?).
Consider setting aside just 10 minutes each day for yourself. It doesn’t have to be extravagant; it’s about those little moments where you can recharge. It’s completely normal to feel guilty about taking these moments, but trust me, your mental health benefits everyone in the household.
Capture the Moments
You know those precious baby giggles and sleepy yawns that can melt your heart? They’re fleeting. Take time to capture these memories—snap photos or jot down little notes about your baby’s milestones and adorable quirks.
Honestly, it’s a wonderful way to reflect on the early days and see how quickly your newborn grows. You might even consider creating a scrapbook. Each little moment you capture now will be special to look back on when they’re older.
Learn About Your Baby’s Cues
As you both get accustomed to each other, you’ll start picking up on your baby’s cues—those subtle signs that they’re hungry, tired, or need a diaper change. Getting to know your baby’s cries and behaviors can feel like an achievement!
For example, you might find that your baby fusses differently when they’re tired compared to when they’re hungry. Each baby is unique, and by tuning in, you’ll feel more in control and confident.
Keep It Simple in the Kitchen
Meal planning can be daunting, especially with a newborn. Here’s a pro tip: keep meals simple and quick. Preparing large batches of food that can be frozen for later is a game-changer. Things like soups or casseroles are easy to reheat and provide nourishment without much fuss.
And let’s face it, takeout is going to be your best friend in those early weeks. Having a variety of options available can save you from the stress of cooking every night.
Take Naps When You Can
I can’t stress this enough—sleep when your baby sleeps. It sounds cliché, but you’ll thank yourself later. Those precious hours of sleep (no matter how short) can help you feel more energized to tackle the day ahead.
Sure, you might have a laundry list of things to do, but trust me, sleep is your superpower right now. The chores can wait; your well-being is worth prioritizing.
Engage in Gentle Play
While sleep and feeding are your top priorities, gentle play can be a beautiful way to bond with your newborn. Simply talking, singing, or softly moving their arms and legs can encourage early development.
This stage is all about exploration—your baby is learning about the world and how to relate to it. Those silly faces and funny sounds you make? They’re not just cute—they also encourage your baby’s social and cognitive skills.
Stay Mindful of Your Own Emotions
The first weeks with a newborn can be an emotional rollercoaster. From immense joy to overwhelming pressure, it’s completely normal to feel a whirlwind of feelings. Remember to check in with yourself and acknowledge how you’re feeling.
You may experience baby blues or even postpartum depression, and if that happens, don’t hesitate to seek professional help. Talking about your experiences or even keeping a journal can help you process everything.
Conclusion
Enjoying those early days with your newborn might seem challenging, but remember, you’re not alone in this journey. From establishing routines to prioritizing self-care, every small step makes a difference. Embrace this beautiful chaos, and take a moment to soak in all the little joys, because they won’t last forever.
If you’re curious about what those first days will be like, check out What the First Week With a Newborn Is Really Like. And, if you want to prepare even more, take a look at Your Newborn’s First Week: How to Prepare & What to Expect. Embrace each moment, and don’t forget to enjoy your journey into motherhood!
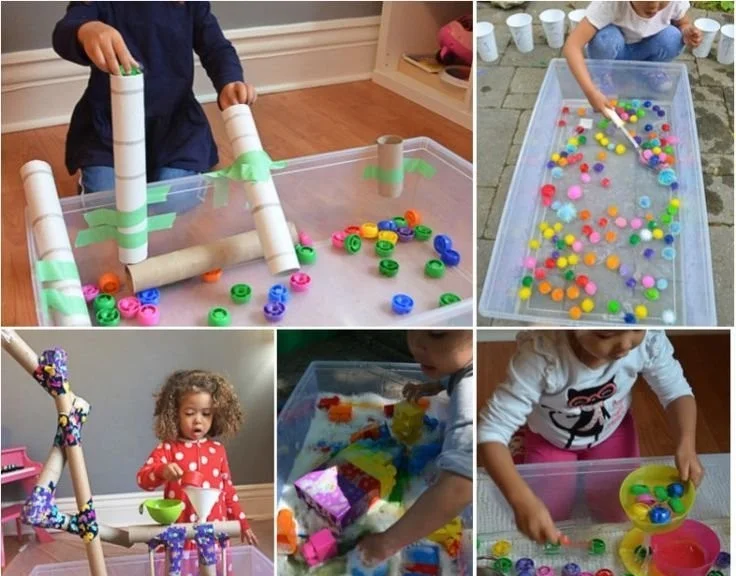
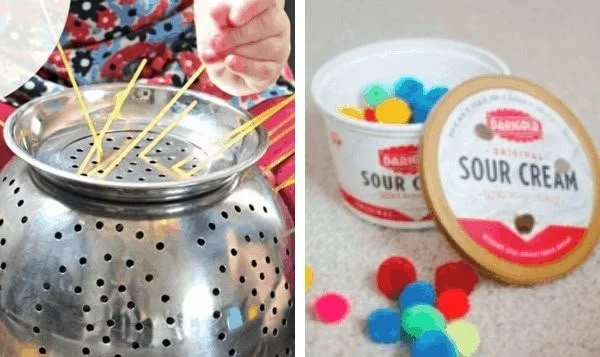
21+ Sensory Bins for Toddlers to Boost Play, Focus, and Fun Daily
Imagine you’re knee-deep in toys, outlets are child-proofed, and the house has transformed into a mini obstacle course of toddler-proofing. Just when you think you’ve got everything under control, your little one walks over to the spice cabinet and starts rummaging through containers. Sound familiar? We’ve all been there, and as any parent will tell you, children at this age are naturally curious and thrive on stimulation. That’s why sensory bins can be a total game-changer. They offer engaging, hands-on experiences that encourage exploration and learning—all while keeping the chaos contained!
This article dives deep into 21 amazing sensory bins for toddlers and preschoolers. Each idea is simple, effective, and most importantly, fun! Grab your supplies, and let’s create some magical moments for your little ones.
What is a Sensory Bin?
Before we jump into specific ideas, let’s take a moment to understand what a sensory bin is. In short, a sensory bin is a container filled with various materials that encourage tactile exploration. These bins can include anything from rice and sand to water and pasta. They are designed to engage multiple senses, allowing kids to touch, hear, see, and even smell as they play. The beauty of sensory bins is that they offer endless possibilities for imaginative play, creativity, and fine motor skill development.
21 Sensory Bin Ideas
1. Rainbow Rice Bin
Who doesn’t love a burst of color? Create a rainbow rice sensory bin by dyeing rice in various colors. Kids will love digging through the vibrant grains, and the experience can be enhanced by adding small scoops, containers, and even small toys or animals.
2. Ocean-Inspired Bin
Fill a bin with blue water beads, seashells, and small plastic sea creatures. This watery wonderland will have your child pretending they’re under the sea. It’s a simple way to introduce ocean themes or summer fun without the wet swimsuits!
3. Cloud Dough Sensory Bin
You’ll need flour and baby oil for this one, mixed until it resembles crumbly sand. Add cookie cutters and small molds, and let your little one create their own cloudy formations. It’s a terrific way to stimulate their senses and improve their hand strength.
4. Farm Animals in Sand
Create a mini farm by filling a bin with sand and placing plastic farm animals throughout. Your child can dig, bury, and discover each animal. This also opens up conversations about farm life and animal sounds, making it educational too!
5. Edible Sensory Bin
Use oats, flour, or even applesauce as a base. It’s safe and fun to play with, and perfect for toddlers who might still be inclined to taste everything. Throw in some measuring cups and spoons to enhance the experience.
6. Pumpkin Spice Sensory Bin
As the leaves change in autumn, scents like pumpkin spice become a staple. Combine dried beans and add in cinnamon sticks, mini pumpkins, and even plastic acorns. The scents and textures will engage their senses beautifully.
7. Colorful Yarn Bin
Fill a bin with various colors of yarn. Add scissors (under your supervision, of course) and let your little one explore cutting and creating with different textures. It’s a perfect opportunity to dive into discussions about colors!
8. Water Play Bin
On a hot day, nothing beats water! Fill a plastic container with water and add in boats, cups, or bath toys. You can also add food coloring for an extra twist. It’s refreshing, and you might be surprised how long they’ll play!
9. Zen Garden Bin
Create a calming space with sand, rocks, and miniature rakes or combs. This isn’t just a sensory experience; it can also serve as a mindfulness activity where you and your child can calmly interact with nature.
10. Tactile Sensory Bin
Utilize various materials like cotton balls, feathers, or sponges. Let your child explore which feels soft, squishy, or bumpy. You could even incorporate a “guess the texture” game to add an element of surprise!
11. Dinosaur Dig Bin
Fill a bin with dirt (or sand) and hide small dinosaur figures. Your child can excavate, search, and discover—sparking an interest in paleontology along the way. Just watch out for the tiny “T-Rex” bites!
12. Gelatin Sensory Bin
Make a big batch of flavored gelatin and let it set in a bin. Add plastic toys or fruits for tactile exploration. The squishy texture and enticing smell will make this a real hit!
13. Nature Bin
Collect items from your backyard or a nearby park: pine cones, leaves, and stones. This can even transform into a mini nature scavenger hunt. Your little one can learn about the environment while having a blast!
14. Alphabet Soup Bin
Use cooked pasta as your base and throw in foam alphabet letters. It’s both tasty and educational! Your child can find letters, make words, or even serve up some pretend soup!
15. Space Themed Bin
I’m all about combining play with learning! Fill a bin with black beans and add silver stars, planets, and astronauts. This is a fun way to explore outer space while being wonderful for imaginative play.
16. Winter Wonderland Bin
Use artificial snow (or salt) as your base, add mini snowmen, and let your child create their winter masterpiece. This could be a magical way to celebrate winter without the cold!
17. Sensory Sand Bin
Kinetic sand is every toddler’s dream! It’s moldable, doesn’t make a mess, and feels incredible. Add tools and utensils so your child can mold and create as desired.
18. Healing Herbs Bin
Gather a collection of dried herbs like lavender, rosemary, and mint. Let your child explore the textures and scents. You could even add a mortar and pestle for a real-life experience of making herbal concoctions!
19. Food-Safe Bean Bin
Mix different types of dried beans in a bin. Add scoops and cups for pouring, which helps develop fine motor skills. It’s also an excellent way for kids to learn about different types of beans.
20. Rice and Beans
Combine rice and various beans for a colorful, textured bin. This is a versatile and engaging play area—you can add measuring cups for pouring and counting games as well.
21. Candy Land Bin
Use colorful candies like jelly beans or gumdrops (though you might want to supervise this one!) to create a sweet sensory experience. Just imagine the excitement in your child’s eyes!
Quick Tips for Sensory Bin Success
- Start Simple: Don’t overthink it! You don’t need every colored rice or fancy item to make it effective.
- Rotate and Refresh: Use the same bin base but switch out materials regularly. This keeps things fresh and exciting for your child.
- Supervise Play: While sensory bins are generally safe, always keep an eye on what your little one is exploring, especially with smaller items.
- Let Them Lead: Encourage your child to explore without too many restrictions. It’s their playtime, after all!
Common Mistakes to Avoid
- Overstuffing the Bin: Too many items can overwhelm. Keep it simple.
- Forgetting Cleanup: Keep a handheld vacuum handy for easy cleanup, or designate a play area for it.
- Neglecting Supervision: Some small items are safe for older kids but not for every toddler. Always ensure safety first.
Conclusion
Sensory bins are a fantastic way to keep your little ones engaged, learning, and having fun. These 21 ideas should spark your creativity, helping you create memorable play experiences with your toddlers and preschoolers. Remember, it’s all about exploration and play, so don’t stress about perfection.
If you’re looking for even more ideas on sensory play, you may enjoy checking out 21+ Sensory Bins For Toddlers. And if you’re searching for the perfect toys to keep your child engaged during sensory play, look into The Play Kits by Lovevery. Happy playing!
