
15 Gender Reveal Cake Ideas
15 Gender Reveal Cake Ideas — Inspired by Emma’s Cake Studio
Gender reveal cakes are a playful, delicious way to share the big news. Whether you want a dramatic center-cut moment or a subtle hint at the end of the party, a well-designed cake can make the reveal unforgettable. If you’re gathering ideas before committing to a baker or DIY plan, try this quick primer for flavors, designs, and staging. For more curated concepts, check this gender reveal cake ideas guide to spark creativity.
Below are 15 distinct cake concepts—each with a short how-to tip so you can adapt it for a small gathering or a full-blown celebration.
- Confetti- or Candy-Filled Piñata Cake
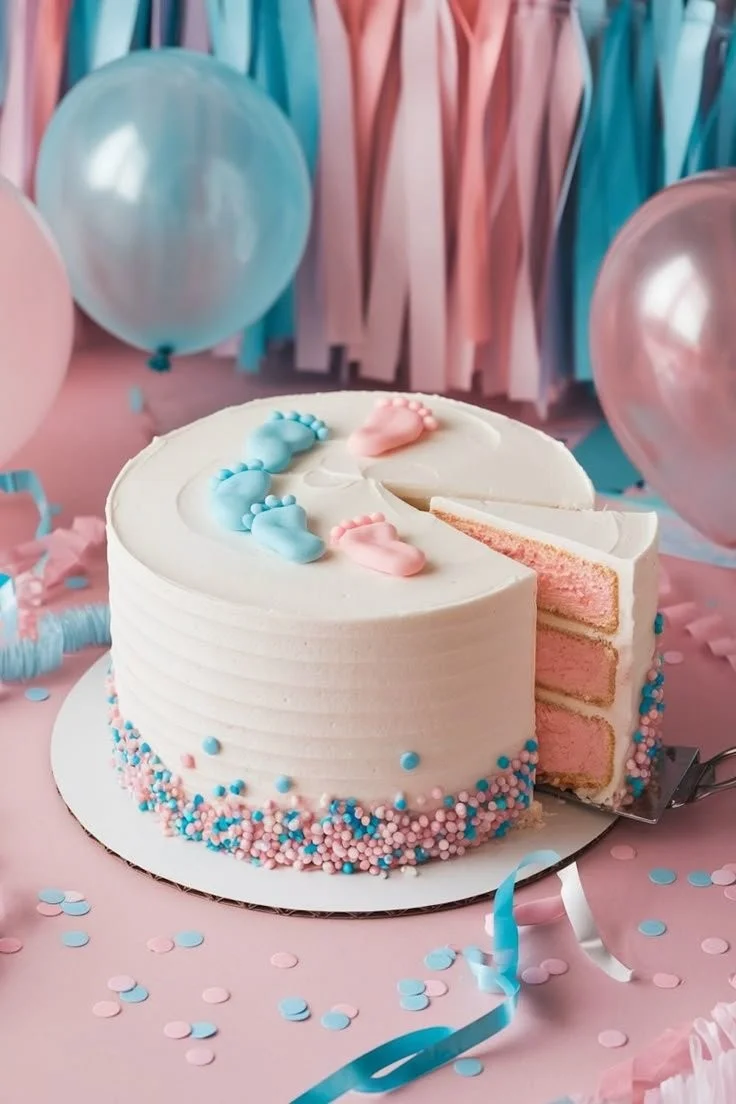
- Hollow the center of a layered cake and fill with colored sprinkles or mini candies. Cut the cake to let the pink or blue cascade out for a joyful, messy reveal. Use denser sponge so it holds shape when hollowed.
- Cut-to-Reveal Colored Sponge
- Match the cake crumb color to the reveal (natural beet or blueberry coloring works well). Keep frosting neutral to misdirect guests until the first slice.
- Color-Drip Ganache Accent
- Use a white buttercream exterior and drip pink or blue ganache from the top edge. For extra suspense, make the drip color the same as the interior sponge.
- Ombre Layers Visible on Slice
- Bake multiple thin layers, tinting each progressively deeper. Stack with thin buttercream layers so a single slice displays the gradient reveal.
- Smash Cupcake or Mini Smash Cake
- Individual mini cakes for the mom-to-be (or parents) to smash for photos. These are easy to customize and cleaner than a full-sized smash cake.
- Sprinkle-Coated Reveal Cake
- Cover the outside in neutral sprinkles and fill the core with a pop of colored nonpareils that fall when cut.
- Balloon-Filled Hollow Cake (Lightweight)
- Create a cavity filled with small confetti balloons or biodegradable confetti packets that burst when the cake is sliced.
- Gender Reveal Cake Pops or Mini Desserts
- If space is limited, make cake pops with colored centers. Hand them out for simultaneous reveals among guests.
- Floral or Botanical Surprise
- Frost a rustic buttercream and top with edible flowers. Inside, a single colored layer or a ring of colored filling signals the news with elegance.
- Drip-with-Inscription Cake
- Add a playful inscription like “He or She?” and let a single slice reveal the colored interior and answer.
- Two-Tier Dual Reveal
- Each tier represents one possibility; cut both simultaneously to confirm which tier contains the colored interior. Great for dramatic photo ops.
- Themed Character Cake
- Decorate with favorite characters, sports, or hobbies and place a colored core or ribbon inside to reveal gender in a themed way.
- Naked Cake with Layered Filling
- Minimal frosting reveals the layers; use colored buttercream between layers or a colored filling to reveal when sliced. This works well for rustic or outdoorsy parties.
- Drip-and-Sprinkle Cross-Section
- Combine exterior colored drip with inside sprinkles for a double-layered reveal: a hint on the outside and the full reveal inside.
- Faux-Out Cake (Decoy + Real Reveal)
- Present a harmless decoy cake (neutral inside) and then unveil a second hidden cake that contains the colored surprise for maximal effect.
Tips for success
- Use gel food coloring for vivid interior colors without altering texture.
- Practice a trial run for complicated structures like hollow cavities or multi-tiered systems.
- Coordinate with decorations and announcements for a consistent reveal theme — pairing your cake with matching décor elevates the photos and guest experience. For complementary styling ideas, explore matched gender reveal decoration ideas to plan cohesive color, table setups, and signage.
Photography and staging
- Set up good lighting and a neutral background for the cutting moment.
- Have extra plates and napkins ready; confetti or candy-filled cakes can get messy.
- Consider who will cut the cake — letting both parents cut together creates a meaningful photo moment.
Safety and dietary considerations
- Clearly label allergy-friendly or gluten-free variations.
- For children or guests avoiding added sugar, consider using fruit fillings or yogurt-based frostings for the reveal layer.
Conclusion
If you want to see examples and step-by-step photos that inspired these concepts, check the original collection at Emma’s Cake Studio’s 15 gender reveal cake ideas for visual reference and styling tips. For a lighter, humorous take on cake culture and occasional design fails, take a look at the Cake Wrecks roundup in their Friday Favs post.
22 Cute & Creative Gender Reveal Ideas (she: Mariah)
22 Cute & Creative Gender Reveal Ideas (she: Mariah)
Expecting a baby girl? Celebrate Mariah’s little one with a reveal that fits your personality, guest list, and comfort level. Whether you want something low-key and intimate or loud and photo-ready, these 22 ideas span crafty, classic, and playful options. If you’re focused on the dessert moment, check out these gender reveal cake ideas for ways to hide the surprise inside a sweet centerpiece.
Quick planning tips before you pick an idea
- Decide whether this is an intimate family moment or a big party — some reveals are best for two, others are show-stoppers.
- Choose colors, props, and a photographer or videographer if you want to capture reactions.
- Think about safety and the environment (avoid harmful fireworks or releases in protected areas).
- Time of day matters: confetti and balloons show up best in daylight; sparklers and lights work for evening reveals.
Themes to inspire the reveal
- Floral tea party (perfect for a girl-themed reveal for Mariah)
- Pastel picnic
- Vintage carnival
- Bookish reveal for library lovers
- Sports-themed if the family loves a team
22 Cute & Creative Gender Reveal Ideas
- Gender reveal cake — cut the cake to reveal pink or blue sponge or filling.
- Balloon box — open a decorated box that pours out helium balloons in pink.
- Confetti cannons — coordinate a synchronized pop for a bright photo moment.
- Smoke bombs — outdoor, colorful puffs reveal the gender dramatically.
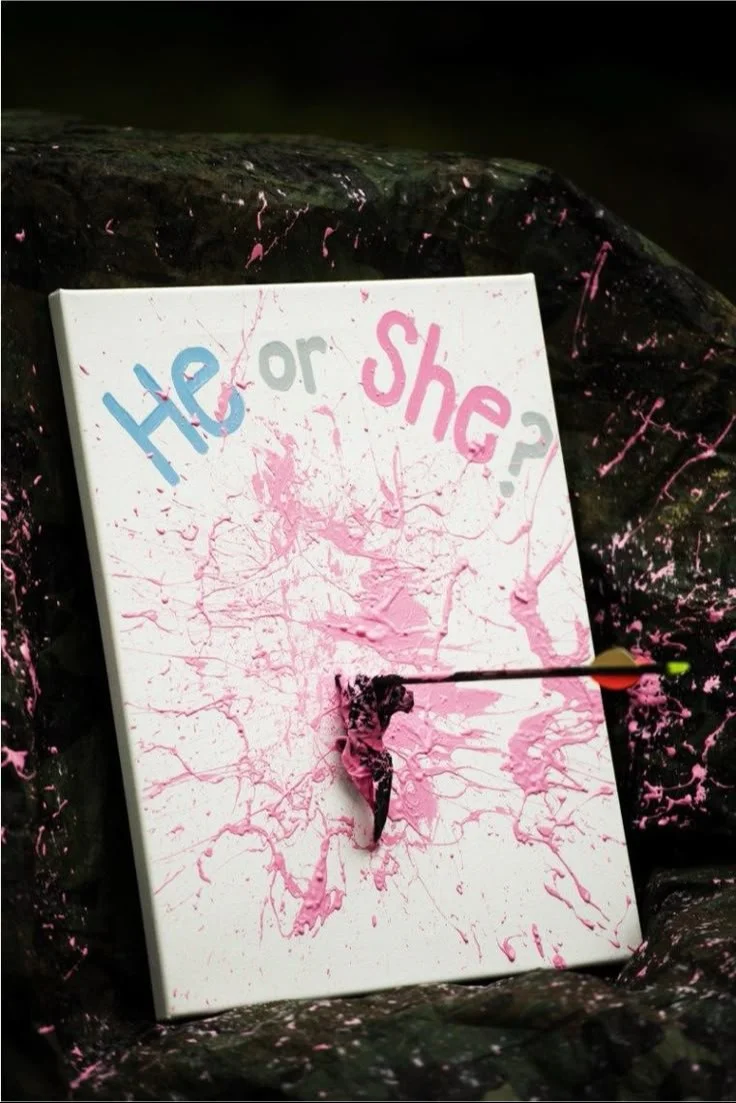
- Paint splash — throw colored paint at a canvas to reveal the hue.
- Scratch-off cards — guests scratch tickets to reveal the color under foil.
- Piñata reveal — fill a piñata with pink ribbons and paper for a festive smash.
- Bun in the oven — bake a tiny bun-shaped reveal inside a covered dish (playful and simple).
- Silly string fight — hand out cans and spray at the same time to see the color.
- Balloon pop wall — a backdrop of balloons with one filled with colored confetti.
- Baby shoe reveal — present a paired set of tiny shoes in pink.
- Confetti-filled balloons dropped from above for a surprise cascade.
- Custom cookies — bite into a cookie with pink filling or icing.
- Message in a bottle — reveal a pink scroll from a decorative bottle for a nautical theme.
- Puzzle reveal — assemble a puzzle that spells out “It’s a girl!” for a long, interactive moment.
- Flower box surprise — arrange flowers with hidden pink tissue inside the box.
- Scavenger hunt — lead guests through clues that culminate in a pink surprise.
- Color-changing drinks — serve beverages with a pH indicator that turns pink when mixed.
- Baby clothes line — reveal a string of tiny pink outfits for a charming photo op.
- Magic lanterns — release lanterns with pink light (check local safety rules).
- Projection reveal — project a short video or the word “girl” on a wall or screen.
- Personalized storybook — read a short story that ends with the reveal that Mariah is having a daughter.
Capturing the moment
- Assign someone to record reactions or set up a tripod for a steady video.
- Use a burst photo mode to catch the exact expressions when the color is revealed.
- For outdoor reveals, consider how wind and lighting will affect confetti, balloons, or smoke.
Practical considerations
- For noisy reveals like cannons or fireworks, notify neighbors and verify local regulations.
- If kids or pets are attending, choose safer options (confetti inside balloons rather than loose glitter).
- Have a backup plan: if weather spoils an outdoor reveal, be ready to move inside and adapt the method.
Personal touches for Mariah
- Incorporate family heirlooms or a favorite color palette to make the moment distinctly hers.
- Add a keepsake element, like saving a piece of the pink confetti or a custom announcement card for the baby book.
- Make the reveal part of a larger ritual: a prayer, a toast, or planting a tree to mark the new life.
Where to find more decorations
For ideas on styling your space and choosing decor that matches your chosen reveal method, consider these curated gender reveal decoration ideas to bring the theme together.
Conclusion
For a full roundup of themed suggestions that inspired this list, see this collection of 22 Cute & Creative Gender Reveal Ideas (she: Mariah). If you’re leaning toward a balloon-based moment, read a real balloon release story for tips on execution and safety at Our Balloon Release Baby Gender Reveal! It’s a…. – the thinking closet.

10 At Home Maternity Shoot Ideas That Willl Turn Out Flawless
10 At-Home Maternity Shoot Ideas That Will Turn Out Flawless
Capturing the glow of pregnancy doesn’t require a studio — your home is full of light, texture, and personal meaning that make photos intimate and unforgettable. Before you start setting up, browse some broader inspiration like these 32 creative maternity photoshoot ideas to spark concepts you can adapt to your space.
Below are ten straightforward, stylish at-home maternity shoot ideas with simple tips so each image looks polished and natural.
- Neutral Window Glow
- Idea: Use soft, natural light from a large window. Position the mom-to-be perpendicular to the light for flattering shadows.
- Tip: Keep backgrounds uncluttered and wear simple, neutral clothing to emphasize the silhouette.
- Cozy Bed Nest
- Idea: Capture candid, relaxed moments on the bed with flowing sheets or textured blankets.
- Tip: Use overhead or side angles and add simple props like a knit throw or a favorite book for personality.
- Kitchen Bonding Moment
- Idea: Photograph interactions in the kitchen — preparing a meal, sipping tea, or smelling spices.
- Tip: Highlight hands on the belly and warm tones; a shallow depth of field keeps focus on faces and connection.
- Silhouette Against Curtains
- Idea: Backlight the subject standing in front of sheer curtains to create a dramatic silhouette.
- Tip: Expose for the background light so the subject becomes a crisp outline; interesting hand placements over the bump create emotion.
- Family Pajama Session
- Idea: Get the partner and older children involved in matching pajamas for playful, intimate shots.
- Tip: Encourage movement and laughter rather than posed smiles for authentic expressions.
- Floral or Greenery Backdrop
- Idea: Arrange a simple bouquet, wreath, or hanging greenery behind the subject to add color and life.
- Tip: Keep florals local and seasonal; avoid overly busy arrangements that compete with the subject.
- Minimalist Black-and-White Portraits
- Idea: Strip away color for timeless, high-contrast images focusing on shape and expression.
- Tip: Use directional side lighting and ask the subject to experiment slowly with poses to capture quiet moods.
- Close-Up Belly Details
- Idea: Focus tightly on hands forming shapes on the belly, rings, ultrasound photos, or tiny shoes.
- Tip: Use a macro or zoom lens to capture texture and emotion in small, meaningful details.
- Maternity in Motion
- Idea: Capture gentle movement — flowing dresses, hair tossed, or walking down a hallway — for dynamic shots.
- Tip: Use a slightly faster shutter to freeze motion or a slower one for soft motion blur; practice a few slow movements first.
- Seasonal or Themed Corner
- Idea: Create a small vignette that reflects the season or holiday — autumn leaves, spring blooms, or a minimalist holiday corner.
- Tip: Keep props cohesive and intentional; a single thematic element keeps the image from feeling cluttered.
Practical Setup Tips
- Lighting: Natural light is your friend. Open curtains, face subjects toward the brightest window, and use white sheets or foam boards to bounce light.
- Wardrobe: Solid colors and simple textures photograph better than busy prints. Encourage form-fitting or flowing garments that highlight the belly shape.
- Composition: Use negative space and vary perspectives — full body, three-quarter, and close-up — to build a diverse gallery.
- Camera Basics: If using a phone, enable portrait mode or use a lens attachment; for cameras, choose a wide aperture (f/1.8–f/4) for subject isolation.
- Posing: Guide poses that feel comfortable — hands on belly, a gentle lean into a partner, seated poses with knees slightly raised for flattering lines.
Props & Wardrobe Ideas
- Use a long, flowing dress for ethereal photos or a fitted top for strong silhouettes.
- A favorite blanket, a soft hat, or a knitted wrap can add texture and personal meaning.
- If including kids, simple matching colors (not exact uniforms) keep the focus on connection. If you’re blending a small birthday celebration into a shoot, consider how a simple cake prop or balloons could be used tastefully rather than dominating the frame; for ideas on coordinating a child-focused moment, see these creative birthday party photo tips.
Quick Checklist Before You Shoot
- Tidy the immediate shooting area and remove distracting items.
- Test photos on your phone to check light, exposure, and background.
- Have a playlist ready to relax subjects and encourage natural interaction.
- Keep sessions short and flexible — comfort is the highest priority.
Conclusion
If you want more at-home styling suggestions and a ready list of concepts to try, this collection of at-home maternity shoot ideas offers helpful visual examples and setups. For seasonal or holiday-inspired family shots that pair well with maternity sessions, see these easy DIY family Christmas photo ideas for creative ways to bring festivity into your home photos.

33 Things to Do When You Find Out Your Pregnant
33 Things to Do When You Find Out You’re Pregnant
Finding out you’re pregnant is a life-changing moment—full of questions, plans, and emotions. This checklist organizes practical steps, health priorities, and emotional supports to help you move from news to confident preparation. If you already have little ones at home, consider reading helpful guidance on when to adjust how you hold your toddler as you prepare for a newborn.
Below are 33 actionable things to consider in the days, weeks, and months after a positive pregnancy test.
- Confirm the pregnancy with a healthcare provider or a reliable home test repeated after a few days.
- Schedule your first prenatal appointment to establish care and discuss next steps.
- Start taking prenatal vitamins with folic acid if you haven’t already.
- Stop or reduce alcohol, tobacco, and recreational drugs immediately.
- Review and adjust any prescription medications with your provider.
- Begin or maintain a balanced, nutrient-rich diet to support early development.
- Hydrate—drink more water and monitor your caffeine intake.
- Track your cycle and estimate your due date; consider using a pregnancy journal or app.
- Learn the signs and symptoms of early pregnancy complications and when to call your provider.
- Share the news with your partner or a trusted person when you feel ready.
- Make an appointment with your dentist—pregnancy affects oral health.
- If you plan a gender reveal or celebration, decide on timing and etiquette and read guidance about bringing a gift to a gender reveal party.
- Research local prenatal classes (childbirth education, breastfeeding, newborn care).
- Start light, pregnancy-safe exercise—walking, swimming, or prenatal yoga—after clearing it with your provider.
- Evaluate your work situation: maternity leave policies, necessary accommodations, and timing for disclosure at work.
- Review your health insurance coverage for prenatal care, delivery, and pediatric needs.
- Create a simple budget projecting costs for the pregnancy and the baby’s first year.
- Read up on breastfeeding and bottle-feeding options to make an informed plan.
- Identify a pediatrician and ask friends or your provider for recommendations.
- Begin reducing heavy lifting and risky activities that could endanger pregnancy.
- Learn about prenatal screening and testing options so you can decide which you want.
- Prepare emotionally: consider counseling or joining a pregnancy support group if anxious or uncertain.
- Start a sleep-friendly routine; early pregnancy can disrupt sleep, and better rest helps you cope.
- Update vaccinations as recommended by your healthcare provider (e.g., flu, whooping cough).
- Make small home safety adjustments in advance—create a nursery plan and clear clutter from key areas.
- Build a support network: family, friends, doula options, and community resources.
- Begin shopping with a list—prioritize essentials like a safe car seat, basic clothing, diapers, and a safe sleeping space.
- Research childbirth options and pain management preferences to discuss at prenatal visits.
- Plan for mental health: know signs of prenatal and postpartum mood disorders and where to get help.
- Take time for yourself and your partner—celebrate privately if you wish and communicate hopes and concerns.
- Keep copies of important medical records and insurance information in a safe, easily accessible place.
- Read reputable pregnancy resources and avoid overwhelming yourself—choose a few trusted sources.
- Make a simple timeline of appointments, tests, and milestones so you can stay organized and reduce stress.
Remember that every pregnancy is different. Use this list as a flexible guide rather than a strict rulebook—priorities will shift depending on medical advice, personal circumstances, and how you feel.
Conclusion
For detailed week-by-week information as you progress, the charity Tommy’s provides a helpful page specifically on 33 Weeks Pregnant: Symptoms, Development & Cramps, which can be useful later in the third trimester. The NHS also offers a clear, evidence-based overview in its 33 weeks pregnant guide – Best Start in Life – NHS for those seeking official UK guidance.

27 hilariously accurate breastfeeding memes
Why breastfeeding memes hit so close to home
Breastfeeding is equal parts tender, messy, exhausting, and deeply rewarding — and sometimes the best way to process it all is by laughing. Memes distill those everyday contradictions into quick, sharable moments that can make a parent feel seen in a single image. This article looks at why breastfeeding memes resonate, the common themes they riff on, and how to use humor in a way that supports, not alienates, others.
What makes a breastfeeding meme work
- Brevity: A single captioned image captures a complex, often contradictory feeling — joy and exhaustion, pride and disbelief — in a way a full story can’t.
- Relatability: Many breastfeeding experiences share the same hurdles (supply worries, leaky shirts, nighttime wake-ups), so a joke about one moment becomes a mirror for many.
- Timing: Memes that arrive at 2 a.m. about starvation-level hunger or the miraculous power of a pacifier are instantly gratifying because they match the moment.
- Community: Sharing a meme says “I get you” without long explanations, which is especially welcome when parents are sleep-deprived and short on time.
Common themes in breastfeeding humor
- Sleep deprivation: Jokes about constant nighttime feeds, blurred days and nights, or mistaking a pillow for a baby.
- The never-ending snack: Babies who need to nurse again five minutes after finishing are meme gold.
- Bodily surprises: Leaks, clogged ducts, and the unpredictable human body make for shared, awkward laughs.
- Pumping vs. nursing: The contrast between the romance of nursing and the industrial-looking, scheduled reality of pumping is a frequent target.
- Public nursing: Memes that celebrate the stealthy, triumphant moments of nursing in public spaces resonate widely.
- Partner dynamics: Humorous takes on partners trying to help — or hilariously misunderstanding feeding routines — are common.
Sample caption ideas (safe to use or adapt)
- “When you finally put the baby down and realize you forgot to breathe for three hours.”
- “Me: I’m going to shower. Baby: Initiates Chapter Two of the Hunger Games.”
- “Pumping: Romance novels make this look different.”
- “Leaky shirt: the chic look nobody asked for.”
These short captions work because they pair a precise, vivid image with a universal feeling.
How to use breastfeeding memes sensitively
- Know your audience: Some parents find certain jokes cathartic; others might feel judged. Avoid memes that shame choices (bottle vs. breast, formula vs. human milk).
- Use humor to include, not exclude: Choose memes that invite commiseration rather than mockery.
- Tag with context: If you share a meme about a rough day, adding a short, honest sentence (e.g., “Today was tough — thanks for the laughter, friends”) can open space for empathy.
- Remember privacy: Don’t post photos of others’ children without permission, and be cautious about identifiable details.
Why humor helps
Laughter is a coping tool. For new parents, it reduces stress, strengthens social bonds, and helps reframe difficult moments. Memes are low-effort but high-return: a few seconds of recognition can turn isolation into community.
Creating your own breastfeeding memes
- Keep it specific: The more precise the image of the experience, the funnier it feels to those who’ve lived it.
- Pair image and caption tightly: A small mismatch can ruin the punchline; the visual and text should be in sync.
- Avoid overused stereotypes: Fresh angles keep your meme from feeling stale.
- Test with friends: Before sharing widely, try it with a trusted friend who can tell you if it lands.
When laughter isn’t enough
While memes are great for emotional first aid, they’re not a substitute for support. If you’re struggling with supply, pain, or postpartum mood changes, reach out to a lactation consultant, pediatrician, or mental health professional. Humor and community help, but professional advice can address problems that jokes can’t.
Conclusion
If you want to browse a lighthearted collection that captures these moments, you can find a good selection of breastfeeding memes in Care.com’s curated gallery: Care.com’s breastfeeding meme collection. And if longer nursing sessions mean you’re spending more time at home and thinking about comfort or energy efficiency, consider reviewing SRP’s window replacement rebate details as one practical way to improve your environment.
42 Magnificent Fruit Creations for Your Next Party …
42 Magnificent Fruit Creations for Your Next Party
Throwing a memorable party doesn’t require complicated recipes—sometimes a little creativity with fruit is all you need. Whether you’re hosting a backyard barbecue, a baby-friendly brunch, or an elegant evening soiree, these fruit-forward ideas will brighten your table and delight guests. If you’re planning a party that includes infants, consider their nap and feeding routine as you pick the start time and review the best sleeping position for your baby so everyone (including caregivers) can enjoy the celebration.
Below are 42 fruit creations organized by type so you can mix and match to suit your theme, season, and guest list.
Fresh Platters & Boards
- Tropical pineapple and mango board — arrange slices with toasted coconut and lime wedges.
- Watermelon feta platter — cubes of watermelon paired with tangy feta and mint.
- Citrus fan board — overlapping slices of grapefruit, orange, and blood orange with honey drizzle.
- Berry mosaic tray — strawberries, blueberries, raspberries, and blackberries arranged in colorful blocks.
- Stone fruit spread — sliced peaches, plums, and nectarines with rosemary sprigs.
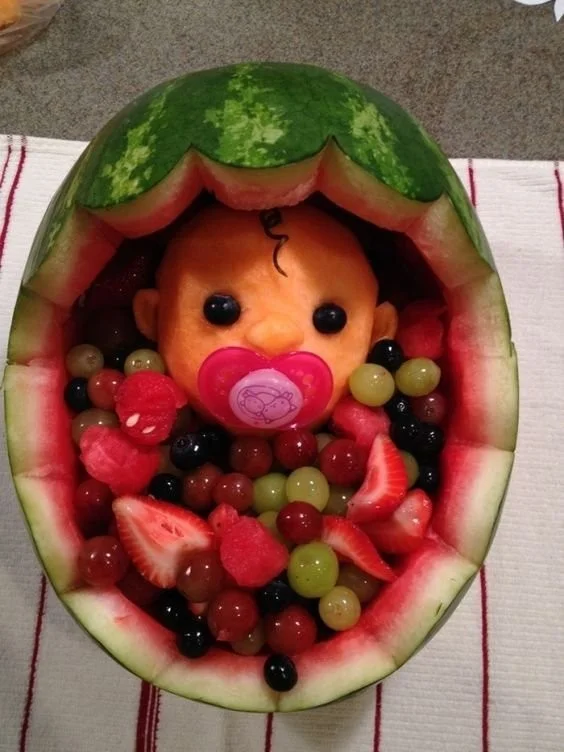
- Mixed melon boat — hollowed cantaloupe or honeydew filled with a melon medley.
- Seasonal orchard board — apples, pears, quince slices, and a selection of cheeses.
Skewers, Kabobs & Pops
- Caprese fruit skewers — cherry tomatoes replaced with strawberries for a sweet-savory twist.
- Tropical fruit kabobs — pineapple, banana (brushed with lemon), and kiwi on bamboo sticks.
- Chocolate-dipped strawberry skewers — alternate strawberries and marshmallows for a treat.
- Melon-lime pops — melon balls marinated briefly in lime and agave, served on sticks.
- Grilled peach skewers — brush with honey and grill for caramelized flavor.
- Fruit & cheese kabobs — grapes, cheddar cubes, and apple slices for balanced bites.
Dips, Sauces & Spreads
- Yogurt-honey dip — Greek yogurt with honey and vanilla for fruit dunking.
- Coconut-lime cream — whipped cream with toasted coconut and lime zest.
- Mango salsa — diced mango, red onion, cilantro, and jalapeño for chips and fruit.
- Dark chocolate fondue — a rich dip for strawberries and banana slices.
- Berry coulis — puree mixed berries with a touch of sugar and strain for a silky sauce.
Drinks & Mocktails
- Sparkling berry punch — club soda, muddled berries, and a splash of vodka or elderflower.
- Cucumber-mint cooler — cucumber slices, mint, lime, and sparkling water.
- Watermelon agua fresca — blended watermelon, lime, and a hint of ginger.
- Peach iced tea spritz — brewed tea, peach purée, and sparkling water.
- Frozen fruit daiquiris — blend frozen mixed fruit with lime and rum (or use rum extract for mocktails).
Desserts & Sweets
- Fruit galettes — rustic tarts using seasonal fruit and a flaky crust.
- Berry pavlova bites — mini pavlovas topped with whipped cream and assorted berries.
- Grilled banana boats — split bananas with chocolate chips and marshmallows, wrapped and grilled.
- Lemon glazed strawberry cake — a light cake studded with berry slices.
- Poached pears with spiced syrup — elegant and simple for dinner parties.
- Fig and honey tartlets — fresh figs, a dab of ricotta, and a drizzle of honey.
Kid-Friendly & Party-Game Friendly
- Fruit faces on pancakes — use berries and banana slices to create silly faces.
- Mini fruit sandwiches — thin apple or pear slices used as “bread” with cream cheese filling.
- Rainbow fruit cups — layers of different colored fruits in clear cups for visual fun.
- Fruit treasure hunt — hide fruit tokens around the yard and offer a fruit basket prize.
- Smoothie shot station — small portions of flavored smoothies for kid sampling.
If toddlers will attend, watch for cues that it’s not yet time for quiet activities; this article on signs your toddler isn’t ready for bed can help you plan the party schedule so little ones stay happy and the celebration runs smoothly.
Elegant Centerpieces & Garnishes
- Citrus candle centerpiece — hollowed oranges holding tealights atop a citrus-strewn runner.
- Floral-fruit arrangement — combine edible flowers with fruit clusters for a showpiece.
- Grapevine wreath with figs — use grape clusters and figs woven into a wreath for buffet decor.
- Fruit-stemmed cocktails — garnish drinks with skewered grapes and citrus wheels.
- Herb and fruit jars — mason jars filled with sliced lemons, sprigs of thyme, and water as decor and refreshment.
- Frosted berry bowls — chill serving bowls and fill them with berries just before guests arrive.
- Sliced-fruit place settings — thin apple or pear slices under place cards for a rustic touch.
- Single-serve fruit parfaits in clear glasses — layer granola, yogurt, and fruit for a polished dessert.
Tips for success: prep a few items in advance (citrus slices, fruit salads kept with a splash of citrus to prevent browning), provide toothpicks or cocktail forks for convenience, and label items that include nuts or honey for allergy-aware guests.
Conclusion
Pair these fruit creations with complementary appetizers to build a full menu—many hosts find inspiration from lists like 25 appetizers, crackers and dips ideas for your next party when planning sides and snacks. For themed birthday events, you might also enjoy browsing a real party example such as Guest Party: A Marvelous First Birthday Party to see how fruit-focused elements can be incorporated into décor and activities.
100+ Gender Reveal Baby Shower Ideas and Decorations
Fresh and Fun Gender Reveal Baby Shower Ideas and Decorations
Planning a gender reveal party is a joyful chance to celebrate an upcoming arrival with creativity and personal flair. Below is a fresh, organized guide of themes, decorations, games, food ideas, and practical tips to help you plan a memorable reveal — whether you want something intimate or an event that wows a crowd.
Start by choosing the tone: playful, elegant, rustic, or ultra-modern. Your chosen tone will guide invitations, décor, and activities. If you’re leaning toward softer, feminine touches, this collection of baby girl shower ideas can spark colors, florals, and dessert-table styling that translate beautifully to a gender reveal.
Themes & Color Concepts
- Classic Pink vs. Blue: Timeless and simple; use alternating accents of pastel pink and blue across balloons, table settings, and signage.
- Neutral Chic: Combine whites, golds, and greens for a gender-neutral palette that still feels festive.
- Seasonal Themes: Spring florals, summer nautical, autumnal rustic, or winter wonderland—each season suggests natural color palettes and decor.
- Surprise Boxes or Balloons: Use themed boxes or confetti balloons decorated to match your party’s vibe.
- Pop-Culture Twist: Base the reveal on a favorite movie, TV show, or sports team for a personalized touch.
Invitations & Announcements
- Digital Invites: Animated e-cards with a countdown reveal add excitement and save on postage.
- DIY Paper Invites: Include a small envelope with colored confetti or a seed packet inside to hint at the reveal.
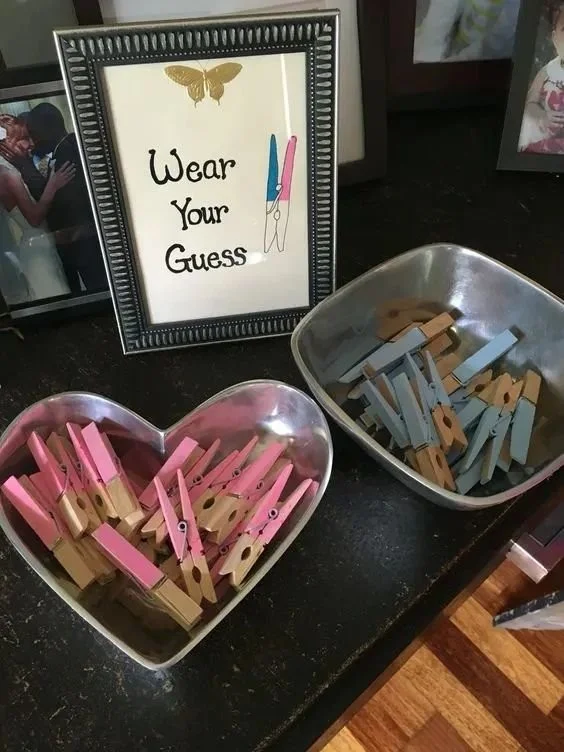
- RSVP Prompts: Ask guests to bring pink or blue wristbands to cast their guess; this doubles as entertainment.
Decorations That Pop
- Balloon Arches and Garlands: Create an entryway or backdrop using two-tone balloons, metallics, and greenery.
- Statement Backdrops: Sequin, floral walls, or a custom banner make great photo opportunities.
- Table Centerpieces: Use mason jars with flowers, mini chalkboards with guest predictions, or themed figurines.
- Lighting: Soft fairy lights or uplighting in your reveal color enhance atmosphere, especially for evening reveals.
Reveal Methods (Creative & Classic)
- Confetti Cannons: Instant, dramatic, and great for photos—choose biodegradable confetti for an eco-friendly option.
- Cake or Cupcake Reveal: A tinted interior sponge or colored frosting inside cupcakes reveals the gender when cut or bitten.
- Smoke Bombs: Perfect for outdoor photos; use safe-handled smoke bombs in the reveal color.
- Balloons in a Box: A closed box filled with helium balloons in pink or blue that fly out when opened.
- Powder Poppers or Paint: Fun for couples who want an active or messy reveal—have clean-up plans ready.
- Puzzle or Game-Based: Guests assemble a puzzle or solve clues that reveal the color.
Games & Activities
- Guessing Wall: Guests place pins or stickers on “team pink” or “team blue” boards.
- Bingo & Baby Predictions: Use baby-themed bingo cards or prediction cards for birth date, weight, and name ideas.
- Craft Stations: Set up onesie-decorating or DIY headband stations for keepsakes.
- Photo Booth: Props in reveal colors, and a backdrop tied to the theme, keep memories fun.
- Prize Ideas: Small themed prizes like candles, succulents, or custom cookies reward winners.
Food & Drink Ideas
- Color-Coordinated Treats: Macarons, cake pops, and jello in pinks or blues give nods to the big reveal.
- Reveal Drink: Serve a mocktail or punch that changes color with a citrus or pH-based ingredient for a surprise element.
- Brunch Options: If hosting a morning reveal, curated baby shower brunch ideas like mini frittatas, fruit platters, and mimosas keep it light and social.
- Dessert Display: A tiered dessert table with labeled treats and a centerpiece cake keeps attention focused for the reveal moment.
Favors & Keepsakes
- Personalized Mementos: Mini frames, engraved spoons, or custom candles make memorable favors.
- Edible Favors: Packets of cookies or candies in reveal colors tied with a note thanking guests.
- Activity-Based Keepsakes: Guests leave a note to the baby on a “wishing tree” or sign a baby book page.
Practical Tips & Timeline
- Guest List & Space: Decide how many people you can comfortably host—this determines venue and rental needs.
- Photographer or Videographer: Capture candid reactions and the reveal moment; ask someone to focus on close-ups.
- Weather Plan: For outdoor reveals, have a backup indoor option in case of rain or wind.
- Safety First: Choose safe reveal methods—avoid open flames near decorations, and use non-toxic confetti or smoke options.
- Timing: Schedule the reveal for a natural peak in the gathering (mid-party rather than at the very end) so excitement builds.
Budget-Friendly Hacks
- DIY Backdrops: Use streamers, fabric, or paper fans to create a high-impact backdrop without breaking the bank.
- Borrow & Swap: Trade decor items with friends or use reusable pieces that fit multiple themes.
- Multiuse Pieces: Design centerpieces that double as guest favors to save on costs.
Inclusive & Low-Key Ideas
- Gender-Neutral Celebrations: Focus on baby-centered games, storytelling, or a plant-a-tree ceremony if you prefer not to emphasize gender.
- Virtual Participation: Stream the reveal live for distant friends and family; coordinate a small reveal kit to mail ahead.
Wrap-Up Checklist
- Confirm RSVPs and final headcount.
- Prepare reveal prop and test any mechanical or edible methods beforehand.
- Charge cameras and phones, and assign someone to capture the main moments.
- Have cleanup supplies and a plan for post-reveal cleanup, especially with confetti or powder.
Conclusion
For favor sets and small party add-ons, consider options like Winrayk Baby Gender Reveal Party Favors Supplies Ideas to outfit guests with themed wristbands and trinkets. If you want even more themes, games, and décor inspiration, you can explore a thorough roundup at 100+ Gender Reveal Baby Shower Ideas and Decorations for additional creative prompts.
30 Pink and Blue Gender Reveal Drinks
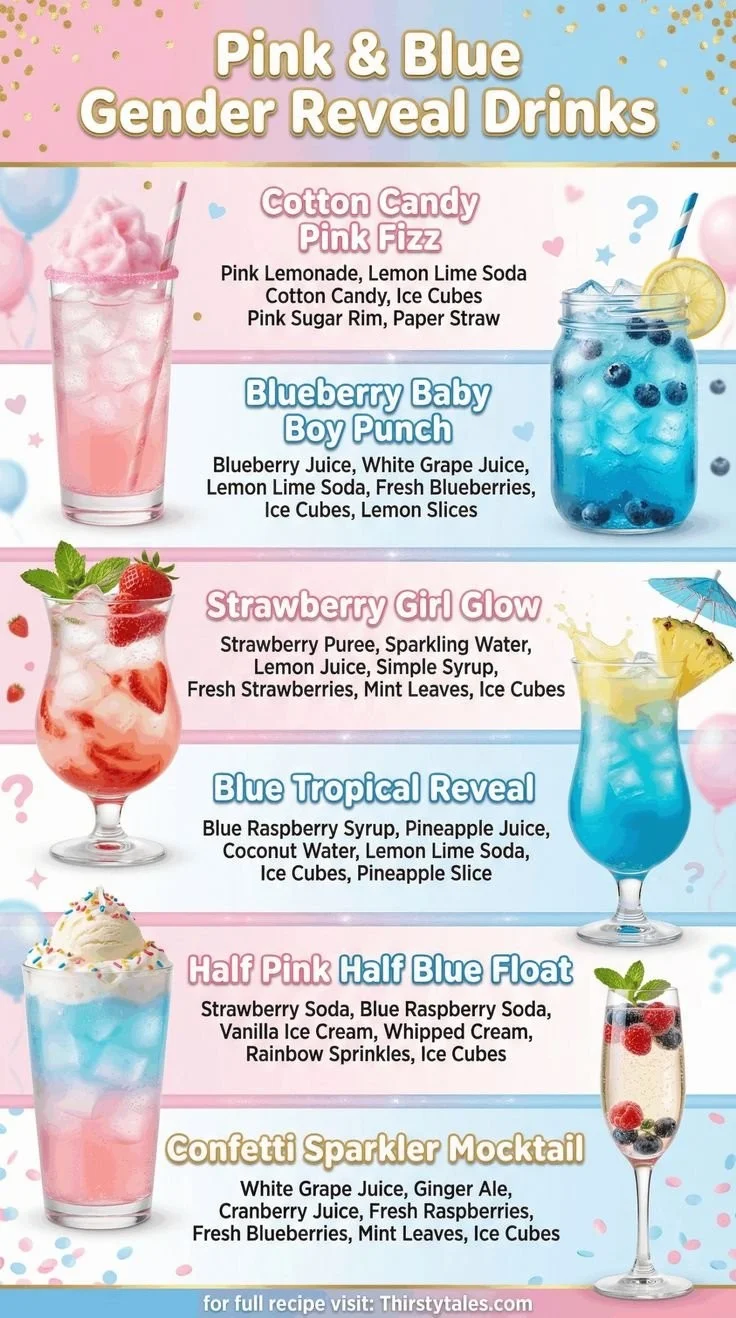
30 Pink and Blue Gender Reveal Drinks
Gender reveal drinks are a fun, visual way to announce whether you’re expecting a baby girl or boy. Whether you want mocktails for a family-friendly party or cocktails for an evening celebration, these beverages use color-changing ingredients, layering, edible glitter, or simple syrups to create a surprising splash of pink or blue. If you’re also thinking about party etiquette, see this helpful guide on do you bring a gift to a gender reveal party to decide whether to bring something for the host.
Below are 30 creative drink ideas grouped by technique so you can pick the approach that best fits your party style and ingredient availability.
Color-changing and pH-reactive drinks
These use butterfly pea flower tea or color-changing powders that turn pink with acid (lemon, lime, or cranberry).
- Butterfly Pea Lemon Fizz
- Brew butterfly pea tea, chill, top with club soda, and stir in lemon at reveal to turn blue to purple-pink.
- Electric Pink Sparkler
- Butterfly pea tea with a splash of lemonade; reveal by squeezing fresh lemon.
- Blue to Blush Punch
- Large punch bowl of butterfly pea infusion; guests add individual citrus wedges to trigger the change.
- Cranberry Surprise Cooler
- Start with light cranberry and tonic; add an acid shot at the reveal to flush the drink bright pink.
- Color-Changing Martini (adult)
- Butterfly pea vodka infusion shaken with citrus; watch it shift from blue to rosy.
Layered and density-play drinks
Use sugar syrups, cream, or liqueurs with different densities to create stacked blue and pink layers.
- Pink-Blue Sunset
- Blue curaçao, simple syrup, and grenadine layered carefully for a two-tone sunset.
- Rosy Ocean Float
- Blue punch base topped with rose syrup and a scoop of vanilla ice cream that slowly melts into pink streaks.
- Two-Tone Lemonade
- Blue lemonade base, gently spooned pink strawberry purée on top for a split-color effect.
- Layered Mocktail Jar
- Use syrup, juice, and soda densities in a mason jar for a pretty reveal you can shake at the end.
- Creamy Reveal Coffee (adult)
- Iced cold brew mixed with blue-tinted syrup, topped with pink foam from frothed milk and strawberry syrup.
Edible glitter and shimmer
Edible shimmer powder or glitter creates a dazzling pink or blue swirl.
- Glittering Blue Lagoon
- Blue punch with edible shimmer stirred at reveal to sparkle like the sea.
- Pink Stardust Lemonade
- Strawberry lemonade mixed with edible pink glitter for an instant bling effect.
- Shimmer Spritz (mocktail)
- Sparkling water, flavored syrup, and a pinch of edible glitter in a clear glass.
- Sparkly Milkshake
- Vanilla milkshake topped with colored sprinkles and edible dust that perfectly matches the reveal.
- Glitter Champagne (adult)
- Sparkling wine with a whisper of shimmer that catches the light when poured.
Frozen and slushy reveals
Frozen drinks can be dyed and spooned for a chilly color surprise.
- Pink Slush Punch
- Frozen strawberries blended with lemonade; blue food coloring omitted or substituted for the boy version.
- Blue Raspberry Slushies
- Blue raspberry syrup mixed with crushed ice for a carnival-style reveal.
- Layered Frozen Mocktail
- Make two frozen slush layers (pink and blue) and slice through to reveal the gender-colored core.
- Frosted Mojito (adult)
- Minty blue slush turned pink with a quick swirl of grenadine.
- Icy Coconut Cooler
- Coconut water ice with a blue or pink syrup drizzle for tropical color.
Shots, shooters, and small-batch reveals
Ideal for smaller gatherings or staged reveals.
- Tiny Tastes (non-alcoholic)
- Mini clear cups filled with colored jellies or juices for quick reveals.
- Pink or Blue Jello Shots (adult)
- Set jello in small cups with the chosen color; hand them out at the reveal.
- Reveal Pop Shots
- Layered shot glasses; remove a cover or pop a capsule to release the color.
- Candy-Colored Espresso Shots
- Sweetened espresso with an edible color shot added at the moment.
- Petite Punch Bombs
- Frozen ice balls tinted pink or blue that melt into a neutral punch for the reveal.
Tea, cider, and cozy options
Warm drinks can be made in gender colors, ideal for cooler-weather reveals.
- Spiced Pink Apple Cider
- Warm apple cider with a splash of cranberry for pink notes and aroma.
- Blueberry Hot Toddy (adult)
- Blueberry syrup added to warm tea and spirit for a cozy blue-hued toddy.
- Floral Rose Tea
- Rosehip or hibiscus tea brewed pink and served in clear mugs for a soft reveal.
- Chai with a Twist
- Chai latte tinted faintly pink with strawberry syrup or blue with butterfly pea concentrate (acid will change blue to pink if lemon is added).
- Colorful Mulled Punch
- Mulled wine or cider tinted to match the reveal color and ladled into cups at the big moment.
Tips for hosting with colored drinks
- Use clear glasses: Transparent serveware shows colors best and delivers the visual surprise.
- Test recipes ahead: Some ingredients (butterfly pea, lemon, dairy) react unexpectedly; trial runs avoid surprises.
- Label alternatives: Offer non-colored alternatives clearly so guests with dietary needs can choose easily.
- Consider edible decorations: Rim salts, sugared rims, or floating fruit slices enhance presentation.
- Timing is everything: Prepare neutral-looking bases and add the reveal ingredient or syrup at the exact moment.
Pair drinks with dessert or party food that complements the reveal color; if you plan to include a show-stopping cake, browse some gender reveal cake ideas to coordinate flavors and color themes.
Conclusion
For a glittering, color-changing option that adds instant sparkle to your gender reveal beverages, consider a premixed product like this glitter color-changing drink mix that’s made for celebrations. If you prefer DIY reveal props to add to cocktails or mocktails, the fishing bobber gender reveal powder can be used creatively for splash effects and powdered color reveals.
Good luck planning—choose a few favorites from this list, do a practice run, and you’ll have a memorable, tasty reveal that matches your celebration style.
20 Beautiful Yellow Nursery Ideas for Your Baby’s Room
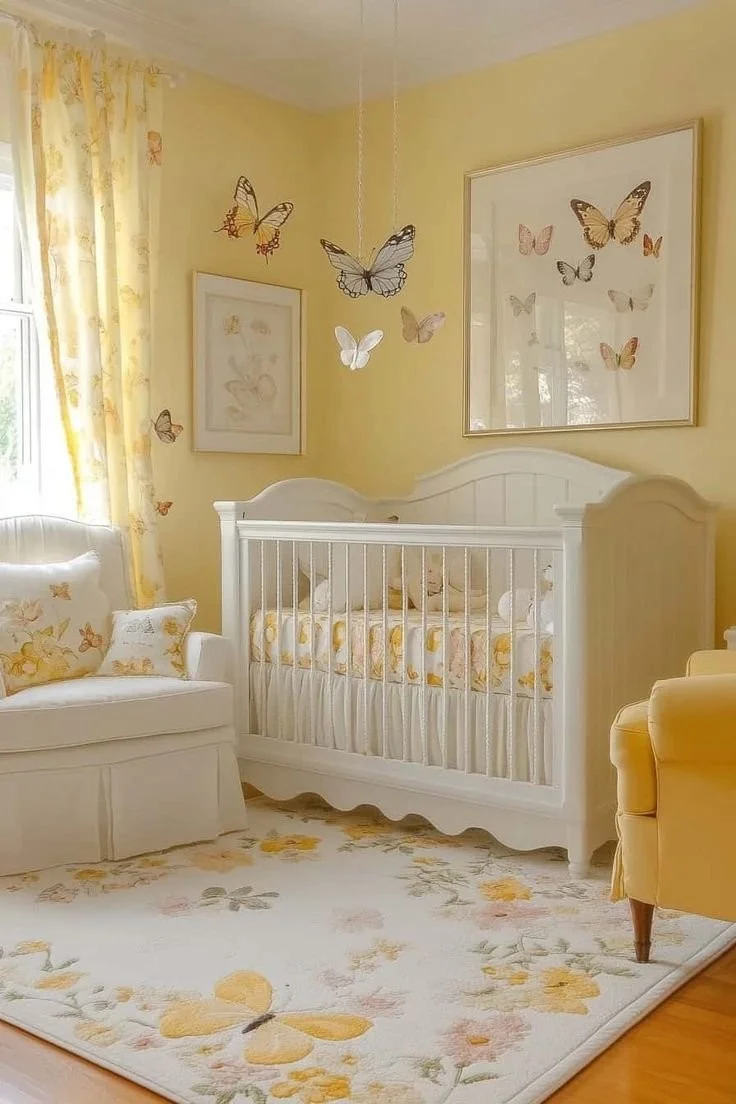
20 Beautiful Yellow Nursery Ideas for Your Baby’s Room
Yellow brings warmth, cheer, and a gentle energy to a nursery—perfect for creating a sunny, comforting space for your little one. Whether you prefer soft buttery tones, pale pastels, or bold mustard accents, yellow pairs beautifully with neutrals and pastels to create a timeless, joyful room. For playful character-driven themes, consider exploring classic motifs like Winnie the Pooh for inspiration; this collection of Winnie the Pooh nursery ideas can spark whimsical direction before you begin decorating.
Below are 20 creative yellow nursery ideas, with tips on color pairings, furniture, textiles, lighting, and decor to help you design a balanced space that’s both stylish and soothing.
Soft Buttercup Walls
Paint the room a soft buttercup yellow for a cozy, enveloping glow. Keep trim and ceiling crisp white to maintain brightness.Accent Mustard Wall
Choose one wall in mustard yellow as an accent behind the crib; keep the other walls neutral to avoid overwhelming the space.Yellow and Gray Palette
Pair pale yellow with soft gray for a modern, gender-neutral nursery—gray grounds the yellow while preserving warmth.Sunshine Ombre Mural
Paint a subtle ombre that fades from pale yellow to white, creating a sunrise effect that’s calming and unique.Lemon and Navy Nautical Theme
Combine bright lemon yellow with navy blue for a lively nautical nursery—add stripes and maritime accents.Floral Accent Wallpaper
Use a yellow floral wallpaper on a single wall for a vintage-inspired nursery; coordinate with simple bedding to avoid clashing patterns.Scandinavian Minimalism
Opt for clean lines, light wood furniture, and muted yellow accents for a Scandinavian look that’s airy and timeless.Animal Silhouette Gallery
Create a wall gallery of animal silhouettes in varying yellows and neutrals—an easy DIY project that adds personality.Yellow Canopy Over Crib
Drape a gauzy yellow canopy above the crib for a soft, dreamy focal point that also helps define the sleeping area.Mustard and Teal Midcentury Style
Combine mustard yellow with teal accents and midcentury furniture for a chic, retro-inspired nursery.Sunshine Striped Rug
Anchor the room with a striped rug featuring yellow tones—this adds texture and ties together other yellow elements.Pastel Yellow and Blush Combo
For a soft feminine feel, pair pastel yellow with blush pink. If you plan a celebration, consult resources like these baby shower food ideas for a girl to match party colors to the nursery palette.Chalkboard Accent Wall
Paint a portion of a wall with chalkboard paint framed in yellow trim—perfect for doodles and milestones as baby grows.Geometric Yellow Decals
Use removable geometric decals in various yellow shades to add modern interest without committing to paint.Natural Wood and Yellow
Combine natural wood furniture with yellow textiles—this pairing creates a warm, organic vibe that feels grounded.Sun and Cloud Mobile
Suspend a handcrafted sun-and-cloud mobile over the changing area or crib to reinforce the sunny theme with soft movement.Vintage Yellow Finds
Search for vintage yellow pieces—an old dresser or lamp can serve as a charming focal point with character.Yellow Accent Lighting
Choose a soft amber nightlight or pendant with a yellow shade to give evening feedings a warm, soothing glow.Pattern Mix with Neutrals
Mix yellow chevrons, polka dots, and stripes in muted tones, balancing them with white and beige to avoid visual clutter.Playful Yellow Reading Nook
Create a cozy corner with a yellow beanbag or armchair, soft throw, and low shelving for board books—encourage early literacy with a sunny spot.
Design tips to keep in mind:
- Test paint samples at different times of day; yellow changes significantly in morning vs. evening light.
- Balance brightness with neutrals—white, cream, taupe, and soft wood finishes temper yellow’s intensity.
- Use textiles (curtains, rugs, crib skirts) to introduce patterns and soften the room without overwhelming it.
- Prioritize safety: secure furniture to the wall, use blackout curtains for sleep, and choose non-toxic paints.
Conclusion
For more nursery decorating ideas and seasonal inspiration, consult this curated list of 40 nursery decorating ideas you’ll love from House Beautiful to expand on color schemes and layouts.
If you’re designing specifically for a baby girl or want themed galleries, see the collection of 20 adorable baby girl nursery ideas for your new little one for additional direction and styling tips.
75 Green nursery ideas for your baby’s room
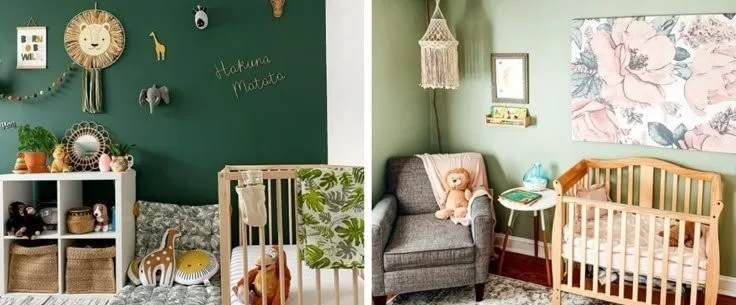
75 Green Nursery Ideas for Your Baby’s Room (sage, light, olive, mint, pale, dark, forest, hunter)
Creating a green nursery is a wonderful way to bring calm, nature, and timeless style into your baby’s room. Whether you prefer soft sage, bright mint, deep forest, or muted olive, green offers versatile backdrops that work with many themes and budgets. For playful character ideas that pair beautifully with green palettes, check out these Winnie the Pooh nursery ideas to spark imaginative touches.
Below are 75 distinct ideas grouped by use—palettes, furniture, walls, textiles, decor, lighting, plants, themes, DIYs, and finishing details—to help you design a soothing, stylish green nursery.
Introduction to palettes and planning
- Choose a main shade: sage for serenity or olive for warmth.
- Pair pale green walls with crisp white trim for a fresh, airy look.
- Use deep hunter or forest green on an accent wall for drama and coziness.
- Create an ombré wall from pale mint at the ceiling to darker green near the baseboard.
- Select a two-tone scheme—soft green on top, cream or beige below—for a classic nursery.
- Incorporate metallic accents (brass or gold) to warm up cooler green tones.
- Opt for a monochrome green palette in varying textures for depth without clutter.
- Use green as an accent rather than a dominant color if you prefer a neutral base.
Furniture and layout ideas 9. Paint or buy a green crib to make it the room’s centerpiece.
10. Choose a white crib and green changing table for balanced contrast.
11. Stain wooden furniture in warm tones to complement olive and forest greens.
12. Add a green rocking chair or glider for a cozy nursing corner.
13. Place a low bookshelf painted mint near the reading nook for accessibility.
14. Use green storage bins or woven baskets to keep toys tidy and coordinated.
15. Select a convertible crib with green bedding to grow with your child.
16. Arrange furniture to maximize natural light, which enhances green hues.
Wall treatments and murals 17. Paint a leafy mural in soft sage behind the crib for a nature-inspired focal point.
18. Apply botanical wallpaper on one wall for texture and visual interest.
19. Use stencils to add subtle, repeating green patterns like ferns or dots.
20. Create a gallery wall with green-themed art prints and frames.
21. Install peel-and-stick decals—green trees, mountains, or animals—for easy updates.
22. Use a vertical stripe of dark green behind the changing area for definition.
23. Hang a painted wooden sign with a loving quote in green lettering.
24. Create a half-wall wainscoting painted pale green for cottage-chic charm.
Textiles and soft goods 25. Pick a mint or sage crib sheet to brighten the sleeping area.
26. Layer a textured green throw blanket in the glider for warmth and style.
27. Use curtains in leafy prints to soften windows and add pattern.
28. Incorporate a dark green rug to ground the room and hide spills.
29. Choose breathable organic cotton green bedding for baby’s comfort.
30. Add green accent pillows with animal or geometric prints to the chair.
31. Use a crib skirt in matching green to hide under-crib storage.
32. Select washable rugs and textiles for practical upkeep.
Decor accents and accessories 33. Hang macramé wall planters with faux greenery for low-maintenance foliage.
34. Place wooden animal figurines painted in subtle green shades on shelves.
35. Add a mobile with green leaves, birds, or stars above the crib.
36. Use soft green storage ottomans that double as seating and toy bins.
37. Display wicker baskets with green liners for a natural look.
38. Choose a growth chart with a green tree motif for tracking milestones.
39. Incorporate green picture frames to highlight family photos.
40. Add a small chalkboard painted green for notes and doodles.
Lighting and ambiance 41. Install dimmable overhead lighting to adjust mood and feedings.
42. Use a green lampshade on a table lamp for soft, colored glow.
43. Add string lights behind sheer curtains for a subtle twinkle.
44. Place a warm-toned nightlight with a green housing near the crib.
45. Use blackout curtains with a green floral pattern for daytime naps.
46. Choose a lamp with natural wood and green ceramic base for a modern touch.
47. Incorporate a star projector for gentle night sky effects on green walls.
48. Ensure multiple light sources for task lighting during diaper changes.
Plants and greenery (real and faux) 49. Add a low-maintenance pothos or snake plant in a green pot out of reach.
50. Use faux preserved moss in framed art for a maintenance-free green accent.
51. Hang a string of faux eucalyptus for a calming scent imitation and look.
52. Create a small herb display on a sunny windowsill for a living touch.
53. Place a faux fiddle leaf fig in a corner for instant scale and texture.
54. Use pressure-mounted shelves for plants to keep floors baby-safe.
55. Choose hypoallergenic artificial plants when real ones aren’t possible.
56. Incorporate botanical prints if you prefer no plants in the room.
Themed green nursery ideas 57. Woodland wonderland with forest green, deer motifs, and natural wood.
58. Tropical mint paradise with palm prints and rattan accents.
59. Vintage olive nursery with antique frames and soft textiles.
60. Minimalist sage nursery with clean lines and monochrome décor.
61. Safari-inspired room with khaki, olive, and animal silhouettes.
62. Garden-themed nursery with floral wallpapers and terracotta pots.
63. Scandinavian mint nursery with light wood and geometric shapes.
64. Fairytale forest with dark green canopy and twinkling lights.
DIY and crafts 65. Paint a DIY growth tree on the wall using olive or sage paint.
66. Make your own crib mobile with felt leaves and wooden beads in green shades.
67. Repurpose thrifted furniture with a fresh coat of mint or sage paint.
68. Sew simple cushion covers in various green fabrics for a coordinated set.
69. Create a green-themed sensory board with different textures for tummy time.
70. Craft botanical art using preserved leaves framed in natural wood.
71. Customize a lamp base with green paint and clear sealant for durability.
72. Upcycle glass jars into green-painted storage for small essentials.
Finishing touches and longevity 73. Choose durable, washable finishes to keep green areas looking fresh.
74. Add a consistent accent color (cream, mustard, or navy) to complement green.
75. Plan for adaptability—select pieces and paint that can evolve as your child grows.
Practical tips
- Test green paint samples in different lights before committing—time of day changes perception.
- Use low-VOC paints for better indoor air quality in a nursery.
- Balance pattern and solid greens to prevent visual overwhelm.
- Consider storage-first design: green bins and labels keep things tidy and cohesive.
A note on safety: Ensure all furniture is secured to walls, plants are non-toxic or out of reach, and small decor items are kept away from the crib.
Body wrap-up If you’re hosting a green-themed baby party or creating a coordinating celebration, these nursery choices pair well with seasonal treats and menu ideas such as those found in well-curated baby shower food ideas for a girl, which can inspire matching colors and motifs.
Conclusion
For more visual examples and curated galleries of green nurseries—from sage and mint to olive and forest tones—see this comprehensive collection of green nursery inspirations at 75 Green baby nursery ideas: sage to olive, dark to light. If you’re choosing the perfect paint, consult professional color guides like the best green paint colors to match your vision and lighting conditions.
