
Kids bathroom ideas to add personality and child friendly touches for a fun vibe
Creative Kids Bathroom Ideas for a Fun and Friendly Space
Transforming your child’s bathroom into a playful sanctuary doesn’t have to be overwhelming. With a few thoughtful touches, you can create a space bursting with personality that your kids will adore. If you’re looking for ideas that balance fun and functionality, you’re in the right place. Here are 10 imaginative kids bathroom ideas that can brighten up their daily routines!
1. Vibrant Color Schemes
Colors have a powerful effect on mood. Bright and bold colors can make the bathroom feel more inviting to kids. Consider:
- Monochromatic Accents: Use a single color in varying shades—think different blues or greens.
- Rainbow Walls: Paint one wall with a cheerful rainbow pattern to inspire creativity.
2. Whimsical Shower Curtains
Switching up the shower curtain can dramatically change the vibe of the bathroom. Look for fun patterns, such as:
- Animal Prints: Jungle creatures or ocean friends add a sense of adventure.
- Cartoon Characters: Get their favorite characters to encourage bath time.
3. Themed Bath Mats
A playful bath mat can add both comfort and flair. Options include:
- Under the Sea: Use a mat shaped like a sea creature.
- Space Explorers: Choose a design featuring planets and stars.
4. Fun Storage Solutions
Children’s bathrooms often need extra storage that’s also visually appealing. Consider:
- Colorful Bins: Brightly colored organizers make cleaning up fun.
- Wall-mounted Shelves: Create space for their toys or books while keeping the floor clear.
5. Personalized Towels
Make bath time special with personalized towels. Options include:
- Monogrammed Designs: Add your child’s name for a personal touch.
- Fun Patterns: Choose patterns that reflect their interests, like superheroes or princesses.
6. Creative Art Displays
A bathroom is a great spot to showcase your child’s artwork or favorite characters. Try these ideas:
- Gallery Wall: Frame their drawings and create a mini art gallery.
- Magnetic Boards: Use a magnetic board to display changing art pieces.
7. Playful Accessories
Incorporate fun accessories to make everyday tasks enjoyable. Look for:
- Cute Soap Dispensers: Choose dispensers shaped like animals or cars.
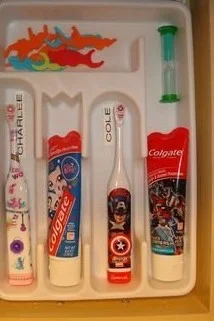
- Colorful Toothbrush Holders: Pick holders that match the bathroom theme.
8. Child-Friendly Fixtures
Consider the functionality of fixtures to accommodate small hands:
- Step Stools: A fun, colorful step stool helps little ones reach the sink.
- Low-Hanging Hooks: Install hooks at their height for towels and bathrobes.
9. Interactive Wall Decals
Wall decals are an easy way to add fun and can be changed out easily if interests change:
- Glow in the Dark Stars: Perfect for night-time adventures.
- Interactive Themes: Choose decals that create scenes, like outer space or jungles.
10. Bath Time Fun
Make bath time an enjoyable experience with entertaining elements:
- Bath Toys: Floating toys or color-changing bath bombs can spark joy.
- Bubble Bath: Opt for colorful bubble baths—who wouldn’t love a rainbow bath?
Quick Tips for a Kid-Friendly Bathroom
- Involve Your Kids: Let them pick some decor items to create a sense of ownership.
- Regular Updates: Change accessories occasionally to keep the bathroom fresh and exciting.
Common Mistakes to Avoid
- Too Many Accessories: Avoid clutter. Choose a few standout pieces instead.
- Ignoring Functionality: Make sure everything is accessible for your child.
FAQs
How can I make my child feel involved in decorating their bathroom?
Encourage kids to choose colors, themes, or even add their artwork.
What are budget-friendly ideas for decorating?
DIY projects, like custom towel holders or repurposing old furniture, can save money while allowing for creativity.
By implementing these fun kids bathroom ideas, you’ll create a space that not only meets their practical needs but also nurtures their imagination. Happy decorating!
Transform Your Kids Bathroom: Fun Bathroom Tile Floor & Colorful Design Ideas
Create the Perfect Kid-Friendly Bathroom for Fun and Safety
Designing a bathroom for kids can feel like a daunting task. How do you create a space that’s safe, encourages independence, and adds an element of fun? The good news is that with a few thoughtful choices, you can transform a simple washroom into a kid-friendly haven.
Here are some helpful tips and ideas to design a bathroom that meets all of your little one’s needs while keeping safety in mind.
Creating a Safe Environment
Safety is the top priority when designing a bathroom for children. Here are some essential tips:
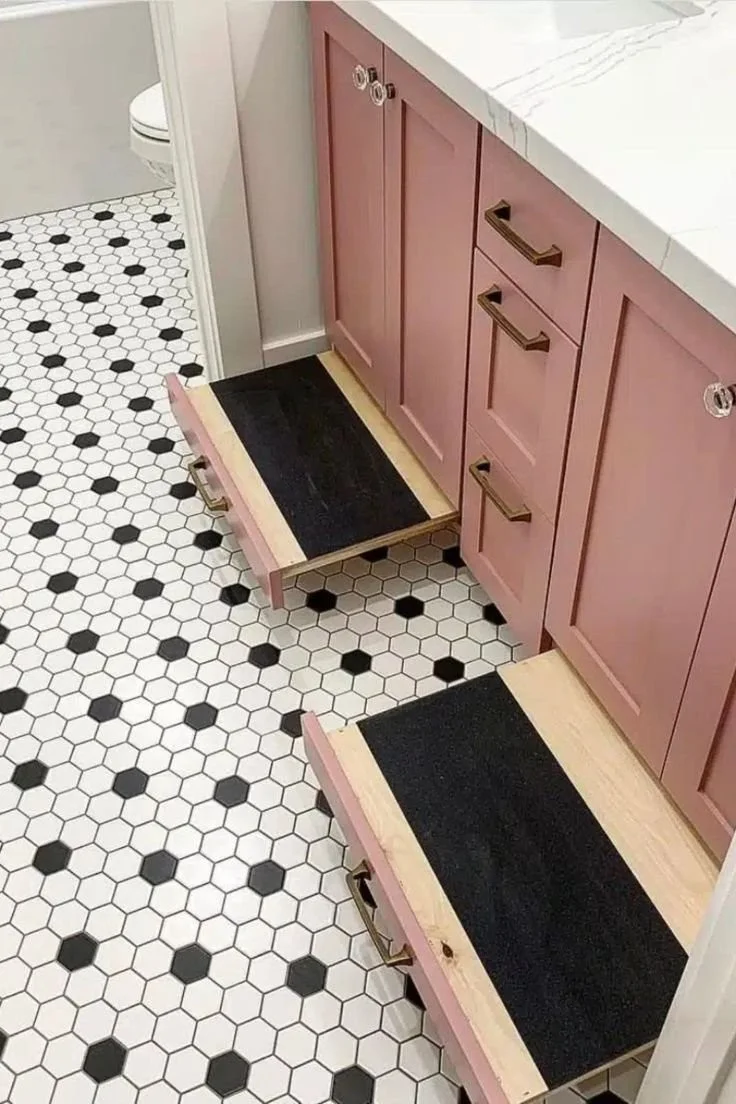
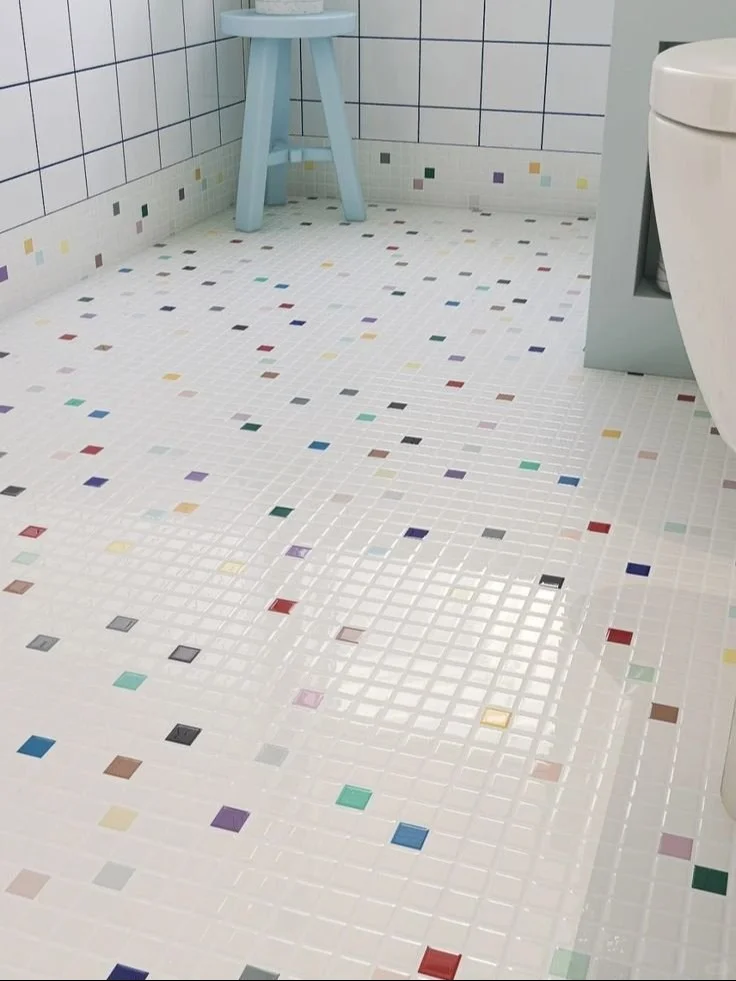
1. Non-Slip Flooring
- Choose materials carefully: Opt for non-slip tiles or vinyl flooring to minimize the risk of slips and falls.
- Add bath mats: Keep a few colorful, non-slip bath mats near the bathtub and sink for extra cushioning.
2. Lowered Amenities
- Sink height: Install a kid-friendly sink. Consider a child-sized vanity with a lower sink height where your child can easily reach the faucet.
- Toilet adjustments: Use a potty training seat or a step stool if your child is transitioning to the regular toilet.
3. Safety Locks and Latches
- Secure cabinets: Use child-proof latches on medicine cabinets and drawers to keep hazardous items out of reach.
- Toxin-free products: Always keep cleaning materials in locked cabinets or on high shelves.
Encouraging Independence
Kids thrive when they can take care of themselves. Here’s how to make their bathroom experience more independent:
4. Step Stools
- Sturdy and colorful: Invest in a colorful, sturdy step stool that can help your little one reach the sink and toilet with ease.
5. Easy-Access Storage
- Baskets and bins: Use labeled baskets for toys and bathroom essentials that your child can easily access.
- Vertical storage: Consider wall-mounted shelves to save space while keeping necessities within reach.
6. Fun Fixtures
- Interactive faucets: Look for touchless or motion-sensor faucets that engage children while making it easier for them to wash their hands.
- Whimsical designs: Choose fun shower curtains or themed items that your child can help pick out.
Making It Fun
A well-designed bathroom can also be a place for creativity and play. Here are some ideas:
7. Colorful Decor
- Bright colors: Use colorful paints or wallpapers that reflect your child’s personality. Think playful patterns or mural stickers.
- Themed accessories: Incorporate their favorite characters into soap dispensers or towels.
8. Fun Bath Toys
- Water-friendly friends: Keep a stash of bath toys that can make bath time enjoyable and engaging.
- Bubble baths: Invest in bubble bath solutions that are safe for kids but make bath time super fun.
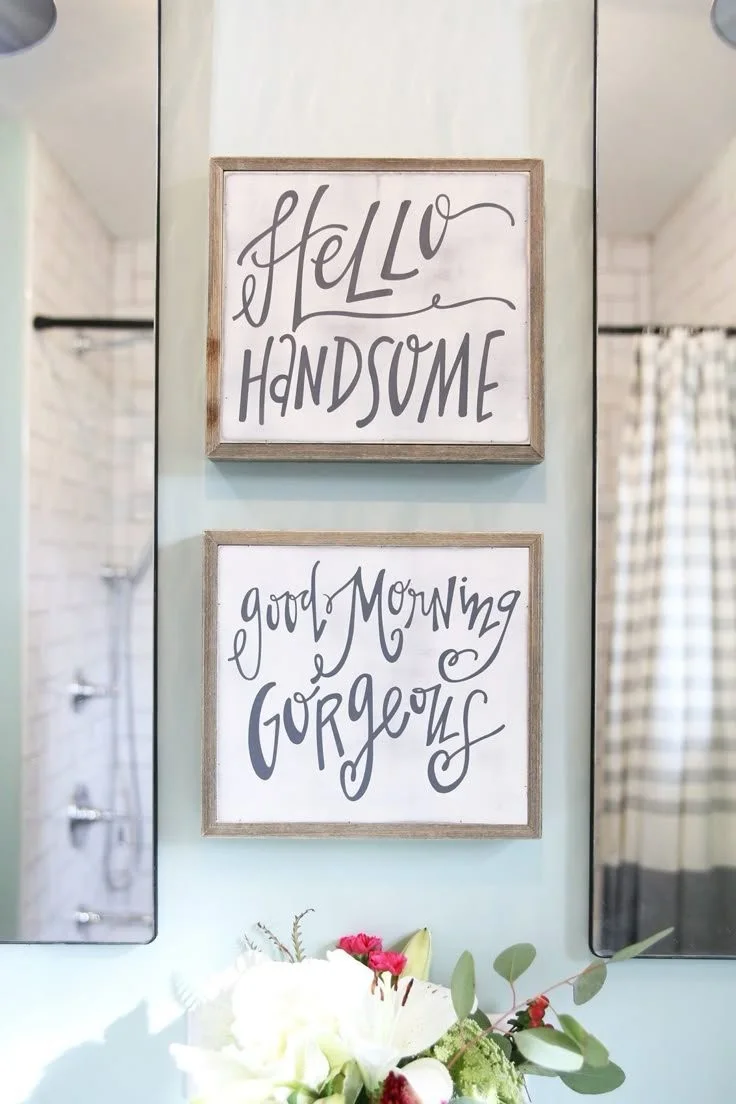
9. Personalized Touches
- Customizable elements: Let your child personalize their bathroom space with their artwork or photos.
- Monogrammed towels: Surprise them with towels embroidered with their initials for an added special touch.
Quick Tips for Parents
- Involve your child: Let your child help in the design process. This will make them more excited about their new space.
- Maintain simplicity: Don’t overcrowd the bathroom with too many items. Keep it simple for ease of use.
Mistakes to Avoid
- Overly complex designs: Avoid installing complicated fixtures that could confuse or frustrate your child.
- Ignoring their input: Not involving your child in the design could lead to less enjoyment of the space.
FAQs
How can I make bath time more enjoyable for my child?
You can incorporate fun toys, bubbles, and playful lighting to make the experience delightful.
What age is appropriate for kids to start using a regular toilet?
Most children are ready between ages 2 and 4. Consider a transition seat for comfort.
How can I ensure the bathroom remains safe as they grow?
Continue to evaluate the bathroom as your child ages, making adjustments for accessibility and safety as necessary.
Bonus Ideas
- Chalkboard walls: Consider painting a section of the wall with chalkboard paint to encourage creativity and doodling during bath time.
- Light strips: Install LED light strips near the floor for a night-light effect, adding a fun glow that makes the bathroom less intimidating at night.
With these tips, you can create a bathroom that beautifully balances safety, independence, and fun for your child. Designing a kid-friendly bathroom doesn’t just improve functionality, it also fosters a sense of ownership and responsibility in your little ones. Happy decorating!
Delicious Banana Pancakes for Infants: Easy Applesauce Baby Food Recipe
Fluffy Banana Pancakes Your Kids Will Love
Are you tired of breakfast battles with your little ones? If so, it might be time to switch things up with a breakfast treat that feels like a hug—banana pancakes. Not only are they delicious, but they’re also a fantastic way to sneak in some fruit! Let’s dive into how you can whip up these fluffy banana pancakes that will have your kids smiling and begging for seconds.
Why Banana Pancakes Are a Hit
Banana pancakes are:
- Nutritious: They contain bananas, which provide essential vitamins and minerals.
- Simple: With just a few ingredients, they’re quick to whip up.
- Customizable: You can add nuts, chocolate chips, or spices to suit your family’s tastes.
Ingredients You’ll Need
To make the fluffiest banana pancakes, gather the following ingredients:
- 2 ripe bananas
- 1 cup all-purpose flour
- 1 tablespoon baking powder
- 1/2 teaspoon salt
- 1 cup milk (dairy or non-dairy)
- 1 large egg
- 2 tablespoons sugar (optional)
- 1 teaspoon vanilla extract
- Cooking spray or butter for the pan
Step-by-Step Guide to Delicious Banana Pancakes
Step 1: Prepare Your Bananas
- In a mixing bowl, mash the ripe bananas until smooth.
- The more mashed they are, the sweeter your pancakes will be!
Step 2: Mix Dry Ingredients
- In a separate bowl, combine the flour, baking powder, and salt.
- For extra flavor, feel free to add in 1/2 teaspoon of cinnamon.
Step 3: Whisk Wet Ingredients
- In another bowl, whisk together the milk, egg, sugar (if using), and vanilla extract.
- Mix well to ensure everything is combined.
Step 4: Combine Mixtures
- Pour the wet mixture into the dry ingredients.
- Fold in the mashed banana until just combined. Don’t worry if the batter is a little lumpy; it’s perfect!
Step 5: Cook the Pancakes
- Heat a non-stick skillet over medium heat and add a bit of cooking spray or butter.
- Use a 1/4 cup measuring cup to pour the batter onto the skillet.
- Cook for about 2-3 minutes or until bubbles form on the surface. Flip and cook for another 1-2 minutes.
Step 6: Serve Warm
- Serve the pancakes warm with your favorite toppings! Think maple syrup, sliced bananas, or a sprinkle of nuts.
Quick Tips for Perfect Pancakes
- Don’t Overmix: Overmixing can lead to tough pancakes. Mix just enough to combine the ingredients.
- Adjust Consistency: If the batter seems too thick, add a splash more milk until you reach your desired consistency.
- Keep Warm: If you’re making a big batch, keep the pancakes warm in the oven at 200°F until ready to serve.
Mistakes to Avoid
- Not Using Ripe Bananas: The riper the bananas, the sweeter the pancakes. Aim for bananas with plenty of brown spots!
- Skipping the Resting Time: Letting the batter rest for a few minutes can yield fluffier pancakes.
FAQs About Banana Pancakes
Can I make these pancakes gluten-free?
Absolutely! Substitute the all-purpose flour with a gluten-free flour blend.
How do I store leftovers?
Store any leftovers in an airtight container in the fridge for up to 3 days. Reheat in a toaster or microwave for quick breakfasts.
Can I freeze banana pancakes?
Yes! Freeze individual pancakes between layers of parchment paper in a plastic bag. They’ll last up to 2 months in the freezer.
Bonus Ideas for Fun Toppings
- Yogurt and Berries: A healthier option that adds protein and antioxidants!
- Nut Butter: Spread peanut butter or almond butter for extra creaminess.
- Chocolate Drizzle: For a special treat, drizzle melted chocolate on top.
Banana pancakes are not only a hit with kids, but they can also help you enjoy a stress-free morning. With these tips and a simple recipe, you’re just a few minutes away from a delightful breakfast that everyone will adore! Happy cooking!
children’s bath makeover
Transform Your Children’s Bath Time Into a Fun Adventure
Bath time can often feel like a chore for both parents and kids. If you’ve ever struggled to get your little ones into the tub or faced tantrums during bath time, you’re not alone. Fortunately, a children’s bath makeover can turn this essential routine into an exciting adventure. Let’s explore some enjoyable updates that will make bath time something everyone looks forward to.
Why a Bath Makeover Matters
Imagine a bath where your kids can’t wait to jump in! A well-designed and playful bathing space creates:
- A positive experience: Kids enjoy their baths and may even ask for extra time in the water.
- Improved cleanliness: Fun baths encourage more frequent washing and better hygiene habits.
- Easy clean-up: A well-organized space minimizes mess during and after the wash.
Steps to Create a Fun and Functional Bath Space
Here’s a simple guide to transforming your children’s bath area.
Step 1: Choose a Theme
Pick a theme that resonates with your child’s interests. Some popular ideas include:
- Under the Sea: Think mermaids, fish, and beach elements.
- Outer Space: Incorporate stars, planets, and astronauts.
- Fairy Tales: Use colors and characters from their favorite stories.
Step 2: Fun and Colorful Accessories
Brighten up the space with fun accessories:
- Bath toys: Go for a mix of floating toys, water guns, and squeaky creatures.
- Colorful towels: Choose towels featuring their favorite characters.
- Decorative shower curtains: Find a playful shower curtain that matches the theme.
Step 3: Smart Organization
Keep the bath tidy with smart organization ideas:
- Toy storage: Use mesh bags or baskets for bath toys to allow them to dry and reduce mildew.
- Shower caddy: Invest in a hanging caddy for easy access to bath essentials.
- Step stool: A fun, themed step stool can help kids reach the sink or tub safely.
Step 4: Create a Sensory Experience
Make bath time a sensory exploration:
- Water play: Add cups, funnels, and scoops for imaginative pouring and mixing.
- Bubble bath: Use natural bubble bath solutions that are gentle on skin and safe.
- Light changes: Consider waterproof LED lights for a fun ambiance, like undersea colors or soft hues.
Step 5: Safety First
While fun is essential, safety always comes first:
- Non-slip mats: Place mats in and out of the tub to prevent slipping.
- Temperature control: Use a bath thermometer to ensure water is the right temperature.
- Bath toys cleanliness: Regularly clean toys and bathroom surfaces to maintain hygiene.
Quick Tips for a Seamless Bath Time
- Involve them: Let your child choose bath toys and accessories to foster excitement.
- Schedule consistent times: Regular bath times help establish positive routines.
- Make it a game: Turn washing into a fun activity with songs or challenges.
Mistakes to Avoid
- Overloading the bath: Too many toys can create chaos instead of fun.
- Ignoring their input: Not considering their preferences may lead to resistance.
- Neglecting clean-up: Leaving items scattered can create a dislike for bath time.
FAQs About Children’s Bath Makeovers
Q: How do I encourage my child to enjoy bath time?
A: Involve them in choosing their bath items, and make the experience interactive and playful.
Q: What’s the safest way to organize bath toys?
A: Use mesh netting or organized bins with holes for drainage to keep toys dry.
Bonus Ideas for Extra Fun
- Bubble parties: Add extra bubbles and invite stuffed animals for a “bubble party.”
- Themed bath crayons: Use washable bath crayons to let your kids express their creativity.
Transforming your children’s bathing space can turn a routine task into an enjoyable and memorable ritual. With a few thoughtful changes, bath time can become a cherished part of your day.
Embrace these tips, and you’ll ignite a love for bath time in your little ones, all while ensuring safety and fun in the tub!
10 Easy Toddler Bathroom Ideas for Stress-Free Routines and Organization
Transform Your Kids’ Bathroom with These 10 Organization Tips
As the school season approaches, many parents find themselves juggling a flurry of back-to-school tasks. One often-overlooked area is the kids’ bathroom. A cluttered bathroom can lead to hectic mornings filled with stress and frustration. Luckily, with a little organization, you can create a functional and tidy space that makes getting ready for school a breeze.
In this article, we’ll explore 10 simple DIY tips to transform your kids’ bathroom, making it an organized haven for you and your little ones.
1. Create a Bathroom Command Center
Designate a spot in the bathroom for all necessary supplies. Use a small basket or a wall-mounted organizer to hold essentials like:
- Toothbrushes
- Toothpaste
- Hairbrushes
- Soap
2. Use Clear Storage Containers
Invest in clear storage bins for easy visibility. Label each container for specific items, like “Hair Accessories,” “Bath Toys,” and “First Aid.” This way, kids know exactly where to find what they need and where to put it back.
3. Hang Extra Towels
Make space by hanging extra towels in easy-to-reach spots. Consider installing hooks at their height. This encourages independence and keeps towels off the floor and countertops.
4. Employ Vertical Storage Solutions
Maximize limited bathroom space by using vertical organizers. Shelves or hanging baskets are great for holding extra toiletries or beauty products that kids can access themselves.
5. Create a Fun Bath Time Zone
Make bath time enjoyable! Turn a basket into a playful storage solution for bath toys. When it’s playtime, the kids can easily grab their toys, and the basket can be tucked away when they’re done.
6. Set Up Daily Routine Caddies
Help kids build good habits by creating daily routine caddies. Each caddy can hold the items they need for efficient morning and evening routines—such as hair products, deodorant, and skincare items.
7. Keep Cleaning Supplies Handy
Involve your kids in keeping their space tidy by placing child-safe cleaning supplies within reach. A small spray bottle with water and a microfiber cloth can empower them to clean spills and messes.
8. Organize Under the Sink
The area under the sink can be a chaotic mess. Install a pull-out shelf or divide this space with bins to keep cleaning supplies, extra toiletries, and spare toilet paper organized and accessible.
9. Use Color Coding
Assign each child a color for their towels, washcloths, and storage bins. This visual cue helps kids take ownership of their belongings and makes it easier to keep track of what belongs to whom.
10. Make It Personal
Add a personal touch to the bathroom by incorporating your child’s favorite colors or themes. Let them choose bathroom décor so they feel more connected to their space.
Quick Tips / Mom Hacks
- Use Tension Rods: Hang shower caddies or small baskets for extra storage in the shower or on the walls.
- Repurpose Items: Use small plastic containers from the kitchen to sort smaller items like hair ties or combs.
Mistakes to Avoid
- Overcrowding: Don’t overload shelves and storage bins; it can lead to chaos.
- Ignoring Height: Make sure items are within kids’ reach, promoting autonomy and encouraging responsibility.
FAQs
What are some budget-friendly organization solutions?
Repurpose household items like jars, baskets, and trays, or check local thrift stores for inexpensive storage options.
How can I get my kids involved in bathroom organization?
Ask them to help decide how items should be stored and encourage them to maintain their designated areas.
Bonus Ideas
- Seasonal Clean-Out: Prepping for back to school is a perfect time for a seasonal clean-out. Toss expired lotions or outgrown hair accessories together!
- Create a Rewards Chart: Motivate kids to keep the bathroom organized by implementing a rewards chart for consistent tidiness.
Transforming your kids’ bathroom into an organized space doesn’t have to be overwhelming. With these tips, you can create an efficient environment that helps streamline your mornings and puts a big smile on your little ones’ faces! Happy organizing!
90+ Fun Indoor Birthday Party Games For Kids of All Ages
Discover 90 Fun Indoor Birthday Party Games for Kids of All Ages
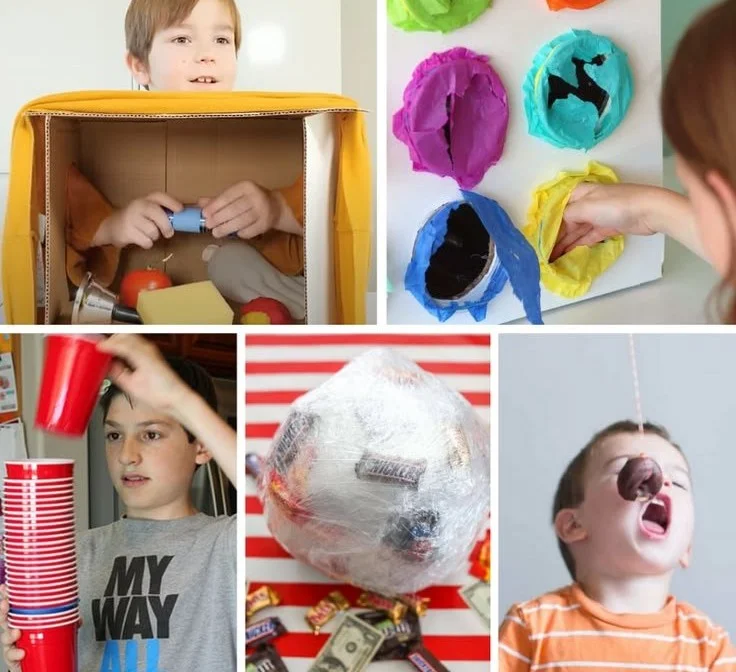
Planning a birthday party for your little one can feel overwhelming, especially when trying to keep everyone entertained indoors. Whether it’s raining outside or you just want to keep the mess contained, indoor birthday party games can save the day and keep the good times rolling! Let’s explore over 90 fun activities that kids of all ages will love, ensuring a delightful celebration without endless chaos.
Fun Games for Younger Kids
1. Balloon Pop Relay
Kids love balloons! Split them into teams and have them race to pop balloons by sitting on them.
2. Indoor Scavenger Hunt
Create a list of items for your little detectives to find around the house. It’s fun and encourages teamwork!
3. Freeze Dance
Blast some tunes and have the kids dance. When the music stops, they must freeze in place. The last one to freeze is out!
4. Simon Says
A classic that needs no introduction. It’s simple but can lead to lots of giggles!
5. Craft Circle
Set up a craft station where kids can create their own masterpieces. Offer supplies like paper, markers, and stickers.
Exciting Games for Elementary Kids
6. Hide and Seek
Always a hit! Just make sure you set some boundaries so no one gets too lost.
7. Indoor Bowling
Use plastic bottles and a soft ball to create a bowling alley in your hallway.
8. Storytime Theater
Have the kids put on a play using their favorite story. Encourage creativity in their presentations!
9. Mini-Olympics
Set up multiple stations with various activities like jumping jacks, hula hoops, and a mini obstacle course.
10. Charades
Another great team game, where kids act out a word or phrase without speaking while others guess what it is.
Engaging Games for Tweens and Teens
11. Escape Room Challenge
Create an escape room scenario at home where they need to solve puzzles to “escape” within a time limit.
12. Murder Mystery Game
Set up a mystery scenario where each guest plays a character, and they must figure out “whodunit” through clues.
13. DIY Pizza Contest
Let the teens show off their culinary skills by making their own mini pizzas, and then have a taste test.
14. Trivia Competition
Prepare a list of trivia questions related to the birthday child’s interests or pop culture, and see who gets the most correct!
15. TikTok Dance Challenge
Let your kids showcase their best dance moves to trending songs. They could even create a fun compilation video!
More Ideas for All Ages
16. Blanket Fort Building
Encourage creativity by having teams build the most epic blanket fort, then hang out inside for storytime or snacks.
17. Relay Races
Set up a course using cushions and furniture to create a fun relay experience.
18. Guess the Snack
Blindfold kids and have them taste different snacks, trying to guess what they are.
19. Obstacle Course
Use household items to create an exciting obstacle course. Kids will love the challenge!
20. Puppet Show
Have the children create puppets from socks and put on a puppet show for everyone to enjoy.
Quick Tips for Hosting an Indoor Party
- Keep Activities Structured: Plan games that require minimal supervision so you can enjoy the party too.
- Be Flexible: If kids want to switch games or try something different, go with the flow to keep the energy alive!
- Create a Comfortable Setting: Use pillows and cushions to make the space cozy, especially if you plan to sit and enjoy games.
Mistakes to Avoid
- Overloading the Schedule: Too many games can lead to chaos. Choose a few solid options and stick to them.
- Ignoring Age Differences: Ensure the games are suitable for the age groups you’re inviting to avoid frustrating the younger ones or boring the older ones.
- Neglecting Snacks: Always have snacks and drinks ready. A little nourishment goes a long way in keeping the kids energized.
FAQs About Indoor Birthday Party Games
What if the space is small?
Utilize energetic games that don’t need much space or focus on quieter activities like crafts or games in small groups.
How can I involve all ages?
Choose versatile games that can be adapted for different skill levels or team up kids with varying ages.
What supplies will I need?
Common household items often suffice, but consider easy-to-get supplies like paper, balloons, and art materials.
Bonus Ideas
- DIY Photo Booth: Set up a corner with props for kids to take fun photos.
- Cooking Party: Kids can bring their ideas for simple snacks, fostering creativity and teamwork.
- Board Game Marathon: Set up different tables with various board games for kids to rotate through.
Pinterest Description:
Planning an indoor birthday party? Discover over 90 fun indoor games for kids of all ages that will make your celebration unforgettable. Enjoy creativity, laughter, and entertainment no matter the weather with these exciting ideas!
Catchy Pinterest Title Ideas
- Celebrate Indoors with 90 Fun Games for Kids
- Keep Kids Happy with 90 Indoor Birthday Party Games
- 90 Creative Indoor Party Games Every Kid Will Love
- Make Any Indoor Birthday Unforgettable with 90 Fun Games
- Boredom No More with These 90 Indoor Games for Kids
Now you have all the tools you need to create an unforgettable indoor birthday party experience! Enjoy every moment and watch your children create cherished memories.

60+ Baby Led Weaning Recipes {6 Months+} – Healthy Kids Recipes
Discover 60 Delicious Baby Led Weaning Recipes for Happy, Healthy Kids
Bringing home your little bundle of joy opens a world of new experiences. One of the most exciting is introducing solid foods! But for many parents, the thought of starting baby led weaning can feel overwhelming. How do you ensure your little one gets the right nutrition while having fun eating? Look no further! We have compiled over 60 mouth-watering, healthy baby led weaning recipes perfect for little hands and curious taste buds.
Why Choose Baby Led Weaning
Baby led weaning (BLW) allows your baby to explore solid foods at their own pace, fostering independence and a healthy relationship with food. It encourages:
- Exploration: Babies learn to enjoy different textures and flavors.
- Motor Skills: Grasping and self-feeding helps develop fine motor skills.
- Family Mealtime: It promotes a sense of inclusion during family meals.
Ready to dive into fun and nutritious recipes? Let’s get started!
Breakfast Recipes for Baby Led Weaning
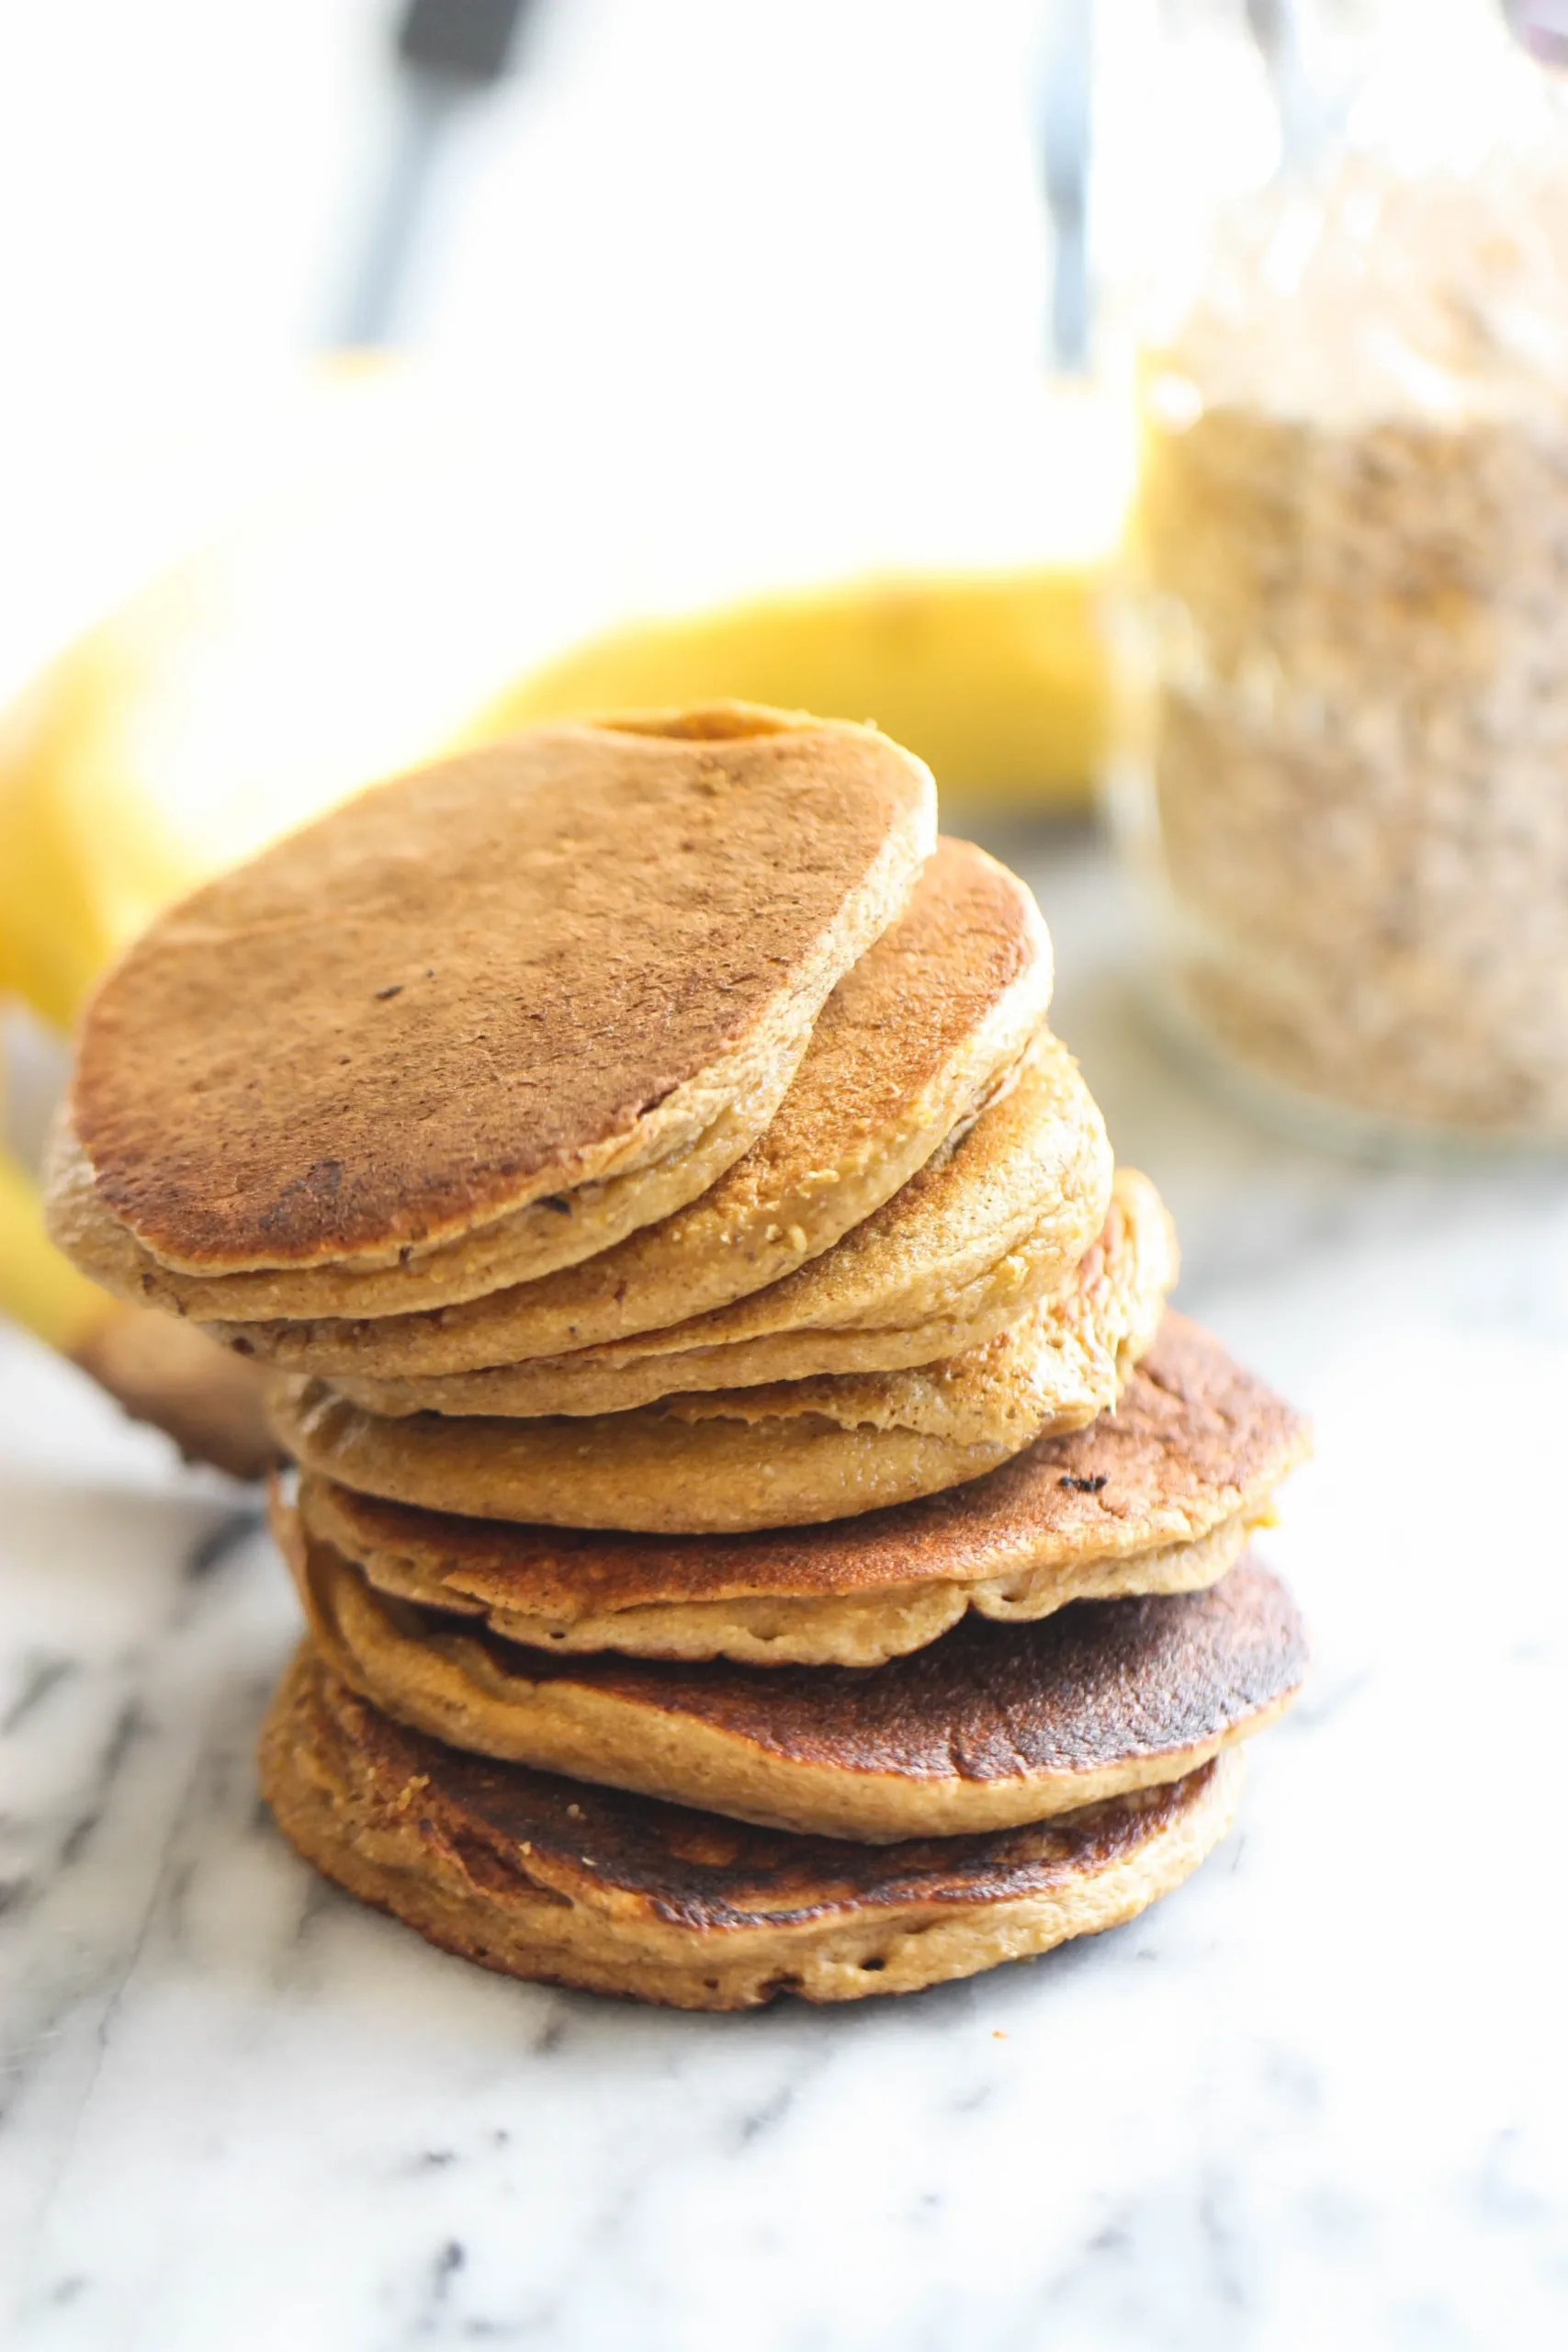
1. Banana Pancakes
Mix mashed bananas with eggs to create fluffy, healthy pancakes. Perfectly soft for tiny mouths!
2. Avocado Toast
Spread ripe avocado on whole-grain bread. Cut into strips for easy grasping.
3. Oatmeal Fingers
Cook oatmeal with mashed fruit until thickened. Spread it onto a plate and cut into fingers for a wholesome breakfast treat.
4. Sweet Potato Waffles
Blend cooked sweet potatoes, oats, and eggs. Waffle them for a sweet start to the day!
Lunch Recipes for Baby Led Weaning
5. Veggie Frittata
Whisk eggs with your choice of finely chopped veggies. Bake until set for an easy, nutritious meal.
6. Hummus and Veggie Sticks
Serve homemade or store-bought hummus with an assortment of cut veggies like carrots and cucumber.
7. Quinoa with Peas and Carrots
Cook quinoa and add steamed peas and carrots. This colorful dish is easy to chew and packed with nutrients.
Dinner Recipes for Baby Led Weaning
8. Mini Meatballs
Create tender meatballs with ground turkey or beef and finely chopped veggies. Bake or fry for a tasty finger food.
9. Roasted Vegetable Medley
Toss your favorite veggies with olive oil and roast until soft. Serve warm for a comforting side.
10. Fish Fingers
Coat pieces of white fish in whole-grain breadcrumbs and bake until golden. These are great for little hands!
Snack Recipes for Baby Led Weaning
11. Yogurt and Fruit Drops
Mix yogurt with pureed fruits and freeze them in small drops for a refreshing snack.
12. Apple and Cheese Slices
Serve thin slices of apple with soft cheese for a delightful combination of flavors and textures.
13. Energy Balls
Blend oats, nut butter, and honey. Roll into small balls for a nutritious on-the-go snack.
Tips for Successful Baby Led Weaning
Quick Tips for New Parents
- Always supervise meals to ensure safety.
- Start with soft, cooked foods to minimize choking hazards.
- Encourage exploration! Let babies touch and taste at their own pace.
Mistakes to Avoid
- Avoid salt and sugar in recipes.
- Don’t rush the process; let your baby guide their own journey with food.
- Be cautious with small, hard foods until you’re sure your baby can chew well.
FAQs
When should I start baby led weaning?
Most babies are ready around six months when they can sit up on their own and show interest in food.
What foods should I avoid?
Avoid whole nuts, hard pieces of fruit or vegetables, and anything that poses a choking hazard.
Bonus Ideas
As your baby becomes more comfortable with eating, get creative! Try different flavors by adding spices and herbs. Join cooking classes to meet other parents and share tips on baby led weaning too!
Pinterest Description
Unlock the world of baby led weaning with these 60 delicious and healthy recipes! From breakfast to dinner and everything in between, discover quick meals that your little ones will love.
Catchy Pinterest Title Ideas
- 60 Nutritious Recipes for Tasty Baby Led Weaning
- Easy & Healthy Baby Led Weaning Recipes for Growing Kids
- 60 Baby Led Weaning Recipes You Need to Try Today
- Wholesome Baby Led Weaning Recipes Your Kids Will Love
- Discover 60 Fun and Healthy Baby Led Weaning Foods
Let me know how it goes with these recipes! You’ll soon enjoy mealtime moments together with your little one. Happy cooking!

Cheesy Broccoli Quinoa Bites (Perfect for Babies, Toddlers & Kids!)
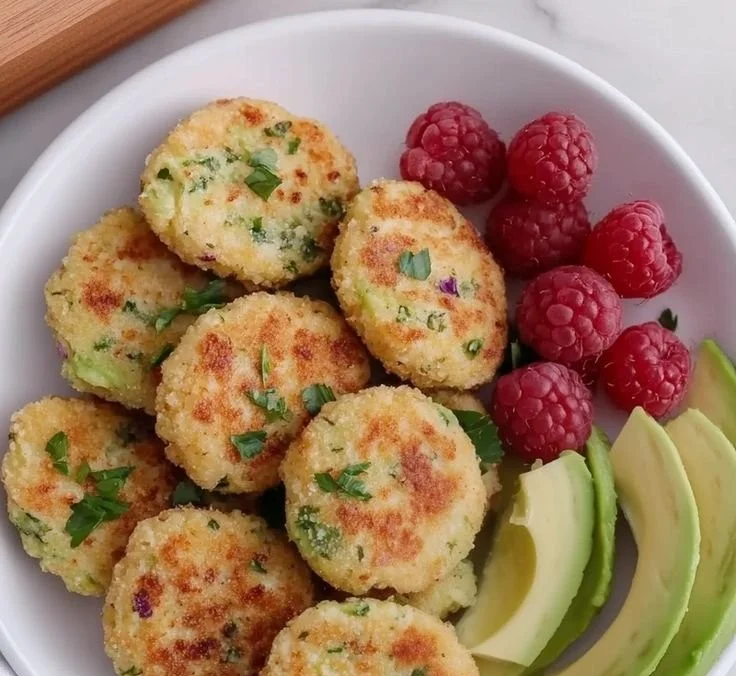
Discover Cheesy Broccoli Quinoa Bites That Even the Pickiest Eaters Will Love
Are you struggling to find the perfect snack or meal that your little ones will actually eat? If you’re tired of the same old options and want something nutritious that your babies, toddlers, and kids will enjoy, you’re in the right place. These Cheesy Broccoli Quinoa Bites are not only delicious but also packed with wholesome ingredients. Plus, they are a hit with kids at every stage!
The Magic of Cheesy Broccoli Quinoa Bites
These bites are a delightful combination of cheesy goodness and nutritious broccoli, all wrapped up in the protein-packed power of quinoa. Whether you need a quick snack for your little ones or a side dish for dinner, these bites deliver.
Why Choose Quinoa?
- Complete Protein: Quinoa contains all nine essential amino acids, making it an excellent choice for growing kiddos.
- Easy to Digest: It’s gentle on the tummy and perfect for young eaters.
- Packed with Nutrients: Quinoa is loaded with magnesium, vitamin B, and iron, essential for your child’s development.
Making Cheesy Broccoli Quinoa Bites
Ready to whip up a batch? Follow this simple recipe for Cheesy Broccoli Quinoa Bites that your kids will devour!
Ingredients You Will Need
- 1 cup cooked quinoa
- 1 cup steamed broccoli, finely chopped
- 1 cup shredded cheese (cheddar or your favorite blend)
- 2 eggs
- 1/2 cup breadcrumbs (you can use whole wheat or gluten-free)
- 1/2 teaspoon garlic powder
- 1/2 teaspoon onion powder
- Salt and pepper to taste
Step-by-Step Instructions
- Preheat your oven to 375°F (190°C).
- Prepare your quinoa: If you haven’t already, cook your quinoa per package instructions, then let it cool.
- Steam the broccoli: Cook until tender, then chop it finely.
- Mix all the ingredients: In a large bowl, combine the quinoa, chopped broccoli, cheese, eggs, breadcrumbs, garlic powder, onion powder, salt, and pepper. Mix well until everything is incorporated.
- Shape the bites: Using your hands, form small balls or patties with the mixture (about 1-2 inches in diameter).
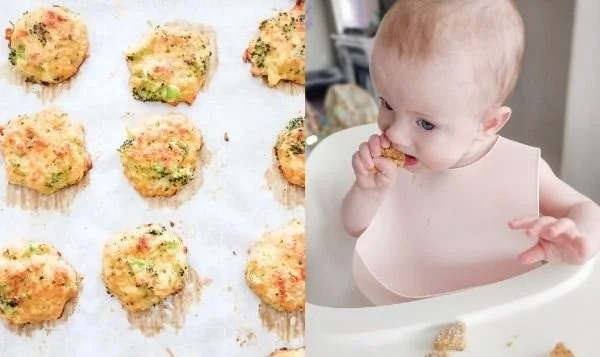
- Bake: Place them on a baking sheet lined with parchment paper. Bake for 20-25 minutes or until golden and crispy.
- Cool and serve: Let them cool for a few minutes before serving. Your kids will love them warm!
Quick Tips for Perfect Bites
- Make Ahead: You can prepare the mixture a day ahead and store it in the fridge.
- Freeze for Later: These bites freeze well! Just pop them in the oven directly from the freezer when you need a quick meal.
- Experiment with Veggies: Don’t hesitate to add other veggies like carrots or spinach to broaden the nutrition.
Mistakes to Avoid When Making Quinoa Bites
- Overcooking Quinoa: Make sure not to overcook your quinoa; it should be fluffy, not mushy.
- Dry Mixture: If the mixture feels too dry, add a splash of milk or an extra egg to keep it moist.
- Not Enough Flavor: Don’t skimp on the seasoning! A little extra salt or spices can enhance the flavor significantly.
FAQs About Cheesy Broccoli Quinoa Bites
Can I use frozen broccoli instead of fresh?
Absolutely! Just make sure to thaw and drain it well before mixing it into the recipe.
How should I store leftovers?
Keep them in an airtight container in the fridge for up to three days or freeze them for later use.
What dipping sauces work best?
Both yogurt-based dips and marinara sauce are fantastic accompaniments for these bites!
Bonus Ideas for Serving Cheesy Broccoli Quinoa Bites
- As a Meal: Serve with a side of fruit or a salad for a balanced meal.
- Party Snack: These bites are also great for parties and playdates, loved by both kids and adults alike!
These Cheesy Broccoli Quinoa Bites are a fabulous way to get your children excited about healthy eating. They’re fun, easy to make, and the perfect finger food for little hands. Give this recipe a try, and watch your kids clean their plates!
Pinterest Description: Satisfy your kids’ hunger with these Cheesy Broccoli Quinoa Bites! Easy to make, packed with nutrients, and loved by toddlers and kids. A perfect healthy snack or meal option.
Catchy Pinterest Title Ideas:
- Love at First Bite with Cheesy Broccoli Quinoa Treats
- Sneaky Veggies: Cheesy Broccoli Quinoa Bites Your Kids Will Devour
- Healthier Snack Time Made Delicious with Cheesy Broccoli Quinoa Bites
- Snack Attack: Cheesy Broccoli Quinoa Bites for Picky Eaters
- Quick and Easy Cheesy Broccoli Quinoa Bites for Happy Tummies
Try this delicious recipe today and turn snacking into a nutritious adventure!
Nutritious Chicken and Broccoli Nuggets for Baby
Little Bites of Joy with Nutritious Chicken and Broccoli Nuggets for Baby
Are you struggling to find healthy, easy-to-eat meals for your little one? If so, you’re not alone! Many parents are on the lookout for nutritious foods that are both delicious and convenient to prepare. Chicken and broccoli nuggets are a fantastic solution. They are packed with protein, vitamins, and minerals—perfect for fueling your baby’s growing body!
Why Chicken and Broccoli Nuggets Are a Great Choice
These nuggets are not only nutritious, but they are also super easy to make. Plus, babies love the bite-sized texture! Here are some reasons why you should consider adding them to your meal rotation:
- Nutritious Ingredients: Chicken provides quality protein while broccoli is rich in vitamins C and K.
- Easy to Prepare: Quick to cook and can be made in batches for the whole week.
- Customizable: You can mix in other vegetables or spices based on your baby’s preferences.
- Great for Meal Prep: Freeze leftovers for busy days.
How to Make Nutritious Chicken and Broccoli Nuggets
Ingredients You Will Need
Here’s what you need to whip up these delectable nuggets:
- 1 cup cooked chicken, shredded
- 1 cup steamed broccoli, finely chopped
- 1/2 cup breadcrumbs (whole grain is preferred)
- 1/2 cup shredded cheese (like cheddar or mozzarella)
- 1 egg
- 1 teaspoon garlic powder
- Salt and pepper to taste
- Optional: herbs like parsley or basil for added flavor
Step-by-Step Guide to Make the Nuggets
- Preheat Your Oven: Set it to 400°F (200°C).
- Prepare the Chicken and Broccoli: Shred the cooked chicken and finely chop the steamed broccoli.
- Mix Ingredients: In a large bowl, combine chicken, broccoli, breadcrumbs, cheese, egg, garlic powder, salt, and pepper.
- Form the Nuggets: Use your hands to shape the mixture into small nuggets, about 1-2 inches each.
- Bake: Place the nuggets on a lined baking sheet and bake for 15-20 minutes, until golden brown.
- Cool and Serve: Allow them to cool before serving to your baby. Enjoy!
Quick Tips for Making It Stress-Free
- Batch Cooking: Make a larger batch and store leftovers in the freezer for quick meals later on.
- Experiment with Flavors: Try adding sweet potatoes or carrots for varied taste and nutrition.
- Get Little Hands Involved: Let your toddler help mix ingredients for some fun family bonding.
Mistakes to Avoid
- Not Cooling Properly: Always let nuggets cool to a safe temperature before offering them to your baby.
- Skipping the Vegetables: Don’t forget the broccoli; it adds vital nutrients!
- Using Additional Salt: Babies don’t need added salt in their diet, so try to limit it.
FAQs
Can I use frozen chicken?
Absolutely! Just make sure to cook it thoroughly and shred it before mixing.
What age is suitable for these nuggets?
These nuggets are suitable for babies who are already eating solid foods, typically around 9-12 months.
How should I store leftovers?
Store them in an airtight container in the fridge for up to three days or freeze them for later use.
Bonus Ideas for Serving
- Serve with a side of homemade yogurt dip.
- Offer a small portion with a colorful fruit salad for a balanced meal.
With these nutritious Chicken and Broccoli Nuggets, you’re well on your way to providing your baby with delicious and healthy options. Bon appétit!
Pinterest Description
Discover how to make nutritious Chicken and Broccoli Nuggets for your little one! Packed with protein and vitamins, these easy-to-make nuggets are perfect for busy parents and picky eaters.
Catchy Pinterest Title Ideas
- Mini Chicken and Broccoli Nuggets Your Baby Will Love
- 5 Easy Steps to Nutritious Chicken Nuggets for Little Ones
- Wholesome Chicken and Broccoli Nuggets for Busy Parents
- Tasty Nuggets That Are Super Healthy for Your Baby
- Unlock the Secret to Delicious Chicken Nuggets for Infants
Happy cooking, fellow parents! Your little ones are going to love these nutritious nuggets!
The Top 15 BLW Freezer Foods Your Baby Will Love
The Top 15 BLW Freezer Foods Your Baby Will Love
Embarking on the journey of baby-led weaning (BLW) can sometimes feel overwhelming, especially when you’re trying to prepare nutritious meals for your little one. How do you ensure your baby gets a variety of flavors? What can you whip up ahead of time for those busy days? Don’t worry, I’ve got you covered! Here’s a list of the best BLW freezer foods that are not only easy to prepare but also nutritious and delicious for your baby.
Why Freezer Foods are a Game-Changer for BLW
One of the biggest challenges parents face with baby-led weaning is managing time—because let’s face it, life is busy! Freezing meals and snacks can help you save precious time while ensuring your baby gets a variety of healthy options. Plus, having a well-stocked freezer means you’ll always be ready when hunger strikes.
Top 15 BLW Freezer Foods
1. Sweet Potato Wedges
Sweet potatoes are packed with vitamins and are naturally sweet, making them a perfect finger food. Cut them into wedges, roast them, and freeze for an easy meal.
2. Banana Pancakes
Made with just bananas and eggs, these pancakes freeze beautifully and are soft enough for little hands to manage.
3. Veggie Muffins
Sneak in some greens by making veggie muffins. These flavorful morsels can be frozen and popped in the toaster for a quick meal.
4. Avocado Puree Cubes
Although avocados brown quickly, pureeing them and freezing them in ice cube trays keeps their nutritious benefits intact.
5. Chicken Meatballs
You can pack these protein-rich meatballs with veggies. Bake in batches and freeze for a quick dinner option.
6. Oatmeal Bites
Make small “bites” using cooked oatmeal, bananas, and berries. Freeze them and serve as breakfast or a snack.
7. Zucchini Fritters
These savory fritters are easy to make and freeze well. Just add a little cheese for extra flavor!
8. Pea Purée
Freezing fresh or frozen peas into ice cubes offers a nutrient-packed option that’s sweet and fun for babies to eat.
9. Fish Cakes
These protein-rich cakes made from white fish and sweet potatoes can be baked and frozen for an easy lunch.
10. Quinoa and Veggie Patties
Quinoa is a fantastic source of protein. Mix it with grated veggies, form into patties, and freeze for a nutritious meal.
11. Tofu Cubes
Press and cut tofu into cubes, season lightly, and freeze. They can be quickly stir-fried or added to soups.
12. Homemade Vegetable Soup
Make a soul-soothing vegetable soup, then freeze portions in ice cube trays for easy access.
13. Apple and Cinnamon Oat Bars
These bars are perfect for a sweet treat. Bake, cut, and freeze them to enjoy later.
14. Stuffed Bell Peppers
Fill mini bell peppers with rice or quinoa and freeze for a colorful, finger-friendly meal.
15. Yogurt Drops
Drop spoonfuls of yogurt onto a baking sheet and freeze. These make for a refreshing snack on warmer days.
Quick Tips for Freezing Baby Food
- Always cool food to room temperature before freezing.
- Label your food with the date and contents to avoid confusion.
- Use airtight containers or freezer bags to prevent freezer burn.
Mistakes to Avoid
- Freezing Foods Too Long: Most baby foods are best used within 3-6 months.
- Not Labeling: Forgetting to label can lead to waste or unwelcome surprises.
- Overcomplicating Recipes: Keep it simple with easy, wholesome ingredients to avoid stress.
FAQs
Can I freeze any baby food?
Most cooked foods can be frozen, but avoid freezing foods with high water content, like cucumbers.
How do I know if my frozen food is still good?
Look for any signs of freezer burn or off smells. If it doesn’t smell right, it’s better to be safe and toss it out!
When can I start baby-led weaning?
Most experts recommend starting around 6 months, but consult your pediatrician to find the best time for your baby.
Bonus Ideas
Consider making a big batch of any recipe and sharing some with friends or family who are also navigating the world of baby-led weaning. It’s a great way to bond and support one another!
Having a well-stocked freezer with these BLW friendly foods means you can spend less time preparing meals and more time enjoying precious moments with your baby.
Pinterest Description: Discover the top 15 BLW freezer foods that are perfect for your little one. These easy-to-make meals are nutritious, delicious, and a pure joy to serve!
Pinterest Title Ideas:
- 15 Easy BLW Freezer Foods Every Parent Needs
- Wholesome BLW Freezer Foods Your Baby Will Love
- The Ultimate Guide to Freezer Foods for Baby-Led Weaning
- 15 Nutritious Freezer Foods for Baby-Led Weaning
- Make Mealtime Easy with These BLW Freezer Foods
