
Simple DIY Baby Shower Ideas for Boys on a Budget to Wow Guests
Imagine this: you receive an invitation in the mail for a baby shower celebrating a little boy. The excitement builds as you think about the joy, cute outfits, and adorable baby toys! But then it hits you—planning a shower can be downright overwhelming, especially when you want to stick to a budget. Trust me, I’ve been there—trying to create a heartfelt celebration without breaking the bank.
Don’t fret, I’m here to share some DIY baby shower ideas for boys that are not only budget-friendly but also packed with cuteness. Let’s dive into those ideas that’ll make everyone ooh and aah, and maybe even shed a tear or two!
Creative Invitations That Won’t Break the Bank
Here’s the thing: the invitation sets the tone for the entire event. Instead of splurging on expensive store-bought invitations, why not get crafty? You could make fun, themed invites at home.
Here’s a simple breakdown:
- Choose a Theme: Nautical, Superheroes, or even animals are great choices that are easy to pull together.
- Design It Yourself: Use free design tools like Canva to create beautiful invites. You can print them at home or send them digitally to save a few bucks on postage.
- Be Clear on Details: Don’t forget the date, time, and place! Include RSVP details for an accurate headcount.
DIY Decorations That Wow
We all love lovely decorations—but they can get pricey fast! The good news is, you can whip up stunning decor on a shoestring budget.
Balloon Garland
Balloon garlands are super trendy right now! Here’s how you can create one:
- Grab a pack of balloons in colors like blue, white, and yellow to represent a baby boy.
- Blow them up in different sizes and tie them in clusters using fishing line or string.
- Attach them to your wall or doorway for a vibrant entrance.
Table Centerpieces
For your table centerpiece, think simple but effective. Here’s a cute idea that I’ve tried:
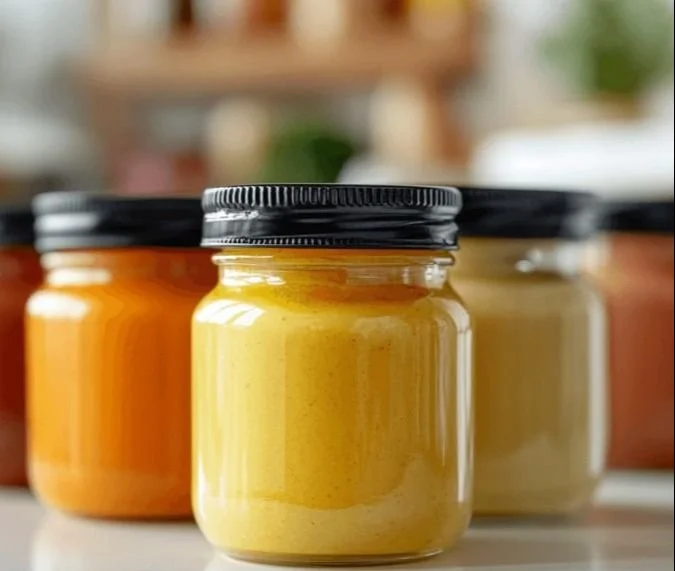
- Fill mason jars with baby blue candies or colorful flowers.
- Wrap the jars with twine for that rustic touch.
- You can place themed onesies on a cute clothesline using clothespins for a fun display.
Fun Games to Keep Everyone Engaged
Now, what’s a baby shower without some laughter and games? Here are a few DIY games that are easy to set up and will have everyone rolling in laughter.
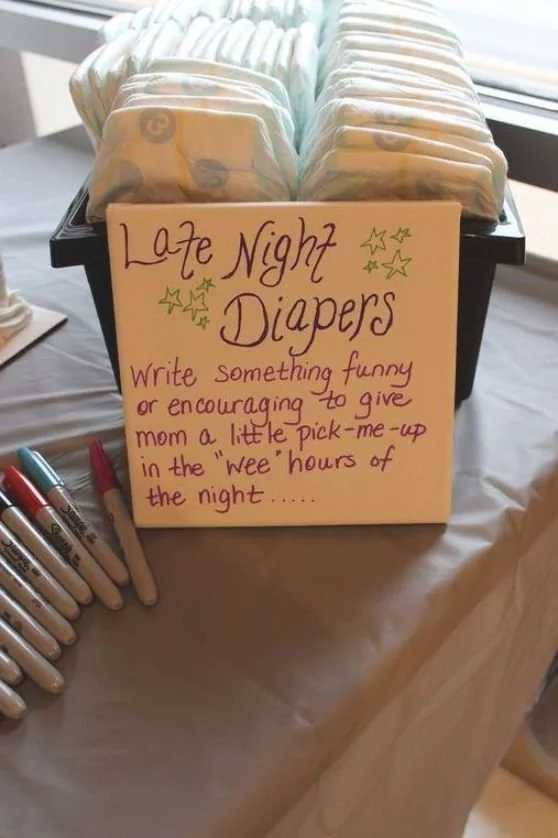
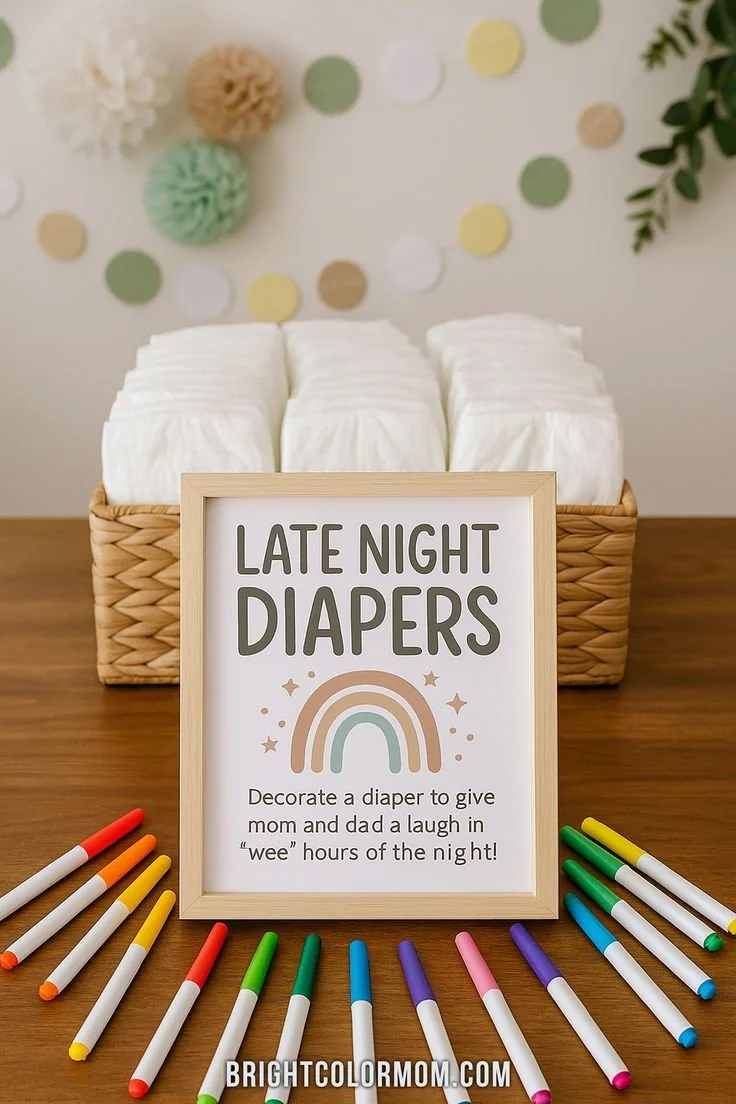
Diaper Raffle
Ask guests to bring a pack of diapers for a raffle ticket. The more packs they bring, the better their chances of winning a prize! It’s a win-win—you help stock the parents-to-be’s diaper stash, and everyone gets in on the fun.
Guess the Baby Food
Buy a few jars of baby food and remove the labels. Let everyone sample them and guess the flavors. You’d be surprised at how entertaining this can get. (Pro tip: make sure to keep some napkins handy for the inevitable spills!)
Sweet Treats That Add Charm
Let’s be honest, who doesn’t love dessert? Creating a budget-friendly dessert table can be as easy as pie!
Themed Cupcakes
Incorporate your theme with some homemade cupcakes. If you’ve got a flair for baking, this is a chance to shine. Decorate them with blue icing and edible decorations like little baby shoes.
Cookie Bar
Set up a cookie decorating station as a fun activity. Provide plain cookies, icing in different colors, and sprinkles. The kids (and adults!) will love getting creative!
Party Favors That Guests Will Admire
As the day winds down, it’s nice to send your guests home with a little something. DIY party favors can be personalized and meaningful, plus they don’t have to cost a fortune.
Here’s a couple of ideas you could use:
- Miniature Soap Bottles: Find tiny bottles and fill them with homemade soap in a gentle, baby scent. Tie a tag on with a thank-you note!
- Plantable Seed Paper: Create paper that can grow into flowers or herbs. Guests will appreciate a fun and eco-friendly gift.
Tips for a Successful Budget Baby Shower
- Plan Early: The earlier you start, the more time you have to find deals and discounts.
- Collaborate with Friends: If you have friends who are eager to help, delegate tasks like decorations or food preparation.
- Stick to a Budget: Set a spending limit and keep track of expenses along the way to avoid any surprises.
Mistakes to Avoid
As we all know from experience, there are some common mistakes to steer clear of. Here are a few to think about:
- Overspending on Venue: Opt for a backyard or a community park to keep your costs down.
- Underestimating Food Needs: Always have a little extra food—you never know who might show up!
- Ignoring the Theme: Themed decor and activities can help tie everything together, making it more memorable.
Bonus Ideas You Can Easily Implement
- Photo Booth Station: Set up a simple backdrop with props for cute pictures that everyone can take home.
- Memory Wishing Tree: Guests can write down their wishes for the new baby on tags and hang them on a tree. This creates a wonderful keepsake for the parents.
Conclusion
Planning a baby shower on a budget doesn’t mean you have to sacrifice cuteness or fun. With a bit of creativity, you can have a beautiful celebration that everyone will remember. Don’t forget, as you embark on this DIY journey, the most important thing is to celebrate the new addition to your family. So gather your supplies, enlist some family and friends to help, and get crafting!
For even more inspiration, you can check out a bee-themed baby shower for ideas, learn how to create a stunning dessert table, or discover some fun baby shower games. Happy planning!
High Protein Snacks for Kids and Toddlers That Fuel Growth
Imagine this: it’s mid-afternoon, and your toddler’s energy is hitting a wall. You’ve already gone through the usual snacks, and you can sense the impending meltdown if their hunger isn’t tackled quickly. Sound familiar? We all know that moment when the magic of snack time can quickly turn into a not-so-magical scene. As parents ourselves, it’s completely normal to want to provide our little ones with snacks that not only taste great but also pack a nutritional punch.
Here’s the thing: protein is essential for growing kids. It helps with muscle repair, keeping energy levels high, and even supports bone health. So, how do we ensure our tiny humans get enough of it without becoming food detectives? The answer lies in simple, high-protein snacks that cater to even the pickiest of eaters. Let’s dive into some delightful recipes that will not only keep your kids satisfied but also make your life a whole lot easier!
Wholesome High Protein Snack Ideas
Homemade Energy Bites
Ingredients:
- 1 cup rolled oats
- 1/2 cup nut butter (or sunflower butter)
- 1/3 cup honey or maple syrup
- 1/4 cup mini chocolate chips or dried fruit
- 1/4 cup seeds (like chia or flaxseed) for an extra boost
Instructions:
- In a bowl, mix all the ingredients until well combined.
- Roll the mixture into small balls, about 1 inch in diameter.
- Place them on a baking sheet lined with parchment paper and freeze for about 30 minutes.
- Store them in an airtight container in the fridge for up to a week.
These energy bites are not just tasty; they’re incredibly forgiving. You can switch out ingredients based on your child’s preferences, so if your little one isn’t a fan of chocolate chips, try swapping them for crushed nuts or different dried fruit.
Cheesy Air-Fried Chickpeas
Crunchy and cheesy, these are perfect for snack time!
Ingredients:
- 1 can chickpeas, drained and rinsed
- 1 tablespoon olive oil
- 1 teaspoon garlic powder
- 1/2 cup grated cheese (like Parmesan or nutritional yeast for dairy-free)
Instructions:
- Preheat your air fryer to 400°F (200°C).
- Toss chickpeas with olive oil, garlic powder, and cheese.
- Cook in the air fryer for about 15-20 minutes, shaking halfway through, until crispy.
This snack is a hit with the kids, and it’s a great way to sneak in some extra fiber along with that protein.
Yogurt Parfait Cups
Let’s give a classic twist to snack time!
Ingredients:
- 2 cups Greek yogurt (rich in protein)
- 1 cup granola (low sugar)
- 1 cup mixed berries or any fruit they like
Instructions:
- In a cup or bowl, layer Greek yogurt, a layer of granola, and then a layer of berries.
- Repeat the layers until you fill the cup.
These parfaits are visually appealing, so they might actually want to dig in! A great alternative to sugary store-bought yogurts, these can be made quickly and they look so inviting!
Quick Cheese Snacks
For the cheese lovers in the house, this one’s a game-changer.
Ingredients:
- String cheese or cheese cubes
- Whole grain crackers
- Optional: slices of apple or cucumber
Instructions:
- Serve cheese sticks with whole grain crackers and a side of apple or cucumber slices.
It’s an easy assembly rather than a cooking recipe. Plus, cheese is an excellent source of protein and calcium, making this a win-win!
Peanut Butter Banana Roll-ups
These are so simple, it’ll feel like you’re cheating unintentionally!
Ingredients:
- Whole grain tortilla
- 2 tablespoons peanut butter or almond butter
- 1 banana
Instructions:
- Spread the nut butter on the tortilla.
- Place the banana on one edge and roll it up tightly.
- Cut it into bite-sized pieces.
These rolls are not just delicious; they’re portable, making them ideal for those busy afternoons at the park!
Sweet and Savory Edamame
Looking for something new? This snack is nutritious and delicious.
Ingredients:
- 1 cup edamame, shelled
- 1 tablespoon soy sauce
- Optional: sesame seeds for garnish
Instructions:
- Simply microwave or steam the edamame until tender.
- Toss with a splash of soy sauce and sprinkle sesame seeds on top.
This dish introduces your little one to new flavors while providing protein and fiber. Plus, it’s fun for them to pop the beans out of their pods!
Fruit and Nut Butter Dippers
This is about as easy as it gets, and it’s a fantastic way for your little chef to get involved!
Ingredients:
- Variety of fruits (like apple slices, bananas, or strawberries)
- Nut butter of choice (peanut, almond, or sunflower)
Instructions:
- Slice your fruit.
- Serve with a generous dollop of nut butter for dipping.
Fruits piled high with nut butter are not just satisfying; they have a crunch, a creamy texture, and they offer a sweet-savory combo that kids adore.
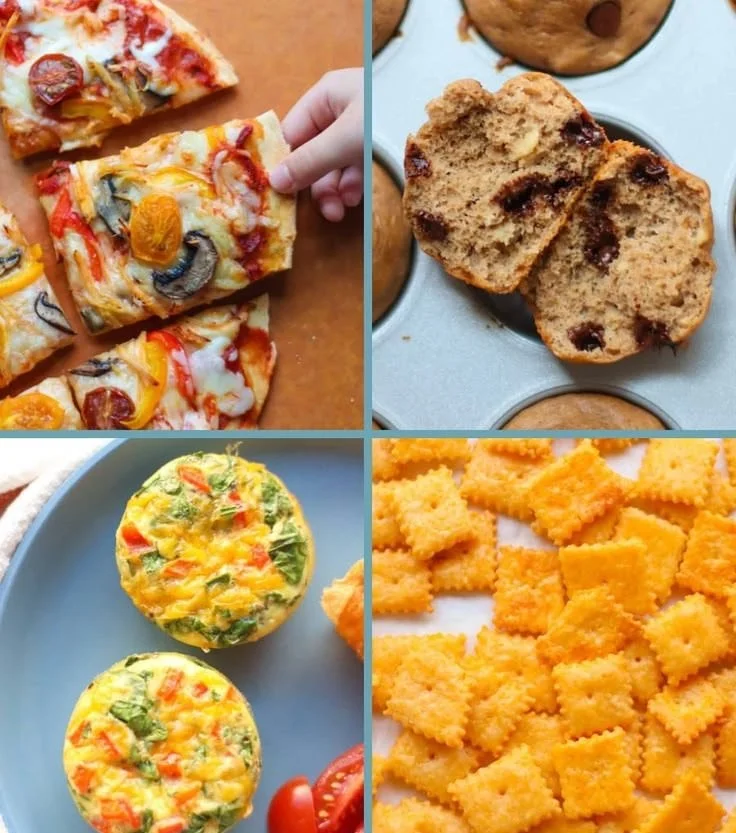
High Protein Pizza Bites
Who says pizza can’t be a snack?
Ingredients:
- Whole grain English muffins
- 1/2 cup pizza sauce
- 1 cup shredded cheese
- Toppings: diced turkey, veggies, or extra cheese
Instructions:
- Preheat the oven to 375°F (190°C).
- Spread sauce on each half of the English muffin. Sprinkle with cheese and add toppings.
- Bake for 10-15 minutes, or until the cheese is bubbly.
This is one of those snacks that make great use of leftovers, and boy do kids love pizza!
Veggie Oatmeal Cookies
Getting veggies into your child’s diet can feel like a minor miracle, but cookie form? Yes, please!
Ingredients:
- 1 cup oats
- 1 cup grated carrot or zucchini
- 1/2 cup mashed banana
- 1/4 cup honey or maple syrup
- Optional: chocolate chips for a sweet touch
Instructions:
- Preheat the oven to 350°F (175°C).
- Mix all ingredients in a bowl until combined.
- Scoop onto a baking sheet and bake for about 15 minutes.
These are soft, chewy, and practically a health food in cookie form, perfect for an after-school treat!
Quick Tips for Picky Eaters
Navigating the realm of child nutrition can be tricky, especially if you’ve got a picky eater on your hands. Here are some practical tips that may help:
- Involve Them in the Kitchen: Let your kids help with the cooking process. They’re more likely to eat something they helped create.
- Presentation Matters: Aim for a rainbow of colors; make food fun! Use cookie cutters for shapes or arrange snacks in animal figures.
- Be Patient and Persistent: It’s normal for kids to refuse foods several times before accepting them. Keep offering those high-protein snacks, and you might be surprised at their willingness to try.
Conclusion
As parents, we crave simplicity, deliciousness, and nutrition when it comes to feeding our little ones. Incorporating these high-protein snacks not only helps support their growth and energy levels but also allows you to spend less time worrying about what they eat and more time enjoying the moments you share.
If you need more options or inspiration, check out these resources for toddler protein snacks at Target, explore the best protein snacks for kids at Yummy Toddler Food, or find even more easy protein snacks at MJ and Hungryman. Remember, you’re not alone in this journey; we’re all in it together! Happy snacking!
Floral Baby Shower Theme Ideas to Make Your Party Memorable
Imagine this: a sun-drenched afternoon, laughter filling the air, and a beautifully adorned table overflowing with floral delights, all to celebrate a precious new life about to blossom into the world. Yes, we’re talking about planning a baby shower that radiates warmth and joy, infused with flower-themed ideas that will surely make this event absolutely unforgettable.
If you’ve ever thought about throwing a baby shower, you’ll know it can feel a little overwhelming with options everywhere. But here’s the thing: the beauty of flowers is that they can create both whimsical and elegant vibes, making them versatile enough to please any mom-to-be’s taste. Let’s dive into 17 fabulous flower-themed ideas that will have you on your way to throwing a shower that your guests, and of course the mom-to-be, won’t stop talking about!
Bright and Blooming Decorations
1. Floral Centerpieces
Picture this: a long table adorned with charming, colorful floral centerpieces. Mix and match different sized vases filled with a variety of seasonal blooms. Don’t sweat it if you don’t have an expert’s hand; simplicity often speaks volumes. You could even have your kids help by gathering wildflowers!
2. Flower Garland
Creating a whimsical atmosphere is easy with a flower garland. You can hang these over the food table or across doorways. You might even opt for a DIY project and make one together with your friends or family. It’s a great bonding activity and a unique touch to the décor!
3. Balloon Bouquets with Florals
Incorporating helium balloons can add a fun dimension to your theme, and why not mix them with floral arrangements? Tie flowers to the bottom of balloons. It’s a simple yet effective way to elevate your party decor.
4. Tropical Flower Backdrop
Want a photo booth that pops? Set up a wall of tropical flowers or faux blooms where guests can gather for snaps. This backdrop will not only make memorable photos but also serve as a vibrant focal point for the party.
Fun Activities and Games
5. Flower Arranging Station
Consider setting up a flower arranging station where guests can create small bouquets to take home as favors. You can set the table with different types of flowers, vases, and decorative accessories. This is not only a fun activity but also gives guests a personal touch to take away.
6. Floral Bingo
How about playing a game of bingo with flower-themed terms? Prepare some fun prizes, and as the expectant mother opens her gifts, players can mark their bingo cards. This blends the gift-opening moment with entertainment, and trust me, everyone loves a little competition!
7. "Who’s That Baby" Guessing Game
Create a board decorated with flowers, and ask guests to bring in their baby pictures. Participants guess who each baby picture belongs to. Not only is this super fun, but it is also a great icebreaker for guests who might not know each other well.
Delightful Treats and Favors
8. Floral Cupcakes
Let’s be honest, what’s a party without sweets? Bake or order cupcakes adorned with edible flower decorations. They’re visually delightful and oh-so-tasty. You could even host a little cupcake decorating corner if your guests have kids.
9. Herbal Iced Tea Bar
Instead of serving just regular drinks, create a flower-infused herbal iced tea bar. Think hibiscus or chamomile iced tea, garnished with fresh mint or citrus slices. It’s refreshing, especially for a spring or summer shower, and guests will love customizing their drinks!
10. Flower-Pressed Cookies
Serve delightful sugar cookies pressed with edible flowers. They can be made in fun shapes, like little blossoms or baby-themed designs. Plus, they’ll make for a stunning addition to your dessert table – you’ll have guests reaching for these!
Invitations and Theme Development
11. Floral Invitations
Send out invitations that embody your flower theme. Whether you choose elegant calligraphy on a floral-patterned card or a whimsical doodle-style invite, setting the tone early gets everyone excited. You can easily find templates online or work with a local designer.
12. Memory Book with Floral Cover
Encourage guests to write their favorite memories or share advice in a floral-covered memory book for the expectant mom. It’s a beautiful keepsake that she can look back on when the baby arrives!
13. Bride to Be’s Flower Crown
As the guest of honor, the mom-to-be deserves something special! Why not crown her with a beautiful floral headpiece that matches the decor? It’ll make her feel like a queen and look gorgeous in all those pictures.
Thank You Gifts and Goodies
14. Flower Seed Packets
As a thoughtful thank you, consider gifting flower seed packets in beautiful little envelopes. It captures the essence of your celebration, and guests will think of the special day as they nurture their flowers to bloom.
15. Lavender Sachets
Who doesn’t love a sweet aroma? Create little lavender sachets for your guests to take home. Not only do they smell delightful, but they also evoke calming vibes, perfect for busy households with little ones running around.
Final Touches with Theme
16. Floral Table Runners
Enhance your table with floral fabric runners. They can be vintage-style lace or bold floral prints. Adding layers like these not only beautifies the table but also gives it a wholesome feel – just like great home cooking!
17. Personalized Flower Tags
Lastly, have personalized flower tags for favors or foods. You could include the mom-to-be’s name and the date of the event. These little touches make everything feel special and well thought out.
Bringing It All Together
All these ideas can easily come together to make your flower-themed baby shower a beautiful day for everyone involved. You might even want to jot down a few decorating hacks or creations that you and your friends can do together. After all, the planning process can be just as joyful as the shower itself (which we can all appreciate in the chaotic world of parenting!).
Flowers have a way of brightening up any moment and evoking a sense of joy – exactly what’s needed as we get ready to welcome a new little bud to the family tree.
Conclusion
In the whirlwind of planning a baby shower, let these flower-themed ideas guide you towards creating a memorable experience. This special event isn’t just about the decorations or games; it’s about celebrating life and nurturing connections—something we understand all too well as parents ourselves. If you’re looking for more inspiration, consider these 17 Sweet Unicorn Baby Shower Ideas or explore 17 Cute And Creative Fall Baby Shower Ideas. And if you’re planning something for those frosty months ahead, don’t miss out on these 17 Winter Party Ideas for Frosty Fun. Happy planning, friends!🌸

Iron Rich Puree Recipes to Power Up Your Little One’s Health
Imagine this: It’s the middle of the day, and you’ve just realized your little one is about to embark on their journey into the world of solid foods. Exciting, right? But the pressure to get it just right can be overwhelming. You’ve heard about the importance of iron for growth and development, especially if you’re transitioning from breastfeeding or formula. You might be wondering, “What can I make that’s not only rich in iron but also delicious?” Trust me, you’re not alone in this!
Starting solids is a monumental step, and I remember when I started my baby on purees. It felt like I was feeding her the keys to health—not to mention countless moments of messy giggles! Fortunately, I’ve compiled a list of 12 iron-rich puree recipes that are packed with flavor and essential vitamins to help your little one thrive. Let’s dive in!
Spinach and Banana Puree
Spinach is a powerhouse of iron, and combining it with sweet bananas makes for a tasty combo!
- Ingredients: 1 cup fresh spinach, 1 ripe banana
- Instructions: Steam the spinach until wilted. Blend with the banana until smooth.
This puree is also a great way to introduce greens to your baby. Plus, the sweet banana balances the slightly bitter taste of spinach, making it more appealing.
Sweet Potato and Lentil Puree
Sweet potatoes are not only rich in vitamins but also pair beautifully with lentils, which are packed with iron.
- Ingredients: 1 medium sweet potato, 1/4 cup cooked lentils
- Instructions: Bake or steam the sweet potato until soft. Blend with lentils and enough water to achieve desired consistency.
What if your baby isn’t a fan of lentils? Mixing in some cinnamon can add a sweet twist that might do the trick!
Beef and Carrot Puree
Beef is a fantastic source of iron, and when blended with carrots, it creates a savory delight.
- Ingredients: 1/2 cup cooked ground beef, 1 medium carrot
- Instructions: Steam the carrot until soft. Blend together with the beef, adding water as needed for smoothness.
Here’s the thing: Carrots help balance the beef’s richness and can introduce this protein to your child in a gentle way.
Quinoa and Pear Puree
Quinoa is a fantastic alternative grain that kicks iron up a notch.
- Ingredients: 1/2 cup cooked quinoa, 1 ripe pear
- Instructions: Blend the quinoa and pear together until smooth.
This puree provides a delightful sweetness that many babies enjoy, making it a perfect addition to your meal rotation.
Avocado and Chickpea Puree
For a soothing and creamy texture, try this avocado and chickpea mix.
- Ingredients: 1 ripe avocado, 1/4 cup cooked chickpeas
- Instructions: Blend together until smooth.
What if your baby’s palate is still adjusting? You can add a squeeze of lemon to brighten the flavor!
Apple and Spinach Puree
Say hello to a fruity twist on the classic spinach puree!
- Ingredients: 1 apple, 1 cup fresh spinach
- Instructions: Steam the spinach and apple until soft, then blend.
This combo not only adds a burst of flavor but also ensures that your little one gets their iron while enjoying some natural sweetness.
Chicken and Pea Puree
Protein-packed chicken blends well with sweet peas for a tasty dish.
- Ingredients: 1/2 cup cooked, shredded chicken, 1/2 cup peas
- Instructions: Blend together until completely smooth, adding water to thin if necessary.
This puree is perfect for introducing meats, and the sweetness from the peas helps mask any strong flavors.
Broccoli and Brown Rice Puree
Broccoli is a superfood that deserves a spot on your baby’s plate.
- Ingredients: 1 cup cooked broccoli, 1/2 cup cooked brown rice
- Instructions: Blend together until smooth.
This nutrient-rich blend is filling and provides iron, along with plenty of fiber, which can help keep your little one regular.
Lentil and Sweet Potato Puree
If you loved the lentil and sweet potato combo before, here’s a delightful twist!
- Ingredients: 1/2 cup cooked lentils, 1 medium sweet potato
- Instructions: Bake or steam the sweet potato, then blend with lentils.
This puree is not only tasty but also rich in vitamins A and C, making it a meal you can feel really good about.
Pumpkin and Chicken Puree
This recipe is not just for fall; it’s a tasty combo all year round!
- Ingredients: 1/2 cup cooked, shredded chicken, 1/2 cup pumpkin puree
- Instructions: Blend together until smooth.
Pumpkin’s natural sweetness pairs perfectly with chicken, providing healthy fats and iron.
Zucchini and Potato Puree
Don’t underestimate the power of veggies; zucchini combined with potatoes makes for a creamy texture.
- Ingredients: 1 small zucchini, 1 medium potato
- Instructions: Steam both until soft, then blend together.
This is especially great for babies adjusting to new flavors, as the potato takes away some of the zucchini’s earthiness.
Carrot and Apricot Puree
This sweet and tangy treat is perfect for curious little taste buds.
- Ingredients: 1 medium carrot, 1/4 cup dried apricots (soaked in water)
- Instructions: Steam the carrot, then blend together with soaked apricots.
Here’s the kicker: The natural sugars in apricots can entice even the pickiest eaters!
Conclusion
Starting your baby on solid food can be a fun adventure filled with lots of trial and error. These 12 purees are a great beginner guide, ensuring your baby gets the iron they need to thrive during those formative months. As you try these recipes, you might find some favorites that keep your little one coming back for more—after all, feeding them is about nourishing their bodies and creating those cherished bonding moments.
If you’re looking for more inspiration, you might want to check out this selection of homemade baby food recipes, explore further ideas with iron-rich recipes for babies, or read a comprehensive guide on iron-rich foods for toddlers. You’re doing great, and your little one is lucky to have you!
Easy Homemade Baby Food Recipes for Beginners, Your Baby Will Love
Imagine this: it’s a sunny Saturday morning, and you’re in the kitchen, bright-eyed and ready to introduce your little one to the exciting world of flavors. You’ve just taken a step towards nurturing their taste buds and laying the foundation for healthy eating habits. If you’re a first-time parent, the idea of making homemade baby food can feel daunting. But here’s the thing: it’s much simpler than it seems, and today, I’m here to guide you through it.
As parents, we’ve all been there, staring at store-bought baby food jars, wondering if they’re truly nourishing our children. The good news is, making your own baby food not only gives you control over the ingredients, but it can also be a fun bonding experience for you and your baby. Let’s dive into some easy and nutritious homemade baby food recipes that even the busiest parents can whip up!
Getting Started with Homemade Baby Food
Before we jump into the recipes, let’s chat about a few basics. You might be wondering when to start introducing solids to your baby. The general guideline suggests starting around six months, depending on your baby’s readiness. Look for cues like sitting up with support, showing interest in food, or reaching for what you’re eating. Remember, it’s completely normal for your baby to take their time adjusting to new textures and flavors.
When you’re ready to start, keep these tips in mind:
- Choose fresh, organic ingredients whenever possible. They pack more nutrients and flavor for your little one.
- Keep it simple at first. Aim for one food at a time to watch for any food sensitivities.
- Invest in some good quality storage containers for batch-cooking and freezing portions. It’ll save you time and make your life easier.
Now, let’s explore some delicious homemade baby food recipes that are perfect for beginners!
Flavor-Packed Vegetable Purees
Sweet Potato Delight
Sweet potatoes are not just delicious; they’re packed with vitamins and antioxidants. Here’s how to make a creamy sweet potato puree:
- Ingredients: 1 medium sweet potato
- Instructions:
- Peel and chop the sweet potato into small cubes.
- Steam the cubes for about 15–20 minutes until they’re soft.
- Puree in a blender with a little water until smooth.
Now, your baby is ready to enjoy this naturally sweet and nutrient-rich meal!
Carrot and Pea Mash
Did you know that carrots and peas make a delightful combination? Here’s how to prepare this simple dish:
- Ingredients: 1 cup of chopped carrots, 1 cup of frozen peas
- Instructions:
- Boil the carrots for about 10 minutes until tender.
- Add the peas for the last 2 minutes.
- Drain and blend with a splash of water until it reaches your desired consistency.
This mash is not only tasty but also a great source of vitamins A and C!
Nutrient-Dense Fruit Purees
Creamy Avocado Banana Mash
Both of these fruits are so easy to prepare, you’ll wonder why you didn’t start making baby food sooner!
- Ingredients: 1 ripe avocado, 1 ripe banana
- Instructions:
- Scoop out the avocado and banana into a bowl.
- Mash or blend until smooth. You can add a little breast milk or formula for a silkier texture.
This combo is a powerhouse of healthy fats and natural sweetness!
Apple and Pear Puree
Fruits can provide a wonderful introduction to sweetness in your baby’s diet. Here’s how to whip up a classic:
- Ingredients: 1 apple, 1 pear
- Instructions:
- Peel and chop both fruits.
- Steam them for about 10 minutes until they’re soft.
- Blend with a little water until smooth.
Your little one will love the natural sweetness, and you’ll appreciate the vitamins!
Wholesome Grain Mash
Oatmeal Banana Blend
Oatmeal is a fantastic grain to introduce early on, and when combined with banana, it creates the perfect breakfast!
- Ingredients: 1/2 cup of quick oats, 1 ripe banana
- Instructions:
- Cook the oats according to the package instructions (using water or milk).
- Once cooked, mash in the banana until smooth. Adjust the consistency with water or milk as needed.
This hearty meal will keep your baby full and satisfied!
Tips for Success and Mistakes to Avoid
Starting your baby on solids doesn’t have to be stressful, but there are common pitfalls you can avoid. Here are a few key tips:
- Don’t overwhelm with flavors. Stick to one ingredient at a time to help your baby adjust. You’re not preparing a gourmet meal for your friends—it’s about their comfort.
- Be patient. Sometimes, it may take several attempts before your little one warms up to a new food. Remember, this is a learning process!
- Label and date your purees if you’re batch cooking and freezing. This way, you’ll always know what’s in your freezer and when it was made.
Next Steps in Your Baby’s Food Journey
Once your baby gets the hang of eating purees, you can start exploring mixed combinations and finger foods around 8-9 months. This will help them develop their chewing skills and introduce a variety of textures. You’re setting them up for healthy eating habits for life!
What if they don’t like something? Don’t take it personally. You’re not alone in this parenting journey. It’s completely normal for babies to have preferences.
Conclusion
Starting your baby’s food journey can be an exciting experience filled with discovery and joy. By making homemade baby food, you’re providing them with nutritious meals that are sure to delight their taste buds while creating a wonderful bonding experience.
If you’re looking for even more great ideas, check out 20 Easy Homemade Baby Food Recipes to expand your repertoire. Also, be sure to explore 10 Easy Homemade Baby Food Ideas for quick options that are sure to please. And for those first stages, Easy Homemade Stage 1 Baby Food can guide you with simple recipes perfect for your little one.
So roll up your sleeves, put on that apron, and get ready for some fun! Happy cooking!
50+ Creative Baby Shower Games and Printable Activities for Everyone
Make Your Baby Shower Unforgettable with Fun Games and Activities
Picture this: you walk into a beautifully decorated room filled with laughter, joy, and eager guests waiting to celebrate the soon-to-be mom. You’re there to support your friend, but let’s be honest, you’re also there for the games and delicious cake, right? A memorable baby shower isn’t just about charming decorations and quirky onesies; it’s about creating moments of bonding and fun! If you’re looking to spice things up, I’ve got a well-rounded collection of baby shower games, printable ideas, and themed activities that will ensure everyone has a blast. After all, who doesn’t love a little friendly competition?
Exciting Baby Shower Games
Baby shower games can set the tone for the entire event, allowing everyone from kids to grandparents to engage. Here are some beloved classics and a few creative twists that’ll keep everyone entertained:
Baby Bingo
Let’s start with a classic! Baby Bingo is simple but entertaining. Guests fill in their bingo cards with common baby-related gifts (like diapers, onesies, bibs) that they think the mom-to-be will receive. As she opens the gifts, they mark off their cards. The first to shout “Bingo!” wins a prize! You can even create custom Bingo cards and make them available as printable downloads.
Diaper-Change Relay
If you’re planning a co-ed shower, this game is sure to break the ice. Divide guests into teams and have them race to change a diaper on a baby doll while blindfolded. It’s hilarious to watch and always generates some laughter. Plus, it’s an actual skill that will come in handy when the little one arrives!
Baby Trivia
Test your guests’ baby knowledge with a trivia game that covers everything from baby care to nursery rhymes. Pose questions such as, “How many diapers does a newborn go through in a day?" (Spoiler: It’s a lot!) This game invites everyone to share their parenting wisdom while having fun.
Guess the Baby Food
For this one, you’ll need some baby food jars—just remove or cover the labels. Guests will taste each one and guess the flavor—easy, right? Not so fast! The combination of weird flavors and guests’ expressions will be priceless. Just make sure to have a spittoon handy!
Themed Activities for All Ages
Not all guests may want to participate in competitive games, so having themed activities can accommodate all ages.
Craft Station
Set up a craft station where guests can create their own baby onesies or bibs. Provide fabric markers and plain clothing, and let creativity flow. It’s a great way for guests to express their thoughts and make memorable gifts for the mom-to-be.
Story Time
You could hold a story-time activity for the little ones. Gather them around and read from a variety of baby and toddler classic books. It keeps them engaged and offers a nice break for their parents!
Gender-Neutral Games
If you’re looking for something that fits any baby shower theme, consider these gender-neutral games. They’re perfect for celebrating a baby regardless of gender.
Baby Predictions
Have guests fill out cards predicting the baby’s weight, gender, and birthday. It’s a fun way to get them involved and provides keepsakes for the parents-to-be to look back on.
Name That Tune: Baby Edition
Play snippets of songs that have the word "baby" in them and have guests guess the song title and artist. This game works well as a background activity, especially with a mixed-age group.
Budget-Friendly Ideas
Hosting a memorable baby shower doesn’t have to mean breaking the bank. Here’s how to create a fabulous atmosphere without overspending.
DIY Decor
Instead of splurging on expensive decorations, gather your friends for a craft day. Create fun banners, centerpieces, and decorations that can be reused for future occasions. Think about making a “wishes for baby” tree where guests can write their hopes for the little one on hanging tags.
Utilize Free Printables
Here’s the thing: there are loads of free or cheap printables online for baby-themed games, invites, and decor. Hunting these down can save you both time and money. Sites like Pinterest are your best friend for finding inspiration and resources.
Quick Tips for a Smooth Event
- Plan Ahead: A little organization goes a long way in ensuring your event flows smoothly.
- Create a Timeline: Decide in advance how long each game will take and what time guests should arrive.
- Personalize Prizes: Offer small gifts that are thoughtful and related to parenting to encourage engagement.
- Capture the Moments: Designate someone to take pictures throughout the event, or set up a fun photo booth for group shots!
Mistakes to Avoid
While planning a baby shower can be fun, there are common pitfalls we all should avoid. Don’t over-schedule activities; too many games can leave guests feeling rushed. Remember, the point is to celebrate life and love, not to keep a strict timeline. It’s also important to provide a balance between games and downtime, especially for guests with little ones who may need a break.
FAQs
How many games should I include?
It depends on your guests and the flow of the event. Generally, 2-4 games are ideal, especially if you allow time for mingling and enjoying snacks.
What if my guests are too shy to participate?
Don’t pressure anyone! Introduce games that allow for passive involvement. Maybe have a station where they can fill out fun cards without being called out.
Can I mix traditional games with modern ones?
Absolutely! Mixing classic and innovative games can appeal to a diverse crowd, making sure everyone has something to enjoy.
Conclusion
Bringing together loved ones to celebrate the impending arrival of a gorgeous baby can be both heartwarming and joyful. By incorporating a vibrant mix of baby shower games, themed activities, and fun ideas, you’ll create an unforgettable event for the mom-to-be and her guests. With these suggestions, I hope you feel more confident in your planning!
If you’re seeking further inspiration, check out these unique baby shower games available on Amazon, or grab some delightful Etsy printables perfect for your party. For even more themed strategies, look at this collection of game cards that will keep everyone engaged!
Celebrating this exciting milestone should be about joy, laughter, and lasting memories. Go forth and plan an extraordinary baby shower!
Adorable Baby Shower Theme Ideas for Every Season You’ll Love
Imagine this: you’re surrounded by close friends and family, laughter fills the air, and the sweet aroma of a delicious cake wafts through the room. Everyone’s celebrating an exciting chapter in your life — the arrival of your little one. Now, picture this party adorned with charming decorations, thoughtful details, and a stunning theme that perfectly encapsulates the joy and anticipation of bringing new life into the world. If you’re on the hunt for the perfect baby shower theme, let’s explore some creative ideas that’ll wow your guests and create unforgettable memories.
Sunshine and Strawberries
Can we all agree that nothing says joy quite like sunshine and strawberries? A theme centered around these bright, cheerful elements instantly evokes warmth and happiness. Think about it: sunshine symbolizes new beginnings, and strawberries are sweet, juicy, and delightful.
- Decor: You can use vibrant yellow and soft pink as your color scheme. Think sunshine-yellow tablecloths, lovely strawberry centerpieces, and fairy lights that mimic the glow of a sunny day.
- Food: Offer a refreshing strawberry lemonade, strawberry shortcake, and maybe even a fruit bar with assorted berries. You can even create a “Sunshine Board” with sun-shaped cheese and crackers, paired with a side of fresh strawberry dip.
This theme works beautifully for a spring or summer shower, creating a lovely outdoor ambience if the weather permits. Your guests will love enjoying the sunshine while celebrating your new journey!
Coastal Celebration
Now, who doesn’t love a day at the beach? A coastal-themed baby shower can whisk your guests away to a sandy paradise, even if they’re miles from the ocean. Let’s be honest, the beach is all about relaxation and fun which makes it perfect for any baby shower.
- Decor: Use shades of blue, sandy beige, and soft white. You might hang seashell garlands, and driftwood centerpieces, and even place beach towels as table runners.
- Food: Think seafood platters, coconut water to sip on, and a cake designed like a beach ball. You could even create a sandcastle out of layered desserts—your guests will be blown away!
This theme is particularly great for coastal locales or even a poolside gathering. The laid-back vibe can create a welcoming atmosphere that puts everyone in a celebratory mood.
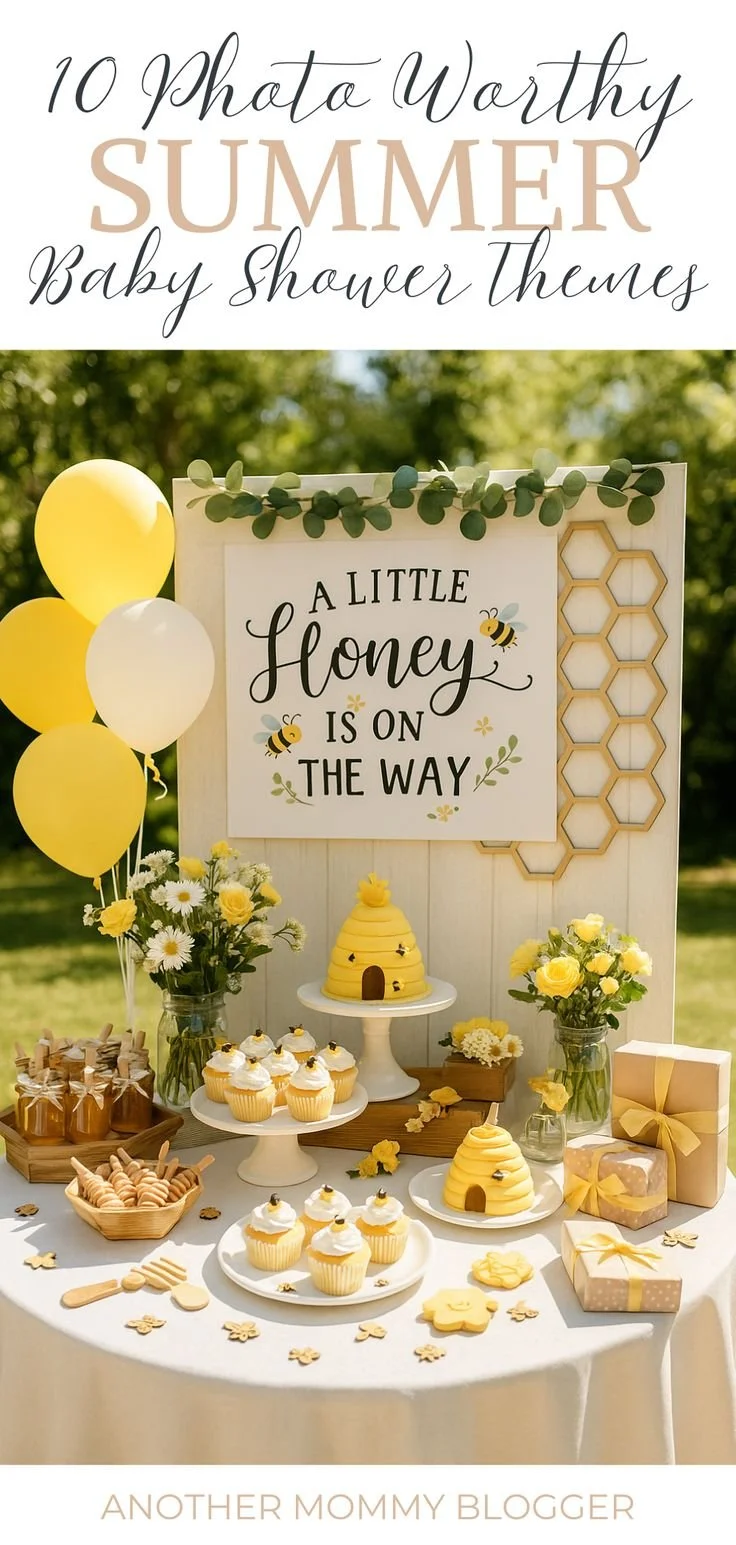
Honeycomb and Beehive
You might be wondering, “What in the world is a bee-themed baby shower?” But here me out. Honeybees symbolize love and community, perfectly reflecting the support system you’ll need as a new parent. A honeycomb-themed shower can be both adorable and sophisticated.
- Decor: Use hexagonal shapes for table settings, and yellow and black for colors. Consider honeycomb-patterned tablecloths or even honey jar favors for guests to take home.
- Food: Serve honey-infused treats like honey-glazed ham, bee-shaped cookies, and perhaps a honey-tasting station with artisanal honey.
This charming theme works through all seasons, especially in the warmer months when vibrant flowers bloom alongside it, symbolizing growth and nurture.
Backyard Movie Night
Let’s say you want something a bit more relaxed — how about a cozy backyard movie night? This theme allows for a laid-back vibe, making it perfect for expecting parents who’d love spending quality time with friends.
- Decor: Set up fairy lights to mimic a starlit sky, and throw some comfy blankets and pillows around. Use a projector for the movie screen — you can show baby-themed flicks like "Baby Mama" or "What to Expect When You’re Expecting."
- Food: Popcorn is a must, but you can jazz it up with different toppings. Consider offering a candy bar with baby-themed sweets.
Imagine your guests laughing at the adorable baby antics on screen while enjoying the food and company. It’s casual but meaningful, making it an excellent choice for any time of year.
Seasonal Themes
Whether it’s spring, summer, fall, or winter, each season brings its unique charm, making it easy to find a fitting theme for your baby shower. Here’s a breakdown of a few themes perfect for seasonal celebrations:
Spring Showers
Spring calls for bright colors and blooming flowers. Think about a garden party theme with floral decor, fresh fruits, and perhaps a flower-crown-making station for guests.
Summer Fun
For summer, consider a luau or Hawaiian theme. Think vibrant tropical colors, refreshing smoothies, and leis! A picnic-style setup can also work beautifully.
Fall Harvest
Autumn brings warm hues and harvest vibes. A pumpkin patch or autumn festival theme with apples, pies, and cozy decorations can warm everyone’s hearts.
Winter Wonderland
If you’re celebrating in the winter, how about a cozy winter wonderland? White, silver, and blue decor can create a magical setting, complemented by hot chocolate and warm treats.
As you brainstorm ideas, remember that the heart of your baby shower is the love and joy you share with those around you. The theme is just the icing on the cake, so don’t stress too much over the details.
Quick Tips for Planning
- Involve Your Partner: Share ideas and tasks to lighten the load. Planning a shower can feel overwhelming, but you don’t have to do it alone.
- Create a Budget: Knowing what you can spend will help narrow down your choices and prevent last-minute scrambles.
- Focus on Comfort: Make sure you have comfortable seating options and a plan for weather contingencies, particularly if you’re celebrating outdoors.
Mistakes to Avoid
We’ve all been there—planning a big event can bring up a lot of pressure. Here are some common pitfalls to steer clear of:
- Overcomplicating the Theme: Keep it simple! A clear but relaxing theme will resonate more with your guests than an unnecessarily complex one.
- Ignoring Dietary Restrictions: Offer a variety of foods to accommodate all guests. You never know who might be gluten-free or allergic to nuts.
- Trying to Do Everything Yourself: Remember, it’s okay to delegate tasks or even hire help for catering or decorating.
Conclusion
Throwing the perfect baby shower doesn’t have to feel daunting. With themes like sunshine and strawberries, coastal celebrations, honeycombs, and backyard movie nights, each idea is crafted to help you celebrate the milestone with style and warmth. Feel free to mix and match ideas to cater to your preferences and your guests’ tastes. You’ll create an atmosphere filled with joy and connections — the real gift of this beautiful occasion.
As you plan, remember to take a step back and enjoy the journey. You can check out resources like The Bump for unique baby shower themes, Minted for creative and sweet themes, and What to Expect for more inspiration. Your creativity will surely shine through, making the day precious for you and your loved ones. Happy planning!
Easy Mini Pancakes Ideas for a Charming Baby Shower Brunch
Imagine this: You’re hosting a baby shower brunch and the sun is shining, the smell of fresh coffee fills the air, and laughter echoes around the room. Everyone’s gathered around a beautifully set table adorned with adorable decorations, ready to celebrate the mom-to-be. The best part? You didn’t break the bank to pull off this unforgettable gathering. It sounds dreamy, right? Well, it doesn’t just have to be a fantasy. From finger foods to stunning drinks, I’m here to share budget-friendly baby shower brunch ideas that will leave your guests raving about the spread.
Menu Planning for the Budget-Conscious
Here’s the thing about planning a baby shower brunch: it can feel overwhelming. You might be unsure about what to serve, how much food you need, and let’s not forget about dietary restrictions. Fear not! With a well-thought-out menu and a little creativity, you can host a shower that’s both impressive and enjoyable without blowing your budget.
Decide on a Theme
First things first, deciding on a theme can guide your food choices and decoration. Whether you want something simple and elegant, fun and colorful, or even inspired by a favorite book or character, having a theme will make all your decisions easier. Picture a sweet pastel color palette with floral arrangements or a playful “Under The Sea” theme with nautical treats. What matters is that the theme reflects the mom-to-be’s personality.
Budget-Friendly Menu Ideas
Once your theme is set, it’s time to curate the menu. Here are some ideas that won’t leave your wallet feeling empty:
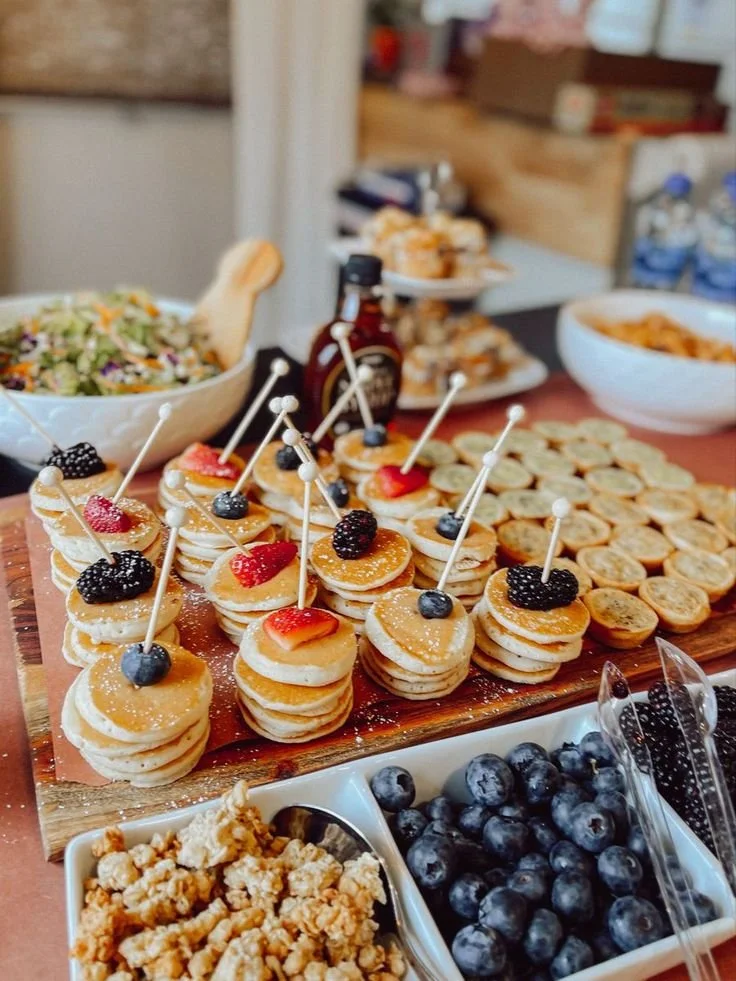
Mini Pancakes
They’re adorable and delicious! You can go for classic mini pancakes or spice things up with different flavors. They’re easy to make in bulk and can be served with syrups and toppings. Try these great mini pancakes for a delicious twist.Savory Quiches
Whip up a couple of quiches with different fillings. They’re simple, can be made ahead of time, and are always a crowd-pleaser. Plus, they can fit right in with a daytime brunch!Fruit Skewers
Fresh fruits are not only refreshing but also colorful! Assemble fruit skewers with a mix of seasonal fruits. These are visually appealing and healthy, making them a perfect addition.S’mores Pancakes
If you want to impress your guests, consider indulging their sweet tooth with some unique options like S’mores Pancakes. They’re as fun to make as they are to eat!Yogurt Parfaits
Layer yogurt, granola, and fruits in clear glasses. It looks fancy but is super simple to throw together. It’s also a healthy choice that can cater to various dietary needs.Spinach and Feta Puff Pastries
These bites are quick to prepare, and you can freeze them ahead of time. They’ll look elegant on your table while being budget-friendly.Homemade Muffins
Bake different flavors such as blueberry, banana nut, or chocolate chip. Not only are they a hit with kids, but they can also be made ahead of time!Bruschetta Bar
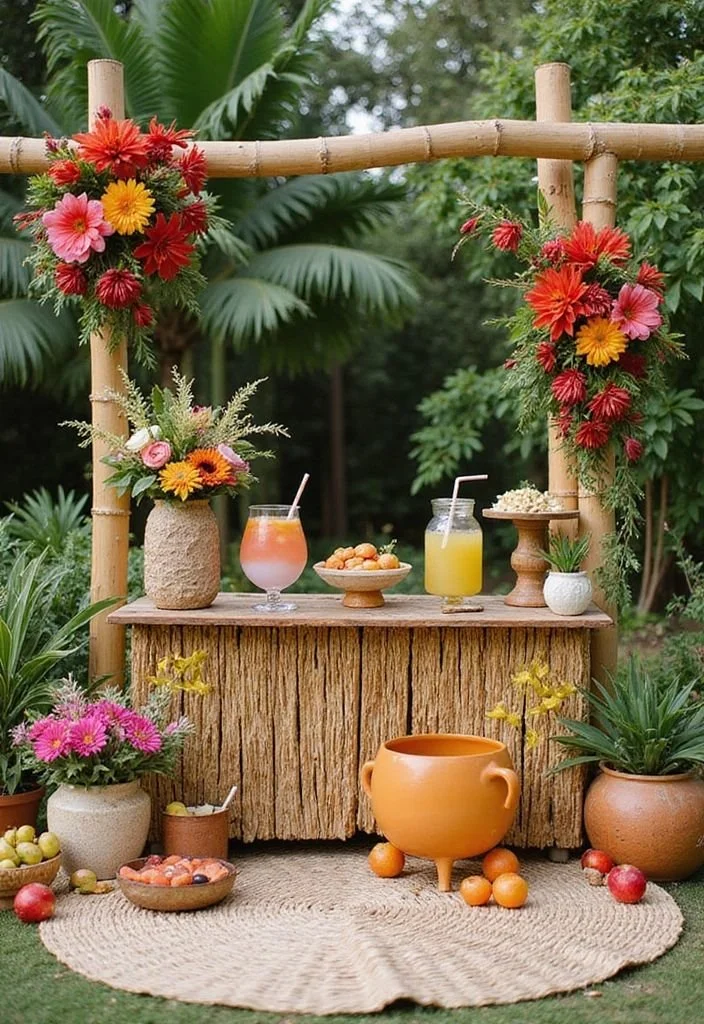
Set out an array of toppings like tomatoes, basil, avocado, and olive spreads for guests to make their own bruschetta. It’s interactive and offers something for everyone!Charming Drink Station
A DIY beverage station can be a fun addition. Offer a basic juice bar with a few flavored syrups and garnishes. The best part is you can keep costs low by buying in bulk.Dessert Table
Finally, don’t forget about desserts! You can bake cookies or cupcakes at home, keeping everything delicious and affordable. Don’t be afraid to get creative with themes or flavors here too.
Simple Recipes for a Smooth Brunch
Once you have your menu, you’ll want to ensure you can execute it smoothly. Preparing foods in advance can alleviate the stress of the day-of. Let’s dive a little deeper into a few simple recipes that are both easy to make and budget-friendly.
Recipe for Mini Pancakes
Ingredients:
- 1 cup all-purpose flour
- 1 tablespoon sugar
- 1 teaspoon baking powder
- 1/2 teaspoon baking soda
- 1/2 teaspoon salt
- 1 cup buttermilk (or regular milk)
- 1 large egg
- 2 tablespoons melted butter
- Toppings: syrup, fruit, whipped cream
Instructions:
- In a bowl, mix flour, sugar, baking powder, baking soda, and salt.
- In another bowl, whisk together buttermilk, egg, and melted butter.
- Combine the wet and dry ingredients until just mixed (a few lumps are okay!).
- Heat a non-stick skillet over medium heat. Pour small amounts of batter to form mini pancakes. Cook until bubbles appear, then flip.
- Serve with toppings of your choice!
This recipe can be easily doubled or tripled based on the number of guests. Plus, they’re super easy to customize.
Recipe for Yogurt Parfaits
Ingredients:
- 2 cups yogurt (Greek or regular)
- 1 cup granola
- 2 cups assorted fruits (berries, bananas, peaches)
Instructions:
- In clear cups, layer yogurt, granola, and fruits.
- Repeat the layers until the cup is full.
- Drizzle honey or a sprinkle of cinnamon on top for an extra touch.
These parfaits look appealing and can be a quick grab-and-go option for guests.
Fun Ideas to Enhance the Experience
Remember, it’s not just about the food! Little touches can create an unforgettable atmosphere.
Decorate with Fresh Flowers
You don’t need to go all out to create charm. Simple arrangements in mason jars can make your table pop. Wildflowers or even some greenery can create a warm feeling that keeps the vibe cheerful and inviting.
Capture the Memories
Consider setting up a photo booth area. Add props related to your theme and provide instant camera options for guests to take home memories. It’s an easy way to keep guests entertained when mingling.
Create Customizable Place Settings
Help your guests feel included by having customizable name tags. Not only does this add a lovely touch, but it also helps break the ice if people don’t know each other well.
Quick Tips for a Stress-Free Shower
- Start Early: Don’t wait until the last minute to prepare. Plan the menu and start cooking at least a day in advance.
- Delegate Tasks: Invite close friends or family to help with specific dishes or drinks.
- Don’t Be Afraid to Ask for Help: There’s no shame in asking for potluck-style contributions from guests who want to pitch in.
Mistakes to Avoid
- Over-Preparing: It’s so easy to go overboard trying to impress, but remember that less can be more.
- Ignoring Dietary Restrictions: Make sure there’s at least one option for everyone to enjoy.
- Forgetting to Enjoy Yourself: This is a celebration! While hosting is a task, make sure to soak in the joy around you.
Encouragement and Conclusion
Planning a baby shower brunch can be as delightful as it sounds when you take the right steps. As parents, we often put pressure on ourselves to make everything perfect—trust me, I’ve been there too. It’s about the love and the connections, not about extravagant costs or intricate details. In the end, your gathering will be cherished in memories more than it will be judged on its budget.
So save this guide for those future celebrations, and remember to enjoy the process as much as the event itself! If you want more ideas or help with your upcoming shower, check out our additional resources like baby shower brunch ideas, baby shower food ideas, or explore gender reveal inspirations. Happy planning!
Tropical Jungle Safari Animals Boy Baby Shower Invitations Ideas
Imagine this: you’re sitting around the table, surrounded by family and friends, the excitement in the air is almost palpable. Everyone’s buzzing about the new little guy (or gal) about to make their debut into the world. It’s a baby shower! But wait, have you thought about the invites? That’s the first impression everyone gets, so let’s make it a memorable one. Now, if you’re leaning towards a tropical jungle and safari theme for your boy baby shower, you’re in for a treat.
Tropical jungle and safari animals have a charm that’s perfectly suited for a baby boy’s shower. They represent adventure, fun, and the wild spirit that comes with motherhood. Plus, they add a playful touch that children — and parents — just love. I remember the joy on my friends’ faces when they received beautifully crafted invitations depicting cute elephants, mischievous monkeys, and colorful parrots. It really set the tone for a vibrant, lively celebration.
Choosing the Right Theme
When choosing a theme, you might want to think about what resonates with you. Are you a big fan of bright colors and playful patterns? Or maybe you prefer something a bit more subdued, with earthy tones and simple designs? Either way, a tropical jungle and safari theme can offer the perfect blend of whimsy and warmth.
Consider how you want your invitations to reflect your theme. Think about images of friendly animals, tropical leaves, and cheerful colors. You want your guests to know right away that they’re in for a delightful time, and a well-designed invite goes a long way.
Cute Designs That Delight
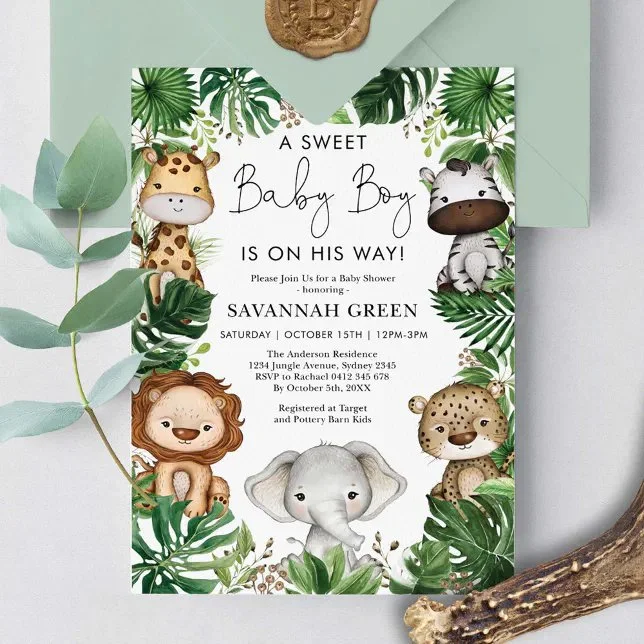
When it comes to cute baby shower invites for boys, there are countless options out there. Here are some designs that might inspire you:
- Animal Parade: Invitations featuring cute baby safari animals lined up with balloons or party hats. Picture tiny lions and playful monkeys, all ready to celebrate!
- Over the Jungle: An invitation with a hot air balloon floating over a jungle, complete with illustrated trees and goofy animals peeking through the foliage. This could really capture the imagination of your guests.
- Simple Silhouettes: Sometimes less is more. A clean design featuring silhouettes of safari animals like lions and elephants can be both elegant and playful.
- Storybook Illustration: For a nostalgic touch, think about invites that look like they’re from a fairy tale book, complete with colorful imagery and whimsical fonts.
Things to Include on Your Invitations
Here’s the thing — it’s not just about the pretty pictures. You’ll want to make sure your invites cover all the essential details. Here’s a checklist to ensure you don’t miss a thing:
- The Date and Time: Make sure your guests know when to arrive. It’s a good idea to include the day of the week as well, just to avoid any confusion.
- Venue Address: Include the full address of the location. GPS can be finicky, and you want your loved ones to find you without a hitch.
- RSVP Details: Add a way for guests to confirm if they’re coming. Nothing like planning for food when you don’t really know how many to prepare for. A simple phone number or an email will do.
- Theme Mention: If you’re doing something special like a dress code or fun theme activities, let your guests know. For instance, “Join us in your best safari attire!”
- Registry Information: If you’re registered somewhere, consider adding a small note about it. It’s a gentle reminder for those who want to bless the little one with gifts.
Exploring Invitation Options
Now that we know what you want on your cards, it’s important to decide how to get them. You could choose to craft your own invites, which can be a fun project (and quite personal), or you might decide to go for something professionally printed. Websites like Minted and Zazzle offer a range of customizable templates.
Opting for high-quality printed invitations means you can enjoy the designs without stressing over the details. Plus, they come in so many styles that you’re bound to find one that fits your vision perfectly.
Quick Tips for a Successful Shower
While the invitations are critical, there’s more to planning a great baby shower. Here are some quick tips to help keep things running smoothly:
- Create A Theme Board: Collect colors, patterns, and ideas that inspire you. This will help guide you and your party planners.
- Consider Timing: Choose a time that works for most family and friends. Weekends usually work best, especially in the mid-afternoon.
- Food and Drinks: Think about simple snacks that can be shared. Finger foods are usually a hit, and they allow your guests to mingle without worrying too much about what’s on their plate.
- Games and Activities: You can never go wrong with some fun shower games! Have a mix of traditional games and some that fit your jungle theme for a good laugh.
Mistakes to Avoid
No one wants to hit a snag during their baby shower planning. Here are a few common pitfalls to steer clear of:
- Ignoring the Guest List: It’s easy to get carried away. Remember to keep the invite list to those you genuinely want to be there.
- Forgetting to Send Invites on Time: Aim to send out those invitations at least three to four weeks before the shower. This gives everyone enough time to prepare.
- Not Personalizing: Personal touches matter — whether it’s a thoughtful message or unique designs. It makes your invitations feel special, just like the little one on the way.
Bonus Ideas for Your Baby Shower
Since we’re all about that tropical jungle feel, think beyond just the invitations. You might also want to consider:
- Jungle Themed Decor: Think simple green table linens with plush animal centerpieces.
- Fun Favors: Consider giving guests small themed items like animal-shaped soaps, mini plush toys, or even bottled drinks with personalized labels.
- Outdoor Elements: If weather permits, an outdoor setting can truly enhance that jungle feel.
Conclusion
Planning a boy baby shower with a tropical jungle and safari animals theme is not only adorable, but it’s also a fantastic way to create lasting memories. Your invitations are the first step in gathering loved ones to celebrate this exciting new chapter. So take a moment to find the perfect invites that reflect your style, and don’t forget about the little details that will make your event extra special.
For fantastically designed invitations that capture the magic of your jungle theme, check out Safari Baby Shower Invitations. If you’re after something more elegant, do check the beautiful options at Minted’s Jungle Baby Shower Invitations. Finally, for additional jungle-inspired options, consider browsing Zazzle’s Jungle Baby Shower Invitations. Enjoy the planning, embrace the joy, and know that this time flies by faster than you’d think — you’ve got this!
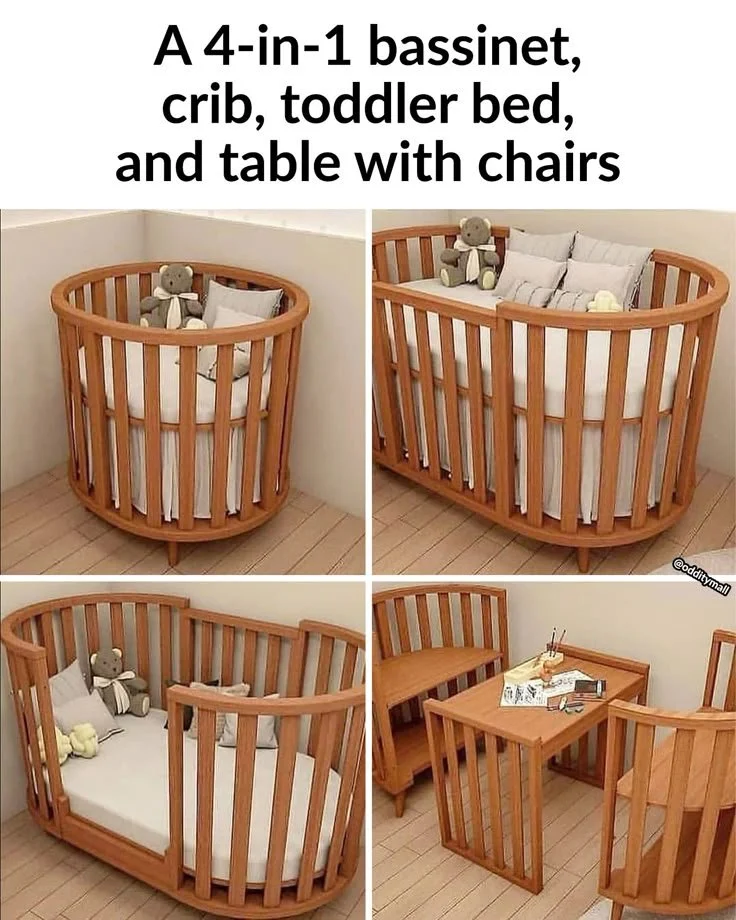
Benefits of a 4-in-1 Convertible Crib, Bassinet, and Toddler Bed
Imagine this: it’s 3 a.m., and you’re stumbling into your baby’s nursery to soothe a crying little one. As a parent, you’ve likely navigated many of these moments—from late-night feedings to those fleeting, sweet snuggles. Now, picture a cozy space where all these precious memories unfold, complete with a crib that grows with your baby. Sounds dreamy, right? Well, that’s where the magic happens with a 4-in-1 convertible crib, bassinet, and toddler bed. This versatile piece of furniture is designed to support you and your child through various stages of development, helping to ease some of those nightly hurdles.
The 4-in-1 Concept Explained
So, what exactly is a 4-in-1 convertible crib? Here’s the scoop: it typically transforms from a bassinet, to a crib, then to a toddler bed, before finally evolving into a kid’s daybed. This multi-functionality means you’re investing in more than a place for your baby to sleep; you’re creating a long-term solution that can adapt as your child grows.
Why Choose a Convertible Crib?
Here’s the thing: cribs can be a significant financial investment, and let’s face it, parenting comes with plenty of costs. By opting for a convertible crib, you’re not only saving money but also reducing clutter in your home. This type of crib doesn’t just cater to your baby’s early needs; it evolves as your child matures, meaning you won’t find yourself scrambling to buy new furniture every couple of years.
The Bassinet Phase
During the early months, when your newborn is still getting used to this big, wide world, having a bassinet close by can be a game-changer. A 4-in-1 convertible crib typically starts as a bassinet, allowing your little one to feel cozy and secure. I remember those early days with my baby, where every tiny noise felt amplified. Having them close by provided so much reassurance, not just for me but for them too.
Now, you might be wondering: how do I know when my baby is ready to transition out of the bassinet? Typically, once they start showing signs of rolling over or if they’ve reached the weight limit of the bassinet, it’s time to move them into the crib. Plus, you’ll find that many models include breathable mattresses designed to promote airflow, making sure your baby stays comfortable while they sleep soundly (and so do you!).
Moving to the Crib
Once your baby grows a bit, it’ll be time to convert that bassinet into the full-fledged crib. This is an exciting time filled with milestones, like those first giggles and tummy time. The transition from bassinet to crib is relatively easy; you’ll just adjust the mattress height based on their comfort and safety.
Here’s a little tip from my experience: choose a crib with adjustable mattress heights to make it easier to lift and place your baby in and out. When they’re tiny, you’ll want the mattress higher to avoid straining your back, and as they grow, lowering it becomes essential for safety.
The Toddler Bed Transition
Now, let’s chat about the toddler bed phase. You’ll notice once your little one grows into a curious and adventurous toddler, staying in one place becomes less appealing. It’s completely normal for them to test boundaries (trust me, I’ve been there!). A good convertible crib will easily transition into a toddler bed, typically featuring removable side rails to give your child a sense of independence, while still keeping them safe.
It’s a beautiful moment when you see your toddler climb into bed on their own. However, it can also be daunting if they decide that sleep isn’t actually what they want. I’m a firm believer that consistency is key, but you might want to check out some strategies for helping your curious toddler stay in bed—like establishing a calming bedtime routine which can be helpful as you’re guiding them through this transition (you can find some ideas in our post on signs your toddler isn’t ready for bed).
The Daybed Stage
Finally, let’s not forget about those early school years when your child can enjoy their “big kid” setup. The daybed feature is versatile, allowing for playdates and nap times with friends without the need for additional beds. Talk about a space-saver! When we had playdates, I loved how our convertible bed became a play area in the day and a cozy sleeping spot at night.
The Practical Aspects
Aside from the emotional and developmental benefits, let’s talk about some practical aspects that shouldn’t be overlooked in your decision-making process.
Quality and Safety
When choosing a convertible crib, make sure to prioritize safety and quality. Look for cribs that meet the latest safety standards. You’ll want to ensure the materials used are non-toxic and that the design follows rigorous safety protocols.
Design Appeal
Let’s face it: nursery design is exciting! You want a crib that complements your decor, right? Many convertible cribs come in various styles and colors, so you can find one that feels right in your space. I loved how the design of my crib added a touch of elegance to our nursery.
Budget Considerations
While convertible cribs can be on the pricier side upfront, consider the long-term savings. Instead of constantly purchasing new beds or cribs as your child grows, this all-in-one investment cushions the financial hit a bit.
Quick Tips for New Parents
Do Your Research: Not all convertible cribs are created equal. Read reviews from other parents, and if possible, test them out in-store.
Consider Your Style: Look for colors and designs that suit your home—finding the right aesthetic makes a huge difference when you’re spending hours in the space.
Plan for Other Uses: Think ahead about how the daybed feature can be used for sleepovers or even as reading nooks.
Mistakes to Avoid
Skipping Safety Standards: Always check if your crib meets all safety regulations.
Ignoring Weight Limits: Each crib and bassinet will have weight limits. Be sure to transition before your baby reaches those to prevent accidents.
Overlooking Comfort: Ensure you select a quality mattress that’s firm yet comfortable for your baby.
Conclusion
Choosing a 4-in-1 convertible crib offers not just a bed but a nurturing space that grows with your child. From the tender moments of the bassinet phase to the adventurous spirit of toddlerhood, every aspect of this crib supports your family’s journey through early parenting stages. Investing in one of these cribs can truly leave an impact on your little one’s comfort and safety.
Explore some great options like the Convertible Cribs and Bassinet Options from Babyletto to find the perfect fit for your nursery. For a highly reviewed choice, don’t miss the Newton Nest 4-in-1 Convertible Crib, which emphasizes safety and adaptability. Another wonderful compact option is the Gelato 4-in-1 Convertible Mini Crib that’s perfect for smaller spaces. Remember, you’re not alone on this parenting journey, and finding the right crib can help you navigate it with a little more ease and comfort.
