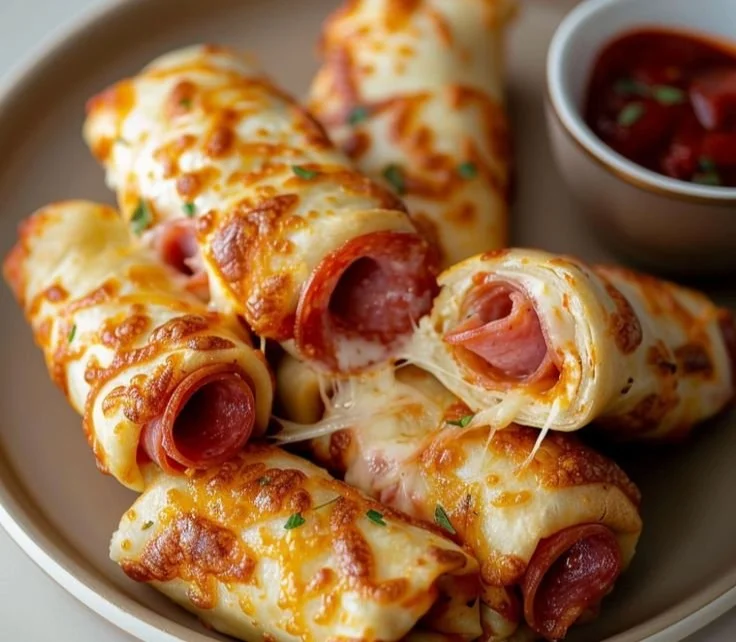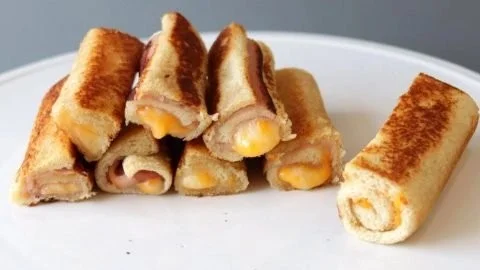
Grilled Cheese Roll-Ups: A Simple, Fun Twist on a Classic
Grilled cheese roll-ups are a playful and compact variation of the traditional grilled cheese sandwich. They transform sliced bread and melted cheese into bite-sized, hand-held delights that are perfect for lunchboxes, appetizers, or a quick snack. Crisp on the outside and gooey inside, these roll-ups are fast to make and endlessly customizable.
Why you’ll love them
- Quick to prepare—ready in about 10 minutes.
- Kid-friendly and portable.
- Easily adaptable to different cheeses, breads, and fillings.
- Great for using up leftover deli meats, veggies, or spreads.
Ingredients (serves 2–4)
- 6–8 slices of sandwich bread (white, whole wheat, or sandwich loaf)
- 4–6 slices of your favorite cheese (American, cheddar, mozzarella, etc.)
- 1–2 tablespoons butter or margarine, softened
- Optional fillings: thinly sliced ham, turkey, cooked bacon, spinach, tomato slices, or a light smear of mustard/mayo
Equipment
- Rolling pin or glass bottle
- Skillet or griddle
- Spatula
- Knife and cutting board
Method
- Prepare the bread: Use a rolling pin or a glass bottle to flatten each slice of bread into a thin square. This makes rolling easier and helps the bread crisp up.
- Add the cheese and fillings: Place a slice of cheese on each flattened bread slice. Add any optional fillings in a thin layer—avoid overstuffing to prevent bursting.
- Roll: Starting from one edge, tightly roll each slice into a neat cylinder. Seal the edge by pressing gently so it stays closed during cooking.
- Butter the outside: Spread a thin layer of softened butter over the outside of each roll-up for golden crisping.
- Cook: Heat a skillet over medium heat. Place roll-ups seam-side down and cook, turning occasionally, until all sides are golden brown and the cheese is melted—about 2–3 minutes per side.
- Slice and serve: Let roll-ups rest for a minute, then slice in half or serve whole. They pair well with ketchup, marinara, ranch, or a simple mustard dip.
Variations and flavor ideas
- Caprese: Fresh mozzarella, basil leaves, and a thin slice of tomato with a drizzle of balsamic.
- Pepperoni pizza: Shredded mozzarella, sliced pepperoni, and a smear of pizza sauce.
- Mediterranean: Feta, roasted red pepper, and a sprinkle of oregano.
- Sweet: Cream cheese with a thin layer of fruit jam for a dessert roll-up.
Tips for success
- Use thin fillings and evenly distribute them to avoid soggy or burst roll-ups.
- If you want extra crunch, brush with a mixture of melted butter and a pinch of garlic powder before cooking.
- For even melting, cover the skillet with a lid for the first minute to trap heat, then remove to crisp the exterior.
- To make ahead: assemble roll-ups and store them uncooked in the fridge for a few hours. Cook right before serving for best texture.
Serving suggestions
- Serve as a snack platter with several dipping sauces.
- Pair with a simple soup or salad for a light meal.
- Pack them warm or allow to cool for convenient lunchbox additions.
Conclusion
For a reliable, kid-approved twist on a classic, check out the original inspiration at Grilled Cheese Roll Ups – The BakerMama for recipe variations and step-by-step photos. If you’re looking for more creative fillings and presentation ideas, explore the helpful suggestions at Grilled Cheese Roll Ups | Something About Sandwiches.

Click to get the full bundle — instant download