
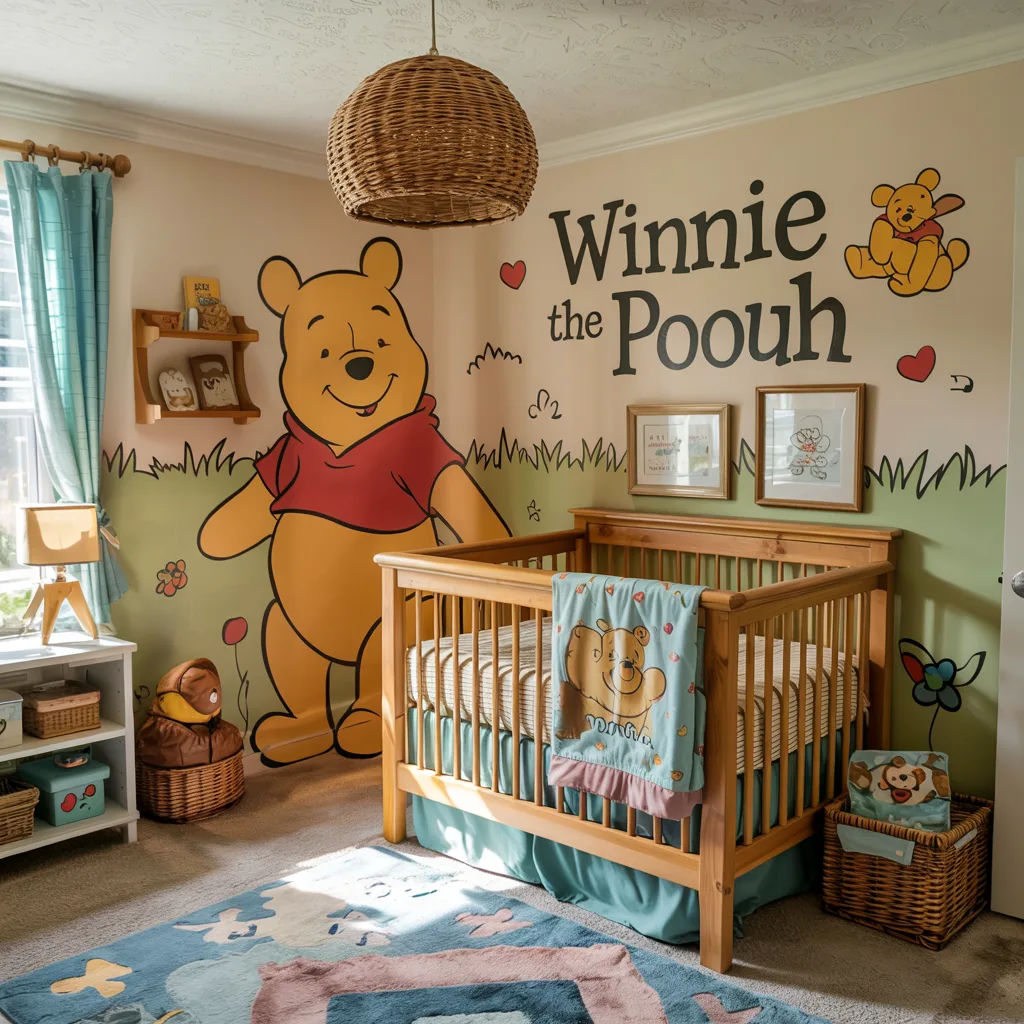
28 Winnie the Pooh Nursery Ideas
Creating a nursery inspired by the timeless world of Winnie the Pooh offers the perfect blend of nostalgia, whimsy, and gentle comfort for your little one. Whether you’re drawn to the classic E.H. Shepard illustrations or the more contemporary Disney interpretations, Winnie the Pooh nursery ideas provide endless possibilities for a space that’s both magical and soothing.
In this comprehensive guide, we’ll explore everything from color palettes and wall treatments to furniture, textiles, and delightful Hundred Acre Wood accessories. You’ll discover practical tips for creating a Pooh Bear nursery theme that can grow with your child, budget-friendly approaches, and creative DIY projects to personalize your baby’s special space.
The enduring appeal of Winnie the Pooh makes it an excellent choice for a gender-neutral winnie the pooh nursery, allowing parents to create a nurturing environment filled with beloved characters and the simple wisdom of A.A. Milne’s cherished stories.
Table of Contents
Choosing Your Winnie the Pooh Nursery Theme Style
Before diving into specific decor elements, consider which stylistic approach to your Pooh-inspired nursery resonates most with you:
Classic & Nostalgic
Embrace the original charm of E.H. Shepard’s delicate illustrations with a vintage-inspired nursery that feels like stepping into the original storybooks. This approach features:
- Muted, watercolor-like tones
- Classic Pooh illustrations as framed art
- Vintage book displays
- Handcrafted wooden elements
- Subtle nods to honey pots and “hunny” trees
“Sometimes the smallest things take up the most room in your heart.” – A.A. Milne
Modern & Minimalist

For parents who prefer contemporary aesthetics, a modern Pooh nursery incorporates subtle character references within a clean, streamlined design:
- Monochromatic base with strategic pops of honey yellow
- Abstract woodland elements
- Simplified silhouettes of iconic characters
- Typography-focused quote art
- Geometric patterns inspired by the Hundred Acre Wood
Bright & Playful
Celebrate the vibrant energy of characters like Tigger and the playful spirit of Pooh’s adventures:
- Bold primary colors (reds, blues, yellows)
- Character-forward decor items
- Interactive elements
- Playful patterns
- Dynamic wall displays
Gender-Neutral Focus
The Winnie the Pooh universe naturally lends itself to gender-neutral designs:
- Earth tones with gentle accents
- Focus on woodland elements and nature motifs
- Emphasis on story themes rather than character colors
- Versatile furniture that transitions beyond babyhood
- Balanced mix of playfulness and sophistication
Perfect Palettes: Winnie the Pooh Nursery Color Schemes
The right color palette serves as the foundation for your Winnie the Pooh baby room. Here are four distinctive approaches:
| Palette Name | Primary Colors | Accent Colors | Best For |
|---|---|---|---|
| Classic Pooh | Soft yellow, cream | Sky blue, gentle green | Traditional nurseries with vintage appeal |
| Hundred Acre Woods | Sage green, warm brown | Honey gold, soft blue | Nature-inspired, organic spaces |
| Honey & Friends | Warm yellow, light gray | Red, blue, pink | Character-focused, bright nurseries |
| Modern Storybook | White, light gray | Mustard yellow, blush | Contemporary, minimalist aesthetics |
Pro Tip: Choose your palette first, then build your decor around these colors for a cohesive look that doesn’t overwhelm the space.
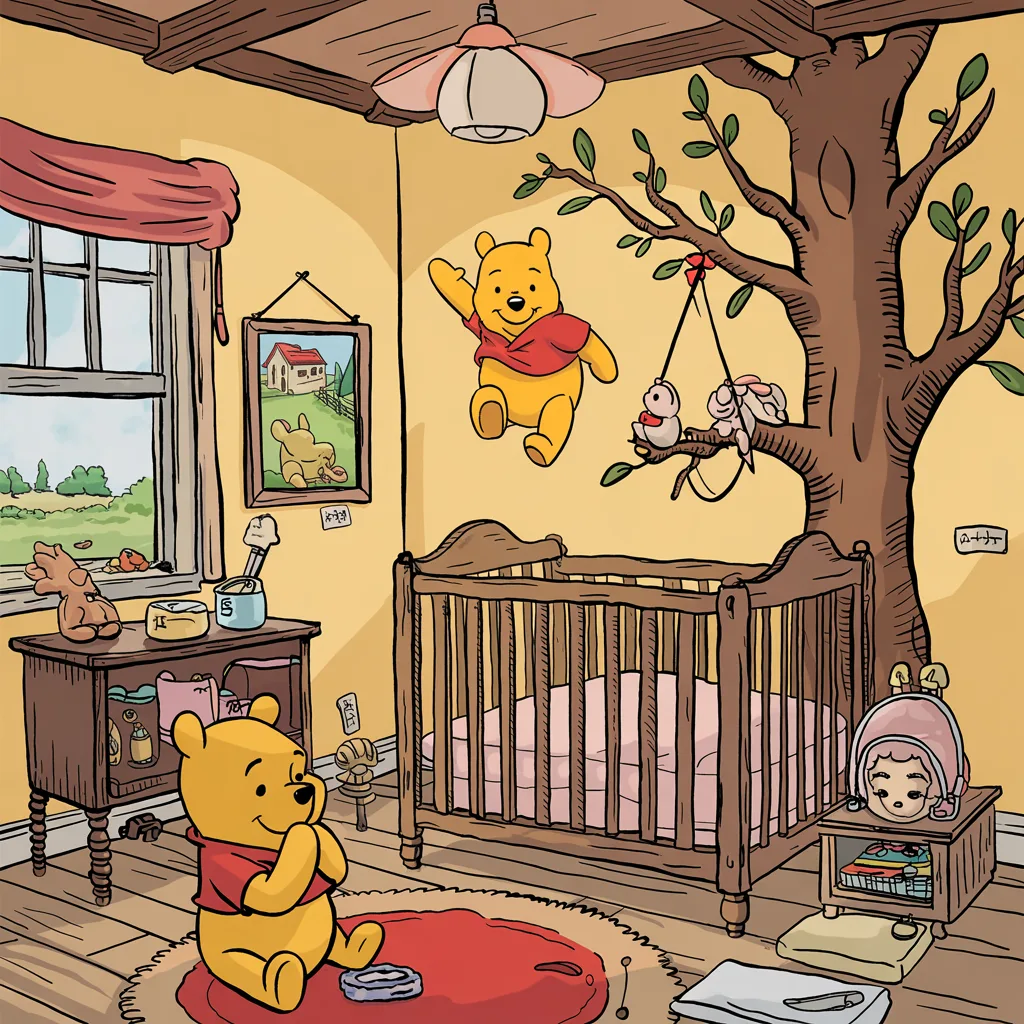
Walls That Wow: Hundred Acre Wood Backdrops
The walls of your nursery provide the perfect canvas for bringing the Hundred Acre Wood to life.
Paint Color Ideas
Create the perfect backdrop with these Winnie the Pooh-inspired paint colors:
- Honey Warmth: Benjamin Moore “Hawthorne Yellow” or Sherwin Williams “Decisive Yellow”
- Piglet Pink: Behr “Carnation Bloom” or Valspar “Ballet Slipper”
- Hundred Acre Green: Sherwin Williams “Contented” or Benjamin Moore “Fernwood Green”
- Eeyore Blue: Behr “Bluebird” or Benjamin Moore “Blue Heather”
- Christopher Robin Cream: Sherwin Williams “Creamy” or Valspar “Du Jour”
For a subtle approach, paint three walls in a neutral shade and create an accent wall with a stronger color from your palette.
Wall Murals
Transform an entire wall into a Hundred Acre Wood scene:
- Full woodland scene – Complete with character favorites and iconic elements like the honey tree and wooden bridge
- Character vignettes – Focused scenes of Pooh and friends in key moments
- Abstract landscapes – Gentle rolling hills and stylized trees for a modern interpretation
Wall murals can be professionally painted, purchased as wallpaper panels, or applied as oversized decals.
Wallpaper Wonders
Wallpaper offers pattern consistency and professional results:
- Subtle patterns – Tiny honey bees, small Pooh silhouettes, or honeycomb designs
- Character repeats – Classic Pooh illustrations in a tasteful repeat
- Storybook panels – Pages from the original books enlarged as feature walls
Removable wallpaper is ideal for renters or those who may want to update the room as the child grows.
Wall Decals & Stickers
For flexibility and easy application:
- Character decals – Place Pooh and friends throughout the room
- Quote decals – “How lucky I am to have something that makes saying goodbye so hard”
- Tree decals – Create a dimensional woodland with strategically placed trees
- Customizable scenes – Build your own arrangement with individual elements
Recommended Product: RoomMates “Winnie the Pooh Classic” peel and stick wall decals offer repositionable design flexibility.
Framed Art & Prints
Curate a gallery wall with these art options:
- Original E.H. Shepard illustrations
- Watercolor Hundred Acre Wood maps
- Typography featuring Pooh quotes
- Vintage book covers framed as art
- Character sketches in matching frames
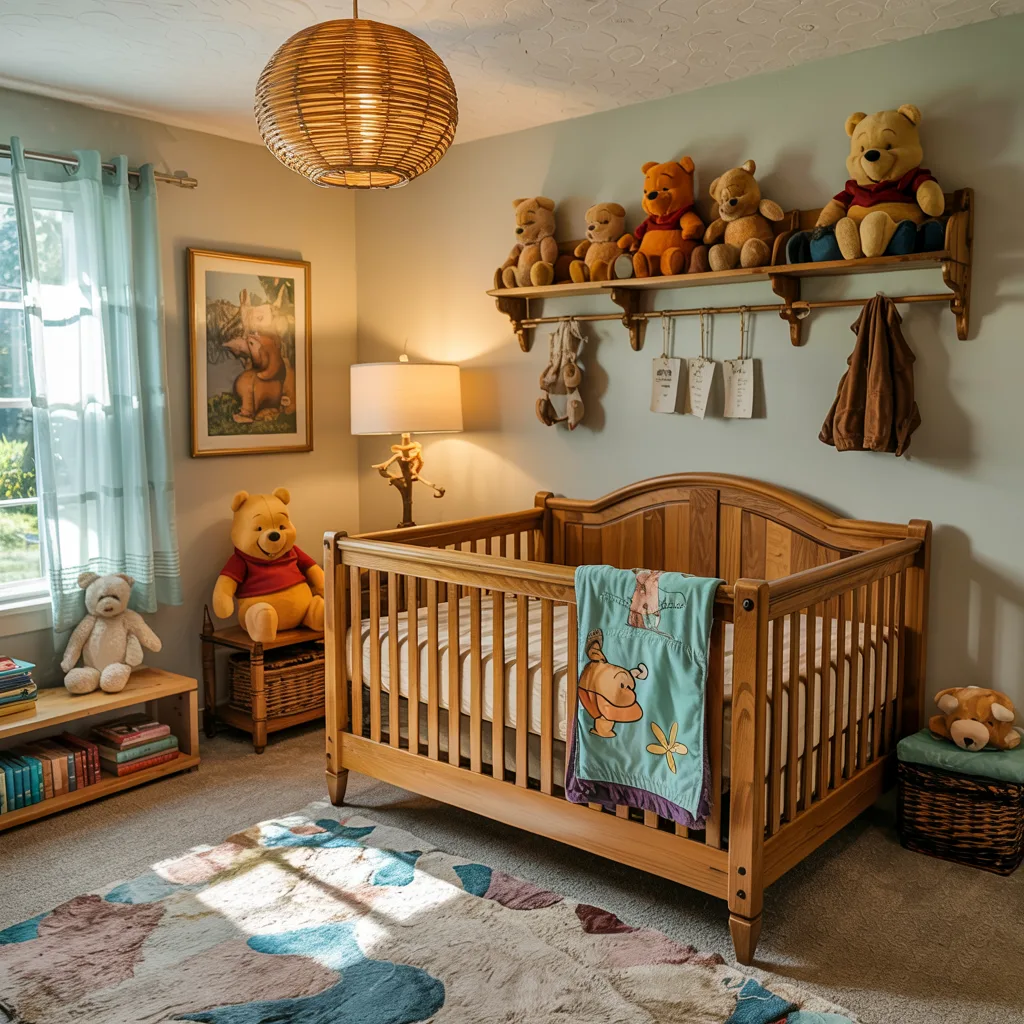
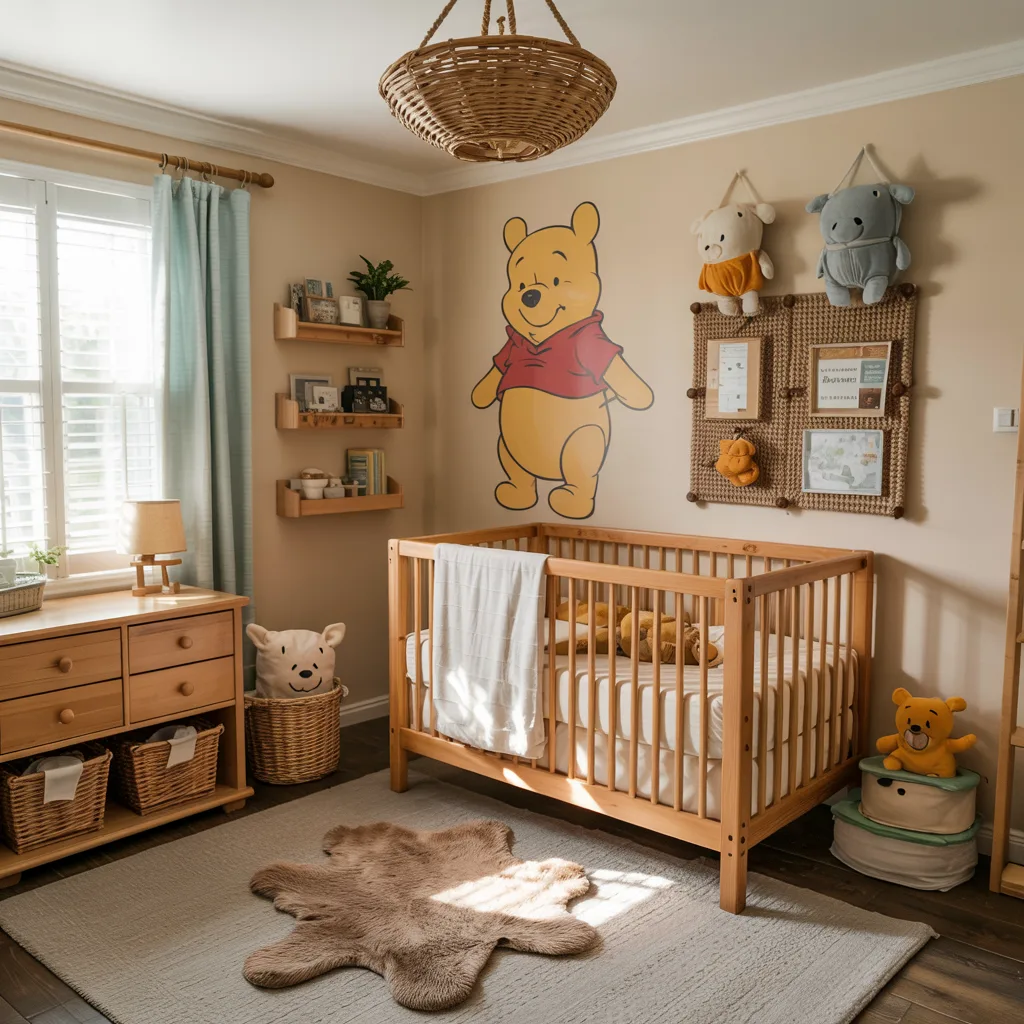
Furnishing Your Cozy Corner
Select furniture that complements your Winnie the Pooh theme while providing functionality.
Crib Choices
The crib serves as the centerpiece of your classic Pooh nursery decor:
- Natural wood finish – Echoes the woodland setting of the stories
- White cribs – Provide a clean backdrop for colorful Pooh accents
- Honey-toned wood – Reinforces the color story
- Convertible options – Grow with your child from infancy to toddlerhood
Add subtle theme elements with Pooh-themed crib sheets or a character mobile rather than choosing a character-branded crib.
Dresser & Changing Table Ideas
Functional furniture can incorporate theme elements through:
- Honey pot knobs or drawer pulls
- Character decals applied to drawer fronts
- Coordinating changing pad covers with Pooh motifs
- Framed character art positioned above
Rocking Chair / Glider Sanctuary
Create a comfortable reading nook:
- Choose upholstery that complements your color palette
- Add a small side table for bedtime story books
- Include a Pooh-themed throw pillow or blanket
- Position a bookshelf within arm’s reach filled with A.A. Milne classics
Bookshelves & Storage
Organize with style:
- Floating shelves – Display Pooh figurines and books face-out
- Honeycomb shelving – Hexagonal wall shelves for a thematic touch
- Character bookends – Hold cherished stories between Pooh and friends
- Storage bins – Fabric cubes with character appliqués or woodland designs
Storage Tip: Label bins with character faces – Pooh for stuffed animals, Rabbit for blocks, Owl for books – to create an organizational system that’s both functional and themed.
Sweet Dreams: Bedding & Textiles
Soft textiles add comfort while reinforcing your Winnie the Pooh theme.
Crib Bedding Sets
Choose from a variety of styles:
- Classic Pooh Collection – Features vintage Shepard illustrations on soft cream backgrounds
- Hundred Acre Wood Set – Focuses on woodland elements with character accents
- Modern Character Approach – Clean designs with simple character silhouettes
- Quote-Focused Linens – Bedding featuring beloved Pooh wisdom
Remember to follow safe sleep guidelines with appropriate fitted sheets and sleep sacks rather than loose blankets for infants.
Blankets & Swaddles
Add warmth and theme consistency:
- Muslin swaddles with tiny Pooh prints
- Plush character blankets for tummy time
- Quilts featuring story scenes for wall display (not sleep)
- Knit throws with subtle honeycomb patterns
Curtains & Window Treatments
Frame the window with:
- Simple solid curtains in a palette-appropriate shade
- Subtle bee or honeycomb patterned fabrics
- Roman shades with character silhouettes
- Valances featuring small character prints
Design Tip: For a gender-neutral Winnie the Pooh nursery, focus on patterns and scenes rather than character-specific colors.
Nursery Rugs
Ground the space with:
- Round honey-colored rugs
- Woodland scene area rugs
- Character shaped accent rugs
- Subtle bee or honeycomb patterns
- Soft, neutral bases with small character details
Delightful Decor & Accessories
The finishing touches bring your Winnie the Pooh baby room to life.
Mobiles
Soothe baby with overhead movement:
- Classic character – featuring Pooh, Piglet, Tigger, and Eeyore
- Balloon themed – referencing Pooh’s honey pot balloon adventures
- Hundred Acre elements – honey pots, bees, and butterflies
- Musical options – playing the Winnie the Pooh theme song
DIY Option: Create a custom mobile using small stuffed characters or felt cutouts suspended from a wooden embroidery hoop.
Lighting
Set the perfect ambiance:
- Character table lamps – Classic Pooh base with neutral shade
- Honey pot night lights – Soft glow for midnight feedings
- Woodland projectors – Cast forest scenes on the ceiling
- String lights – Bee or balloon shaped for whimsical overhead lighting
Shelving Decor
Accessorize shelves with:
- Classic Pooh figurine sets
- Vintage honey pots
- Small stuffed characters
- Wooden blocks spelling “Pooh” or baby’s name
- Snow globes featuring beloved scenes
Personalized Touches
Make the space unique:
- Name signs incorporating character elements
- Custom artwork featuring baby with Pooh
- Handcrafted story-inspired elements
- Growth charts with Hundred Acre Wood themes
- Memory books styled after Pooh’s adventures
Get Crafty: DIY Winnie the Pooh Nursery Ideas
Add personal touches with these doable DIY projects.
| Project | Difficulty | Materials | Estimated Cost |
|---|---|---|---|
| Framed Pooh Quotes | Easy | Frames, cardstock, calligraphy pens | $15-30 |
| Character Felt Mobile | Moderate | Felt, embroidery hoop, fishing line | $20-40 |
| Painted Honey Pot Storage | Easy | Terracotta pots, yellow paint, black marker | $10-25 |
| Custom Drawer Knobs | Easy | Wooden knobs, character images, Mod Podge | $15-30 |
| Hundred Acre Wood Map | Moderate | Canvas, paints, reference image | $30-50 |
Simple Wall Art
Create custom artwork by:
- Framing quotes from the stories in complementary fonts
- Painting simple character silhouettes on canvas
- Creating a series of small honey pot paintings
- Tracing and coloring book illustrations onto quality paper
DIY Mobile Components
Craft a custom overhead attraction:
- Cut character shapes from felt or lightweight wood
- Use an embroidery hoop as the mobile base
- Add clouds, honey pots, or balloons as accent elements
- Balance the pieces carefully for proper rotation
Custom Storage Bin Labels
Organize with character:
- Print character images on cardstock
- Laminate for durability
- Attach to fabric bins with decorative ribbon
- Group toys by character or function
Hand-painted Drawer Knobs
Upgrade furniture with:
- Wooden knobs painted in character colors
- Decoupage character faces from book illustrations
- Simple honey pot or beehive shapes in yellow and black
- Small woodland elements like butterflies or trees
Bringing Characters to Life (Subtly or Boldly)
Each character from the Hundred Acre Wood brings unique elements to your nursery design:
Winnie the Pooh
- Honey pots
- Red shirts
- “Hunny” typography
- Golden yellow tones
Piglet
- Soft pink accents
- Striped elements
- Small butterfly motifs
- Friendship quotes
Tigger
- Playful orange and black stripes
- Bouncy decorative elements
- Energetic patterns
- “The wonderful thing about Tiggers” quotes
Eeyore
- Subtle blue elements
- Thistles as decorative motifs
- Rain cloud imagery
- Contrasting patches
Balance Tip: Choose one or two featured characters for focus areas, while incorporating others more subtly throughout the space.
Shopping Guide: Where to Find Winnie the Pooh Nursery Items
Sources for quality Pooh nursery elements span from major retailers to handmade marketplaces:
Major Retailers
- Pottery Barn Kids – Higher-end classic Pooh bedding and decor
- Target – Affordable character bedding and accessories
- Amazon – Wide variety of decor items across price points
- Buy Buy Baby – Quality nursery furniture with Pooh accessories
- Walmart – Budget-friendly character bedding sets
Specialty Shops
- Disney Store – Official merchandise with seasonal collections
- Etsy – Handmade custom items and vintage finds
- Wayfair – Diverse decor options and furniture
- Redbubble – Unique artist-designed prints and accessories
- Society6 – Artistic interpretations on various products
Best Items By Category
Bedding:
- Lambs & Ivy “Honey Bear” 3-piece set (Amazon)
- Disney Classic Pooh 4-piece crib set (Disney Store)
- Trend Lab Winnie the Pooh fitted crib sheet (Buy Buy Baby)
Wall Decor:
- RoomMates Winnie the Pooh decals (Target)
- Classic Pooh art prints (Etsy)
- Hundred Acre Wood map canvas (Society6)
Furniture & Storage:
- Delta Children Winnie the Pooh storage bin (Walmart)
- Honey-colored Hampshire bookcase (Pottery Barn Kids)
- Classic Pooh toy chest (Wayfair)
Planning Your Pooh Nursery on a Budget
Create a charming Winnie the Pooh nursery without breaking the bank:
Focus Investment Pieces:
- Quality crib that converts to toddler bed
- Comfortable glider for feeding and reading
- One statement wall treatment (mural or quality decals)
Save On:
- DIY wall art instead of expensive prints
- Thrifted furniture refreshed with new hardware
- Digital downloads printed locally instead of pre-framed art
- Seasonal sales at major retailers (Disney Store quarterly events)
Money-Saving Tips:
- Choose a neutral furniture base that can transition beyond the theme
- Create a Pooh-themed gift registry to help complete the space
- Start with a simplified version and add elements over time
- Shop secondhand for vintage Pooh items with character
- Focus the theme on textiles and art rather than permanent fixtures
FAQ: Your Winnie the Pooh Nursery Questions Answered
Is Winnie the Pooh gender-neutral for a nursery? Yes! The Winnie the Pooh universe features a balanced color palette and themes of friendship, adventure, and wisdom that work beautifully for any child. The classic illustrations particularly offer a timeless, gender-neutral aesthetic.
What are the main colors for a Pooh nursery? Traditional Pooh nurseries feature honey yellow, soft green, sky blue, and cream as primary colors. Modern interpretations might include light gray, white, mustard yellow, and gentle woodland tones.
Can a Pooh theme look modern? Absolutely! Focus on abstract elements like honeycomb patterns, simplified silhouettes, typography-based quotes, and a clean color palette with strategic pops of honey yellow for a contemporary Pooh nursery.
Where can I find classic Pooh illustrations for decor? Look for vintage book reprints, official Disney Classic Pooh collections, Etsy shops specializing in E.H. Shepard illustrations, and specialty children’s bookstores that carry art prints.
How can I create a Pooh nursery that grows with my child? Choose quality furniture in neutral finishes, incorporate Pooh elements through easily changeable items like wall art and textiles, and select quotes and themes that remain relevant beyond babyhood.
Conclusion
Creating a Winnie the Pooh nursery offers the perfect blend of nostalgia, whimsy, and heartwarming comfort for welcoming your little one. Whether you prefer the classic charm of original illustrations, a modern minimalist approach, or a vibrant character-focused space, the Hundred Acre Wood provides endless inspiration for a nurturing environment.
The timeless wisdom and gentle adventures of Pooh and friends create more than just a beautiful space—they lay the foundation for years of storytime, imagination, and the simple joys of childhood. As A.A. Milne wrote, “Sometimes the smallest things take up the most room in your heart,” and a thoughtfully designed Winnie the Pooh nursery will certainly hold a special place in your family’s memories.
Which Winnie the Pooh nursery idea speaks most to your heart? Will you embrace the classic illustrations or opt for a contemporary interpretation? Share your own Pooh nursery plans or photos in the comments below!

the Mommy or Daddy Baby Shower Game (FREE Printable Questions!)
Looking for a guaranteed hit at your upcoming baby shower? The mommy or daddy baby shower game is one of the most popular activities for good reason! This hilarious and engaging game not only breaks the ice but also celebrates both parents-to-be in a fun, interactive way.
Whether you call it “Mom vs. Dad,” “He Said/She Said,” or simply the “Mommy or Daddy game,” this activity creates memorable moments and lots of laughter. In this comprehensive guide, I’ll walk you through everything you need to know about this classic baby shower game—from setup to execution, plus a FREE printable question list you can download right now!
Table of Contents
What is the Mommy or Daddy Baby Shower Game?

The mommy or daddy baby shower game is an entertaining activity where guests guess which parent is more likely to do certain things once the baby arrives (or which one has done certain things in the past). The mom-to-be and dad-to-be answer questions about themselves, revealing sometimes surprising and often hilarious insights about their relationship and future parenting styles.
This versatile game comes in several variations, but the core concept remains the same: questions are asked, and everyone discovers who’s most likely to handle midnight feedings, who’s the better diaper changer, or who’s more likely to cry at the first day of school!
Why Play This Game at Your Baby Shower?

The popularity of the Mom vs. Dad baby shower game isn’t just about tradition—it offers several benefits that make it perfect for any celebration:
- Includes both parents: Unlike some traditional games, this one puts both mom and dad in the spotlight
- Easy to set up: Requires minimal preparation and materials
- Adaptable: Works for large or intimate gatherings, formal or casual events
- Great icebreaker: Gets guests laughing and engaged
- Budget-friendly: Can be completely free or dressed up with simple props
- Creates memories: Provides fun predictions that the couple can look back on after baby arrives
As one happy host shared: “This game had everyone in stitches at my sister’s shower! Even the grandparents-to-be were placing bets on the answers. Definitely the highlight of our afternoon!”
How to Play: Step-by-Step Instructions
There are several ways to play the mommy or daddy game. Here are the three most popular variations:
1. The Shoe Game (Back-to-Back Version)
This interactive version creates a fun visual spectacle for guests.
Materials needed:
- Two chairs placed back-to-back
- List of questions
- Props (optional): the parents’ actual shoes, signs, or paddles labeled “Mom” and “Dad”
Steps:
- Have the parents-to-be sit in chairs with their backs to each other (so they can’t see each other’s answers)
- Give each parent their own shoe and their partner’s shoe (or alternative props)
- The host reads questions from the list
- For each question, the parents raise either their own shoe or their partner’s shoe to indicate their answer
- Guests laugh at matching or contradicting answers
- Optional: Keep score of matching answers for a sweet conclusion
2. The Paddle Version
This streamlined version works well for any setting.
Materials needed:
- Two chairs (parents can sit side-by-side)
- Two paddles or signs (one labeled “Mom”/”Mommy” and one labeled “Dad”/”Daddy”)
- List of questions
Steps:
- Give each parent-to-be both paddles
- Host reads questions aloud
- Parents hold up the paddle indicating their answer
- Delight in the matching or conflicting responses!
3. The Written Version
Perfect for larger gatherings where visibility might be an issue.
Materials needed:
- Printed questionnaires for all guests
- Pens or pencils
- Answer key from the parents-to-be (collected beforehand)
Steps:
- Distribute questionnaires to all guests
- Guests circle who they think is more likely to do each item
- The host reads the actual answers provided by the parents
- Guests score their own sheets
- Award a prize to the guest with the most correct answers
The MOST Important Part: The Questions!
The success of your mommy or daddy baby shower game depends largely on having great questions. Here’s an extensive list organized by category:
Funny Questions
- Who will be more likely to forget the diaper bag?
- Who will take more selfies with the baby?
- Who’s more likely to use baby talk?
- Who will be more protective with potential future dates?
- Who will be more likely to fall asleep while feeding the baby?
- Who’s more likely to buy unnecessary baby gadgets?
- Who will share more embarrassing baby photos on social media?
- Who’s more likely to call the pediatrician for minor concerns?
- Who will be more creative with excuses to get out of diaper duty?
- Who’s more likely to accidentally dress the baby in mismatched outfits?
Sweet/Sentimental Questions
- Who said “I love you” first?
- Who is more emotional?
- Who will cry more on the first day of school?
- Who will be more likely to check on the baby while sleeping?
- Who will take more baby photos?
- Who’s more excited about becoming a parent?
- Who will be more strict about bedtime?
- Who will read more bedtime stories?
- Who will be more protective?
- Who will be the softer parent (easier to convince)?
Baby-Related Questions
- Who will change more diapers?
- Who will be better at soothing the baby?
- Who picked the baby’s name?
- Who will do more middle-of-the-night feedings?
- Who will be more likely to rock the baby to sleep?
- Who’s more likely to buy too many baby clothes?
- Who will be better at assembling baby furniture?
- Who will be more organized with baby supplies?
- Who will be more likely to research parenting techniques?
- Who will be stricter about what the baby eats?
Future Predictions
- Who will be the disciplinarian?
- Who will be more likely to give in to “just 5 more minutes”?
- Who will be the fun parent?
- Who will be more likely to teach life skills?
- Who will help more with homework?
- Who will be more likely to plan elaborate birthday parties?
- Who will be stricter about screen time?
- Who will be more involved in PTA/school activities?
- Who will embarrass the child more during teenage years?
- Who will be better at giving advice about relationships?
Childhood/Past Questions
- Who was the pickier eater as a child?
- Who had the messier room growing up?
- Who had better grades in school?
- Who was more rebellious as a teenager?
- Who had more childhood pets?
- Who learned to drive first?
- Who was more athletic growing up?
- Who had the more embarrassing childhood haircut?
- Who had the stricter parents?
- Who was more shy as a child?
Pro Tip: Choose 10-15 questions from different categories for a well-balanced game that takes about 15-20 minutes to play—the perfect length to keep everyone engaged without dragging on too long.
Tips for Writing Your Own Questions
Want to create custom questions tailored to the parents-to-be? Here are some guidelines:
- Consider their relationship: Include inside jokes or references to their unique story
- Balance humor and sentiment: Mix lighthearted questions with meaningful ones
- Know your audience: Ensure questions are appropriate for all guests present
- Avoid controversial topics: Steer clear of potentially divisive parenting approaches
- Use a question formula: “Who is more likely to…” or “Who will…” makes writing questions easy
FREE Printable Question List
Ready to play? Click the button below to download our free printable mommy or daddy baby shower game questions! We’ve designed them in three different styles to match any baby shower theme:
- Classic Minimalist: Clean, simple design that works with any decor
- Sweet Floral: Beautiful botanical design perfect for garden-themed showers
- Modern Gender-Neutral: Contemporary design in soothing colors
Each printable includes 30 pre-selected questions and blank spaces to add your own custom questions.
[DOWNLOAD FREE PRINTABLES HERE]
Fun Variations & Twists
Want to make your mommy or daddy baby shower game even more memorable? Try these creative twists:
Video Answers
Record the dad-to-be answering the questions beforehand (especially if he can’t attend). Play the video after the mom-to-be gives her answers for extra surprise and laughter.
Guest Predictions
Before revealing the parents’ answers, have guests vote on what they think each parent will say. Award small prizes for the most accurate predictions.
Themed Questions
Tailor your questions to match your shower theme:
- Sports theme: Who will coach the baby’s first sports team? Who’s more competitive?
- Book theme: Who will read more bedtime stories? Who had the favorite childhood book?
- Animal theme: Who’s more likely to bring home a pet without discussing it first?
Lightning Round
End with rapid-fire questions where parents must answer immediately without thinking—often revealing hilarious truths!
Adapting for Virtual Baby Showers
Hosting a virtual celebration? The mommy or daddy baby shower game translates beautifully to online formats:
- Use virtual backgrounds: Create “Mom” and “Dad” Zoom backgrounds parents can switch between to indicate their answers
- Digital paddles: Parents can hold up digital signs to their cameras
- Online polls: Create polls in your video platform for guests to guess answers
- Shared document: Use a shared spreadsheet where everyone can record their predictions
Tips for the Host
As someone who has facilitated countless baby shower games, here’s my best advice:
- Practice reading the questions beforehand so you can deliver them clearly
- Appoint a score keeper if you’re tracking correct answers
- Have the parents review questions in advance to ensure they’re comfortable with all topics
- Space out sentimental questions between funny ones to maintain a good emotional flow
- Remember the purpose: This game is about celebrating the parents and creating memories, not competition
Conclusion
The mommy or daddy baby shower game stands the test of time because it brings genuine joy, laughter, and connection to baby celebrations. It highlights the partnership of parenting while creating lasting memories for everyone involved.
Whether you choose the shoe game, paddle version, or written format, this activity is guaranteed to be a highlight of your baby shower. Don’t forget to download our free printable question sets to make your planning even easier!
Have you played the Mom vs. Dad baby shower game before? What questions got the biggest laughs? Share your experiences in the comments below!

What to Wear to a Baby Shower Guest Outfits & Etiquette
Receiving a baby shower invitation is exciting—it means celebrating a new life and the parents-to-be! But it also brings that age-old question: “What should I wear?” Whether you’re attending your first baby shower or your fifteenth, choosing the right outfit can feel surprisingly challenging. You want to look appropriate, feel comfortable, and help celebrate the mom-to-be without stealing any spotlight.
In this comprehensive guide, I’ll walk you through everything you need to know about baby shower guest outfits—from seasonal considerations to venue-appropriate attire and etiquette dos and don’ts. By the end, you’ll have all the information you need to show up looking stylish, feeling confident, and ready to celebrate!
Table of Contents
Key Factors to Consider Before Choosing Your Outfit

Before diving into specific outfit recommendations, let’s cover the crucial factors that should influence your baby shower attire decision:
Season & Weather
The time of year plays a significant role in what you should wear:
Spring: Embrace lighter fabrics like cotton blends and chiffon. Pastel colors and floral prints work beautifully, and you can layer with a light cardigan if needed.
Summer: Opt for breathable, lightweight fabrics such as cotton, linen, or rayon. Sleeveless dresses, breezy skirts, and bright colors are perfect for staying cool while looking festive.
Fall: Rich autumn colors (burgundy, mustard, forest green) pair well with light layers. Consider knit dresses, slacks with blouses, and closed-toe shoes.
Winter: Choose richer fabrics like velvet accents or heavier cotton blends. Long sleeves, warm-toned colors, and dressy boots can keep you warm while looking appropriate.
Venue & Formality
The location significantly impacts your outfit choice:
Home gatherings: These tend to be more casual. A sundress or nice jeans with a blouse would be appropriate.
Restaurant brunch: Smart casual is typically expected—think dressy pants with a nice top or a casual dress.
Event hall or upscale venue: These call for semi-formal attire like cocktail dresses, jumpsuits, or dressy separates.
Outdoor settings: Consider practical elements like grass (avoid stilettos) or sun exposure (bring a hat or light wrap).
Time of Day
Morning and afternoon events generally call for lighter, more casual looks, while evening showers—especially co-ed ones—might warrant slightly dressier attire.
Check the Invitation for Dress Code
Always look for explicit dress code mentions or subtle clues on the invitation. Themed showers (like “Garden Party” or “Tea Time”) offer helpful hints about expected attire.
Prioritize Comfort
Baby showers typically involve sitting for extended periods, playing games, and mingling. Choose outfits that:
- Allow you to sit comfortably
- Provide enough coverage when bending or reaching
- Won’t require constant adjusting
Consider the Mom-to-Be’s Style
While this isn’t mandatory, it can be thoughtful to consider the expectant mother’s general style vibe. If she’s more traditional, ultra-casual attire might feel out of place, while extremely formal wear might seem overdone for a laid-back mom-to-be.
Perfect Baby Shower Guest Outfit Ideas
Dresses: The Go-To Choice
Dresses are the most popular baby shower guest attire—and for good reason! They’re feminine, put-together, and require minimal styling.
Floral Prints: A perennial favorite that feels celebratory and seasonally appropriate. Choose smaller prints for a more sophisticated look.
Pastel Solids: Soft blues, pinks, lavenders, and mint greens all convey the celebratory nature of a baby shower.
Wrap Dresses: These flattering dresses work on nearly every body type and offer adjustable comfort.
A-Line Silhouettes: The slight flare from the waist creates a universally flattering shape that’s both comfortable and elegant.
Midi/Maxi Lengths: These longer hemlines offer sophistication and prevent any awkward moments during shower games.
Jumpsuits & Rompers: Chic Alternatives
For those who prefer pants over dresses, jumpsuits and rompers offer a fashion-forward alternative:
Wide-leg jumpsuits: These create an elegant, dress-like silhouette while providing the comfort of pants. Look for lightweight fabrics like crepe or cotton blends.
Tailored rompers: More appropriate for casual, warm-weather showers. Ensure the length is appropriate (not too short) and pair with a light cardigan or blazer for added polish.
Stylish Separates: Mix and Match Magic
Separates offer versatility and can be just as appropriate as dresses when styled thoughtfully:
Midi skirts + Blouses: A flowy midi skirt paired with a tucked-in blouse creates a feminine, put-together look.
Dressy trousers + Tops: Wide-leg or tailored pants with a silky blouse or structured top work well for more formal settings.
Blazer + Dress pants: For co-ed or evening showers, a colored blazer with tailored dress pants offers sophistication.
Outfit Ideas by Season
SeasonOutfit IdeasFabric SuggestionsColor PaletteSpringFloral wrap dress, Pastel blazer with slacksCotton, Chiffon, Light knitsPastels, Soft greens and bluesSummerSleeveless sundress, Linen jumpsuitLinen, Lightweight cotton, RayonBright colors, White (as accents)FallSweater dress, Slacks with blouse and cardiganMedium-weight cotton, Light wool blendsBurgundy, Mustard, Navy, RustWinterLong-sleeve dress with tights, Velvet-accented outfitVelvet touches, Heavier cottons, Wool blendsDeep jewel tones, Winter white, Emerald
What NOT to Wear to a Baby Shower

Understanding what to avoid is just as important as knowing what works:
- All-white outfits – This color is traditionally reserved for the mom-to-be (similar to avoiding white at weddings)
- Overly revealing clothing – Low-cut tops, very short skirts, or extremely tight clothes aren’t appropriate for family-friendly celebrations
- Clubwear or excessive sequins – Save these statement pieces for evening events
- All-black ensembles – While black pieces can work, an all-black outfit might feel too somber (consider adding colorful accessories)
- Graphic tees or ripped jeans – Even casual showers usually call for slightly elevated attire
- Uncomfortable shoes – You’ll likely be standing, mingling, and playing games
- Overpowering perfume – Many pregnant women have heightened sensitivity to scents
Accessorizing Your Baby Shower Look
Shoes
- Wedges or block heels: Offer height without sinking into grass at outdoor venues
- Dressy flats: Comfortable for long periods of standing/sitting
- Stylish sandals: Perfect for warm-weather showers (ensure they’re dressy, not beach flip-flops)
- Ankle boots: Great for fall/winter showers with dresses or pants
Bags
- Clutch: Elegant for formal venues
- Crossbody: Keeps hands free for games and food
- Small tote: Appropriate for daytime events if you need to carry more items
Jewelry
Choose pieces that complement—not overpower—your outfit. Delicate necklaces, stud earrings, or a statement bracelet (but not all three!) create a balanced look.
Outerwear
- Cardigans: Perfect layering for air-conditioned venues or seasonal transitions
- Blazers: Add structure to casual dresses or pants outfits
- Light jackets: Consider a cropped denim jacket for casual showers or a tailored option for dressier events
Quick Summary
- Choose attire based on season, venue, and time of day
- Dresses, jumpsuits, and stylish separates are all excellent options
- Avoid wearing all-white, overly revealing clothes, or extremely casual attire
- Prioritize comfort—you’ll be sitting, mingling, and playing games
- Accessories should complement your outfit and be appropriate for the venue
- Consider the mom-to-be’s style when selecting your outfit
Baby Shower Guest Outfit FAQ
Q: Can I wear jeans to a baby shower? A: Generally, regular jeans are too casual unless the invitation specifically mentions casual attire. If you must wear denim, choose dark-wash, non-distressed jeans paired with a dressier top and proper accessories.
Q: Is it okay to wear black to a baby shower? A: Black can work when paired with colorful accessories or as part of a pattern. Avoid head-to-toe black as it can feel too somber for such a celebratory occasion.
Q: Can guests wear white to a baby shower? A: It’s best to avoid all-white outfits as this color is often reserved for the mom-to-be. White as part of a pattern or print is generally acceptable.
Q: What’s the difference between guest attire for a baby shower vs. a bridal shower? A: While both events have similar formality levels, baby shower attire often embraces more playful colors and prints. Bridal showers might lean more toward traditional “wedding adjacent” colors and styles.
Q: How dressy should I be for a baby shower? A: Most baby showers fall somewhere between smart casual and semi-formal. When in doubt, it’s better to be slightly overdressed than underdressed.
Celebrate in Style & Comfort
Remember, the perfect baby shower outfit strikes a balance between looking appropriate for the occasion and feeling comfortable enough to enjoy the celebration. The focus should always be on celebrating the mom-to-be and the new life about to enter the world!
Choose an outfit that makes you feel confident and allows you to fully participate in all aspects of the shower—from heartfelt conversations to silly games. When you feel good in what you’re wearing, you can better focus on what truly matters: celebrating this special time with the parents-to-be!
What’s your go-to baby shower guest outfit? Have you found certain styles or colors that work particularly well? Share your favorites in the comments below!
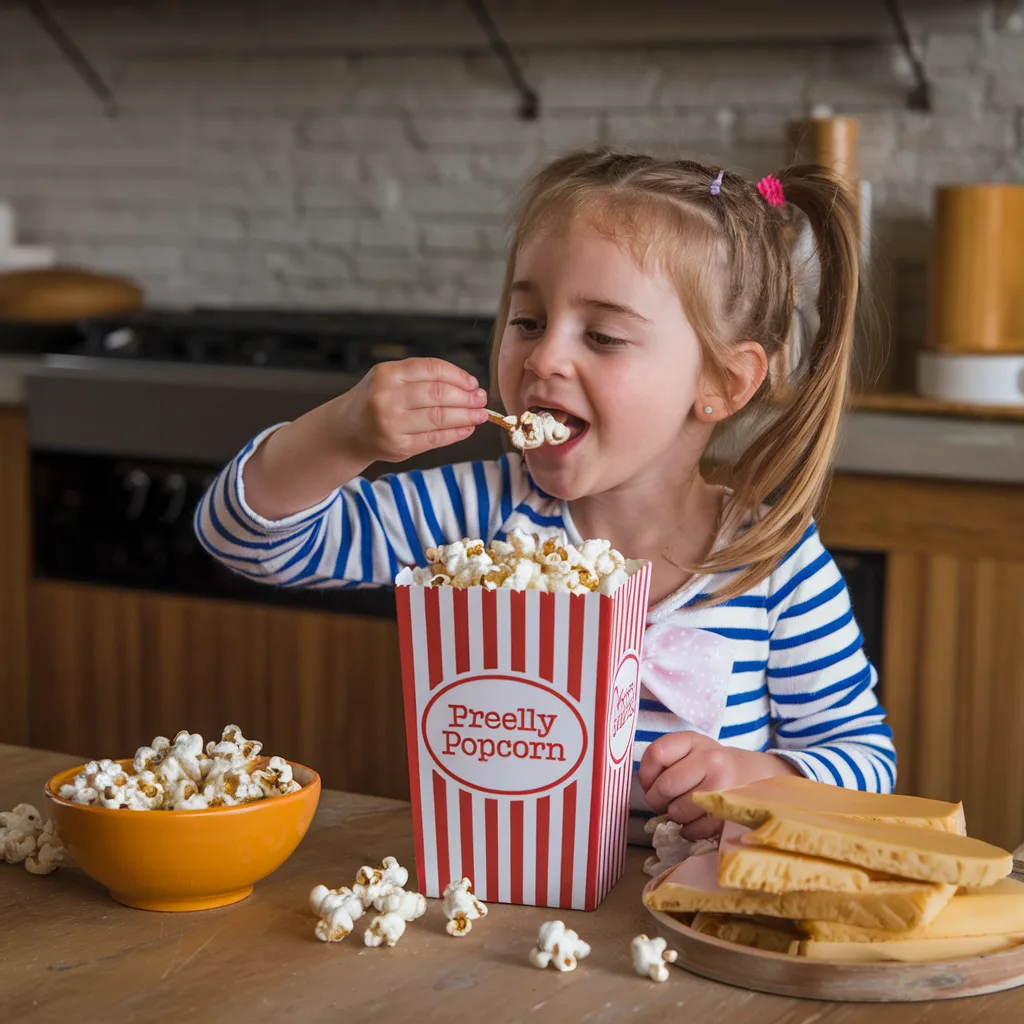
When Can Kids Safely Eat Popcorn?
As a parent, you’re likely wondering When Can Kids Safely Eat Popcorn?—especially if your little one reaches for your movie night snack bowl. It’s a common question with an important answer: most pediatricians and safety experts recommend waiting until children are at least 4-5 years old before introducing popcorn, due to significant choking hazards.
In this comprehensive guide, we’ll explore exactly why popcorn poses risks for young children, when it becomes safer to introduce, and what alternatives you can offer your toddler while waiting for that developmental milestone. As a pediatric nutritionist who’s worked with families for over a decade, I’ll share evidence-based recommendations to help you navigate this common childhood safety concern.
Table of Contents When Can Kids Safely Eat Popcorn?
The Big Risk: Why Popcorn is a Choking Hazard for Young Children
Popcorn ranks among the top choking hazards for children under age 4, and with good reason. Understanding the specific dangers can help clarify why waiting to introduce this snack is so important.
What Makes Popcorn Particularly Dangerous:
- Size and shape: Popped kernels are the perfect size to block a small child’s airway
- Light and airy texture: Children may inhale pieces while laughing or talking
- Hard, unpopped kernels: These can lurk at the bottom of bowls and pose serious risks
- Irregular shapes: The irregular surface can make popcorn difficult to control in the mouth
- Hulls: The thin, sharp edges can stick to the throat and cause discomfort or choking
According to the American Academy of Pediatrics (AAP), popcorn is among the leading food-related choking causes in children under age 5, alongside hot dogs, nuts, seeds, hard candy, and grapes.
“Popcorn is particularly problematic because of its irregular shape and texture, which makes it difficult for young children to chew completely. The unpopped or partially popped kernels present an even greater risk. I’ve treated numerous choking emergencies involving popcorn in my emergency room career, and they’re particularly frightening for parents because the obstruction can happen so suddenly.” — Dr. Melissa Barton, Pediatric Emergency Medicine
What Age Can Kids Safely Eat Popcorn? The Official Guidelines

When determining when kids can eat popcorn safely, experts look at developmental readiness rather than just chronological age. However, clear guidelines do exist:
- American Academy of Pediatrics (AAP): Recommends waiting until at least age 4
- Centers for Disease Control and Prevention (CDC): Lists popcorn as a choking hazard for children under 4
- Many pediatricians: Suggest waiting until age 5 to be even safer
These recommendations are based on children’s developmental milestones in chewing and swallowing:
| Age | Developmental Stage | Popcorn Safety |
|---|---|---|
| 1-2 years | Learning to chew but lacks molars and coordination | High risk – avoid completely |
| 2-3 years | Developing better chewing but still learning | High risk – avoid completely |
| 4-5 years | Usually has full set of primary teeth, better coordination | Lower risk if carefully supervised |
| 5+ years | Generally has mature chewing patterns | Appropriate with normal precautions |
“I look for several developmental markers before recommending popcorn for children: full dentition (especially molars for grinding), consistent ability to chew thoroughly before swallowing, ability to sit still while eating, and the cognitive understanding to follow eating safety instructions. For most children, these skills develop between ages 4 and 5.” — Sarah Johnson, Pediatric Feeding Specialist
Is “Hull-less” Popcorn Safer for Toddlers?
Despite marketing claims, “hull-less” popcorn is not actually hull-free—it simply has smaller, more tender hulls. This variety still poses significant choking risks for young children under 4-5 years.
Key facts about “hull-less” popcorn:
- Still contains hulls, just smaller ones
- Maintains the same dangerous size and shape characteristics
- Can still include unpopped or partially popped kernels
- Is not recommended for children under 4-5, despite packaging that might suggest otherwise
The bottom line: Don’t let packaging mislead you into introducing popcorn earlier than recommended.
What About Popcorn Puffs or Other Corn Snacks?
Parents often wonder about alternatives like puffed corn snacks (such as Pirate’s Booty or cheese puffs), which may seem similar to popcorn but have different safety profiles:
Dissolvable Corn Puffs:
- Dissolve quickly with saliva
- Have a consistent texture without hard pieces
- May be appropriate for toddlers who can manage soft solids (typically around 12+ months)
- Still require supervision and proper sitting position
Corn Chips/Crunchy Corn Snacks:
- Often too hard and sharp for children under 3-4
- May not dissolve easily
- Should be introduced with similar caution as popcorn
Always check the packaging for age recommendations and choking hazard warnings, regardless of the snack type.
Ready to Introduce Popcorn? Safety Tips for Older Kids (Age 4/5+)
When your child reaches the appropriate developmental stage (generally 4-5+ years), here’s how to introduce popcorn safely:
Essential Safety Precautions:
- Always supervise children eating popcorn, even after age 5
- Ensure proper seating – children should always sit upright, not lying down or running
- Remove all unpopped kernels – pre-screen the popcorn before serving
- Start with small amounts to gauge their ability to manage the texture
- Avoid distractions like TV or screens during initial introduction
- Choose plain varieties initially – excess butter or hard seasonings can increase choking risk
- Teach good habits – remind children to chew thoroughly and take small bites
Modified Serving Suggestions:
- Crush popcorn slightly before serving to reduce choking risk
- Consider popcorn that has been popped without hulls or that has softer hulls
- Avoid caramel corn or kettle corn initially, as these harder varieties increase risk
Safer Snack Alternatives for Babies and Toddlers
While waiting for your child to reach the developmental readiness for popcorn, try these safer alternatives that satisfy similar snacking urges:
Age-Appropriate Alternatives:
- 6+ months (with appropriate development)
- Soft, dissolvable puffs designed for babies
- Well-cooked, soft vegetable pieces
- 12+ months
- Cheese crackers that soften quickly
- Freeze-dried fruit that dissolves easily
- Soft fresh fruit in appropriate sizes (banana pieces, ripe pear)
- Yogurt drops or melts
- 2-3 years
- Soft whole grain crackers
- Puffed rice or corn cereals (without hard edges)
- Soft granola bars (without nuts)
- Small pieces of soft bread or toast
Always match snack texture to your child’s current chewing abilities and supervised them during snack time.
Expert Corner: Hear from the Pediatric Specialists
Medical professionals consistently emphasize patience when it comes to introducing potential choking hazards like popcorn:
“Parents often want to share their favorite snacks with their children, which is understandable. However, I always remind families that developmental readiness for foods like popcorn isn’t something we can rush. The risks simply outweigh the benefits when introduced too early. Waiting until age 4-5 is a small delay that significantly reduces a serious safety risk.” — Dr. James Wilson, Pediatrician
“In my practice, I’ve found that parents appreciate clear guidelines. Rather than focusing on what children can’t have, I emphasize the wide variety of safe, nutritious snacks appropriate for each age. Popcorn will still be there when your child reaches the right developmental stage.” — Dr. Amara Lee, Family Medicine
Frequently Asked Questions
Q: Can my 3-year-old eat popcorn if I watch them closely?
A: Even with close supervision, a 3-year-old lacks the necessary oral motor skills to safely manage popcorn. Choking can happen in seconds and sometimes silently, making supervision alone insufficient protection. It’s best to wait until at least age 4-5.
Q: Is microwave popcorn different from air-popped in terms of safety?
A: The preparation method doesn’t change the choking risk. All popcorn—whether air-popped, microwave, or stovetop—presents the same physical hazards. However, microwave popcorn may contain additional chemicals and additives that some parents prefer to avoid for young children.
Q: What should I do if my child chokes on popcorn?
A: Knowledge of infant and child CPR is crucial. If your child is choking and cannot breathe, cough, or speak, immediately perform appropriate back blows and chest thrusts based on their age, and call emergency services (911). For partial airway obstruction where the child can still breathe somewhat, encourage coughing while seeking medical help. Every parent should take a pediatric first aid course to prepare for emergencies.
Q: My child accidentally ate some popcorn before the recommended age. What should I do?
A: Stay calm and observe them closely for any signs of difficulty. If they’ve eaten the popcorn without incident, continue monitoring for delayed reactions like coughing, wheezing, or respiratory issues over the next 24 hours. Contact your healthcare provider if you notice any concerning symptoms. Remember that pieces can sometimes become lodged without immediate obvious signs.
Conclusion: When Can Kids Eat Popcorn Safely?
Understanding when can kids eat popcorn safely is an important part of navigating childhood nutrition and safety. While it may be tempting to introduce this popular snack earlier, the consensus among medical professionals is clear: wait until children are at least 4-5 years old and have developed the necessary skills to handle this challenging food.
Until then, explore the wide variety of age-appropriate alternatives that can satisfy your child’s snacking needs without the associated risks. Remember that each child develops at their own pace, so consult with your pediatrician for personalized guidance about your child’s readiness for popcorn and other potentially challenging foods.
About the Author: Jessica Matthews, MS, RD, is a registered dietitian specializing in pediatric nutrition with over 12 years of experience counseling families on child feeding and safety. She holds a master’s degree in Nutritional Sciences and maintains a private practice focused on early childhood feeding.
This article was medically reviewed by Dr. Robert Chen, MD, FAAP, Board-Certified Pediatrician, on April 10, 2025.
References:
- American Academy of Pediatrics. (2023). Prevention of Choking Among Children. Pediatrics, 145(6).
- Centers for Disease Control and Prevention. (2024). Choking Hazards for Children.
- Nationwide Children’s Hospital. (2024). Choking Hazards: Food Can Cause Choking.
- American Academy of Pediatrics. (2024). HealthyChildren.org: Choking Prevention.
- Pediatric Feeding Specialist Association. (2023). Developmental Stages of Feeding.
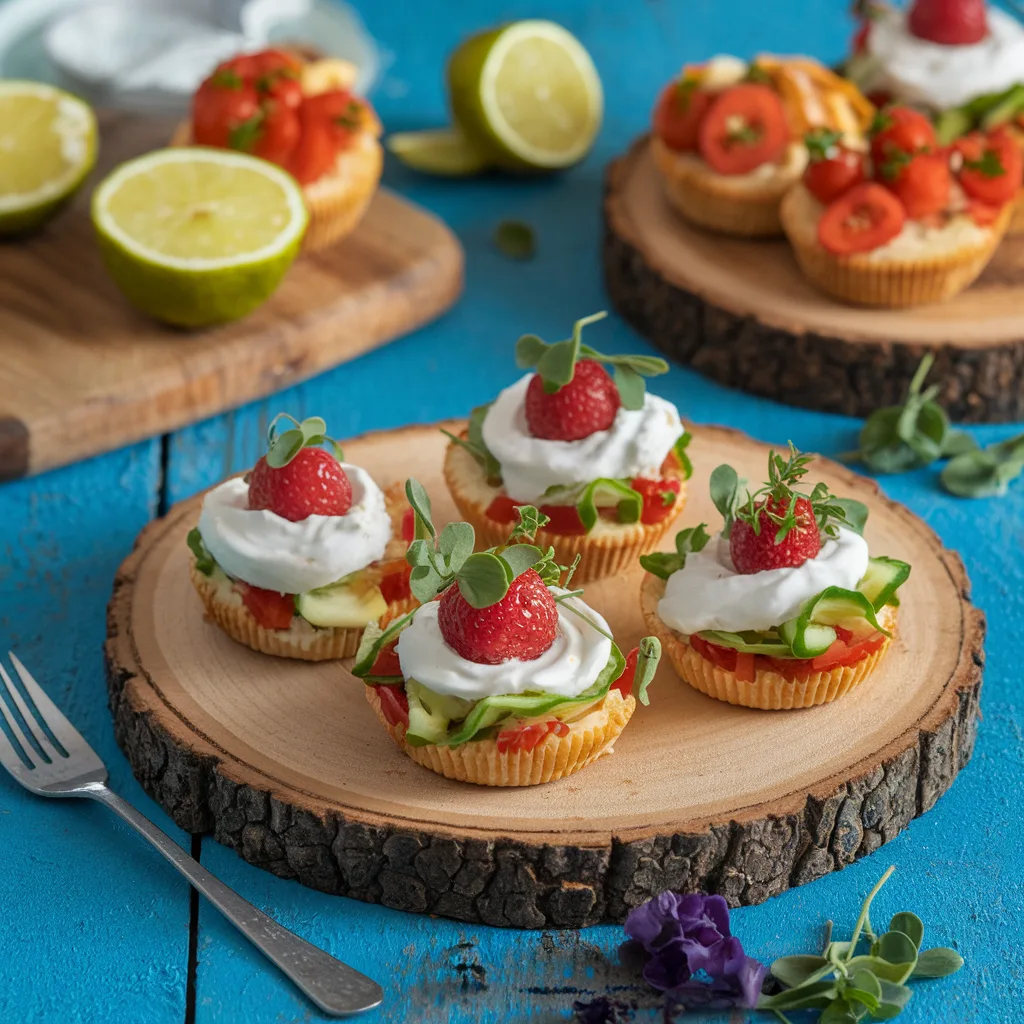
50+ Delicious & Easy Kid-Friendly Appetizers
Finding appetizers that children will actually eat can feel like an impossible mission. Between picky eating phases, texture sensitivities, and the eternal struggle to incorporate vegetables, many parents find themselves stuck in a chicken nugget loop. But the world of kid-friendly appetizers is vast and exciting—filled with opportunities to expand palates while still keeping little ones happy.
As a food blogger who’s spent years developing and testing recipes with my own little food critics, I’ve compiled this comprehensive guide to help you discover appetizers that are not only child-approved but also nutritionally balanced, easy to prepare, and perfect for various occasions—from everyday snacking to birthday celebrations.
Whether you’re looking for healthy kid-friendly appetizers, quick finger foods for kids parties, or toddler appetizers that won’t end up on the floor, this ultimate resource has you covered with over 50 tested and approved options!
Table of Contents
Super Quick & Easy (Under 15 Mins)
When hunger strikes and patience wears thin, these lightning-fast kid-friendly appetizers will save the day.
Ham & Cheese Pinwheels

These colorful spirals combine the classic flavors kids love in an eye-catching package. Simply roll ham, cheese, and a thin layer of cream cheese in tortillas, slice, and serve.
Why Kids Love It: Familiar flavors in a fun spiral shape that’s easy to hold.
Pro Parent Tip: Make a big batch and refrigerate for up to 3 days of ready-to-go snacks.
⏱️ Prep Time: 5 minutes | 🔄 Difficulty: Easy
Cucumber Caterpillars

Transform simple cucumber slices into adorable caterpillars using cherry tomato heads, cream cheese dots for eyes, and carrot slice antennae.
Why Kids Love It: The cute factor makes vegetables suddenly appealing!
Pro Parent Tip: Let kids help with assembly—they’re more likely to eat what they create.
⏱️ Prep Time: 10 minutes | 🔄 Difficulty: Easy
Pizza Toast Bites

Turn whole grain bread into mini pizzas with a smear of sauce, shredded cheese, and tiny toppings cut into fun shapes.
Why Kids Love It: It’s pizza…but faster!
Pro Parent Tip: Use cookie cutters to make the toast bases into stars, hearts, or other shapes before adding toppings.
⏱️ Prep Time: 10 minutes | 🔄 Difficulty: Easy
Yogurt Parfait Cups

Layer vanilla yogurt with fresh berries and granola in clear cups for a healthy, protein-packed appetizer that doubles as a light dessert.
Why Kids Love It: The visible colorful layers make this simple snack seem special.
Pro Parent Tip: Set up a DIY parfait bar and let kids build their own creations.
⏱️ Prep Time: 5 minutes | 🔄 Difficulty: Easy
Healthy & Veggie-Packed Bites
Sneaking nutrition into kid-friendly appetizers doesn’t have to be a struggle! These options make vegetables the star without sacrificing kid appeal.
Rainbow Veggie Skewers

Thread colorful vegetables like cherry tomatoes, cucumber chunks, yellow bell peppers, and purple cauliflower onto child-safe skewers for an appetizer that’s as beautiful as it is nutritious.
Why Kids Love It: The rainbow presentation transforms ordinary veggies into something magical.
Pro Parent Tip: Serve with a variety of dips to increase acceptance—ranch yogurt dip, hummus, and mild guacamole are winners.
⏱️ Prep Time: 15 minutes | 🔄 Difficulty: Easy
Sweet Potato Tot Cups

These baked sweet potato tots served in muffin cups provide a nutrient-dense alternative to traditional tater tots.
Why Kids Love It: The natural sweetness and crispy exterior make these irresistible to little ones.
Pro Parent Tip: Make a double batch and freeze half for busy weeknights.
⏱️ Prep Time: 20 minutes | 🔄 Difficulty: Medium
Cauliflower Popcorn

Roasted cauliflower florets tossed with a light coating of olive oil and parmesan create a crunchy, savory snack reminiscent of popcorn.
Why Kids Love It: The crispy texture and cheesy flavor mask the “vegetable” identity.
Pro Parent Tip: Try different seasoning combinations—taco, ranch, or even cinnamon sugar for a sweet variation.
⏱️ Prep Time: 25 minutes | 🔄 Difficulty: Easy
Avocado Boats

Halved avocados filled with corn salsa, black beans, or cherry tomatoes create nutrient-dense finger food perfect for developing palates.
Why Kids Love It: The interactive “boat” presentation makes healthy eating playful.
Pro Parent Tip: Add a tiny cheese sail on a toothpick to enhance the boat theme.
⏱️ Prep Time: 10 minutes | 🔄 Difficulty: Easy
Cheesy & Crowd-Pleasing Favorites
When in doubt, cheese comes to the rescue! These kid-friendly appetizers leverage the universal appeal of melty, cheesy goodness.
Mini Quesadilla Triangles

Bite-sized quesadilla triangles filled with mild cheese and finely diced vegetables are perfect for little hands.
Why Kids Love It: The crispy exterior and melty cheese interior hit all the right sensory notes.
Pro Parent Tip: Use cookie cutters to create fun shapes before cooking for added appeal.
⏱️ Prep Time: 15 minutes | 🔄 Difficulty: Easy
Mozzarella Stick Coins

Slice string cheese into circles, bread them lightly, and bake until golden for a healthier take on traditional mozzarella sticks.
Why Kids Love It: The pull-apart cheese factor is irresistible to children.
Pro Parent Tip: Freeze breaded cheese coins before baking for a crispier exterior.
⏱️ Prep Time: 20 minutes | 🔄 Difficulty: Medium
Mac and Cheese Bites

Transform leftover macaroni and cheese into baked bites by adding an egg, pouring into mini muffin tins, and baking until golden.
Why Kids Love It: Familiar comfort food transformed into a portable, finger-food format.
Pro Parent Tip: Add finely chopped broccoli or spinach to sneak in vegetables.
⏱️ Prep Time: 30 minutes | 🔄 Difficulty: Medium
Cheesy Puff Stars

Cut puff pastry into star shapes, sprinkle with cheese, and bake for an elegant yet kid-appealing appetizer.
Why Kids Love It: The flaky texture and star shape elevate simple cheese into something special.
Pro Parent Tip: Make a variety of shapes for different occasions—hearts for Valentine’s Day, trees for Christmas.
⏱️ Prep Time: 20 minutes | 🔄 Difficulty: Medium
Make-Ahead Marvels for Parties
Party planning with kids in mind? These kid-friendly party food options can be prepared in advance, freeing you up to enjoy the celebration.
Mini Corn Dog Muffins

Cornbread batter poured over small pieces of hot dog and baked in mini muffin tins creates a portable version of the carnival favorite.
Why Kids Love It: The familiar flavors in an easy-to-eat format make these irresistible.
Pro Parent Tip: These freeze beautifully—make them weeks ahead and reheat on party day.
⏱️ Prep Time: 25 minutes | 🔄 Difficulty: Medium
Fruit Kabob Rainbow
Thread various fruits in rainbow order on skewers for a colorful, healthy party appetizer that doubles as decoration.
Why Kids Love It: The vibrant colors and presentation make fruit exciting.
Pro Parent Tip: Dip certain fruits in lemon juice to prevent browning if preparing hours ahead.
⏱️ Prep Time: 20 minutes | 🔄 Difficulty: Easy
Turkey and Cheese Roll-Up Platter
Arrange rolled-up turkey slices, cheese cubes, crackers, and grapes on a platter for a protein-rich appetizer option.
Why Kids Love It: The build-your-own aspect gives kids control over their food choices.
Pro Parent Tip: Use cookie cutters to create shapes from cheese slices for added visual appeal.
⏱️ Prep Time: 15 minutes | 🔄 Difficulty: Easy
Mini Pizza Muffins
English muffin halves topped with sauce, cheese, and miniature toppings create individual pizzas perfect for little guests.
Why Kids Love It: The individual sizing makes kids feel special.
Pro Parent Tip: Prepare toppings in advance and let kids assemble their own creations at the party.
⏱️ Prep Time: 20 minutes | 🔄 Difficulty: Medium
Fun & Themed Appetizer Ideas
Take ordinary finger foods for kids parties to extraordinary levels with these themed creations.
Butterfly Veggie Plates
Arrange colorful vegetable sticks in the shape of butterfly wings with a celery stick body and cherry tomato head.
Why Kids Love It: The artistic presentation transforms ordinary vegetables into something magical.
Pro Parent Tip: Create a “garden” of butterfly veggie plates for maximum visual impact at parties.
⏱️ Prep Time: 20 minutes | 🔄 Difficulty: Medium
Race Car Banana Boats
Halved bananas with strawberry slice wheels, blueberry headlights, and a grape driver create fruity vehicles kids can’t resist.
Why Kids Love It: The playful presentation makes healthy fruit irresistible.
Pro Parent Tip: Add tiny flags made from toothpicks and washi tape for extra flair.
⏱️ Prep Time: 15 minutes | 🔄 Difficulty: Easy
Under-the-Sea Cucumber Sandwiches
Small cucumber rounds topped with cream cheese and fish-shaped cheese or vegetable cutouts create an ocean-themed bite.
Why Kids Love It: The thematic element transforms simple ingredients into an adventure.
Pro Parent Tip: Use blue food coloring to tint a small portion of cream cheese for “water” effects.
⏱️ Prep Time: 25 minutes | 🔄 Difficulty: Medium
Monster Toast Faces
Open-faced sandwiches decorated with vegetable features and cheese hair create edible characters.
Why Kids Love It: The silly faces make eating healthy ingredients fun.
Pro Parent Tip: Set out various toppings and let kids create their own monster toast masterpieces.
⏱️ Prep Time: 15 minutes | 🔄 Difficulty: Easy
Perfect Dips for Little Dippers
Every great kid-friendly appetizer spread needs dippable options—these will please even the pickiest palates.
Honey-Yogurt Fruit Dip
Greek yogurt sweetened with a touch of honey makes a protein-rich dip for fresh fruit slices.
Why Kids Love It: The sweet flavor profile makes fruit even more appealing.
Pro Parent Tip: Add a drop of food coloring to create pastel-colored dips that coordinate with your party theme.
⏱️ Prep Time: 5 minutes | 🔄 Difficulty: Easy
Mild Guacamole Stars
Serve mild, kid-friendly guacamole with star-shaped tortilla chips for a festive appetizer option.
Why Kids Love It: The star shapes elevate simple chips and dip to something special.
Pro Parent Tip: Add a small amount of Greek yogurt to guacamole to mellow the flavor for sensitive palates.
⏱️ Prep Time: 10 minutes | 🔄 Difficulty: Easy
Pizza Dip Cups
Individual cups with layered pizza dip (cream cheese, sauce, cheese, tiny pepperoni) served with breadsticks for dipping.
Why Kids Love It: All the pizza flavors in a fun, dippable format.
Pro Parent Tip: Bake in oven-safe ramekins for a warm, melty appetizer.
⏱️ Prep Time: 15 minutes | 🔄 Difficulty: Medium
Veggie Ranch Cups
Place a dollop of ranch dip in the bottom of clear cups and stand vegetable sticks vertically for an easily portable appetizer.
Why Kids Love It: The individual presentation makes vegetables feel special.
Pro Parent Tip: Use colorful paper cups that coordinate with your party theme.
⏱️ Prep Time: 10 minutes | 🔄 Difficulty: Easy
Allergy-Friendly Options (Nut-Free, Gluten-Free etc.)
These inclusive kid-friendly appetizers ensure that all children can enjoy party treats regardless of dietary restrictions.
Rice Paper Rainbow Rolls
Fill rice paper wrappers with colorful vegetables and optional protein for a gluten-free, allergy-friendly appetizer option.
Why Kids Love It: The transparent wrappers showcasing colorful fillings create visual interest.
Pro Parent Tip: Serve with a safe dipping sauce like sunflower seed butter thinned with a touch of honey.
⏱️ Prep Time: 25 minutes | 🔄 Difficulty: Medium
Sweet Potato Chicken Poppers
Gluten-free, dairy-free chicken bites made with ground chicken, sweet potato, and safe seasonings.
Why Kids Love It: The natural sweetness from the potato makes these irresistible.
Pro Parent Tip: Make a double batch and freeze extras for quick snacks.
⏱️ Prep Time: 30 minutes | 🔄 Difficulty: Medium
Polenta Pizza Bites
Pre-made polenta tubes sliced, topped with safe pizza toppings, and baked for a gluten-free pizza alternative.
Why Kids Love It: They provide the beloved pizza experience without common allergens.
Pro Parent Tip: Use dairy-free cheese alternatives for children with milk allergies.
⏱️ Prep Time: 20 minutes | 🔄 Difficulty: Medium
Seed Butter Apple Sandwiches
Apple rounds spread with sunflower seed butter and topped with safe toppings like dairy-free chocolate chips.
Why Kids Love It: The sweet-tart apple pairs perfectly with creamy seed butter.
Pro Parent Tip: Brush apple slices with diluted lemon juice to prevent browning.
⏱️ Prep Time: 10 minutes | 🔄 Difficulty: Easy
Tips for Getting Picky Eaters to Try New Appetizers
Converting reluctant tasters into adventurous eaters is possible with these proven strategies:
- Start with the familiar: Introduce new flavors alongside foods you know they already enjoy
- Make it interactive: Let kids help prepare appetizers—they’re more likely to try food they’ve helped create
- Use fun names: “Dinosaur trees” sounds more appealing than “broccoli”
- Create a safe environment: Never force trying new foods; instead, celebrate curiosity
- Model enjoyment: Show your own enthusiasm for healthy appetizers
- Offer choices: “Would you like to try the cucumber boats or the veggie skewers?”
- Consider presentation: Food arranged in fun shapes or patterns is more appealing
- Keep portions tiny: A small taste feels less intimidating than a full serving
Creative Presentation Ideas Kids Will Love
Elevate simple kid-friendly appetizers with these presentation techniques:
| Presentation Technique | Example Application |
|---|---|
| Character-shaped platters | Arrange vegetables in butterfly or flower shapes |
| Colorful serving tools | Use bright, child-sized tongs and spoons |
| Themed food picks | Sail flags, animal toppers, or seasonal motifs |
| Edible food cups | Cucumber rounds or lettuce cups as edible containers |
| Rainbow arrangements | Organize foods in ROYGBIV color order |
| Individual portions | Mason jars, cupcake liners, or paper cones |
| Interactive stations | Build-your-own appetizer bars with various components |
| Height variation | Use cake stands and tiered displays for visual interest |
How to Safely Involve Kids in Appetizer Prep
Getting children involved in the kitchen builds skills and increases the likelihood they’ll try new foods:
Age 2-3 Years
- Washing fruits and vegetables
- Tearing lettuce leaves
- Stirring simple mixes
- Sprinkling cheese or herbs
- Arranging prepared ingredients on platters
Age 4-5 Years
- Cutting soft foods with a butter knife
- Assembling simple appetizers
- Measuring ingredients
- Rolling dough or wraps
- Using cookie cutters for shapes
Age 6-8 Years
- Following simple recipes with supervision
- Cracking eggs
- Basic knife skills with appropriate knives
- Operating a hand mixer
- More complex assembly and decoration
Safety Rules for All Ages
- Always supervise kitchen activities
- Establish clear rules about heat, sharp objects, and hygiene
- Use step stools for proper working height
- Practice frequent hand washing
- Make cleaning up part of the process
Essential Tools for Making Kid-Friendly Appetizers
Stock your kitchen with these items to make appetizer creation easier:
- Mini cookie cutters – Create shapes from cheese, fruits, vegetables
- Silicone muffin cups – Perfect for individual portions
- Child-safe knives – Allow kids to help with simple cutting tasks
- Fun-shaped plates – Make presentation special
- Small food picks – Secure layered appetizers and add visual appeal
- Melon ballers – Create perfect fruit spheres
- Veggie spiralizer – Transform vegetables into fun curly shapes
- Sandwich cutters – Remove crusts and create shapes in one step
Frequently Asked Questions about Kid-Friendly Appetizers
What are the most popular appetizers for kids?
The most universally accepted kid-friendly appetizers include mini quesadillas, cheese and crackers, fruit skewers, mini muffins, and yogurt parfaits. The key is familiar flavors, appropriate textures, and fun presentation.
How can I make appetizers healthier for children?
Focus on incorporating whole foods like fruits, vegetables, lean proteins, and whole grains. Use natural sweeteners sparingly, boost nutrition with hidden vegetables, and opt for baking instead of frying. Gradually reduce sodium and sugar in recipes as taste buds adjust.
What are good finger foods for a toddler party?
For toddlers, focus on soft, easy-to-chew options like cheese cubes, quartered grapes, mini muffins, soft vegetable sticks with dip, and small sandwich quarters. Avoid common choking hazards like whole grapes, popcorn, or hard raw vegetables.
How far in advance can I prepare appetizers for a kids’ party?
Many kid-friendly appetizers can be prepped 1-2 days ahead. Assemble components separately (cut vegetables, prepare dips, bake items that can be reheated) and assemble closer to serving time. Cold items generally keep better than hot ones.
How do I account for picky eaters at a children’s gathering?
Always include a few universally accepted options (plain cheese, simple fruits, familiar baked goods) alongside more adventurous choices. Avoid forcing kids to try new foods—exposure without pressure is key to expanding palates over time.
Conclusion: Creating Memorable Appetizer Experiences
The world of kid-friendly appetizers extends far beyond chicken nuggets and cheese sticks. By incorporating creative presentation, involving children in preparation, and gradually introducing new flavors alongside familiar favorites, you can expand palates while creating joyful food memories.
Remember that patience is key—children may need multiple exposures before accepting new foods. Focus on making the experience positive rather than stressing about what gets eaten.
Whether you’re planning a birthday celebration with finger foods for kids party or simply trying to incorporate more healthy kid-friendly appetizers into everyday snacking, the options in this guide prove that child-appropriate food can be nutritious, delicious, and fun all at once.
What kid-friendly appetizers are hits in your household? Share your successes in the comments below!
Looking for more family-friendly food inspiration? Check out our companion guides to Kid-Friendly Lunches and Family Dinner Solutions!
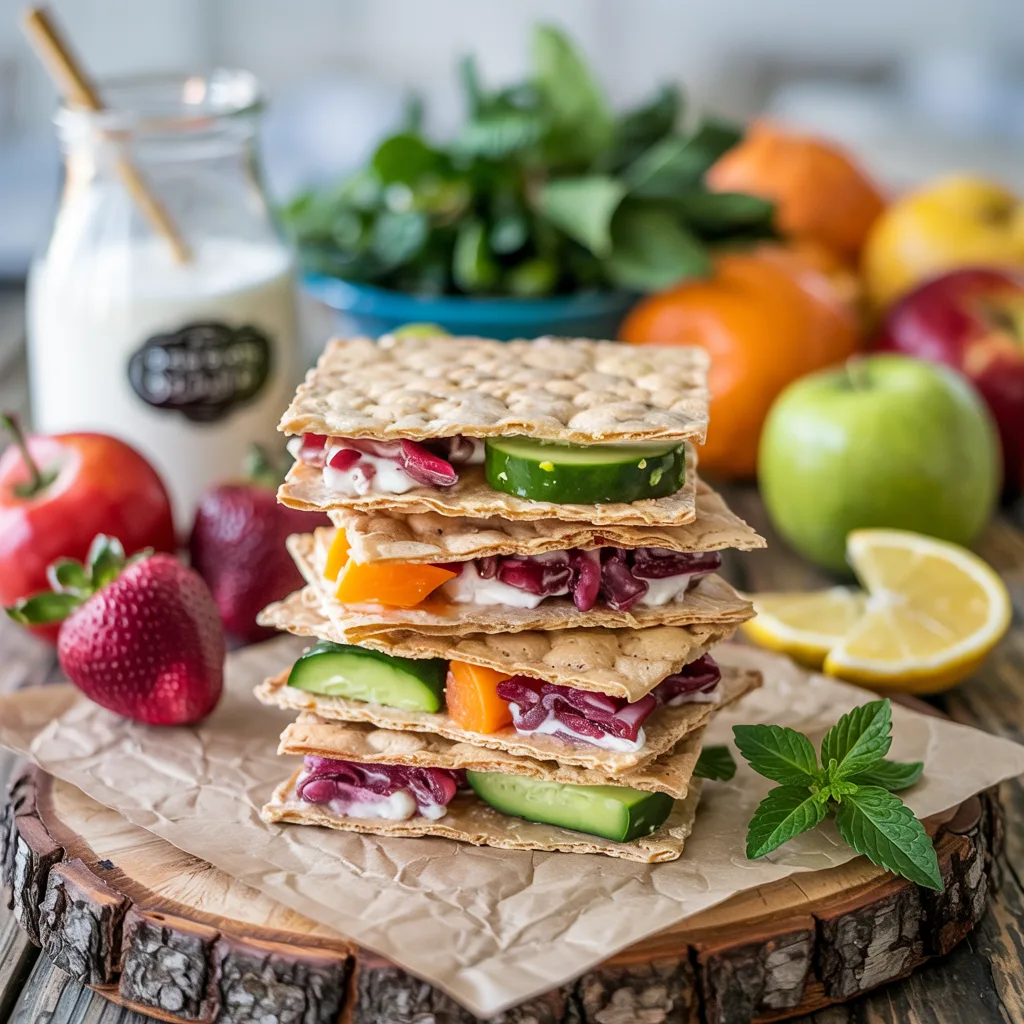
49+ Good Snacks for Kids (Healthy, Easy & Kid-Approved!)
Navigating the world of kids’ snacks can feel like a daily battle. Between rushed mornings, picky eaters, and trying to balance nutrition with convenience, many parents find themselves stuck in a snack rut. Whether you’re looking for after-school fuel, lunchbox fillers, or healthy alternatives to processed options, this comprehensive guide will transform your snack game.
As a nutritionist and parent who’s spent years developing kid-friendly food solutions, I’m sharing my ultimate collection of good snacks for kids that are nutritious, simple to prepare, and—most importantly—ones they’ll actually eat!
- Quick Grab Options
- Make-Ahead Snacks
- Picky Eater Solutions
- Nutritionist-Approved Choices
Table of Contents
What Makes a Good Snacks for Kids? (Beyond Just Taste!)
Before diving into specific options, let’s establish what qualifies as a truly good snack for children:
- Nutrient density: Provides essential vitamins, minerals, and macronutrients rather than empty calories
- Balanced energy: Contains a mix of carbohydrates, protein, and healthy fats to sustain energy levels
- Appropriate portions: Satisfies hunger without interfering with mealtime appetite
- Limited added sugars and unhealthy fats: Focuses on natural sweetness and healthy fats
- Safety: Age-appropriate textures that minimize choking hazards
According to the American Academy of Pediatrics, snacks should complement meals by helping children meet their nutritional needs while teaching healthy eating habits that last a lifetime.
The Master List: 50+ Good Snacks Kids Will Love (Categorized!)
Fresh & Fruity Power-Ups
- Apple slices with almond or sunflower seed butter
- Berry parfait with Greek yogurt and a sprinkle of granola
- Banana “sushi” (banana rolled in nut butter and sliced)
- Frozen grapes (for kids 4+ due to choking hazard)
- Watermelon sticks or melon balls
- Clementine oranges or “sunny orange smiles”
- Fruit kebabs with yogurt dip
- Homemade fruit leather (baked fruit puree)
Vibrant Veggie Victory Snacks
- Baby carrots with hummus
- Cucumber rounds with cream cheese
- Colorful bell pepper strips with ranch yogurt dip
- Cherry tomatoes and mozzarella sticks
- Celery boats with nut butter and raisin “ants”
- Snap peas with mild guacamole
- Zucchini coins lightly salted
- Roasted sweet potato wedges
Protein-Packed Pick-Me-Ups
- Hard-boiled eggs (try egg “flowers” by cutting into petal shapes)
- Cheese sticks or cubes paired with whole-grain crackers
- Edamame pods (sprinkle with sea salt)
- Greek yogurt with honey drizzle
- Turkey roll-ups with thinly sliced cheese
- Cottage cheese with fruit
- Roasted chickpeas (store-bought or homemade)
- Mini tuna salad cups on cucumber rounds
Whole Grain Wonders
- Whole-wheat crackers with cheese
- Oatmeal energy bites (recipe below)
- Air-popped popcorn with minimal seasoning
- Mini whole-grain pita with hummus
- Rice cakes topped with nut butter and sliced bananas
- Homemade granola bars
- Whole-grain cereal mix (low sugar varieties)
- Whole-wheat tortilla roll-ups with light cream cheese
Quick Prep Superstars (Under 5 Minutes!)
- Yogurt tubes (freeze for a summertime treat)
- Apple and cheese quesadilla (microwave for 20 seconds)
- Trail mix with whole grain cereal, dried fruit, and seeds
- Avocado toast fingers on whole-grain bread
- Deli meat and cheese skewers
- Peanut butter and banana sandwich quarters
- Smoothies in reusable pouches
- Hummus and veggie wrap (spread, add veggies, roll, slice)
On-the-Go & Travel-Ready Treats
- Dried fruit and nut mix (portion-controlled)
- Applesauce pouches
- String cheese with whole-grain crackers
- Pre-portioned hummus cups with pretzels
- Homemade muffins (freeze and grab as needed)
- Snack-sized containers of dry cereal
- Freeze-dried fruit crisps
- Individually wrapped cheese squares
Smart Store-Bought Solutions
When selecting packaged snacks, look for options with:
- Short ingredients lists with recognizable items
- Low added sugar (under 5g per serving)
- Some fiber and/or protein content
- No artificial colors or preservatives
Recommended options:
- Roasted chickpea snacks
- Fruit cups in 100% juice (not syrup)
- Plain Greek yogurt cups
- Unsweetened applesauce cups
- RX Kids bars or similar minimally processed bars
- Freeze-dried fruit with no added sugar
- Seaweed snacks
- Whole food-based fruit and veggie pouches
Easy Homemade Heroes (Simple Recipes)

5-Minute Oatmeal Energy Bites
- 1 cup rolled oats
- 1/2 cup nut or seed butter
- 1/3 cup honey or maple syrup
- 1/4 cup mini chocolate chips
- 2 tablespoons ground flaxseed
- 1 teaspoon vanilla extract
Mix all ingredients in a bowl. Roll into 1-inch balls. Refrigerate for at least 30 minutes. Store in an airtight container for up to a week.
Mini Veggie Egg Muffins
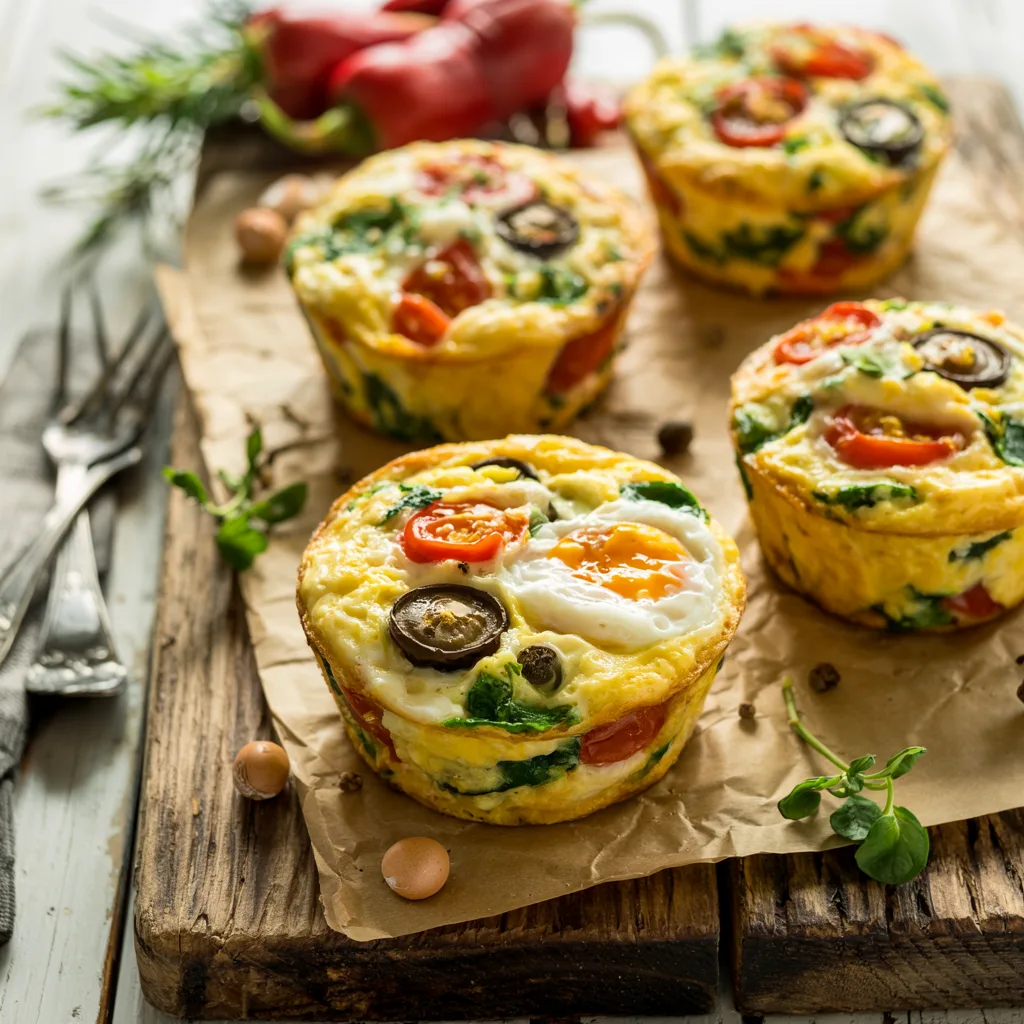
- 6 eggs
- 1/4 cup milk
- 1/2 cup shredded cheese
- 1/2 cup finely chopped vegetables (spinach, bell peppers, etc.)
- Salt and pepper to taste
Whisk eggs and milk. Stir in remaining ingredients. Pour into greased mini muffin tin. Bake at 350°F for 15-18 minutes. Refrigerate up to 3 days or freeze for 1 month.
Tailoring Snacks: Addressing Specific Needs
Lunchbox Legends (Nut-Free & School Safe)
- Sunflower seed butter and apple sandwiches
- Cheese and whole-grain crackers
- Hummus and veggie sticks
- Turkey roll-ups
- Homemade trail mix with seeds (no nuts)
- Yogurt cups with granola topper
Low Sugar Snack Swaps
Instead of...Try This!Fruit snacksFreeze-dried fruit without added sugarCookiesOatmeal energy bitesFlavored yogurtPlain yogurt with fresh fruitChocolate milkMilk with cacao powder and minimal honeyIce creamFrozen banana "nice cream"
Allergy-Friendly All-Stars
- Gluten-free: Rice cakes with toppings, fruit and vegetable sticks
- Dairy-free: Coconut yogurt alternatives, hummus and veggies
- Nut-free: Sunflower seed butter, roasted chickpeas, pumpkin seeds
- Egg-free: Bean-based dips, fruit smoothies, whole-grain crackers
Budget-Savvy Snack Hacks
- Buy seasonal produce when prices are lowest
- Purchase plain yogurt in large containers instead of individual cups
- Make your own trail mix from bulk ingredients
- Freeze leftover bananas for smoothies
- Prepare and portion snacks yourself rather than buying pre-packaged options
- Shop sales and stock up on non-perishable healthy options
Taming the Picky Eater: Snack Strategies That Work
- Offer limited choices: “Would you like apple slices or grapes with your cheese?”
- Involve kids in preparation: Even young children can help wash fruit or arrange crackers
- Make it fun: Use cookie cutters for shapes, create faces with food, serve with colorful toothpicks
- Dip it: Provide healthy dips to make vegetables more appealing
- Bridge with familiar foods: Pair new foods with favorites
- Stay consistent: Don’t give up—it often takes 10-15 exposures before kids accept new foods
- Be a role model: Let them see you enjoying healthy snacks too
Snack Timing & Portion Patrol: Getting it Right
Children need structured eating times to develop healthy habits. Generally, most kids do well with three meals and 2-3 snacks daily. Aim to:
- Schedule snacks at least 1.5-2 hours before meals
- Keep portions age-appropriate (a good rule: about 1 tablespoon of each food type per year of age)
- Listen to hunger cues rather than enforcing “clean plate” rules
- Limit snacking to designated areas (like the kitchen table) rather than grazing throughout the day
Expert Q&A: Answering Your Top Snack Questions
Q: How many snacks should kids have per day? A: Most children do well with 2-3 scheduled snacks daily, typically mid-morning, after school, and possibly before bedtime for younger children.
Q: Are store-bought snacks ever okay? A: Yes! Look for minimally processed options with short ingredient lists. The key is finding balance between convenience and nutrition.
Q: What about drinks as snacks? A: Water should be the primary beverage. Limit juice to 4 ounces daily for young children, and avoid sugary drinks. Milk can be part of a snack but shouldn’t replace solid foods.
Q: How do I handle snack requests right before meals? A: Stick to consistent timing and offer a small vegetable appetizer if needed. Remind children when the next meal is coming and stay consistent with boundaries.
Conclusion: Building Healthy Snack Habits for Life
Creating a positive snack environment helps children develop lifelong healthy eating habits. Remember that your job is to provide nutritious options while letting children decide how much to eat.
By offering a variety of good snacks for kids throughout the week, you’re not just fueling their growing bodies—you’re teaching valuable lessons about nutrition that will benefit them for years to come.
What are your family’s favorite healthy snacks? Share your ideas in the comments below, and don’t forget to pin this guide for future reference!
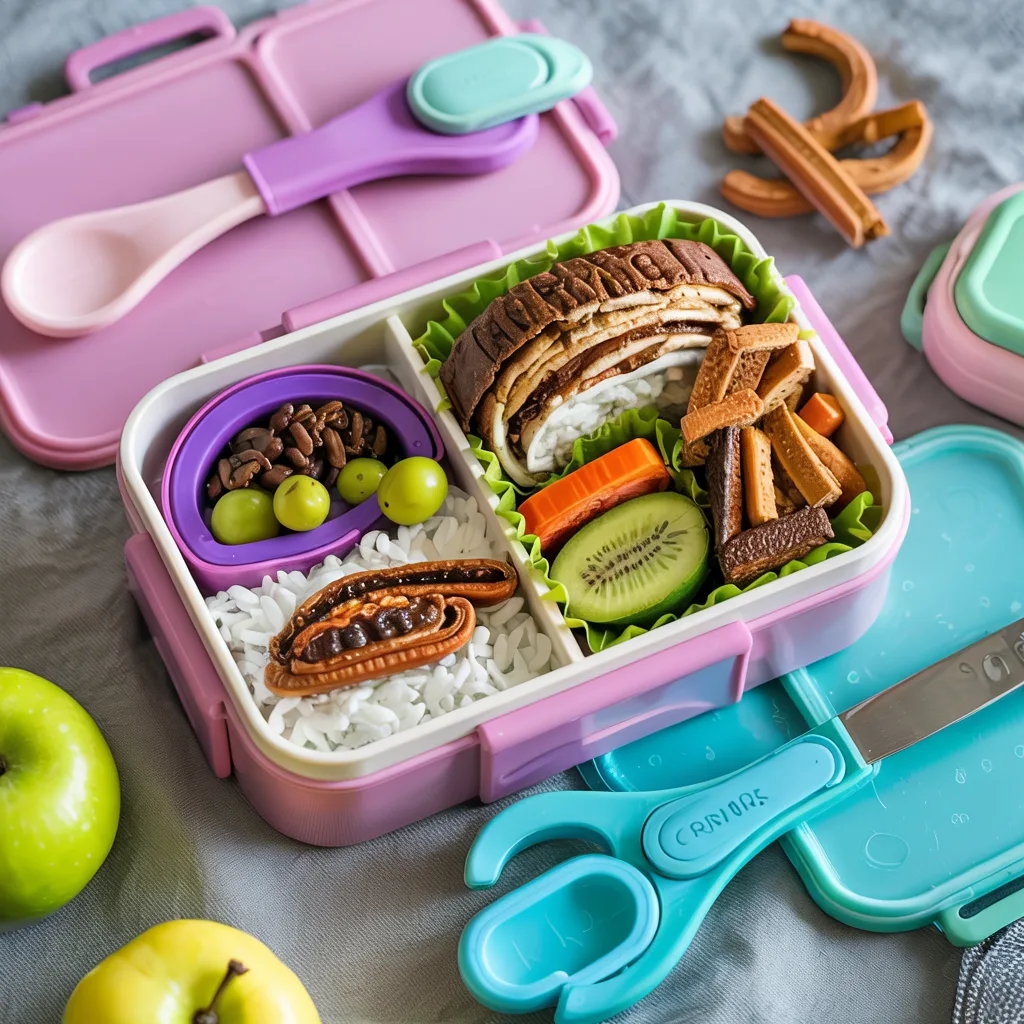
Best Kids Bento Box (2025)
Are you tired of soggy sandwiches and crushed snacks in your child’s lunchbox? A kids bento box might be the solution you’ve been searching for! These compartmentalized meal containers have revolutionized the way parents pack school lunches, making it easier to create nutritious, visually appealing meals that children actually eat. With countless options flooding the market, finding the perfect kids bento box can feel overwhelming—but we’re here to help.
This comprehensive guide explores everything you need to know about selecting the ideal kids bento box for your little one. From materials and leak-proofing to age-appropriate sizes and cleaning tips, we’ve researched all aspects to help you make an informed decision. Whether you’re a bento beginner or looking to upgrade your current lunch packing system, this resource will guide you through the exciting world of bento boxes for children.
Table of Contents
What IS a Bento Box?
Before diving into selection criteria, let’s understand what makes a bento box unique.
A bento box is a traditional Japanese packed meal container characterized by compartments that separate different food items. The concept dates back centuries in Japan, where aesthetically arranged, balanced meals have long been cultural practice. The modern kids bento box adapts this tradition with child-friendly features while maintaining the core principle: separate compartments for different foods.
Bento Basics: The word “bento” (弁当) refers to a single-portion, home-packed meal common in Japanese cuisine. The compartmentalized design keeps foods separate and visually appealing.
Unlike traditional lunch containers, bento boxes are designed with portion control and food variety in mind. Their separate sections prevent flavors from mixing and maintain food textures—no more soggy sandwiches touching juicy fruit!
Key Considerations When Choosing a Kids Bento Box
Materials: Safety First
The material of your child’s lunch container matters significantly for both safety and durability. Here’s a comprehensive breakdown:
Plastic Bento Boxes

Pros:
- Lightweight and easy for kids to carry
- Generally more affordable
- Available in colorful designs and themes
- Less likely to break when dropped
Cons:
- Environmental concerns
- Potential chemical leaching if not high-quality
- May retain odors and stains over time
Safety Tip: If choosing plastic, look for these safety indicators:
- BPA-free (Bisphenol A)
- Phthalate-free
- PVC-free
- FDA-approved food-grade materials
Stainless Steel Bento Boxes

Pros:
- Exceptionally durable and long-lasting
- No chemical leaching concerns
- Environmentally friendly and sustainable
- Doesn’t retain odors or stains
- Some varieties have insulating properties
Cons:
- Heavier than plastic options
- Generally more expensive
- Limited compartment configurations
- Can dent if dropped
Safety Tip: Look for 18/8 or 304-grade stainless steel, which offers the best food safety profile.
Silicone Components
Pros:
- Flexible and durable
- Easy to clean
- Heat resistant (microwave safe)
- More eco-friendly than plastic
Cons:
- May retain odors over time
- Can deteriorate with excessive heat exposure
- Often combined with plastic or metal frames
Safety Tip: Choose medical-grade silicone that’s certified food-safe.
| Material | Weight | Durability | Environmental Impact | Price Range | Best For |
|---|---|---|---|---|---|
| Plastic (BPA-free) | Light | Moderate | Medium-High Impact | $-$$ | Younger children, budget-conscious families |
| Stainless Steel | Heavy | Excellent | Low Impact | $$-$$$ | Environmentally conscious families, long-term investment |
| Silicone Components | Medium | Good | Medium Impact | $$-$$$ | Those wanting microwave-safe options |
Leak-Proofing: The Crucial Factor
Nothing ruins a lunch like discovering yogurt has leaked all over the lunch bag. Effective leak-proofing is perhaps the most important practical feature of a quality kids bento box.
Types of Seals and Their Effectiveness:
- Silicone Gaskets: The gold standard for leak-proofing. These create a tight seal between the lid and container.
- Snap-Lock Mechanisms: Provide good security but may be difficult for younger children to operate.
- Screw-Top Containers: Excellent for liquids but time-consuming to pack and unpack.
- Push-Seal Lids: Convenient but generally less leak-proof than other options.
Pro Tip: Even with “leak-proof” marketing claims, always test your bento box with water before trusting it with potentially messy foods like yogurt or dressings.
For optimal leak protection, look for:
- Inner silicone gaskets around each compartment
- Secure locking mechanisms
- Separate containers for wet foods
- Positive customer reviews specifically mentioning leak resistance
Ease of Use: Kid-Friendly Design
A kids bento box should be functional for both parents packing the lunch and children eating from it.
For Children:
- Can your child open and close the latches independently?
- Is the box lightweight enough for your child to carry?
- Are compartments sized appropriately for small hands?
- Does the design make sense for how your child eats?
For Parents:
- How time-consuming is it to pack?
- Does it require additional containers or silicone cups?
- How easy is it to clean thoroughly?
- Does it fit standard lunch bags?
Age Considerations:
- Preschoolers (3-5): Simpler latches, fewer compartments, more pictorial guidance
- Elementary (6-10): More compartments, slightly more complex mechanisms
- Tweens/Teens (11+): Adult-like designs, larger portion capacities
Durability: Built to Last
Kids aren’t exactly gentle with their belongings. A quality kids bento box should withstand:
- Regular drops from table height
- Daily opening and closing
- Dishwasher cycles (if applicable)
- Temperature changes
- The weight of other items in a backpack
Durability Indicators:
- Quality of hinge design
- Thickness of materials
- Reinforced corners
- Warranty offerings
- Customer reviews mentioning longevity
Size & Compartments: Right-Sized for Your Child
Not all children have the same appetite, and nutritional needs change with age. Consider:
Overall Capacity Guidelines:
- Ages 3-5: Approximately 2-3 cups total capacity
- Ages 6-9: Approximately 3-4 cups total capacity
- Ages 10+: Approximately 4-5+ cups total capacity
Compartment Considerations:
- Fewer, larger compartments: Better for sandwiches, wraps, and larger items
- More, smaller compartments: Ideal for variety and picky eaters who don’t like foods touching
- Removable dividers: Offer flexibility for different meal types
- Depth matters: Deeper compartments work better for juicy fruits and moist foods
Pro Tip: Consider having two different bento styles—one for sandwich-based meals and another for variety meals with multiple small portions.
Insulation: Keeping Foods Safe
Food safety is non-negotiable. Without proper temperature control, perishable foods can enter the “danger zone” (40°F-140°F) where bacteria multiply rapidly.
Insulation Options:
- Built-in Insulation: Some bento boxes feature vacuum-insulated construction (typically stainless steel)
- Separate Insulated Bag: Required for most plastic and non-insulated metal bentos
- Integrated Ice Packs: Some models feature attachable or built-in cooling elements
- Thermal Food Jars: Supplementary containers for hot foods that can pair with bento boxes
Temperature Retention Tips:
- Pre-chill bento boxes in the refrigerator before packing
- Use frozen water bottles or ice packs
- Freeze suitable lunch components like yogurt tubes or fruit cups
- Pack hot foods at 165°F+ in thermal containers
Cleaning & Maintenance: The Daily Reality
Even the perfect kids bento box will become a burden if it’s a nightmare to clean.
Cleaning Considerations:
- Dishwasher-Safe: The ultimate convenience factor
- Corner Design: Rounded corners are easier to clean than sharp angles
- Removable Gaskets: Allow thorough cleaning to prevent mold
- Disassembly Required: Some boxes need complete disassembly for proper cleaning
- Stain Resistance: Some materials resist tomato sauce and berry stains better than others
Maintenance Routine:
- Rinse immediately after use (teach children this habit)
- Clean thoroughly daily, preferably in dishwasher if safe
- Periodically remove and clean gaskets
- Dry completely before storing
- Occasional deep cleaning with vinegar solution for odors
Price Points & Value

Kids bento boxes range from budget-friendly to premium investments. Consider:
Budget Options ($10-$20):
- Basic plastic construction
- Fewer leak-proof features
- May need replacement sooner
- Good starter option to test concept
Mid-Range Options ($20-$35):
- Better quality materials
- Improved leak-proofing
- More thoughtful designs
- Generally good value for most families
Premium Options ($35-$50+):
- Highest quality materials (stainless steel, premium plastics)
- Excellent durability
- Superior leak-proofing
- Special features (insulation, integrated utensils, etc.)
Value Assessment Questions:
- How many years of use do you expect?
- How many children will use it sequentially?
- How important are premium features to your family?
- What’s the replacement cost if lost?
Aesthetics & Kid Appeal
Never underestimate the power of a lunch container your child actually wants to use!
Design Elements That Matter:
- Colors: Bright, gender-neutral options appeal to most children
- Characters: Licensed characters boost appeal but may be outgrown quickly
- Personalization: Name labels or customizable features
- Age-Appropriate Designs: What delights a kindergartener may embarrass a fifth-grader
Balance Form and Function: While aesthetics matter, prioritize functionality. Even the coolest-looking bento box will be abandoned if it leaks or is difficult to use.
Types of Kids Bento Boxes
Here’s a quick overview of the main types you’ll encounter:
Traditional Compartmentalized Plastic
- Most common style
- Multiple fixed compartments
- Various lid mechanisms
- Example brands: Bentgo, Yumbox
Stainless Steel Options
- Environmentally friendly
- Extremely durable
- Often larger and heavier
- Example brands: PlanetBox, LunchBots
Insulated Varieties
- Keep foods hot or cold
- Often feature thermal containers
- Typically more expensive
- Example brands: OmieBox, Thermos brand options
Character-Themed Designs
- Feature popular characters
- Often sacrifice some functionality for aesthetics
- May have fewer compartments
- Example brands: Licensed products (Disney, Marvel, etc.)
Expandable/Modular Systems
- Can be configured differently for different meals
- Often feature multiple containers that fit together
- Good for varying appetite sizes
- Example brands: Monbento, Bentology
Top Recommendations Overview
While we have a dedicated guide to the best bento boxes by age, here’s a quick overview of consistently top-rated options:
For Preschoolers/Kindergarteners:
- Yumbox Original – Exceptionally leak-proof, intuitive design
- Bentgo Kids – Rubber-edged durability, easy-open latches
For Elementary Ages:
- PlanetBox Rover – All-in-one stainless steel durability
- OmieBox – Unique insulated compartment for hot foods
For Tweens/Teens:
- Monbento Original – Sophisticated design, expandable
- LunchBots Bento Cinco – All stainless, generous capacity
How to Pack a Great Kids Bento
Our detailed packing guide covers this extensively, but key principles include:
- Balance nutritional components: Protein, whole grains, fruits, vegetables, and a small treat
- Consider the color wheel: Visual appeal increases consumption
- Maintain food safety: Keep cold foods cold, hot foods hot
- Involve your child: Participation increases the likelihood they’ll eat the lunch
- Pack tightly: Minimize movement that could mix foods during transport
Frequently Asked Questions
Q: Are bento boxes worth the investment compared to regular containers? A: For most families, yes. The compartmentalization encourages varied, balanced meals and reduces the need for disposable packaging. Most parents report less food waste with bento-style lunches.
Q: How many bento boxes do we need per child? A: Ideally, two per child allows for one in use and one clean/ready, especially if you’re packing lunches daily.
Q: Are bento boxes good for picky eaters? A: Often, yes! The separation of foods prevents “contamination” that bothers many selective eaters, and the visual presentation can make new foods more approachable.
Q: Can I put hot foods in a regular bento box? A: Most plastic bento boxes aren’t designed for hot foods. Either use a specialized insulated container like the OmieBox or pack a separate thermos.
Q: How long do quality bento boxes typically last? A: A good quality bento box should last 2-3 school years with proper care. Premium options like stainless steel varieties often last 5+ years, potentially serving multiple children.
Conclusion: Finding Your Perfect Kids Bento Box
Choosing the right kids bento box combines practical considerations with your child’s preferences and your family’s needs. Focus first on the fundamentals—appropriate size, reliable leak-proofing, and ease of cleaning—before considering aesthetic features.
Remember that the perfect bento box supports your ultimate goal: nourishing your child with balanced, appealing lunches they’ll actually eat. While the initial investment might exceed traditional lunch containers, the benefits of reduced food waste, decreased disposable packaging, and increased food variety often make bento boxes worth every penny.
Whether you’re packing lunches for a picky preschooler or a hungry middle schooler, the right bento box can transform lunch packing from a daily chore to a creative opportunity to connect with your child through food.
What’s your experience with kids bento boxes? Share your favorites and tips in the comments below!
50+ Parent Tested Top Favorite Kid Meals
Are you tired of hearing “I don’t like this!” at the dinner table? Do you dread the nightly battle of getting your children to eat something—anything—nutritious? You’re not alone. Finding top favorite kid meals that are both parent-approved and child-loved can feel like searching for a mythical unicorn. But fear not! We’ve compiled the ultimate collection of over 50 kid-tested, parent-approved meals that will transform your mealtime from stress to success.
This comprehensive guide was created through extensive surveys with real parents, consultations with nutritionists, and our own experience testing these recipes with actual children (including some notoriously picky eaters!). Our goal is simple: to provide you with delicious, easy, and kid-approved meals kids love that won’t leave you spending hours in the kitchen.
For easy navigation, we’ve organized these top favorite kid meals into helpful categories so you can quickly find exactly what you need, whether it’s a lightning-fast weeknight dinner or a healthier version of a fast food favorite.
Table of Contents Of Top Favorite Kid Meals
Quick Weeknight Wonders (Under 30 Minutes)
When you’ve got hungry kids and minimal time, these rapid-fire favorites come to the rescue!
15-Minute Cheesy Chicken Quesadillas

Why Kids Love It: Melty cheese, familiar flavors, fun to dip Why Parents Love It: Uses leftover chicken, ready in minutes, protein-packed Picky Eater Hack: Finely dice any vegetables to make them nearly undetectable Quick Tip: Batch-cook chicken on weekends to make this even quicker
Prep/Cook Time: 5 min prep, 10 min cook Key Ingredients: Tortillas, cheese, cooked chicken, mild salsa
Lightning-Fast Breakfast-for-Dinner Pancakes

Why Kids Love It: Breakfast for dinner feels rebellious and fun! Why Parents Love It: Pantry staples, endlessly customizable, minimal cleanup Picky Eater Hack: Create pancake art or use cookie cutters for fun shapes Quick Tip: Use complete pancake mix and add mashed banana for natural sweetness
Prep/Cook Time: 5 min prep, 15 min cook Key Ingredients: Pancake mix, eggs, milk, maple syrup
20-Minute Pasta with Secret Veggie Sauce

Why Kids Love It: Familiar pasta comfort with smooth, tasty sauce Why Parents Love It: Sneaks in 3+ vegetables, freezes beautifully Picky Eater Hack: Blend sauce until completely smooth—no vegetable evidence! Quick Tip: Make double batches and freeze in portion-sized containers
Prep/Cook Time: 10 min prep, 10 min cook Key Ingredients: Pasta, tomato sauce, hidden carrots/zucchini/spinach
10-Minute Sandwich Sushi Rolls

Why Kids Love It: Fun finger food that feels special Why Parents Love It: No cooking required, perfect for lunch or dinner Picky Eater Hack: Start with favorite fillings, then gradually introduce new ones Quick Tip: Use a rolling pin to flatten bread for easier rolling
Prep/Cook Time: 10 min prep, no cooking Key Ingredients: Sandwich bread, cream cheese, deli meat, vegetables
Picky Eater All-Stars (Tried & True Hits)
These crowd-pleasers have converted even the most stubborn little food critics!
Crispy Baked Chicken Tenders

Why Kids Love It: Crispy outside, tender inside, perfect for dipping Why Parents Love It: Baked not fried, customizable seasonings Picky Eater Hack: Let kids create their own dipping sauce combinations Quick Tip: Make extra and freeze uncooked for future quick meals
Prep/Cook Time: 15 min prep, 20 min cook Key Ingredients: Chicken tenders, breadcrumbs, eggs, spices
Build-Your-Own Mini Pizzas
Why Kids Love It: They’re in control of their creation Why Parents Love It: Engages kids in meal prep, easy cleanup Picky Eater Hack: Offer “challenge toppings” with small rewards for trying Quick Tip: Use English muffins, pita bread, or tortillas as quick bases
Prep/Cook Time: 10 min prep, 10 min cook Key Ingredients: Mini pizza bases, sauce, cheese, toppings
Mac and Cheese with Secret Cauliflower

Why Kids Love It: Creamy, cheesy comfort food classic Why Parents Love It: Sneaks in vegetables, can be prepped ahead Picky Eater Hack: Puree cauliflower completely and use white cheddar to hide the evidence Quick Tip: Add a dash of mustard powder to enhance cheese flavor without detection
Prep/Cook Time: 15 min prep, 20 min cook Key Ingredients: Pasta, cheese, milk, pureed cauliflower
Healthy Heroes (Nutrient-Packed & Kid-Approved)
These healthy kid recipes prove nutrition and kid-appeal can happily coexist!
Rainbow Veggie Skewers with Yogurt Dip

Why Kids Love It: Colorful, fun to eat, interactive Why Parents Love It: Packed with vegetables, no cooking required Picky Eater Hack: Start with just their favorites, then add one new vegetable Quick Tip: Use fruit on some skewers for a sweet component
Prep/Cook Time: 15 min prep, no cooking Key Ingredients: Assorted vegetables, yogurt dip
Sweet Potato Super Nuggets

Why Kids Love It: Sweet flavor, fun nugget shape Why Parents Love It: Vitamin-packed, baked not fried Picky Eater Hack: Shape them into fun characters or letters Quick Tip: Add a sprinkle of cinnamon to enhance the natural sweetness
Prep/Cook Time: 15 min prep, 25 min cook Key Ingredients: Sweet potatoes, breadcrumbs, eggs, mild spices
Blender Banana Oat Pancakes

Why Kids Love It: Naturally sweet, fun breakfast-for-dinner option Why Parents Love It: No refined sugar, whole grains, high protein Picky Eater Hack: Add mini chocolate chips for special occasions Quick Tip: Blend everything directly in a blender for easy mixing and pouring
Prep/Cook Time: 5 min prep, 15 min cook Key Ingredients: Oats, bananas, eggs, milk
Budget-Friendly Bites (Easy on the Wallet)
These economical easy kid meals keep both your children and your budget happy!
Bean and Cheese Burritos

Why Kids Love It: Cheesy, handheld, customizable Why Parents Love It: Protein-packed, inexpensive ingredients, freezer-friendly Picky Eater Hack: Mash beans completely for texture-sensitive kids Quick Tip: Make assembly-line style and freeze for future meals
Prep/Cook Time: 10 min prep, 5 min cook Key Ingredients: Tortillas, refried beans, cheese, mild salsa
Egg Fried Rice

Why Kids Love It: Fun to eat with chopsticks (or fingers!) Why Parents Love It: Uses leftover rice, customizable with what you have Picky Eater Hack: Dice vegetables extremely small or puree into the scrambled eggs Quick Tip: Cook once, eat twice—make extra plain rice for tomorrow’s fried rice
Prep/Cook Time: 10 min prep, 10 min cook Key Ingredients: Rice, eggs, frozen peas, soy sauce
Lentil Sloppy Joes

Why Kids Love It: Messy and fun to eat, sweet-tangy flavor Why Parents Love It: Budget-friendly protein, freezes well Picky Eater Hack: Use an immersion blender for a smoother texture Quick Tip: Serve on slider buns for kid-sized portions
Prep/Cook Time: 10 min prep, 25 min cook Key Ingredients: Lentils, tomato sauce, onions, hamburger buns
Lunchbox Legends (Beyond the Sandwich)
These kid-friendly dinners pull double-duty as perfect next-day lunch options!
DIY Lunchable Bento Box

Why Kids Love It: Interactive eating, similar to store-bought versions Why Parents Love It: Healthier than commercial options, customizable Picky Eater Hack: Use small cookie cutters for cheese and meat shapes Quick Tip: Prepare components in bulk at the beginning of the week
Prep Time: 10 min prep, no cooking Key Ingredients: Whole grain crackers, cheese cubes, lean deli meat, fruit
Cheesy Tortellini Skewers

Why Kids Love It: Food on sticks is automatically more fun! Why Parents Love It: Complete meal in one prep, great hot or cold Picky Eater Hack: Start with pasta and cheese, gradually add vegetables Quick Tip: Use refrigerated tortellini for a quick-cooking base
Prep/Cook Time: 10 min prep, 5 min cook Key Ingredients: Cheese tortellini, cherry tomatoes, mozzarella balls, Italian dressing
Savory Muffin Tin Meals

Why Kids Love It: Mini-sized portions, variety in one meal Why Parents Love It: Portion-controlled, freezer-friendly Picky Eater Hack: Create themes like “breakfast muffins” or “pizza muffins” Quick Tip: Silicone muffin tins make for easier removal and cleaning
Prep/Cook Time: 15 min prep, 20 min cook Key Ingredients: Varies by recipe—eggs, cheese, vegetables, meats
Weekend Fun Food (Interactive Meals)
When you have a bit more time, these interactive meals kids love create memorable family experiences!
Taco Bar Night
Why Kids Love It: Complete customization, interactive eating Why Parents Love It: One prep serves various preferences Picky Eater Hack: Institute the “two new items” challenge with small rewards Quick Tip: Prep all ingredients earlier in the day for quick assembly at mealtime
Prep/Cook Time: 20 min prep, 15 min cook Key Ingredients: Tortillas, protein of choice, cheese, toppings
Homemade Pizza Night
Why Kids Love It: Creative control, fun to assemble Why Parents Love It: Healthier than delivery, family activity Picky Eater Hack: Create a “tasting corner” of new toppings to try before committing Quick Tip: Use store-bought dough when short on time
Prep/Cook Time: 25 min prep, 15 min cook Key Ingredients: Pizza dough, sauce, cheese, toppings
Breakfast Charcuterie Board
Why Kids Love It: Grazing-style eating feels special Why Parents Love It: Works for breakfast, lunch, or dinner Picky Eater Hack: Include at least 3-4 guaranteed favorites alongside new options Quick Tip: Use silicone cupcake liners to separate items on the board
Prep/Cook Time: 20 min prep, varies for cooking components Key Ingredients: Various breakfast items—fruits, proteins, breads, spreads
Make-Ahead Magic (Prep Now, Relax Later)
These prep-ahead quick dinners for kids save your sanity on busy weeknights!
Slow Cooker Chicken Tacos

Why Kids Love It: Mild flavor, fun handheld format Why Parents Love It: Set-and-forget cooking, versatile leftovers Picky Eater Hack: Serve components separately for DIY assembly Quick Tip: Freeze portioned leftovers for quick future meals
Prep/Cook Time: 10 min prep, 4-6 hours cook Key Ingredients: Chicken breasts, mild salsa, taco seasoning
Freezer-Friendly Mini Meatloaves

Why Kids Love It: Individual serving size, ketchup topping Why Parents Love It: Cook once, eat twice (or more!) Picky Eater Hack: Grate or finely process vegetables to hide in mixture Quick Tip: Bake in muffin tins for perfect portions and faster cooking
Prep/Cook Time: 15 min prep, 25 min cook Key Ingredients: Ground meat (or plant-based alternative), breadcrumbs, eggs, seasonings
Beyond the Meals: Making Family Dining Work
Top Tips for Taming Picky Eaters
Dealing with selective eaters requires patience and strategy. Here are some expert-backed approaches:
- Remove pressure – Making meals battlegrounds creates negative associations
- Follow the “one bite” rule – Encourage trying without forcing
- Involve kids in meal planning and preparation – Ownership increases interest
- Be a role model – Children learn eating habits by watching you
- Maintain consistent exposure – It can take 15+ exposures before a child accepts a new food
“Research shows that pressuring children to eat actually increases picky eating behaviors and decreases food acceptance over time.” – Pediatric Nutrition Specialist
Involving Kids in the Kitchen: Age-Appropriate Tasks
Building cooking skills from an early age creates capable eaters and helps with food acceptance:
| Age | Safe Kitchen Tasks |
|---|---|
| 2-3 | Washing produce, tearing lettuce, stirring batters |
| 4-5 | Measuring ingredients, mashing potatoes, simple cutting with plastic knives |
| 6-8 | Basic knife skills with supervision, cracking eggs, following simple recipes |
| 9+ | More advanced cutting, operating small appliances with supervision |
Smart Meal Planning Strategies for Families
Transform your approach to family meals with these practical planning techniques:
- Theme nights create predictability (Meatless Monday, Taco Tuesday)
- Cook once, eat twice philosophy (plan intentional leftovers)
- Batch cooking sessions (prep multiple meals in one weekend session)
- “Component cooking” (prepare versatile bases that can transform into different meals)
- Keep a “wins list” of successful meals for easy reference
Essential Pantry Staples for Kid-Friendly Meals
Stock these items for quick easy kid meals when you’re short on time:
- Whole grain pasta and rice
- Canned beans and tomato products
- Frozen vegetables and fruits
- Long-lasting produce (carrots, apples, sweet potatoes)
- Quick proteins (canned tuna, eggs, peanut butter)
- Versatile seasonings (mild herbs, cinnamon, Italian blend)
The Last Bite
Finding top favorite kid meals that satisfy both children and parents doesn’t have to be an impossible task. With this extensive collection of parent-tested, kid-approved recipes, you now have a powerful resource for transforming your family mealtimes from stressful to successful.
Remember that building healthy eating habits is a marathon, not a sprint. Celebrate small wins, be patient with new food introductions, and focus on creating positive associations with mealtimes rather than perfect nutrition at every sitting.
What are YOUR family’s favorite kid-approved meals? Share your tried-and-true winners in the comments below, or save this guide for your next meal planning session!
14+ Actually Easy & Delicious Kid Friendly Chicken Recipes
Are you tired of the dinnertime struggle with your little food critics? Kid Friendly Chicken Recipes That familiar chorus of “I don’t like this!” can wear down even the most patient parent. But here’s the good news: chicken is often the magic ingredient that can bridge the gap between what kids will eat and what parents want to serve. This comprehensive guide brings you over 14 genuinely easy, truly delicious kid-friendly chicken recipes that have passed the ultimate test—real children’s approval!
Table of Contents
Why Chicken Works for Kids
Before diving into our recipe collection, let’s understand why chicken is such a winner with the younger crowd:
- Mild flavor that takes on seasonings beautifully
- Familiar protein many children already accept
- Versatile texture (can be crispy, tender, or shredded)
- Nutrient-rich with lean protein perfect for growing bodies
Quick-Find Recipe Categories
To help you find exactly what you need when you need it, we’ve organized these kid friendly chicken recipes by different helpful categories. Browse based on your time constraints, cooking equipment, or what your child tends to enjoy most!
By Cooking Method
Baked Chicken Winners

Baking is perfect for busy parents—just season, pop in the oven, and help with homework while dinner cooks itself!
Crunchy Ranch Baked Chicken Tenders Prep: 10 mins | Cook: 15 mins | Serves: 4
A guaranteed hit that combines that irresistible ranch flavor with a satisfying crunch kids love.
Kid-Friendly Twist: Let children help with the breading station—they’re more likely to eat what they helped make!
Parmesan Crusted Chicken Cutlets Prep: 5 mins | Cook: 20 mins | Serves: 4
Thin chicken breasts coated with parmesan and breadcrumbs create a crispy exterior kids can’t resist.
Kid-Friendly Twist: Cut into “chicken fingers” before serving for easier handling.
Air Fryer Favorites
The air fryer has revolutionized kid-friendly cooking with its ability to make crispy favorites with less oil and mess!
10-Minute Air Fryer Chicken Nuggets Prep: 5 mins | Cook: 10 mins | Serves: 4
Homemade nuggets that are healthier than drive-thru options but just as appealing to little ones.
Kid-Friendly Twist: Create fun shapes with cookie cutters before breading for extra appeal.
Honey Garlic Air Fryer Chicken Bites Prep: 10 mins | Cook: 12 mins | Serves: 4
Sweet and mild flavor profile that even hesitant eaters gravitate toward.
Kid-Friendly Twist: Serve with toothpicks for fun “pick-up” dining.
Stovetop Simplicity
When you need dinner on the table quickly, these stovetop wonders come to the rescue!
15-Minute Chicken Quesadillas Prep: 5 mins | Cook: 10 mins | Serves: 4
The perfect combination of protein and cheese that’s a consistent winner in households everywhere.
Kid-Friendly Twist: Let kids choose their add-ins from a toppings bar.
One-Pan Chicken and Rice Prep: 10 mins | Cook: 25 mins | Serves: 6
A balanced meal in one skillet means fewer dishes and more family time.
Kid-Friendly Twist: Use alphabet pasta instead of rice occasionally for a fun learning opportunity!
Slow Cooker Sensations
For those busy days when you need dinner ready when you walk in the door:
Slow Cooker BBQ Chicken Sliders Prep: 5 mins | Cook: 6 hours | Serves: 6
Tender, shredded chicken in mild BBQ sauce on mini buns is perfect for little hands.
Kid-Friendly Twist: Create a “build your own slider” station with various toppings.
Creamy Ranch Chicken and Potatoes Prep: 10 mins | Cook: 4-5 hours | Serves: 6
A comforting one-pot meal with flavors kids consistently enjoy.
Kid-Friendly Twist: Use fun-shaped cookie cutters to create potato “stars” or “hearts” before cooking.
Grilled Goodness

When weather permits, these outdoor favorites bring fun and flavor:
Simple Grilled Chicken Skewers Prep: 15 mins | Cook: 8 mins | Serves: 4
Food on sticks is mysteriously more appealing to children!
Kid-Friendly Twist: Let them help design their skewer pattern with chicken and vegetables.
Sweet Honey Lime Grilled Chicken Prep: 10 mins + marinade | Cook: 12 mins | Serves: 6
The touch of sweetness makes this a reliable hit with younger palates.
Kid-Friendly Twist: Serve with fruit skewers on the side for a colorful plate.
By Speed
Under 30-Minute Miracles
For those evenings when homework, activities, and hunger collide:
Quick Chicken Alfredo Pasta Prep: 5 mins | Cook: 15 mins | Serves: 4
Creamy, mild, and ready in a flash—a consistent weeknight savior.
Kid-Friendly Twist: Use fun pasta shapes like bowties or wheels.
15-Minute Chicken Wraps Prep: 10 mins | Cook: 5 mins | Serves: 4
A handheld dinner perfect for busy evenings or lunch boxes.
Kid-Friendly Twist: Cut into pinwheels for younger children.
By Dish Type
Nuggets & Tenders Collection

When in doubt, these universally appealing formats rarely fail:
Cornflake Crusted Chicken Tenders Prep: 10 mins | Cook: 15 mins | Serves: 4
The unique crunchy coating elevates these beyond basic tenders.
Kid-Friendly Twist: Create a “dip sampler” with different sauces.
Pretzel Crusted Chicken Nuggets Prep: 15 mins | Cook: 12 mins | Serves: 4
A sweet-salty combination that intrigues even picky palates.
Kid-Friendly Twist: Let kids crush the pretzels in a zip-top bag—fun and functional!
Pasta Pleasers
Combining two kid favorites—pasta and chicken—for guaranteed clean plates:
Chicken Parmesan Pasta Bake Prep: 15 mins | Cook: 25 mins | Serves: 6
A deconstructed version of the classic that’s more approachable for young eaters.
Kid-Friendly Twist: Use pasta shapes that hold sauce well, like shells or rotini.
Creamy Chicken Pesto Pasta Prep: 10 mins | Cook: 15 mins | Serves: 4
Mild pesto creates an appealing green sauce without overwhelming flavors.
Kid-Friendly Twist: Let them sprinkle their own cheese on top.
Beyond the Recipes: Making Mealtime Work
Picky Eater Strategies That Actually Work
- The One-Bite Rule: Encourage trying just one bite without pressure for more
- Involve Kids in Cooking: Children are more likely to eat what they help prepare
- Consistent Exposure: It can take 10+ exposures before a child accepts a new food
- Be a Role Model: Show enthusiasm for the foods you want them to try
- Respect Food Preferences: Some children have legitimate texture sensitivities
Kid-Approved Side Dishes
Pair these chicken recipes with simple sides for complete meals:
Quick SidesVeggie OptionsFun AdditionsButtered pastaSteamed carrotsFruit kabobsGarlic breadCucumber slicesCheese cubesRice pilafCorn on the cobYogurt dipsPotato wedgesRanch broccoliApple slices
Safe Cooking Tasks for Little Helpers
Getting kids involved in meal preparation builds skills and food acceptance:
- Ages 2-3: Washing produce, tearing lettuce, stirring batter
- Ages 4-5: Measuring ingredients, cracking eggs, breading chicken
- Ages 6-8: Basic knife skills with supervision, operating timer
- Ages 9+: Following simple recipes, operating certain appliances with supervision
Frequently Asked Questions
Q: What chicken dishes do most kids universally enjoy? A: Chicken nuggets, tenders, and mild chicken quesadillas tend to have the highest acceptance rates among children of all ages.
Q: How do I make chicken less boring for kids? A: Try different coatings (cereals, pretzels, parmesan), serve with dipping sauces, use cookie cutters for fun shapes, or involve kids in the preparation.
Q: My child only eats chicken nuggets. How can I expand their preferences? A: Make gradual changes to accepted foods—try homemade nuggets first, then experiment with different coatings or shapes before introducing entirely new formats.
Homemade Baby Food Safe, Simple & Nutritious
Are you considering making your own baby food but feeling overwhelmed by questions about safety, nutrition, and preparation techniques? You’re not alone. As parents, we want to provide the absolute best for our little ones while balancing busy schedules and information overload.
This comprehensive guide to homemade baby food covers everything you need to know—from essential safety protocols and nutritional considerations to step-by-step preparation methods and storage solutions. With expert-backed advice and practical tips, you’ll feel confident creating wholesome, delicious meals for your growing baby.
Table of Contents
The safety and nutritional guidance in this article has been reviewed by Dr. Emily Chen, Registered Dietitian specializing in Pediatric Nutrition with 15 years of experience working with infants and young children.
Why Make Your Own Baby Food?
Making homemade baby food offers numerous advantages beyond the satisfaction of preparing meals for your little one. Let’s explore the compelling benefits that make the extra effort worthwhile:
Superior Nutritional Control
When you prepare baby food at home, you have complete oversight of what goes into each meal. Commercial baby foods often contain thickeners, preservatives, or excess sugars that aren’t necessary for your baby’s development.
With homemade options, you can:
- Select fresh, seasonal ingredients at their peak nutritional value
- Preserve nutrients through gentle cooking methods like steaming
- Avoid unnecessary additives, salt, and sugar
- Gradually introduce spices and herbs to develop your baby’s palate
Significant Cost Savings


The financial benefits of homemade baby food are substantial when calculated over time:
| Food Type | Store-Bought Cost | Homemade Cost | Savings |
|---|---|---|---|
| Sweet Potato | $1.20 per 4oz jar | $0.30 per 4oz | 75% |
| Apple Puree | $1.05 per 4oz jar | $0.25 per 4oz | 76% |
| Chicken & Vegetables | $2.00 per 4oz jar | $0.65 per 4oz | 68% |
For a baby consuming 1-2 jars daily, the annual savings can range from $500-$1000!
Allergen Management & Transparency
Making baby food at home allows you to:
- Introduce single ingredients methodically to monitor for potential allergic reactions
- Avoid cross-contamination risks for babies with known allergies
- Know exactly what’s in each meal without deciphering complex labels
Environmental Impact
Homemade baby food significantly reduces packaging waste. The average baby consuming store-bought food generates hundreds of glass jars or plastic containers annually. By making food at home and using reusable storage solutions, you’ll substantially reduce your environmental footprint.
Flavor Development & Food Acceptance
Research suggests babies who experience a variety of fresh flavors early are more likely to accept diverse foods later. Homemade baby food allows you to:
- Introduce authentic food flavors rather than processed versions
- Create customized combinations based on your baby’s preferences
- Gradually transition textures as your baby develops
Safety First: Non-Negotiable Practices
This section has been carefully reviewed by Dr. Emily Chen, RD, to ensure alignment with current safety guidelines.
Essential Hygiene Protocols
Before preparing baby food, always:
- Wash hands thoroughly with soap and warm water for at least 20 seconds
- Sanitize all preparation surfaces with food-safe cleaners
- Use separate cutting boards for produce and meat products
- Wash all utensils in hot, soapy water or dishwasher
Safe Food Preparation
Produce Safety:
- Rinse all fruits and vegetables thoroughly under cold running water
- For thick-skinned produce like melons or squash, scrub with a clean brush
- For leafy greens, separate leaves and wash individually
- Consider organic options for the “dirty dozen” (strawberries, spinach, kale, etc.) if budget allows
Cooking Temperatures:
- Ensure all meats reach safe internal temperatures:
- Poultry: 165°F (74°C)
- Ground meats: 160°F (71°C)
- Fish: 145°F (63°C)
- Cook eggs until both white and yolk are firm
- Steam vegetables until fork-tender to preserve nutrients while ensuring softness
Foods to Absolutely Avoid
- Honey in any form before 12 months (risk of infant botulism)
- Raw or undercooked meat, eggs, or fish
- High-mercury fish (shark, swordfish, king mackerel, tilefish)
- Unpasteurized dairy products or juices
- Added salt or sugar in baby’s portions
- Cow’s milk as a primary drink before 12 months
- Choking hazards even in pureed form if not completely smooth (nuts, whole grapes, popcorn)
Safe Allergen Introduction
Current pediatric guidelines actually recommend early introduction of potential allergens (between 4-11 months) to help prevent allergies from developing:
- Introduce one new food at a time
- Start with a small amount (¼-½ teaspoon)
- Introduce the food in the morning to monitor reactions throughout the day
- Wait 2-3 days before introducing another potential allergen
- Common allergens to introduce carefully: peanut products (thinned peanut butter), egg, dairy, soy, wheat, tree nuts, fish, and shellfish
“The latest research shows that early, controlled exposure to potential allergens, not avoidance, is the best approach for most babies. Always discuss with your pediatrician first, particularly if your baby has eczema or a family history of food allergies.” – Dr. Emily Chen, RD
Essential Equipment for Making Baby Food
You don’t need expensive specialized equipment to make excellent baby food. Here’s what you’ll need:
Basic Essentials
- A pot for steaming or boiling
- A fork or potato masher for soft foods
- Ice cube trays or small freezer-safe containers
- Reusable storage containers (BPA-free plastic or glass)
- Steamer basket (metal or silicone)
- Cutting board and knife
Helpful Upgrades
- Immersion blender or food processor for smoother textures
- Specialized baby food maker (combines steaming and blending)
- Silicone freezer trays with lids
- Reusable food pouches for on-the-go feeding
- Kitchen scale for portion consistency
Choosing the Best Ingredients

Stage 1 (4-6 months): Perfect First Foods
Focus on single-ingredient purees that are:
- Mild in flavor
- Easy to digest
- Nutritionally dense
- Unlikely to trigger allergies
Excellent starter options include:
- Vegetables: sweet potato, carrots, peas, green beans, avocado
- Fruits: banana, apple, pear
- Grains: iron-fortified infant cereals mixed with breast milk or formula
Nutritional Priorities
When planning baby food, prioritize:
- Iron-rich foods: critical after 6 months as baby’s natural iron stores diminish
- Iron-fortified cereals, pureed meat, beans, lentils
- Protein sources: essential for growth
- Pureed chicken, turkey, beef, legumes
- Healthy fats: critical for brain development
- Avocado, olive oil (small amounts), whole milk yogurt (after 6 months)
- Varied fruits and vegetables: providing diverse vitamins and minerals
Fresh vs. Frozen vs. Canned
| Type | Pros | Cons | Best Uses |
|---|---|---|---|
| Fresh | Peak flavor, No additives | Shorter shelf life, Seasonal variability | Direct consumption, Small batches |
| Frozen | Convenient, Often flash-frozen at peak ripeness, Retains nutrients | Texture changes in some foods | Large batch cooking, Off-season options |
| Canned | Shelf-stable, Convenient | May contain salt/sugar, BPA concerns in some cans | Emergency options (choose no-salt-added varieties) |
Step-by-Step Baby Food Preparation
1. Preparation
- Wash all produce thoroughly
- Peel fruits and vegetables with thick or fibrous skins (apples, squash)
- Remove seeds, pits, and strings
- Cut into uniform, small pieces for even cooking
2. Cooking Methods
Steaming (Preferred Method)
- Place water in a pot with a steamer basket
- Add prepared food to the basket
- Cover and cook until tender (5-15 minutes depending on the food)
- Reserve cooking liquid for thinning purees
Why steam? Steaming preserves the most nutrients while softening foods effectively.
Roasting
- Preheat oven to 375°F (190°C)
- Toss prepared food with a tiny amount of olive oil
- Spread on a baking sheet
- Roast until soft (20-45 minutes depending on the food)
Why roast? Roasting concentrates flavors and can make naturally sweet foods like sweet potatoes even more appealing.
Boiling
- Place prepared food in a pot with just enough water to cover
- Bring to a boil, then reduce to simmer
- Cook until tender
- Reserve cooking liquid
Why boil? Simple and effective, though some water-soluble nutrients may be lost.
3. Pureeing
- Transfer cooked food to a blender, food processor, or use an immersion blender
- Add small amounts of reserved cooking water, breast milk, or formula to achieve desired consistency
- For stage 1 (4-6 months): Blend until completely smooth
- For stage 2 (6-9 months): Leave some soft texture
- For stage 3 (9-12 months): Create thicker textures with soft lumps
4. Cooling
- Let food cool completely before storing
- Speed cooling by placing the container in an ice bath
- Never put hot food directly into the refrigerator or freezer
Storage & Handling Guidelines
Proper storage is critical for maintaining safety and nutritional quality:
Refrigeration
- Store in clean, airtight containers
- Label with contents and date prepared
- Use within 48 hours for most foods (24 hours for meat, fish)
- Keep refrigerator at or below 40°F (4°C)
Freezing
- Pour cooled purees into ice cube trays or containers
- Cover tightly or transfer to freezer bags once solid
- Label with contents and date
- Use within:
- Fruit/vegetable purees: 3-6 months
- Meat/protein purees: 1-2 months
- Mixed dishes: 1-3 months
Safe Thawing & Reheating
- Thaw in the refrigerator overnight (safest method)
- For quick thawing, use cold water bath (change water every 30 minutes)
- Reheat thoroughly to 165°F (74°C)
- Stir well and test temperature before serving
- NEVER refreeze previously frozen baby food
- Discard any food that has been in contact with baby’s saliva
“Many parents don’t realize that baby’s saliva introduces enzymes and bacteria into leftover food. Always discard any food that’s been in contact with the spoon that’s gone into baby’s mouth.” – Dr. Emily Chen, RD
Introduction Strategy & Timing
Signs of Readiness for Solid Foods
- Sits up with minimal support
- Shows good head and neck control
- Shows interest in food (watching others eat, reaching for food)
- Has lost the tongue-thrust reflex (doesn’t automatically push food out)
- Typically around 4-6 months (consult your pediatrician)
First Feedings
- Choose a time when baby is alert but not overly hungry
- Start with 1-2 teaspoons, gradually increasing
- Feed from a small spoon, never in a bottle
- Follow baby’s cues—never force feeding
- Allow exploration and messiness
Expanding the Menu
- Introduce new foods one at a time (especially potential allergens)
- Focus on variety rather than quantity
- Watch for signs of readiness for increased texture
- By 12 months, aim to have introduced a wide range of flavors and textures
Troubleshooting Common Challenges
Baby Rejecting Food?
- Try offering at different times of day
- Consider temperature (some babies prefer room temperature foods)
- Mix with familiar foods initially
- Be patient—it can take 10-15 exposures for acceptance
- Check consistency—some babies are sensitive to texture
Dealing with Constipation
- Offer “P” fruits: prunes, pears, peaches
- Ensure adequate fluid intake
- Consider puree consistency (may need more liquid)
- Avoid excessive rice cereal, which can be binding
Tips for Busy Parents
- Dedicate one day per month for batch cooking
- Freeze in portion sizes appropriate for baby’s current intake
- Consider partial homemade approach—no need to be all-or-nothing
- Repurpose suitable portions of family meals when possible
- Use fresh foods for immediate consumption, frozen batches as backup
Conclusion
Making homemade baby food is a rewarding way to nourish your growing baby with wholesome ingredients while developing their palate for a lifetime of healthy eating. With proper planning and simple techniques, you can provide nutritious meals that support your baby’s development without spending hours in the kitchen.
Remember that each baby is unique—follow your child’s cues, consult with your pediatrician about specific nutritional needs, and enjoy this special time of discovery together.
Would you like personalized guidance for your baby’s nutritional journey? Download our free Homemade Baby Food Starter Guide with printable storage charts and a 3-month introduction plan!
This article was written by Sarah Williams, certified nutritionist and mother of three with 8+ years of experience creating content about infant and toddler nutrition. The safety and nutritional content has been reviewed by Dr. Emily Chen, RD, Pediatric Nutrition Specialist.
