
CoEd Baby Shower Ideas For Outdoor Jack and Jill Couples Showers
Coed Baby Shower Ideas for Outdoor Jack and Jill Couples Showers
A coed baby shower — often called a Jack and Jill shower — brings both parents-to-be and their friends together for a lively, inclusive celebration. When held outdoors, these events gain a relaxed, festive atmosphere that’s perfect for mixing traditional baby-shower touches with couple-friendly activities. If you’re planning the menu, a helpful starting point is this collection of baby shower food ideas for a girl to spark ideas you can adapt for a coed crowd.
Below are creative, practical ideas to help you design an unforgettable outdoor Jack and Jill baby shower.
Theme & Invitations
- Choose a neutral, couple-oriented theme such as "Garden Picnic," "Woodland Welcome," or "Sunset Soirée" that appeals to all genders.
- Send invitations that mention the coed nature of the event and include RSVP options for food preferences and any outdoor accessibility needs.
- Suggest casual attire suitable for the setting (e.g., comfy shoes for grass).
Layout & Comfort
- Create distinct zones: a welcome area, a dining area, an activity/games area, and a cozy lounge with blankets and throw pillows.
- Rent or borrow shaded structures (tents, umbrellas) and include outdoor fans or heaters depending on the season.
- Provide clear signage and a small welcome table with name tags and a brief schedule.
Décor That Fits Everyone
- Use natural elements like potted plants, mason jars, and wooden signage for gender-neutral charm.
- Mix playful baby items (tiny shoes, onesies) into more grown-up centerpieces (candles, succulents) so the décor feels balanced.
- A chalkboard or custom print that celebrates both parents-to-be makes a warm focal point.
Games & Activities for Couples and Friends
- Opt for interactive games that encourage team play or light competition: diaper-changing relays, baby-item trivia, or a “guess the baby food” taste test.
- Offer a collaborative craft station where guests sign a quilt square, write wishes on cards, or decorate onesies.
- Keep prizes simple and useful—gift cards, gourmet snacks, or a small plant.
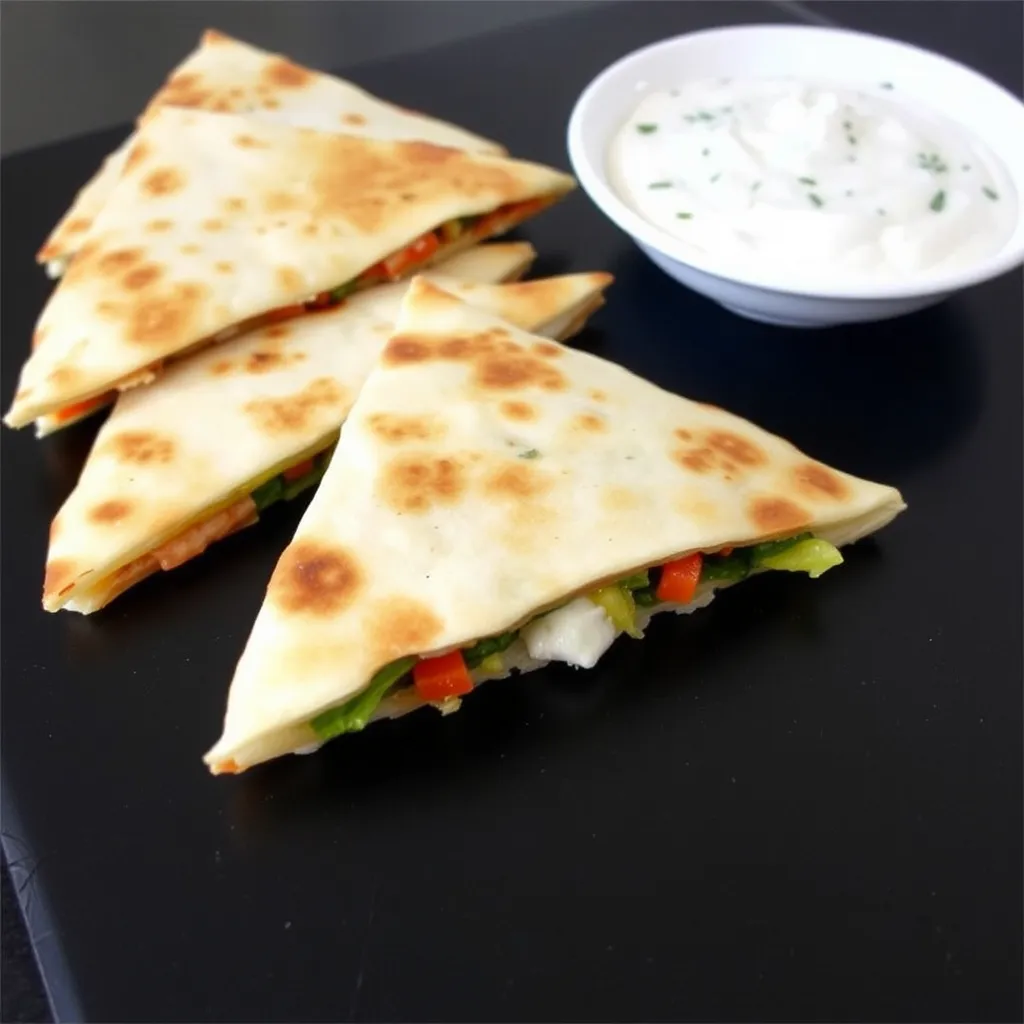
Food & Drink
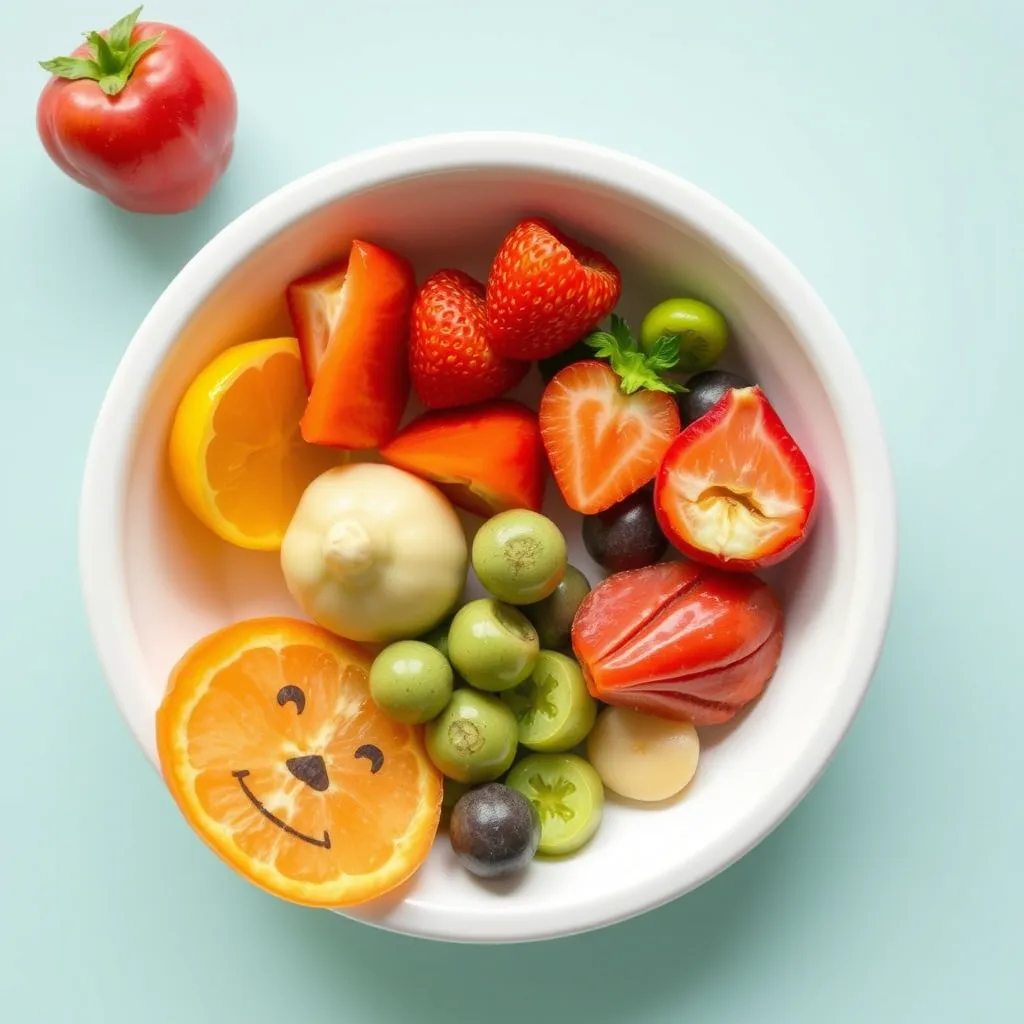
- Serve a mix of handhelds and plated items to suit a picnic-style outdoor shower. Finger foods, sliders, skewers, and build-your-own bowls work well.
- Include vegetarian, vegan, and kid-friendly options, and clearly label all dishes.
- For more outdoor-specific catering ideas and setup tips, take a look at these outside baby shower ideas for girls which can be adapted for coed events.
- Offer a signature mocktail for the expectant parent(s) and one or two simple cocktails for guests, plus plenty of water and iced tea.
Photo Ops & Keepsakes
- Create a photo backdrop that reflects the theme; consider props that work well for couples and groups.
- Set out a guestbook alternative—such as a polaroid guest wall or notes in a keepsake box—so everyone can leave memories for the parents-to-be.
- A timeline or slideshow of the couple’s journey (if desired) adds a personal moment without sidelining guests.
Practical Tips & Timeline
- Aim for a 2–3 hour event to keep energy high and avoid overstaying outdoors.
- Schedule key moments (welcome toast, games, opening gifts or group activity) so guests know what to expect.
- Prepare a weather contingency plan and communicate it in advance.
Favors & Parting Gifts
- Choose favors that appeal to both genders: small bottles of local honey, gourmet popcorn tins, mini potted succulents, or custom coasters.
- Include a thank-you note that references the shared celebration of the couple’s growing family.
Budget & Eco-Friendly Choices
- Reuse decor, choose seasonal produce for the menu, and offer reusable or compostable tableware to reduce waste.
- Pool resources with friends or family to rent a few high-impact items (tents, heaters, quality speakers) instead of buying them.
Conclusion
For a clear overview of why couples choose Jack and Jill-style celebrations and what to consider when planning one, check out Zola’s guide to Jack and Jill wedding showers, which outlines pros and cons that apply well to coed baby showers. If you want more playful game ideas tailored for mixed-gender groups, you’ll find a great list in Greenvelope’s round-up of coed baby shower games to help keep everyone entertained.
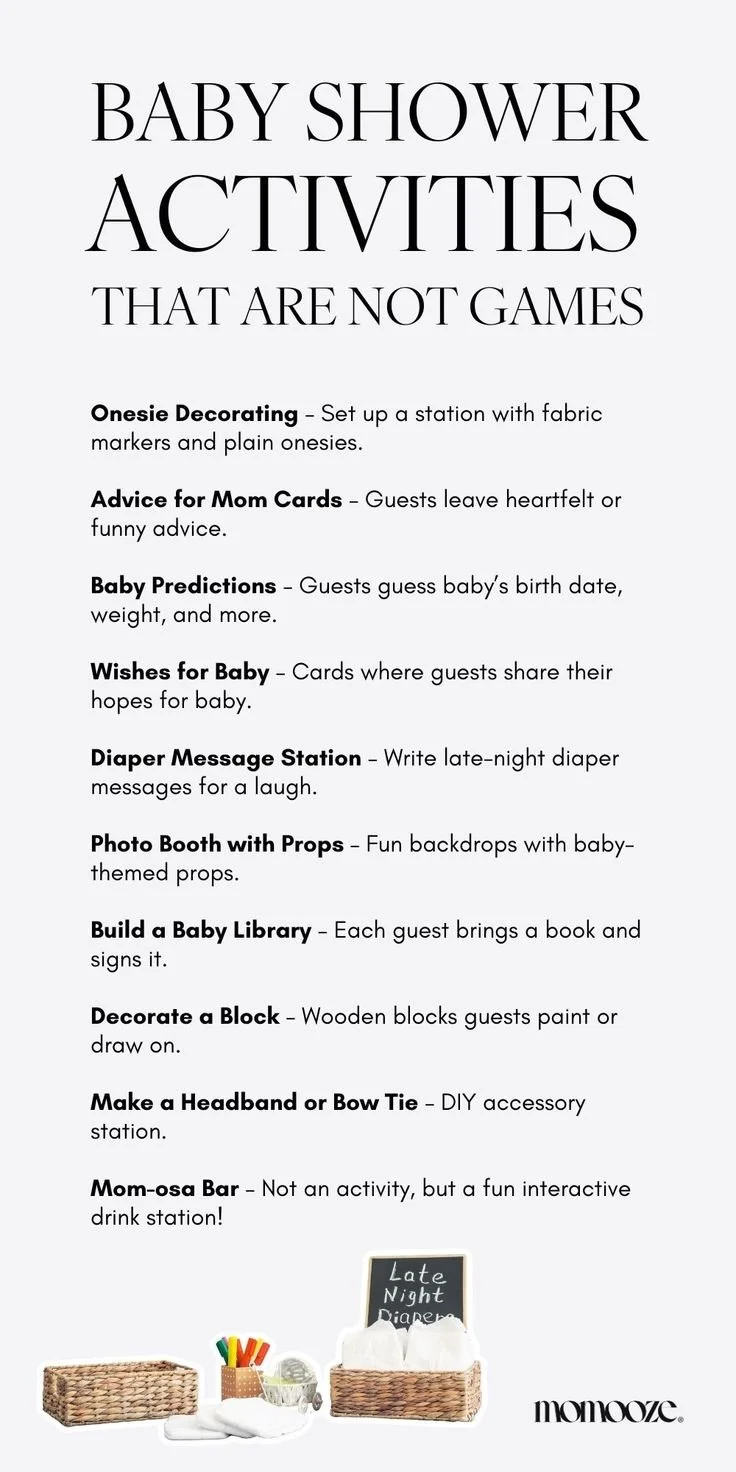
13+ Cool Baby Shower Activities That Are Not Games [Your Guests Will Love]
Fresh Alternatives: 13+ Cool Baby Shower Activities That Aren’t Games (Your Guests Will Love)
A baby shower doesn’t need to rely on competitive games to be memorable. Thoughtful, creative, and inclusive activities can create warm memories and meaningful keepsakes for the parents-to-be and their guests. If you’re planning a celebration and want inspiration beyond the usual trivia and bingo, this list will help you craft an event that feels relaxed, personal, and delightful. For more ideas focused specifically on non-game options, check out creative non-game baby shower ideas.
Below are 13+ activity ideas grouped by purpose: keepsakes, personalization, pampering, learning, and low-key fun. Each idea includes variations and practical tips so you can adapt it to any venue or guest list.
Keepsake & Sentimental Activities
Advice & Wishes Jar
- Ask guests to write a wish, piece of advice, or short memory on cards and drop them into a decorated jar. Later, the parents-to-be can pull out a note whenever they need encouragement.
Letters to Baby
- Provide stationery or themed postcards for guests to write letters to the baby, to be opened at milestones (first birthday, graduation, etc.). Include prompts like “The funniest thing about your parent is…” to help those who need inspiration.
Time Capsule Box
- Invite guests to bring small items or notes to include in a time capsule that the family will open on a future date. Label and seal it with a tag detailing when to open.
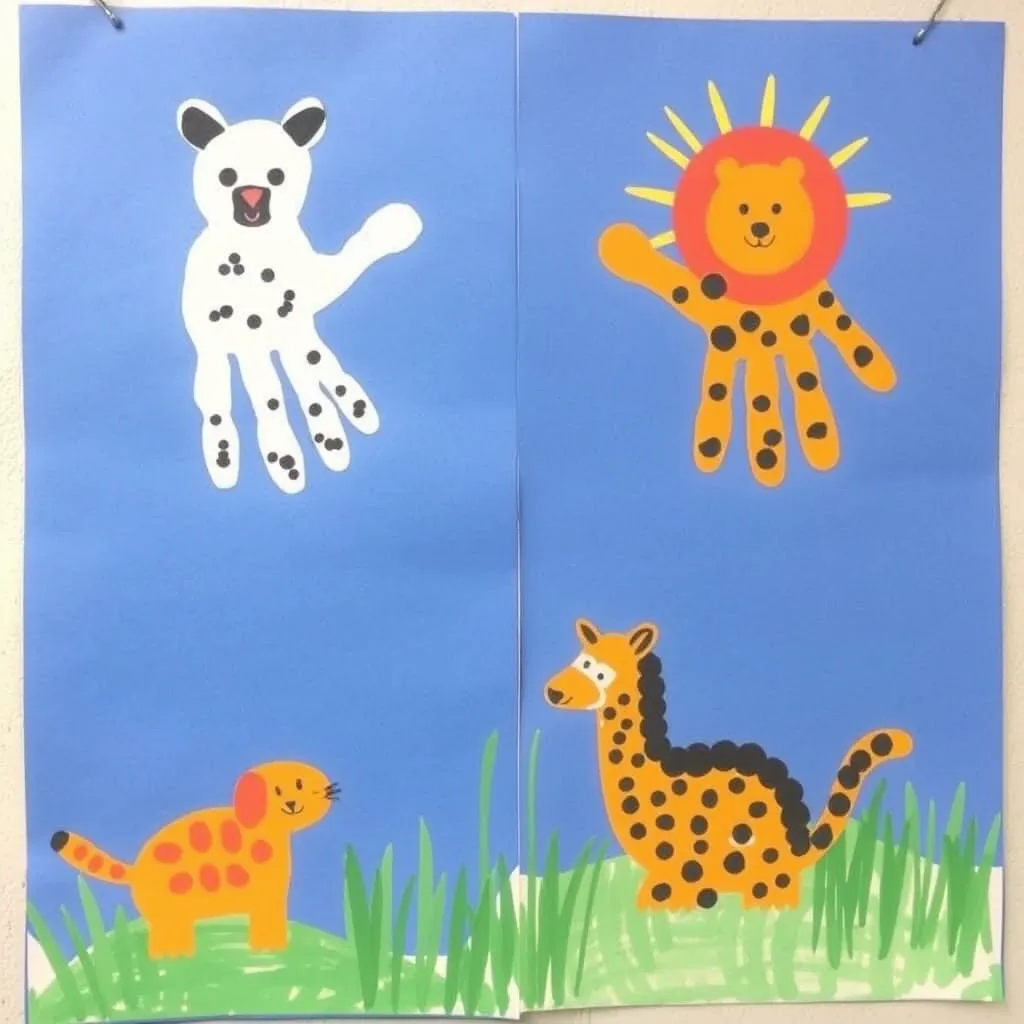
Handprint or Footprint Art Station
- Set up non-toxic paints and paper or canvas so guests can leave handprints or footprints. This creates a colorful keepsake and can be turned into wall art for the nursery.
Personalization & Keepsake Crafts
Onesie Decorating Bar
- Provide plain onesies and fabric markers, paints, and appliqués. Offer stencils and examples so everyone — even non-crafty guests — can make something special.
Storybook Signing Table
- Ask each guest to sign a favorite children’s book with a short message instead of signing a card. Over time the baby will build a library filled with personal notes.
Memory Quilt Squares
- Have guests decorate fabric squares with messages or images; later sew them into a memory quilt. For a simpler version, use pre-cut felt squares and fabric glue.
Pampering & Relaxation
Mini Spa Corner
- Create a mini pampering spot with hand massages, foot soaks, or a quick manicure station. This is especially appreciated at longer events and gives guests a chance to relax and chat.
Tea & Tasting Flight
- Host a tea or mocktail tasting table with small samplers and tasting notes. Guests can compare favorites and vote for the best blend, but it’s meant to be relaxed and social rather than competitive.
Personalized Keeps & Practical Help
Meal Train Sign-Up & Recipe Swap
- Invite guests to sign up to bring a meal in the early weeks after the baby arrives. Combine this with a recipe swap where everyone leaves a favorite family recipe written on a recipe card.
Practical Advice Station
- Offer stations with topics—sleep, feeding, stroller tips—where experienced guests can write short practical tips on index cards for the parents to take home.
Creative & Low-Key Fun
Photo Booth with Props
- Set up a simple backdrop and a box of themed props. Provide an instant camera or ask guests to upload photos to a shared album. It’s easy entertainment that leaves you with candid memories.
Nursery Mood-Board Making
- Provide magazines, fabric swatches, color samples, and glue so guests can assemble a mini mood board to inspire the nursery design. This can be done individually or in small groups.
Poetry & Lullaby Circle (Bonus)
- Invite guests to read a short poem, share a personal lullaby, or sing a verse for the baby. Keep it optional and brief so it’s sweet rather than performative.
Tips for a Smooth, Non-Game Shower
- Keep supplies organized: labeled baskets and clear instructions make DIY stations welcoming for all skill levels.
- Offer clear timing cues: tell guests whether activities are “open all day” or scheduled to avoid crowding.
- Make accessibility choices: choose non-toxic materials, comfortable seating, and consider virtual participation options for distant friends.
- Combine options: pair a keepsake station with a low-key pampering area so guests can mix crafting with conversation.
Inclusive Options for Every Guest
If you expect a diverse guest list — including partners, dads, or nontraditional attendees — plan activities that feel inclusive rather than gendered. For example, the who-will-help-with-meal-train or memory quilt ideas are universally welcoming and create meaningful contributions from everyone. For shower ideas that specifically acknowledge and involve men and other nontraditional guests, consider resources about inclusive baby shower activities for men and nontraditional guests to spark ideas.
Conclusion
Non-game baby shower activities can foster connection, create lasting mementos, and make the parents-to-be feel genuinely supported. If you want additional inspiration specifically around creative gender reveal moments, see this curated collection of gender reveal game ideas for guests. For a broader set of heartfelt and practical options to shape the whole event, check out this meaningful baby shower activities list to help you plan a memorable celebration.
7 Unique and Creative Spring Baby Shower Themes and Ideas
Unique and Creative Spring Baby Shower Themes and Ideas
Spring is a season of renewal, blossoming flowers, and vibrant colors, making it the perfect backdrop for a memorable baby shower. If you’re looking to celebrate the arrival of a little one during this beautiful time of year, consider these unique and creative themes that embrace the essence of spring.
1. Garden Party Extravaganza
Transform your baby shower into a magical garden party. Host the event in a backyard or local park filled with blooming flowers. Decorate with pastel-colored tablecloths, floral centerpieces, and hanging fairy lights. Encourage guests to wear floral prints or garden-themed attire. To enhance the atmosphere, serve refreshing beverages like herbal teas and fruit-infused waters, along with finger foods that celebrate the bounty of spring!
2. Bee-utiful Baby Shower
Celebrate the sweetness of new life with a bee-themed baby shower! Emphasize yellow and black colors in your decorations and opt for honeycomb-inspired patterns. Create buzz with “bee-lieve” signage and incorporate honey-flavored treats, like honey cake or cookies shaped like bees. A fun activity could involve making bee-themed crafts, such as building mini bee hives with candy.
3. Whimsical Woodland
Embrace the charm of the forest with a whimsical woodland theme. Use natural elements like wood slices and pinecones as table decorations, and hang paper lanterns from trees if outdoors. Incorporate woodland creatures into your decor—think owls, deer, and foxes! For a delightful touch, serve treats like acorn cheese balls and a “forest floor” cake made of chocolate and crumbled cookies.
4. Under the Sea
Take your baby shower on an aquatic journey with an under the sea theme. Utilize shades of blue, coral, and sandy beige in your decor. Create a sea-inspired atmosphere with balloons shaped like jellyfish and table settings that resemble ocean waves. Serve seafood-inspired dishes and colorful mocktails while providing guests with seashell-shaped favors filled with chocolates.
5. Sailing into Parenthood
If your heart is set on something nautical, a sailing theme can be a breath of fresh air. Decorate with navy and white stripes, anchors, and sailboats. Provide guests with sailor hats as party favors and serve ocean-themed cupcakes topped with blue frosting and edible sand. Activities could include a nautical trivia game, ensuring your guests are amused while awaiting the arrival of the newest crew member!
6. Starlit Sky
As nights become clearer in spring, draw inspiration from the beauty of the night sky. Use deep blues and purples adorned with twinkling stars and crescent moons. Perhaps you could even have a telescope set up for stargazing if the shower takes place in the evening. Signature cocktails or mocktails could include “galaxy” themes, and you might consider storytelling sessions where guests share tales of their own journeys into parenthood under the stars.
7. Enchanted Fairy Tale
Awaken your guests’ imaginations with an enchanted fairy tale baby shower. Decorate with soft pastel colors, glitter, and elements reminiscent of storybooks—think fairy wings, castles, and charming toadstools. Serve cupcake towers styled as mini castles and offer whimsical party games, like a “Guess the Fairy Tale” quiz. You could even include a storytelling corner where guests can read bedtime stories to honor the forthcoming little one.
Conclusion
Spring presents a wonderful opportunity to celebrate new beginnings and the joy of welcoming a bundle of joy into the world. With these unique and creative baby shower themes, you’ll be sure to capture the spirit of the season while crafting delightful memories for everyone involved. Be sure to tailor the chosen theme with personal touches that reflect the mom-to-be’s personality, ensuring a truly magical experience!

101+ Fun And Easy Crafts for Kids (Ideas for All Ages!)
Are you looking for creative ways to keep your little ones entertained while developing their skills and imagination? You’ve come to the right place! This comprehensive guide brings together over 100 fun and easy crafts for kids of all ages – from toddlers just discovering their creativity to older children ready for more complex projects.
Crafting with kids isn’t just about keeping them busy (though that’s definitely a bonus!). It’s about creating precious bonding moments, encouraging screen-free play, and watching their faces light up with pride when they create something all by themselves. Let’s dive into this treasure trove of creativity!
Table of Contents Fun And Easy Crafts for Kids
Why Crafting is Awesome for Kids
Crafting does so much more than just occupy time. When children engage in arts and crafts activities, they:
- Develop fine motor skills and hand-eye coordination
- Enhance creativity and self-expression
- Practice problem-solving and critical thinking
- Learn to follow instructions and build patience
- Explore sensory experiences and different textures
- Build confidence through completing projects
Essential Craft Supplies Checklist
Before diving into specific projects, here’s a list of versatile supplies worth keeping on hand:
- Paper products: Construction paper, cardstock, paper plates, toilet paper rolls
- Drawing tools: Crayons, washable markers, colored pencils
- Adhesives: Kid-safe scissors, glue sticks, white school glue
- Painting supplies: Washable tempera paint, watercolors, paintbrushes (various sizes)
- Decorative items: Googly eyes, pipe cleaners, pom-poms, sequins, stickers
- Recyclables: Cardboard boxes, plastic containers, bottle caps
- Natural items: Leaves, pinecones, twigs, shells
Fun & Easy Crafts by Age Group
Toddler Crafts (Ages 1-3)
At this stage, focus on sensory exploration and simple activities that don’t require precise skills.
Finger Painting Fun
- Difficulty: Very Easy
- Time: 10-15 minutes
- Materials: Washable finger paint, thick paper or cardboard
- Steps:
- Secure paper to table with tape
- Add small dollops of different colored paints
- Let your toddler explore and create!
- Pro Tip: For edible options, try yogurt colored with food dye or pudding paint
Handprint Animals
- Difficulty: Easy
- Time: 15 minutes
- Materials: Washable paint, paper, markers
- Steps:
- Paint child’s palm and fingers
- Press onto paper to create handprint
- Once dry, add details to transform into animals (fingers become tentacles for octopus, turkey feathers, etc.)
- Safety Note: Use non-toxic, washable paint
Preschool Crafts (Ages 3-5)
Preschoolers are developing their cutting and gluing skills, and they’re ready for slightly more structured activities.
Paper Plate Animal Masks

- Difficulty: Easy
- Time: 20 minutes
- Materials: Paper plates, scissors, elastic string, paint or markers, craft materials
- Steps:
- Cut eye holes in paper plate
- Decorate as favorite animal (lion, cat, bear, etc.)
- Attach elastic string to wear
- Variation: Add construction paper ears, yarn for mane, or feathers
Toilet Roll Characters
- Difficulty: Easy
- Time: 15-20 minutes
- Materials: Toilet paper rolls, construction paper, googly eyes, markers, glue
- Steps:
- Cover roll with construction paper or paint
- Add facial features and decorations
- Create animals, superheroes, or family members
- Pro Tip: Stand them up for pretend play or puppet shows
Early Elementary Crafts (Ages 5-8)
Children in this age range can follow multi-step instructions and use tools more independently.
DIY Slime Creations
- Difficulty: Medium
- Time: 25 minutes
- Materials: Clear or white school glue, liquid starch, food coloring, glitter (optional)
- Steps:
- Mix 1/2 cup glue with 1/4 cup water
- Add food coloring and glitter if desired
- Slowly stir in 1/4 cup liquid starch until slime forms
- Knead with hands until consistency is right
- Safety Note: Adult supervision recommended for measuring ingredients
Rock Painting Pets

- Difficulty: Medium
- Time: 30-45 minutes
- Materials: Smooth rocks, acrylic paint, paintbrushes, clear sealer (optional)
- Steps:
- Clean and dry rocks thoroughly
- Paint base color and let dry
- Add details to create animals or characters
- Seal if displaying outdoors
- Pro Tip: Use dots of paint for detailed patterns
Crafts for Older Kids (Ages 8+)
Older children can handle more complex techniques and longer projects.
Friendship Bracelets
- Difficulty: Medium-Hard
- Time: 45+ minutes
- Materials: Embroidery floss in various colors, tape or safety pin
- Steps:
- Choose 3-6 strands of floss
- Secure at top with tape or safety pin
- Follow basic knot patterns to create designs
- Tie off when reached desired length
- Variation: Add beads for extra flair
DIY Bath Bombs
- Difficulty: Medium
- Time: 30 minutes (plus drying time)
- Materials: Baking soda, citric acid, cornstarch, epsom salt, food coloring, essential oils, spray bottle with water
- Steps:
- Mix dry ingredients in bowl
- Add color and fragrance
- Spritz lightly with water until mixture holds together
- Pack into molds and let dry overnight
- Pro Tip: Perfect for homemade gifts!
Seasonal & Holiday Crafts
Fall Crafts
Leaf Printing

- Difficulty: Easy
- Time: 20 minutes
- Materials: Fall leaves, paint, paper
- Steps:
- Collect various leaf shapes
- Paint one side of leaf
- Press painted side onto paper
- Lift carefully to reveal print
- Variation: Create a full tree with handprints as the trunk and leaf prints as foliage
Winter Crafts
Paper Snowflakes

- Difficulty: Medium
- Time: 15 minutes
- Materials: White paper, scissors
- Steps:
- Fold paper into triangles
- Cut small shapes from edges
- Unfold to reveal unique snowflake pattern
- Pro Tip: Spray with diluted glue and sprinkle with glitter for sparkly effect
Quick & Easy / Low-Mess Crafts
Washi Tape Picture Frames
- Difficulty: Very Easy
- Time: 10 minutes
- Materials: Cardboard, washi tape in various patterns, photo
- Steps:
- Cut cardboard into frame shape
- Cover with overlapping washi tape patterns
- Attach photo to back
- Pro Tip: Add magnet to back for refrigerator display
Tips for Successful (and Fun!) Crafting with Kids
- Prepare ahead of time: Gather all materials before announcing craft time
- Protect surfaces: Use tablecloths, newspaper, or plastic sheeting
- Dress appropriately: Wear old clothes or smocks for messy projects
- Focus on process over product: The experience matters more than perfect results
- Be flexible: Allow kids to put their own creative spin on projects
- Know when to stop: Watch for signs of frustration or waning interest
- Clean together: Make cleanup part of the activity
Frequently Asked Questions About Kids’ Crafts
How do I craft with a child who has a very short attention span?
Start with ultra-quick projects (5 minutes or less) and gradually build up their crafting stamina. Finger painting, sticker art, or simple stamping activities are perfect starting points. Break longer crafts into smaller sessions, completing one part at a time. The key is to quit while they’re still having fun, before frustration sets in.
What are the best crafts for minimizing mess?
Low-mess options include sticker art, washi tape crafts, coloring activities, paper folding projects, and stringing beads. Using washable markers instead of paint, working on trays or mats, and choosing glue sticks over liquid glue can also reduce cleanup time. For potentially messy activities, consider taking them outdoors or into the bathtub.
How can I craft on a budget?
Many amazing crafts require only household items and recyclables. Save toilet paper rolls, egg cartons, bottle caps, and clean food containers. Nature provides free materials like leaves, twigs, and stones. Watch for sales on basic supplies like construction paper and glue, and consider joining parent groups where craft supplies are sometimes swapped or shared.
My child gets frustrated when crafts don’t turn out as expected. What should I do?
Focus conversations on the process rather than the end result. Use phrases like “I love how you mixed those colors!” instead of judging the final product. For children who are perfectionists, choose crafts with more structure and clear steps. Most importantly, model a positive attitude when your own projects don’t turn out perfectly.
Are there any crafts specifically good for developing fine motor skills?
Yes! Look for activities involving these skills: threading (beads, pasta necklaces), cutting, tearing paper, using tweezers to place small items, finger painting, manipulating play dough, weaving, and drawing. These all help strengthen the small muscles needed for writing and other precision tasks.
How do I store and organize craft supplies?
Clear plastic bins labeled with pictures and words work well for most supplies. Rolling carts with multiple drawers allow for mobility. For paper, consider vertical magazine holders or file folders. Recycled containers work great for smaller items like beads or buttons. The most important principle is having a designated place for everything that’s accessible to children (for items safe for them to use independently).
What crafts work well for mixed age groups (like siblings of different ages)?
Look for base projects that can be adapted for different skill levels. For example, with a paper plate craft, a toddler might focus on painting the plate while an older child adds detailed decorations. Nature crafts also work well, as each child can contribute at their own level. Having some “helper” roles for older children can make the experience more engaging for everyone.
My child only wants to do the same craft over and over. Should I be concerned?
Not at all! Repetition is how children master skills and gain confidence. Each time they repeat a craft, they’re likely focusing on different aspects or making small variations. When they’re ready to move on, they will. You can gently introduce variations of their favorite craft to expand their repertoire while honoring their preferences.
Conclusion
The world of kids’ crafts is endless! Whether you have five minutes or an entire afternoon, whether you’re working with a toddler or a tween, there’s always a creative project that fits the bill. Remember, the goal isn’t perfection—it’s about creating memories, building skills, and having fun together.
Ready to get crafting? Pick a project from this guide that matches your child’s age and interests, gather your supplies, and watch their creativity bloom!

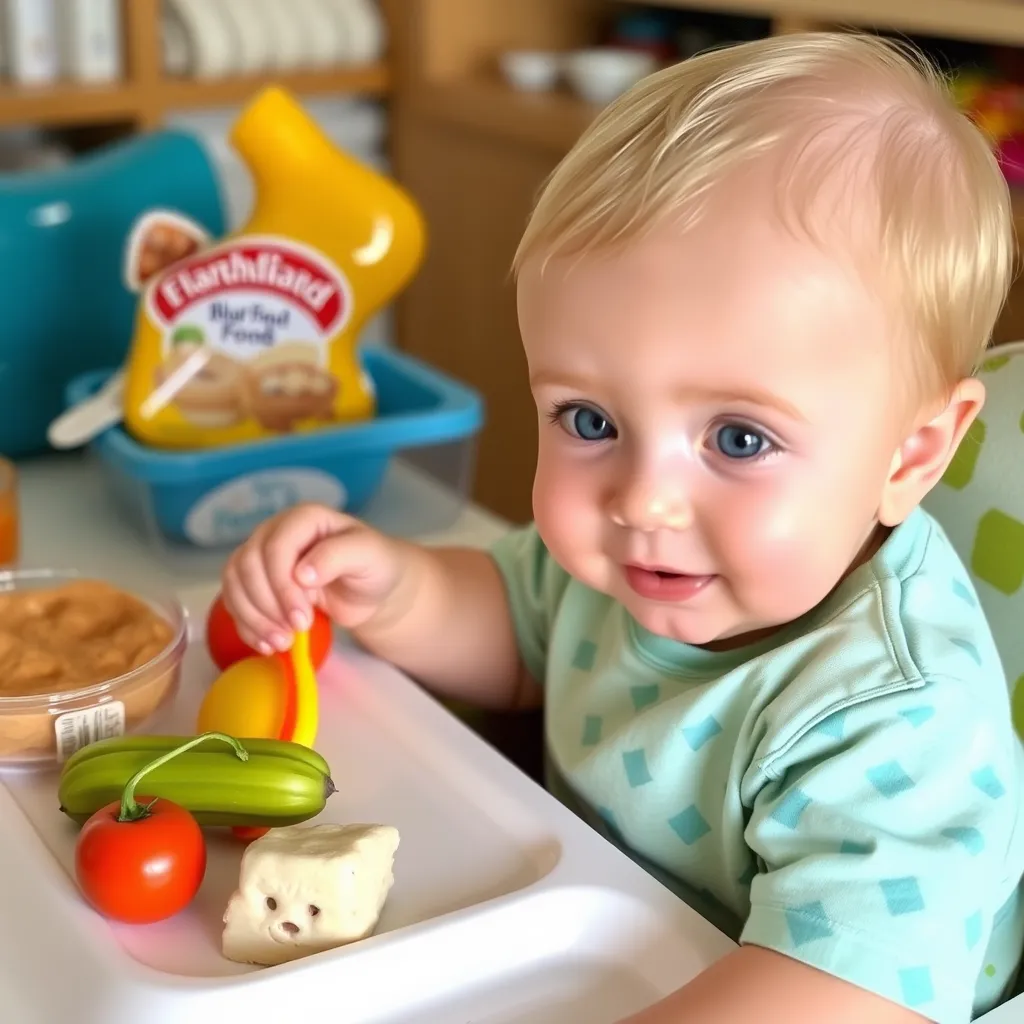
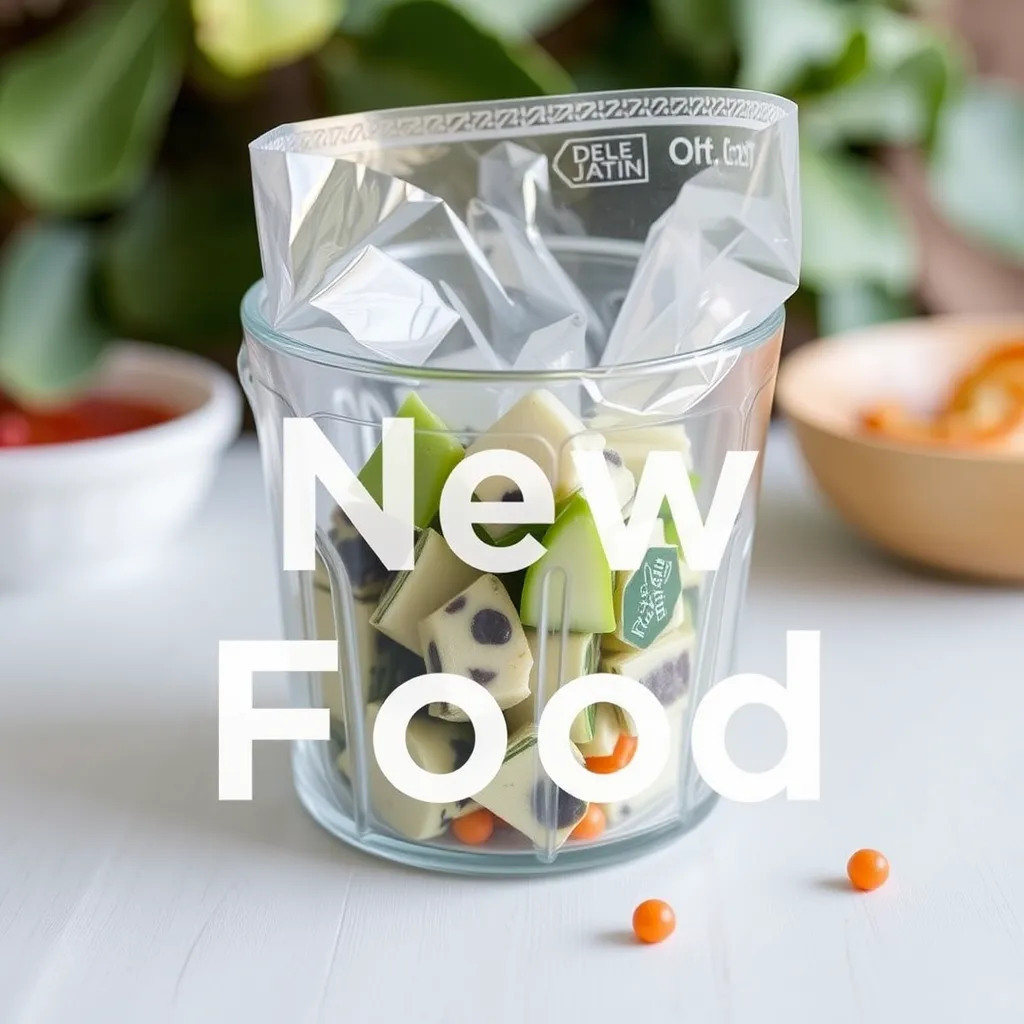
Baby Finger Foods Safe Start, Happy Eater (Expert-Backed)
Watching your little one reach that exciting milestone of starting Baby Finger Foods a mix of joy, excitement, and yes—a healthy dose of anxiety. You’re probably wondering exactly what foods are safe, when to start, and how to navigate this important developmental step.
Finger foods aren’t just convenient; they’re crucial building blocks for your baby’s development. They help develop fine motor skills, encourage self-feeding independence, and introduce your child to diverse tastes and textures that set the foundation for healthy eating habits.
As a pediatric nutritionist with over a decade of experience guiding parents through baby’s first foods, I’ve created this comprehensive guide with safety at the forefront, drawing on the latest evidence-based recommendations and practical experience working with hundreds of families. This article has also been reviewed by Dr. Sarah Johnson, pediatrician specializing in infant nutrition.
Whether you’re following baby-led weaning, a traditional approach, or a combination of both, you’ll find everything you need here: clear readiness signs, safety guidelines, 50+ finger food ideas, troubleshooting tips, and practical advice for this exciting journey.
Table of Contents Baby Finger Foods
When is Your Baby Ready? Beyond the Calendar
While 6 months is often cited as the ideal time to introduce finger foods, your baby’s developmental readiness is far more important than age alone. Look for these key signs that indicate your baby is physically ready for finger foods:
- Sits upright with minimal support: Your baby needs good head and trunk control to eat safely
- Lost the tongue-thrust reflex: When you offer food, your baby no longer automatically pushes it out with their tongue
- Shows interest in food: Reaches for your food, watches intently while you eat, or opens mouth when food approaches
- Developing pincer grasp: Beginning to use thumb and forefinger to pick up small objects (though early finger foods should be larger)
- Can move food to the back of their mouth: Able to transfer food around the mouth rather than just sucking on it
Remember that most babies develop these skills around 6-9 months, but there’s significant individual variation. Trust your baby’s cues rather than rushing based solely on calendar age.
The GOLD Standard Safety Section
Gagging vs. Choking: Know the Difference
Gagging is a normal protective reflex that helps babies learn to manage food safely:
- Forward tongue thrusting motion
- Coughing or sputtering sounds
- Red face
- Watery eyes
- Baby remains in control
Choking is a medical emergency requiring immediate action:
- Silent or very quiet struggling
- Inability to cough
- Blue/gray face or lips
- Look of panic
- Inability to breathe
When babies gag (which is common and normal), stay calm and allow them to work through it. Your anxiety can heighten their stress response. However, be prepared to act if true choking occurs.
Food Size & Shape: The Safety Rules
The ideal finger food follows these guidelines:
- Size: Approximately the size of your pinky finger (about 2-3 inches long)
- Shape: Stick-shaped or large enough that baby can’t fit the entire piece in their mouth
- Texture: Soft enough to squish between your thumb and finger (or against the roof of your mouth)
| Food Type | Safe Preparation | Unsafe Preparation |
|---|---|---|
| Grapes/Cherry Tomatoes | Quarter lengthwise | Whole or halved horizontally |
| Blueberries | Smashed or halved for beginners | Whole for babies under 9 months |
| Meat | Shredded or long, thin strips | Chunks or cubes |
| Cheese | Thin strips or grated | Small cubes |
Texture Matters
Progress through these texture stages as your baby develops:
- Beginner (6-8 months): Very soft, easily mashed between fingers
- Intermediate (8-10 months): Soft-cooked but holding shape
- Advanced (10+ months): Various textures as chewing skills improve
Foods to Avoid or Modify
These foods pose choking hazards and should be avoided until at least age 4:
- Whole nuts and seeds
- Popcorn
- Hard candy
- Whole hot dogs
- Raw hard vegetables
- Sticky nut butters (unless thinly spread)
- Hard or chewy meat
- Large globs of cheese
- Dried fruit (unless rehydrated and cut)
- Chewing gum
Safe Eating Environment
- Always supervise: Never leave your baby alone while eating
- Proper positioning: Baby should be sitting fully upright, never reclined
- Dedicated eating space: Use a high chair with good support
- Focused mealtimes: Minimize distractions
- Be prepared: Take an infant CPR course before starting solids
“The most important safety measure for introducing finger foods is constant, attentive supervision. Even ‘safe’ foods can pose risks if a baby is left unattended.” – American Academy of Pediatrics
Best First Finger Foods
Fruits
- Avocado: Rich in healthy fats. Preparation: Cut ripe avocado into thick finger-length strips.
- Banana: Great source of potassium. Preparation: Leave about 2 inches of peel on as a handle, exposing part of the banana for baby to eat.
- Ripe Pear: Contains fiber and vitamin C. Preparation: Peel and cut into finger-sized wedges.
- Mango: High in vitamins A and C. Preparation: Cut ripe mango into strips with some flesh extending beyond baby’s grip.
- Watermelon: Hydrating with lycopene. Preparation: Remove seeds and rind, cut into finger-length strips.
Vegetables
- Sweet Potato: Rich in beta-carotene. Preparation: Steam or roast until very soft, cut into thick wedges or strips.
- Broccoli: Full of vitamins C and K. Preparation: Steam florets until very soft with stem attached as a handle.
- Carrot: Good source of vitamin A. Preparation: Steam until very soft, cut into thick sticks.
- Zucchini: Contains folate and potassium. Preparation: Steam or roast until soft but still holding shape, cut into finger-length spears.
- Bell Pepper: High in vitamin C. Preparation: Roast until soft, remove skin and seeds, cut into strips.
Proteins
- Tofu: Excellent plant protein. Preparation: Firm tofu cut into thick strips.
- Chicken: Complete protein with iron. Preparation: Poach until very tender, shred or cut into strips.
- Salmon: Rich in omega-3 fatty acids. Preparation: Bake until flaky, remove bones carefully, offer strips.
- Eggs: High-quality protein. Preparation: Hard-boiled and cut into quarters, or make egg fingers (omelette cut into strips).
- Lentils: Plant protein and iron. Preparation: Cook until very soft, form into patties or fingers.
Grains
- Toast: Easy introduction to grains. Preparation: Lightly toast bread, cut into strips.
- Pancakes: Versatile base. Preparation: Make thin pancakes with minimal sugar, cut into strips.
- Oatmeal: Fiber-rich grain. Preparation: Cook until thick, cool slightly, and offer as finger-sized portions.
- Pasta: Fun, graspable option. Preparation: Cook well-past al dente, offer large shapes like penne or rigatoni.
- Rice cakes: Simple grain option. Preparation: Choose plain, thin varieties that dissolve easily.
Introducing Common Allergens
Current guidelines recommend early introduction of allergens (around 6 months) to potentially reduce allergy risk. Always introduce one allergen at a time and watch for reactions:
- Eggs: Offer well-cooked egg strips (thin omelette)
- Peanuts: Thin layer of smooth peanut butter on toast strips
- Tree nuts: Finely ground nuts mixed into pancakes or mashed into banana
- Fish: Well-cooked, boneless strips of mild fish
- Wheat: Toast fingers or pasta
- Soy: Soft tofu strips
Consult your pediatrician before introducing allergens if your baby has severe eczema or existing food allergies.
Finger Food Ideas by Age/Stage
6-8 Months (Beginner Stage)
- Texture focus: Very soft, easily squishable
- Size: Larger pieces for palmer grasp (whole hand)
- Best options: Steamed vegetable spears, ripe fruit strips, avocado wedges, soft tofu strips
- Sample meal: Steamed sweet potato wedge + avocado strip + soft tofu strip
9-12 Months (Intermediate Stage)
- Texture focus: Soft-cooked but holding shape
- Size: Finger-length pieces, plus some smaller pieces as pincer grasp develops
- Best options: Soft meatballs, pasta pieces, soft fruit chunks, cheese strips
- Sample meal: Small pasta shells + shredded chicken + steamed broccoli floret “trees”
12+ Months (Advanced Stage)
- Texture focus: Various textures as chewing skills improve
- Size: Gradually smaller pieces as pincer grasp refines
- Best options: Wider variety including softer berries, small pasta, rice, quartered grapes
- Sample meal: Whole grain pasta pieces + small meatball pieces + quartered cherry tomatoes
Integrating Finger Foods: Approaches That Work
Baby-Led Weaning (BLW)
- Core concept: Skip purees entirely, let baby self-feed from the beginning
- Finger food approach: All meals are finger foods baby can self-feed
- Typical progression: Larger finger-sized pieces to start, gradually incorporating more textures and smaller pieces
Traditional Approach
- Core concept: Start with smooth purees, gradually introducing textures
- Finger food approach: Introduce finger foods alongside purees around 8-9 months
- Typical progression: Purees → mashed foods → soft finger foods → varied textures
Combination Approach
- Core concept: Uses elements of both methods based on baby’s needs
- Finger food approach: Introduce some finger foods early while also offering purees
- Typical progression: Simple finger foods and purees simultaneously, with increasing variety and texture
There’s no “perfect” approach—follow your baby’s cues and do what works for your family.
Troubleshooting & FAQs
What if my baby doesn’t seem interested?
- Continue offering without pressure
- Model eating enjoyment yourself
- Try different temperatures (some babies prefer room temperature foods)
- Ensure proper timing (not too tired, not too hungry)
How much should my baby eat?
- Let baby lead—they’ll eat what they need
- Look for signs of fullness (turning away, playing with food, closing mouth)
- Remember milk feeds remain primary nutrition in the first year
Help! My baby just plays with the food.
- This is normal and important exploration
- Learning happens through play and sensory experience
- Messy play with food builds comfort and eventual acceptance
- Focus on exposure rather than consumption initially
Dealing with messy eating
- Use a large splash mat under the high chair
- Consider a full-coverage bib with sleeves
- Keep cleanup supplies handy
- Embrace the mess as part of learning
- Save messier foods for bath nights!
How do I balance finger foods with purees/milk feeds?
- Milk remains main nutrition source until 12 months
- Offer solids 1-2 hours after milk feeds initially
- Gradually work toward a schedule of 3 meals + snacks + milk feeds
Essential Gear for Finger Food Success
- High chair: Look for easy-to-clean surface and good support
- Splash mat: Washable mat to protect floors
- Full-coverage bibs: Sleeved bibs with catch pockets
- Suction plates/bowls: Reduce tipping and throwing
- Safe open cups: Introducing early builds skills
- Cleaning supplies: Baby-safe surface wipes for quick cleanups
Conclusion
Introducing finger foods is an exciting milestone that builds the foundation for your baby’s lifelong relationship with food. Remember these key takeaways:
- Follow your baby’s developmental cues rather than strict calendar dates
- Prioritize safety through proper food preparation and constant supervision
- Offer a wide variety of nutritious options to develop diverse tastes
- Be patient—learning to self-feed is a skill that takes time and practice
- Embrace the mess as part of the learning process
Trust your instincts and your baby’s natural ability to explore foods at their own pace. With the right preparation and attitude, finger foods can transform mealtimes into enjoyable learning experiences that nurture both body and development.
What finger food will you try first with your little one?

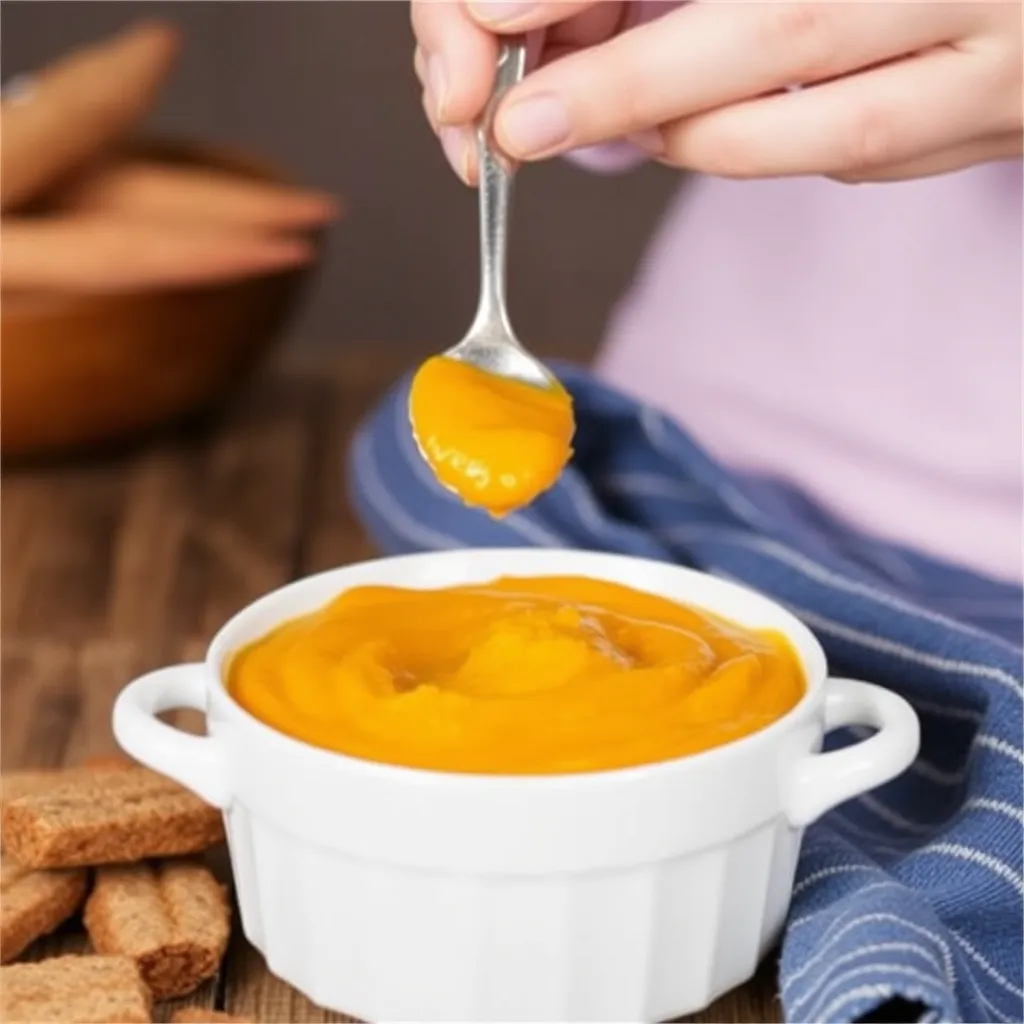
Simple & Healthy Infant Puree Recipes for Your Baby
Starting your baby on solid foods is an exciting milestone in their development journey. This comprehensive guide covers everything you need to know about infant puree recipes – from essential safety basics to creative combinations that will nurture your little one’s developing palate and provide optimal nutrition during this crucial growth stage.
Table of Contents
Getting Started with Infant Purees
Safety First: Hygiene and Choking Prevention
Before diving into recipes, establishing proper food safety practices is essential when preparing infant purees:
- Always wash hands thoroughly before handling baby food ingredients
- Clean all utensils, cutting boards, and preparation surfaces with hot, soapy water
- Cook foods to appropriate temperatures to eliminate harmful bacteria
- Avoid honey completely for babies under 12 months (risk of botulism)
- Inspect all fruits and vegetables for soft spots or mold
- Remove pits, seeds, and tough skins that could pose choking hazards
Essential Equipment for Homemade Baby Food
Creating nutritious infant purees doesn’t require expensive gadgets, but these tools will make the process significantly easier:
| Essential Tools | Optional but Helpful |
|---|---|
| Food processor or blender | Baby food maker (all-in-one steamer/blender) |
| Steamer basket | Immersion blender |
| Ice cube trays with lids | Silicone freezer trays |
| Storage containers | Food mill |
| Mesh strainer | Baby food grinder |
| Vegetable peeler | Reusable food pouches |
Understanding Puree Stages
Infant purees typically progress through three stages as your baby develops:
Stage 1 (4-6 months): Single-ingredient, smooth purees with thin consistency. Perfect for babies just starting solids.
Stage 2 (6-8 months): Combined ingredients with slightly thicker texture. Introduces flavor combinations and more complex nutrition.
Stage 3 (9-12 months): Chunky purees and soft mashed foods that help develop chewing skills before transitioning to finger foods.
Pediatrician’s Note: While this guide provides general recommendations, always consult your pediatrician before starting solids, typically around 4-6 months when your baby shows readiness signs like sitting with support and showing interest in food.
First Tastes: Stage 1 Single-Ingredient Purees
Starting with simple, single-ingredient purees helps identify potential allergies and allows babies to experience distinct flavors. Here are nutritious first foods with their key benefits:
Vegetable First Foods
- Nutrients: Beta-carotene, vitamin C, potassium, fiber
- Preparation: Steam or bake until soft, peel, puree with filtered water until smooth
- Storage: Refrigerate up to 3 days or freeze for 3 months
- Tip: Sweet potatoes’ natural sweetness makes them appealing to most babies
Carrot Puree
- Nutrients: Beta-carotene, vitamin K, potassium
- Preparation: Steam until very tender, puree until completely smooth
- Storage: Refrigerate up to 3 days or freeze for 3 months
- Tip: Always peel carrots for babies to remove any dirt residue
Pea Puree
- Nutrients: Vitamin K, folate, protein, fiber
- Preparation: Steam fresh or frozen peas until tender, puree with water as needed
- Storage: Refrigerate up to 3 days or freeze for 2 months
- Tip: Strain through a fine mesh sieve to remove outer skins for the smoothest texture
Butternut Squash Puree
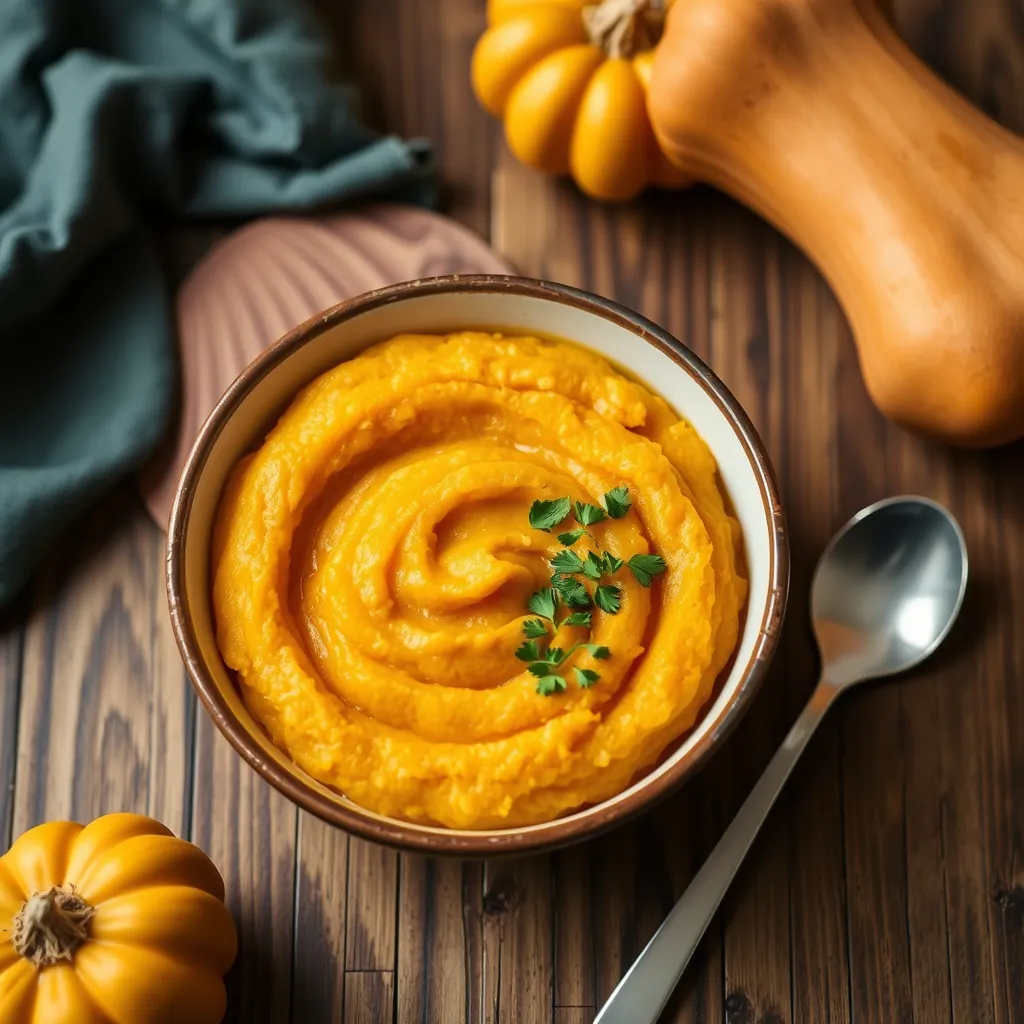
- Nutrients: Vitamin A, vitamin C, potassium, magnesium
- Preparation: Roast or steam until fork-tender, scoop flesh, puree until smooth
- Storage: Refrigerate up to 3 days or freeze for 3 months
- Tip: Roasting brings out natural sweetness babies love
Fruit First Foods
Apple Puree
- Nutrients: Fiber, vitamin C, antioxidants
- Preparation: Peel, core, and dice apples. Steam until very soft, then puree
- Storage: Refrigerate up to 2 days or freeze for 3 months
- Tip: Mixing apple varieties like Gala and Golden Delicious creates complex flavor
Pear Puree
- Nutrients: Fiber, vitamin C, copper
- Preparation: Peel, core, and dice pears. Steam until tender, then puree
- Storage: Refrigerate up to 2 days or freeze for 3 months
- Tip: Naturally sweet and gentle on digestion, perfect for constipation
Banana Puree
- Nutrients: Potassium, vitamin B6, vitamin C, fiber
- Preparation: Mash ripe banana with fork until smooth, no cooking required
- Storage: Refrigerate up to 1 day (discolors quickly), not ideal for freezing
- Tip: Mix with breast milk or formula for familiar flavor during transition
Avocado Puree
- Nutrients: Healthy fats, fiber, folate, potassium
- Preparation: Scoop ripe avocado flesh, mash with fork until smooth
- Storage: Refrigerate up to 1 day with lemon juice to prevent browning
- Tip: Excellent brain-boosting first food with no cooking required
Stage 2 Combinations: Exploring Flavor Pairings
Once your baby has successfully tried individual foods with no reactions, you can begin creating more interesting combinations. These pairings introduce complementary flavors while providing balanced nutrition.
Fruit Combinations
- Apple & Blueberry: Antioxidant powerhouse with natural sweetness
- Pear & Banana: Gentle on digestion with potassium boost
- Mango & Avocado: Tropical creaminess with healthy fats
- Peach & Raspberry: Vitamin-rich with complex flavor profile
Vegetable Combinations
- Sweet Potato & Carrot: Beta-carotene blend with balanced sweetness
- Pea & Zucchini: Protein-packed green goodness
- Butternut Squash & Spinach: Vitamin A boost with iron
- Cauliflower & Broccoli: Cruciferous combination rich in vitamins K and C
Fruit & Vegetable Blends
- Apple & Spinach: Iron absorption enhanced by vitamin C
- Banana & Sweet Potato: Energy-boosting carbohydrates with creamy texture
- Pear & Pea: Fiber-rich pairing with natural sweetness
- Mango & Carrot: Tropical twist on a root vegetable classic
Protein Additions
Once your baby reaches 6-8 months, incorporating proteins becomes important:
- Lentil & Sweet Potato: Plant-based protein with fiber
- Chicken & Carrot: Complete protein with beta-carotene
- White Fish & Zucchini: Gentle protein with mild vegetable
- Yogurt & Peach: Probiotics with calcium and natural sweetness
Stage 3 Textures & Finger Foods Introduction
As your baby approaches 9 months, they’re ready to develop chewing skills with more texture and small, soft pieces.
Transitioning to Textured Foods
- Begin with lumpy purees: Partially blend foods or mash with fork
- Move to soft mashes: Think mashed banana, avocado, or sweet potato
- Introduce soft pieces: Small, soft food bits mixed into familiar purees
- Progress to finger foods: Soft, age-appropriate pieces they can grasp
Textured Recipe Ideas
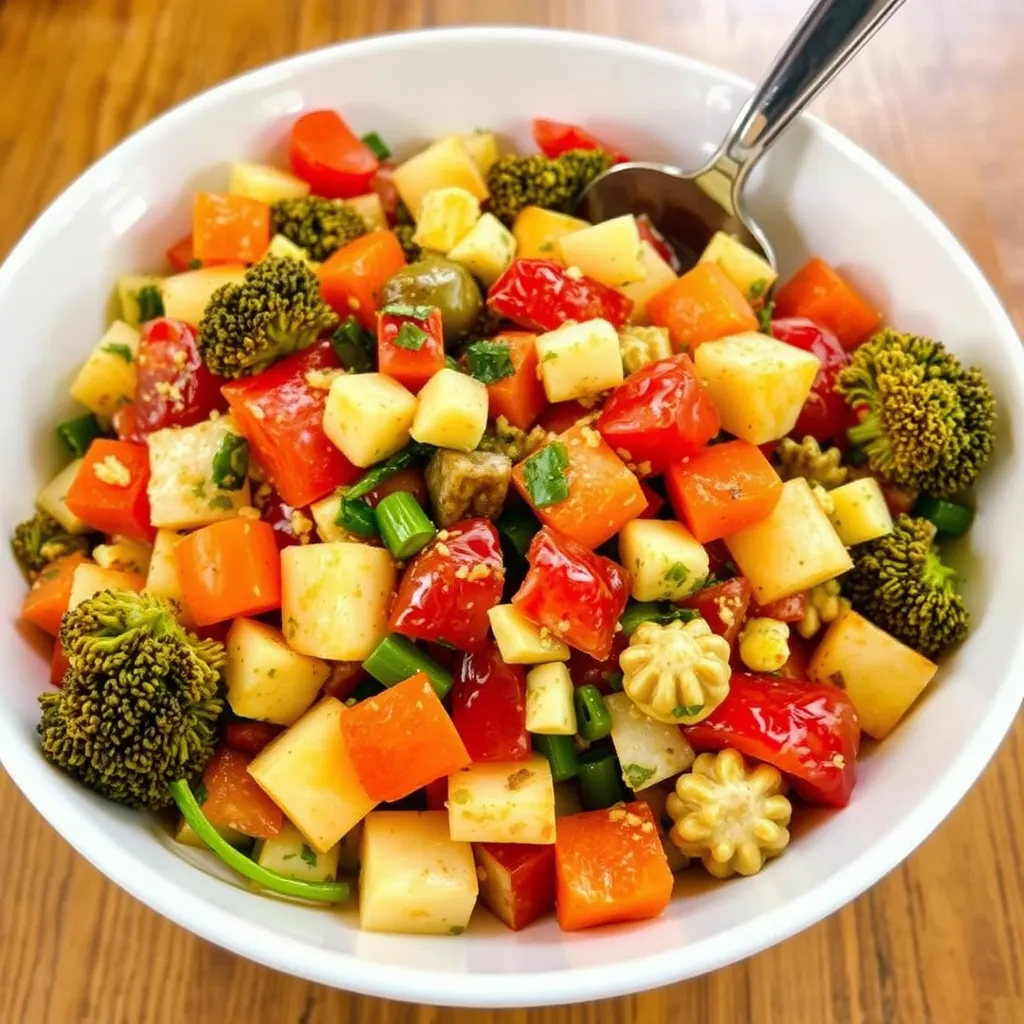
Chunky Vegetable Medley
- Steam small diced carrots, peas, and small pasta until very soft
- Lightly mash, leaving recognizable pieces
- Mix with small amount of smooth vegetable puree as “sauce”
Banana Oatmeal Mash
- Cook infant oatmeal according to package directions
- Mix with mashed banana and small pieces of soft fruit
- Add cinnamon for flavor enhancement (optional)
Lentil & Vegetable Blend
- Cook red lentils until very soft
- Mix with partially mashed sweet potato and finely chopped spinach
- Consistency should be thick but still easily eaten with spoon
Adding Herbs & Spices Safely
Contrary to popular belief, babies don’t need bland food! Introducing herbs and spices early can develop sophisticated palates and provide additional health benefits. Always introduce one at a time and in small amounts.
Baby-Friendly Herbs
- Basil: Pairs well with sweet potato, squash
- Mint: Refreshing with peas, pears
- Parsley: Complements vegetables like carrots
- Cilantro: Perfect with avocado, sweet potato
Gentle Spices for Babies
- Cinnamon: Sweet enhancement for fruits and oatmeal
- Mild curry powder: Tiny pinch for variety in vegetables
- Ginger: Soothes digestion, pairs with carrots, apples
- Cumin: Rich flavor for lentils, beans, squash
Introducing Allergens via Purees
Current pediatric guidelines recommend early introduction of potential allergens (between 4-11 months) to help prevent food allergies. Always consult your pediatrician first, especially with family history of allergies.
Safe Introduction Protocol
- Offer allergen early in the day to monitor reactions
- Start with tiny amount mixed into familiar puree
- Wait 3-5 days before introducing another potential allergen
- Know signs of allergic reaction: hives, facial swelling, vomiting, difficulty breathing
- Have emergency plan in place for severe reactions
Common Allergen Introduction
Peanut Butter: Mix 1/4 teaspoon thinned smooth peanut butter into fruit puree
Egg: Start with well-cooked egg yolk (less allergenic) before introducing whole egg
Fish: Choose mild white fish like cod, pureed very smooth with familiar vegetable
Wheat: Mix infant cereal containing wheat into familiar puree
Storage & Freezing Guide
Proper storage ensures safety and preserves nutrients in homemade baby food.
Refrigerator Storage Guidelines
- Store purees in airtight containers
- Label with contents and date prepared
- Most purees last 48-72 hours refrigerated
- Keep refrigerator temperature at or below 40°F (4°C)
Freezing Methods
- Freeze in ice cube trays (1 oz portions)
- Once frozen, transfer to freezer bags
- Label with contents and date frozen
- Most purees maintain quality for 1-3 months frozen
Thawing Safety
- Thaw overnight in refrigerator (safest method)
- Quick-thaw in bowl of warm water
- Never microwave baby food (creates hot spots)
- Never refreeze previously frozen baby food
Troubleshooting & FAQs
Common Feeding Challenges
Refusing New Foods
- Offer rejected foods alongside favorites
- Try different temperatures (some babies prefer room temperature)
- Model eating and enjoying the food yourself
- Remain patient and continue offering (may take 10-15 attempts)
Texture Aversion
- Progress texture gradually
- Mix smooth with slightly textured at first
- Give baby safe finger foods to explore textures themselves
- Consult pediatrician if severe aversion persists
Constipation
- Increase “P” fruits: prunes, pears, peaches
- Ensure adequate fluid intake
- Add small amount of pureed prunes to other fruits
- Avoid constipating foods like bananas temporarily
Food Throwing
- Use suction bowls and plates
- Offer smaller portions
- Determine if baby is full or just playing
- Remain calm and consistent with boundaries
Remember, each baby develops at their own pace. The journey to solid foods should be enjoyable for both you and your little one. By starting with nutrient-dense purees and gradually introducing textures and flavors, you’re establishing the foundation for healthy eating habits that can last a lifetime.
Conclusion
As we’ve explored throughout this comprehensive guide, introducing your baby to solid foods through purees is a journey filled with discovery, nutrition, and developmental milestones. Creating homemade infant puree recipes isn’t just about providing nourishment—it’s about laying the foundation for a lifetime of healthy eating habits and positive relationships with food.
Remember that every baby is unique. Some may eagerly accept new flavors and textures, while others might need more time and repeated exposures. Patience and persistence are key as you navigate this exciting stage together. Trust your baby’s cues—they’ll let you know when they’re hungry, full, or not quite ready for a particular food.
Making your own infant purees allows you to personally select fresh, high-quality ingredients while avoiding unnecessary additives and preservatives found in some commercial options. It’s also significantly more economical and environmentally friendly than purchasing pre-packaged baby foods.

50+ Easy & Healthy Recipes for Toddlers (12-18 Months)
Navigating the world of toddler feeding can feel like a rollercoaster—exciting yet challenging! As your little one ventures into the 12-18 month stage, they’re developing rapidly: mastering the pincer grasp, getting more teeth, and gradually moving beyond purées to more complex textures and tastes.
This period represents a crucial transition in your toddler’s eating journey. They’re becoming more independent eaters while their nutritional needs remain high to support their incredible growth and development. As a pediatric nutritionist with over 10 years of experience creating nutritionally balanced healthy recipes for toddlers, I’ve compiled this comprehensive guide to make your mealtime adventures both delicious and nutritious.
Whether you’re dealing with a picky eater or a little foodie in the making, these recipes and strategies will help you provide optimal nutrition while fostering healthy eating habits that can last a lifetime.
Table of Contents Healthy Recipes For Toddlers
Understanding Your 12-18 Month Old’s Needs
Nutritional Essentials
At this stage, your toddler needs specific nutrients to thrive:
- Iron: Critical for brain development and preventing anemia. Focus on lean meats, beans, fortified cereals, and dark leafy greens.
- Calcium: Essential for developing strong bones and teeth. Incorporate dairy, fortified plant milks, and calcium-rich vegetables.
- Vitamin D: Works with calcium for bone development. Found in fortified milk, egg yolks, and fatty fish.
- Healthy Fats: Crucial for brain development. Include avocados, nut butters (if tolerated), and olive oil.
- Fiber: Supports digestive health. Offer whole grains, fruits, and vegetables.
Texture Progression
At 12-18 months, most toddlers are ready to move beyond smooth purées. Gradually introduce:
- Soft, small chunks of food
- Minced and finely chopped options
- Soft finger foods
- Modified versions of family meals
This progression helps develop chewing skills and oral motor development while expanding your child’s palate.
Portion Sizes
Toddler appetites are notoriously variable—ravenous one day, bird-like the next. A general guideline:
- Protein: 2-3 tablespoons per meal
- Fruits/Vegetables: 2-3 tablespoons per meal
- Grains/Starches: ¼-½ cup per meal
- Dairy: ½ cup milk or equivalent per meal
Trust your child’s hunger and fullness cues rather than enforcing clean plates.
Feeding Safety
Safety is paramount when feeding toddlers in this age range:
- Always supervise mealtime
- Avoid high-risk choking foods: whole grapes, hot dogs, hard raw vegetables, popcorn, nuts, hard candy
- Prepare safely: quarter grapes, cook vegetables until soft, cut meat into tiny pieces
- Keep child seated during meals and snacks
- Learn infant CPR as a precautionary measure
The Recipe Collection
Breakfast Ideas
Veggie Egg Muffins

- Prep time: 10 minutes
- Cook time: 18 minutes
- Yield: 12 mini muffins
Ingredients:
- 4 eggs
- ¼ cup milk (dairy or plant-based)
- ¼ cup finely chopped spinach
- ¼ cup finely diced bell peppers
- 2 tablespoons grated cheese
- Pinch of black pepper
Instructions:
- Preheat oven to 350°F. Grease a mini muffin tin.
- Whisk eggs and milk together in a bowl.
- Stir in vegetables and cheese.
- Pour mixture into muffin tin, filling each cup ¾ full.
- Bake for 15-18 minutes until set.
- Cool slightly before serving.
Nutrition per muffin: 35 calories, 2g protein, 2g fat, 1g carbohydrate
Tip: These freeze beautifully! Make a big batch and defrost as needed. Allergens: Contains eggs, dairy (can substitute plant-based alternatives)
Cinnamon Apple Oatmeal Fingers
- Prep time: 5 minutes
- Cook time: 25 minutes
- Yield: 16 fingers
Ingredients:
- 1 cup rolled oats
- 1 ripe mashed banana
- 1 grated apple
- ½ teaspoon cinnamon
- ½ cup milk of choice
- 1 tablespoon ground flaxseed
Instructions:
- Mix all ingredients in a bowl.
- Spread evenly in a parchment-lined 8×8 baking dish.
- Bake at 375°F for 25 minutes.
- Cool and cut into finger-sized pieces.
Nutrition per finger: 45 calories, 1g protein, 1g fat, 8g carbohydrate
Tip: Store in the refrigerator for up to 3 days or freeze for future use. Allergens: Contains oats (ensure gluten-free if needed)
Lunch & Dinner Options
Mini Turkey Meatballs
- Prep time: 10 minutes
- Cook time: 15 minutes
- Yield: 24 mini meatballs
Ingredients:
- ½ pound ground turkey
- ¼ cup grated zucchini, excess moisture squeezed out
- 2 tablespoons finely grated carrot
- 2 tablespoons breadcrumbs
- 1 egg, beaten
- 1 teaspoon mild Italian herbs
Instructions:
- Preheat oven to 400°F.
- Mix all ingredients gently but thoroughly.
- Form into small, toddler-sized meatballs.
- Bake on parchment paper for 15 minutes until fully cooked.
Nutrition per 3 meatballs: 75 calories, 9g protein, 4g fat, 2g carbohydrate
Tip: Serve with a simple tomato sauce for dipping or alongside pasta. Allergens: Contains egg, wheat (can use gluten-free breadcrumbs)
🍼 Must-Have Tools for First Foods
These are popular, parent-approved items that make this easier and less stressful.
Makes smooth purees fast and saves cleanup time.
👉 Check Price on AmazonPerfect for storing meals safely in the fridge or freezer.
👉 See on AmazonGentle on gums and easy for first feeds.
👉 View on Amazon


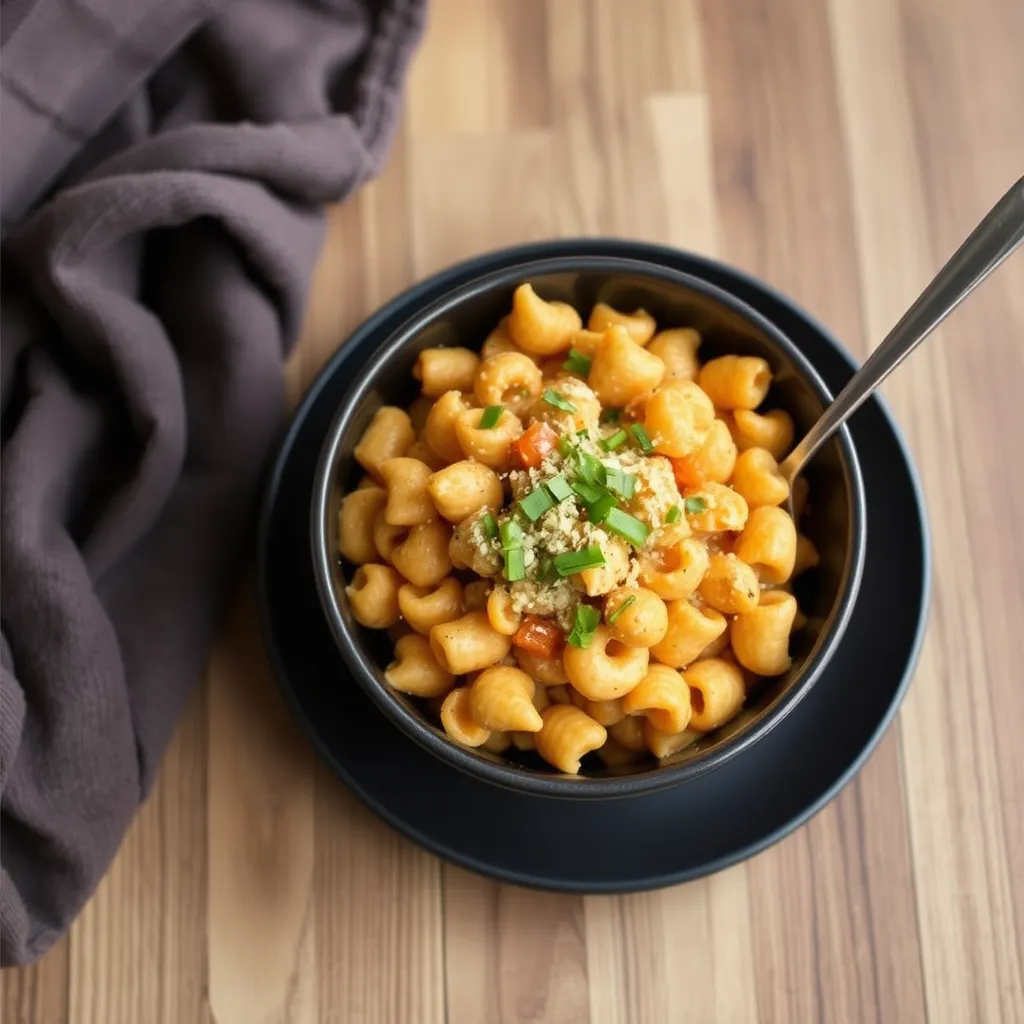
Sweet Potato Mac and Cheese
- Prep time: 15 minutes
- Cook time: 25 minutes
- Yield: 6 toddler servings
Ingredients:
- 1 cup whole grain pasta shapes
- 1 small sweet potato, peeled and diced
- ½ cup milk
- ¼ cup grated cheddar cheese
- 2 tablespoons cream cheese
- Pinch of garlic powder
Instructions:
- Cook pasta according to package directions.
- Steam sweet potato until very tender.
- Blend sweet potato with milk until smooth.
- In a pan, combine sweet potato mixture with cheeses and garlic powder.
- Heat gently until cheese melts.
- Fold in cooked pasta.
Nutrition per serving: 120 calories, 4g protein, 3g fat, 18g carbohydrate
Tip: For extra protein, add shredded chicken or white beans. Allergens: Contains dairy, wheat (can use gluten-free pasta)
Finger Foods & Snacks
Banana Avocado Bites
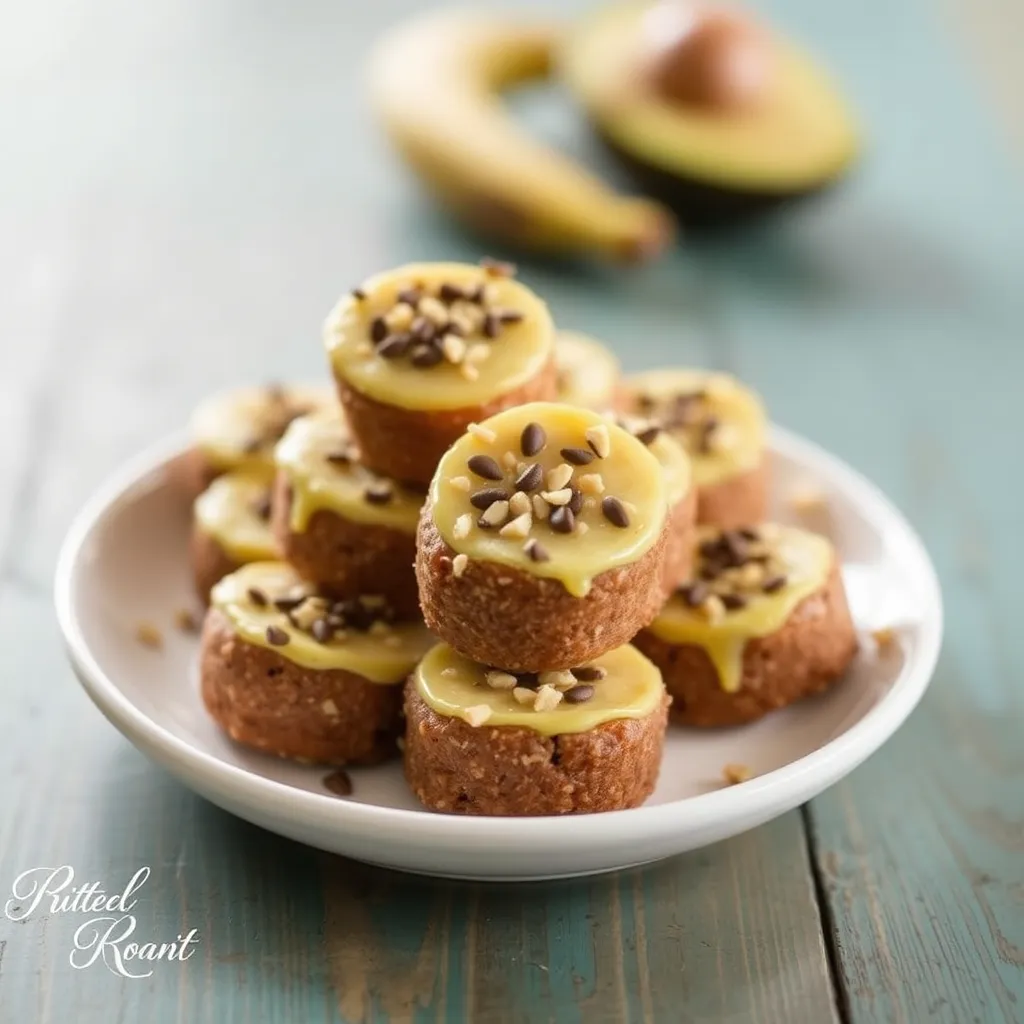
- Prep time: 10 minutes
- Yield: 15 bites
Ingredients:
- 1 ripe banana
- ½ ripe avocado
- ½ cup rolled oats
- 2 tablespoons chia seeds
Instructions:
- Mash banana and avocado together until smooth.
- Stir in oats and chia seeds.
- Form into small bites using a tablespoon measure.
- Refrigerate for 30 minutes before serving.
Nutrition per 3 bites: 95 calories, 2g protein, 5g fat, 12g carbohydrate
Tip: Roll in crushed cereal for easier handling. Allergens: Contains oats (ensure gluten-free if needed)
🍼 Must-Have Tools for First Foods
These are popular, parent-approved items that make this easier and less stressful.
✅ The-Go Fork and Spoon Set
Makes smooth purees fast and saves cleanup time. 👉 Check Price on Amazon
✅ Baby Food Maker with Steam Basket
Perfect for storing meals safely in the fridge or freezer. 👉 See on Amazon
✅ Stick and Stay Suction Plate
Gentle on gums and easy for first feeds. 👉 View on Amazon
- VERSATILE BAKING KIT: Pack of 9 in 3 different sizes 15.9 x 12 x 1 inch, 12.4 x 9.6 x 1 inch, and 10.4 x 8.1 x 1 inch- T…
- PREMIUM MATERIAL: The baking sheet pans and cooling racks are made of premium pure stainless steel, rust and warp resist…
- SUPERIOR CRAFT: Our stainless steel cookie sheets are highly mirror polished to reduce the risk of food sticking and to …
Cheesy Veggie Quesadilla Triangles
- Prep time: 5 minutes
- Cook time: 5 minutes
- Yield: 8 triangles
Ingredients:
- 2 small whole grain tortillas
- ¼ cup grated cheese
- 2 tablespoons finely chopped cooked spinach
- 2 tablespoons mashed sweet potato
Instructions:
- Spread sweet potato on one tortilla.
- Sprinkle with spinach and cheese.
- Top with second tortilla.
- Cook in a dry pan until golden and cheese melts.
- Cut into triangles when cool enough to handle.
Nutrition per 2 triangles: 85 calories, 4g protein, 3g fat, 10g carbohydrate
Tip: Make a batch and reheat in toaster oven for quick snacks. Allergens: Contains wheat, dairy (can use alternatives)
🍼 Must-Have Tools for First Foods
These are popular, parent-approved items that make this easier and less stressful.
✅ The-Go Fork and Spoon Set
Makes smooth purees fast and saves cleanup time. 👉 Check Price on Amazon
✅ Baby Food Maker with Steam Basket
Perfect for storing meals safely in the fridge or freezer. 👉 See on Amazon
✅ Stick and Stay Suction Plate
Gentle on gums and easy for first feeds. 👉 View on Amazon


Beyond Recipes – Practical Tips
Dealing with Picky Eaters
- Maintain a routine: Consistent meal and snack times create security.
- Keep trying: It can take 10-15 exposures before a child accepts a new food.
- Lead by example: Eat the same foods with enthusiasm.
- Avoid pressure: Making mealtimes stressful can worsen pickiness.
- Involve them: Let them “help” prepare food when safe to do so.
Meal Planning Ideas
| Day | Breakfast | Lunch | Dinner | Snacks |
|---|---|---|---|---|
| Mon | Veggie Egg Muffins | Sweet Potato Mac & Cheese | Mini Turkey Meatballs with pasta | Banana Avocado Bites |
| Tue | Cinnamon Apple Oatmeal Fingers | Tuna salad with crackers | Bean and veggie soup | Cheese cubes with fruit |
| Wed | Yogurt with crushed berries | Quesadilla triangles | Baked fish fingers with veg | Hummus with soft veggies |
Introducing New Foods
- Pair new foods with familiar favorites
- Start with small portions to avoid overwhelming
- Try different preparations of the same food
- Use cookie cutters for fun shapes
- Keep a positive attitude even if rejected
Making Mealtimes Positive
- Eat together as a family when possible
- Remove distractions like screens
- Use appropriately sized utensils and plates
- Praise trying new foods, not just eating them
- Accept that mess is part of learning

Frequently Asked Questions
How much should a 15-month-old eat? Most 15-month-olds need about 1,000-1,400 calories daily, but appetite varies greatly. Focus on offering nutritious options at regular intervals and let your child decide how much to eat.
What finger foods are safe for a 1-year-old? Safe finger foods include soft fruits, well-cooked pasta, small pieces of tender meat, soft cheese cubes, cooked vegetables, toast strips, and scrambled eggs. Always ensure pieces are soft and small enough to prevent choking.
Can my 12-month-old eat family meals? Yes! By 12 months, toddlers can generally eat modified versions of family meals. Ensure food is cut into appropriate sizes, not too salty, and the texture is manageable.
How do I get my toddler to eat vegetables? Try multiple preparations (roasted, steamed, raw if safe), incorporate vegetables into favorite foods like pasta sauce or smoothies, make them visually appealing, and always model enjoying vegetables yourself.
Remember, feeding your toddler is a journey filled with both challenges and joys. Focus on offering a variety of nutritious options and creating positive associations with food. Every small step toward healthy eating habits is a victory worth celebrating!

46+ Quick Stress-Free Dinner Ideas for Families
The daily dinner Ideas for Families dilemma—we’ve all been there. It’s 5 PM, everyone’s hungry, and you’re staring into the refrigerator wondering what to make that’s quick, nutritious, and won’t trigger a meltdown at the table. As a parent who’s navigated thousands of family meals (and the occasional cereal-for-dinner emergency), I’ve compiled this comprehensive guide to rescue you from the “what’s for dinner?” panic.
This isn’t just another list of recipes. It’s a practical, organized resource designed for real families with real challenges—from tight schedules and tighter budgets to the infamous picky eater phase. Whether you need lightning-fast meals for hectic weeknights or budget-friendly options that don’t sacrifice flavor, you’ll find solutions here that actually work for your family’s unique needs.
Table of Contents Dinner Ideas for Families
How to Use This Guide
I’ve organized these dinner ideas into practical categories addressing the most common family mealtime challenges. Each suggestion includes:
- A clear, descriptive title
- A brief overview highlighting key benefits (prep time, ingredient count, etc.)
- Complete recipe instructions
- Helpful indicators for special considerations (budget-friendly, kid-approved, etc.)
Bookmark this page and return whenever you need fresh inspiration or when your usual rotation needs a refresh. Let’s transform family dinners from a daily struggle into moments of connection and satisfaction!
Lightning Fast: Under 30-Minute Family Dinners
Sheet Pan Lemon Herb Chicken & Veggies
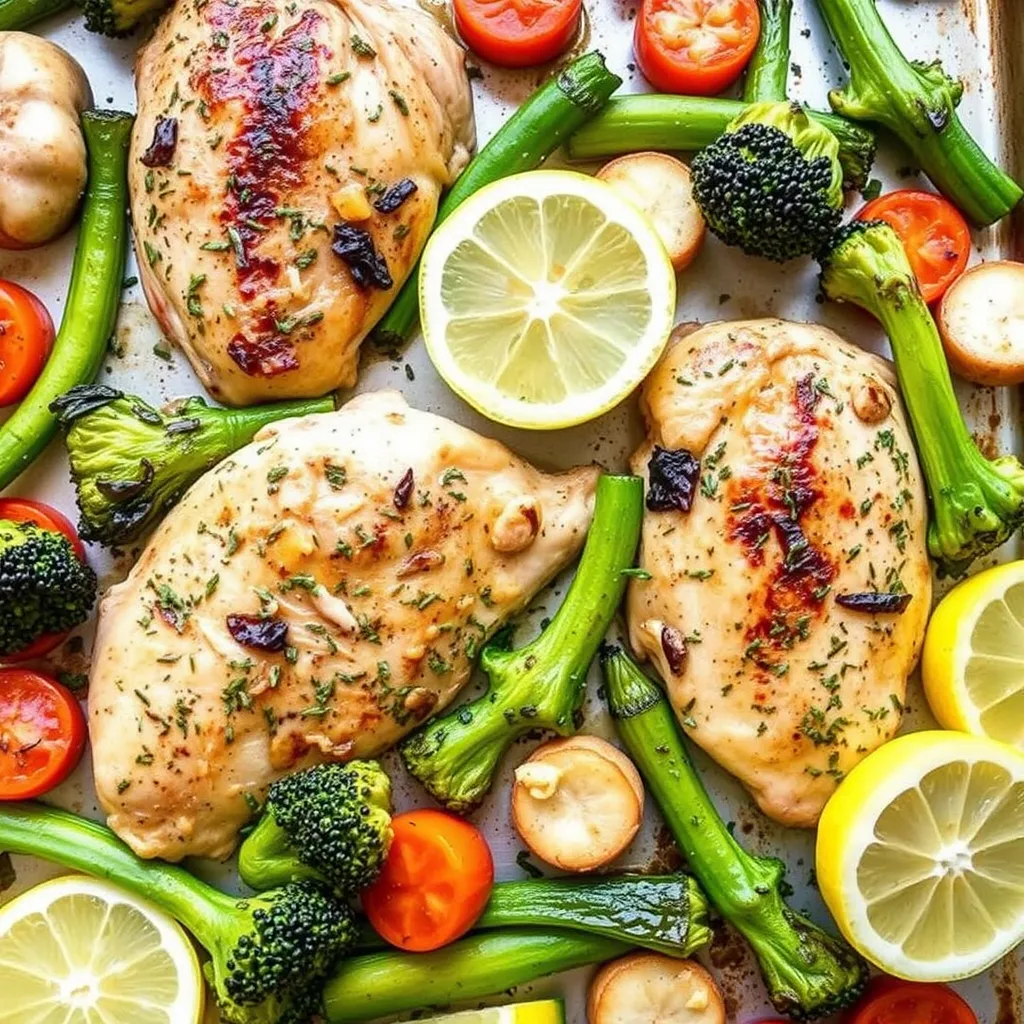
Prep Time: 10 minutes | Cook Time: 15 minutes | Serves: 4
Ingredients:
- 4 boneless, skinless chicken breasts
- 3 cups mixed vegetables (bell peppers, zucchini, broccoli)
- 3 tablespoons olive oil
- 2 tablespoons lemon juice
- 2 cloves garlic, minced
- 1 tablespoon Italian herbs
- Salt and pepper to taste
Instructions:
- Preheat oven to 425°F. Line a large sheet pan with parchment paper.
- In a small bowl, whisk together olive oil, lemon juice, garlic, herbs, salt, and pepper.
- Place chicken breasts and chopped vegetables on the sheet pan.
- Pour the marinade over everything and toss to coat evenly.
- Arrange in a single layer and bake for 15-18 minutes until chicken reaches 165°F.
- Let rest for 5 minutes before serving.
15-Minute Pasta Primavera
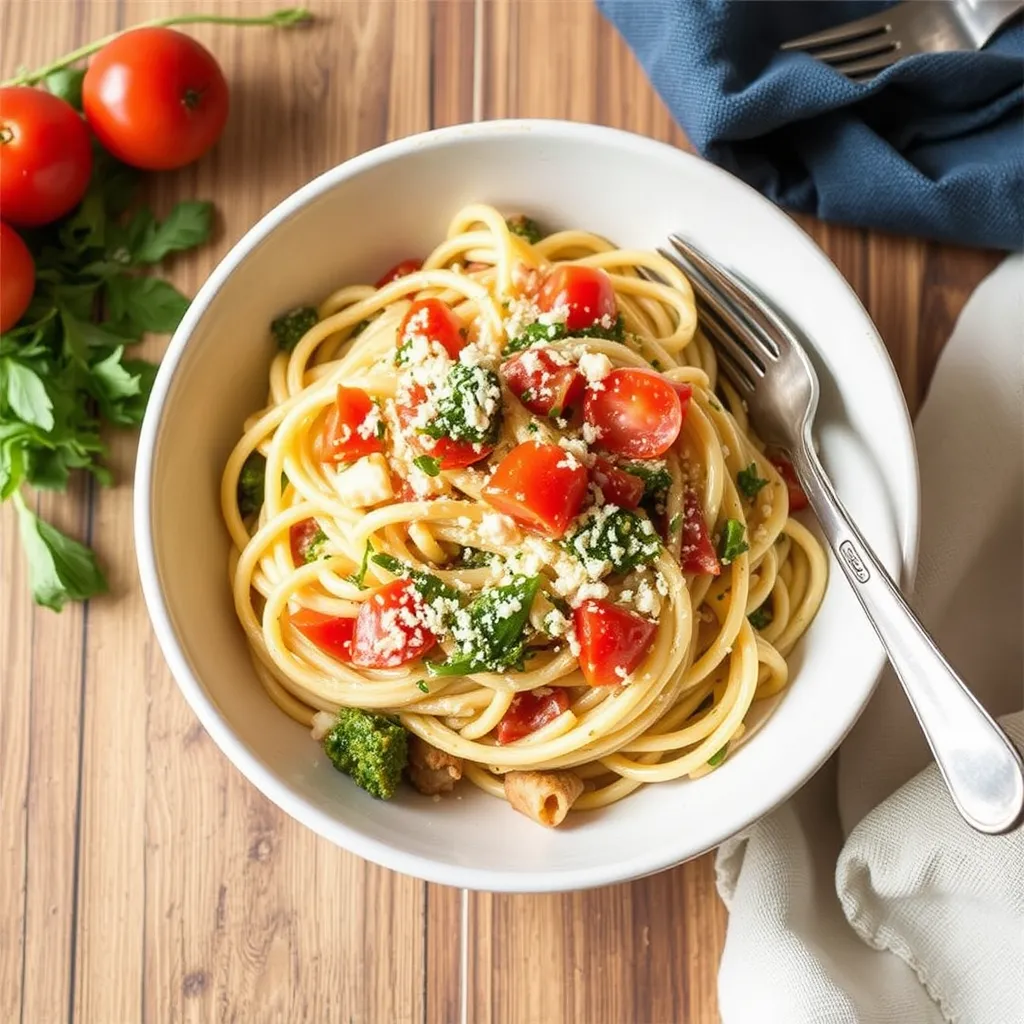
Prep Time: 5 minutes | Cook Time: 10 minutes | Serves: 4
Ingredients:
- 12 oz pasta of choice
- 3 cups mixed vegetables (cherry tomatoes, bell peppers, zucchini, broccoli)
- 3 tablespoons olive oil
- 2 cloves garlic, minced
- 1/4 cup grated Parmesan cheese
- 2 tablespoons fresh herbs (basil, parsley)
- Salt and pepper to taste
Instructions:
- Cook pasta according to package directions.
- While pasta cooks, chop vegetables into bite-sized pieces.
- Heat olive oil in a large skillet over medium-high heat.
- Add vegetables and garlic, sauté for 4-5 minutes until tender-crisp.
- Drain pasta, reserving 1/4 cup cooking water.
- Toss pasta with vegetables, reserved cooking water, and Parmesan.
- Season with salt, pepper, and sprinkle with fresh herbs before serving.
Quick Taco Salad Bowls
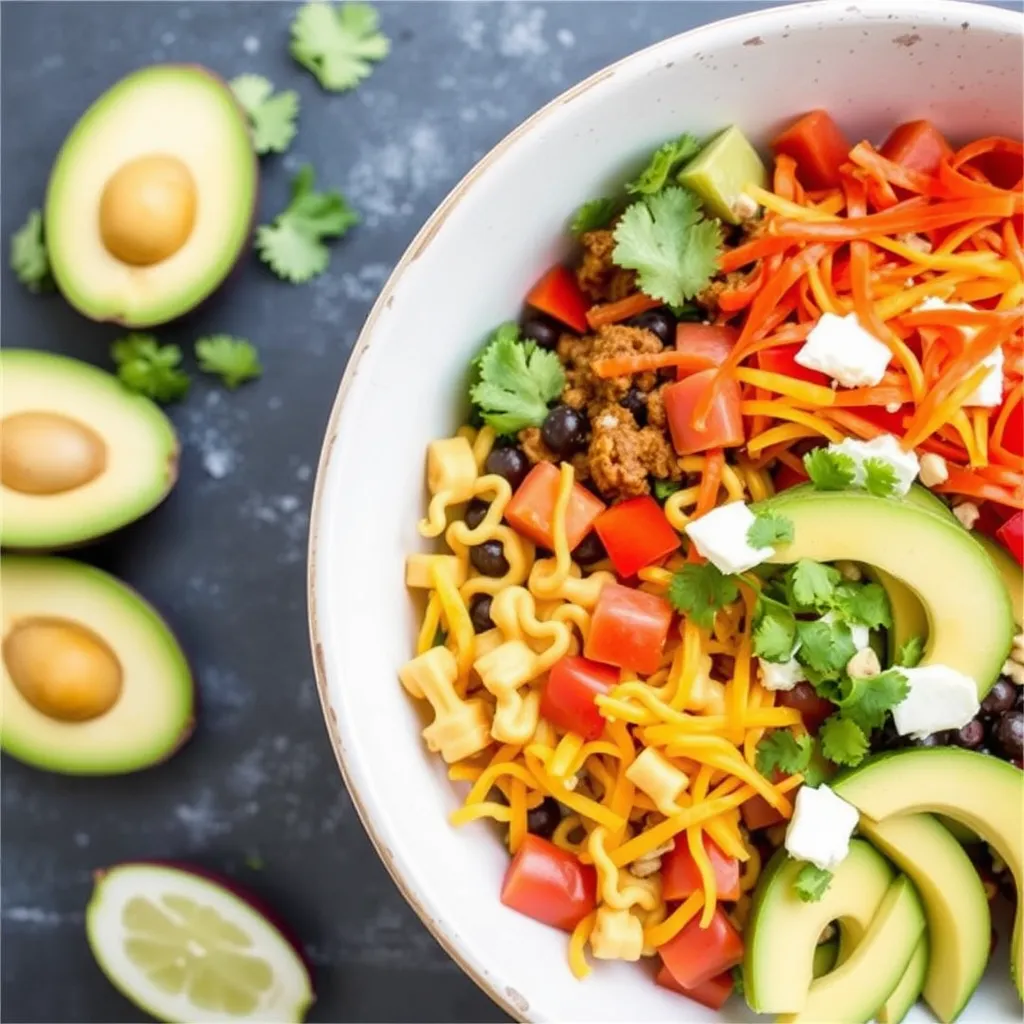
Prep Time: 10 minutes | Cook Time: 10 minutes | Serves: 4
Ingredients:
- 1 lb ground beef or turkey
- 1 packet taco seasoning
- 8 cups chopped romaine lettuce
- 1 can black beans, rinsed and drained
- 1 cup corn kernels
- 1 cup cherry tomatoes, halved
- 1 avocado, diced
- 1/2 cup shredded cheese
- 1/4 cup sour cream
- Tortilla chips for serving
Instructions:
- Cook ground meat in a skillet over medium heat until browned.
- Add taco seasoning and 1/4 cup water, simmer for 3-4 minutes.
- Arrange lettuce in individual serving bowls.
- Top with meat, beans, corn, tomatoes, avocado, and cheese.
- Add a dollop of sour cream and serve with tortilla chips.
Speedy Stir-Fry
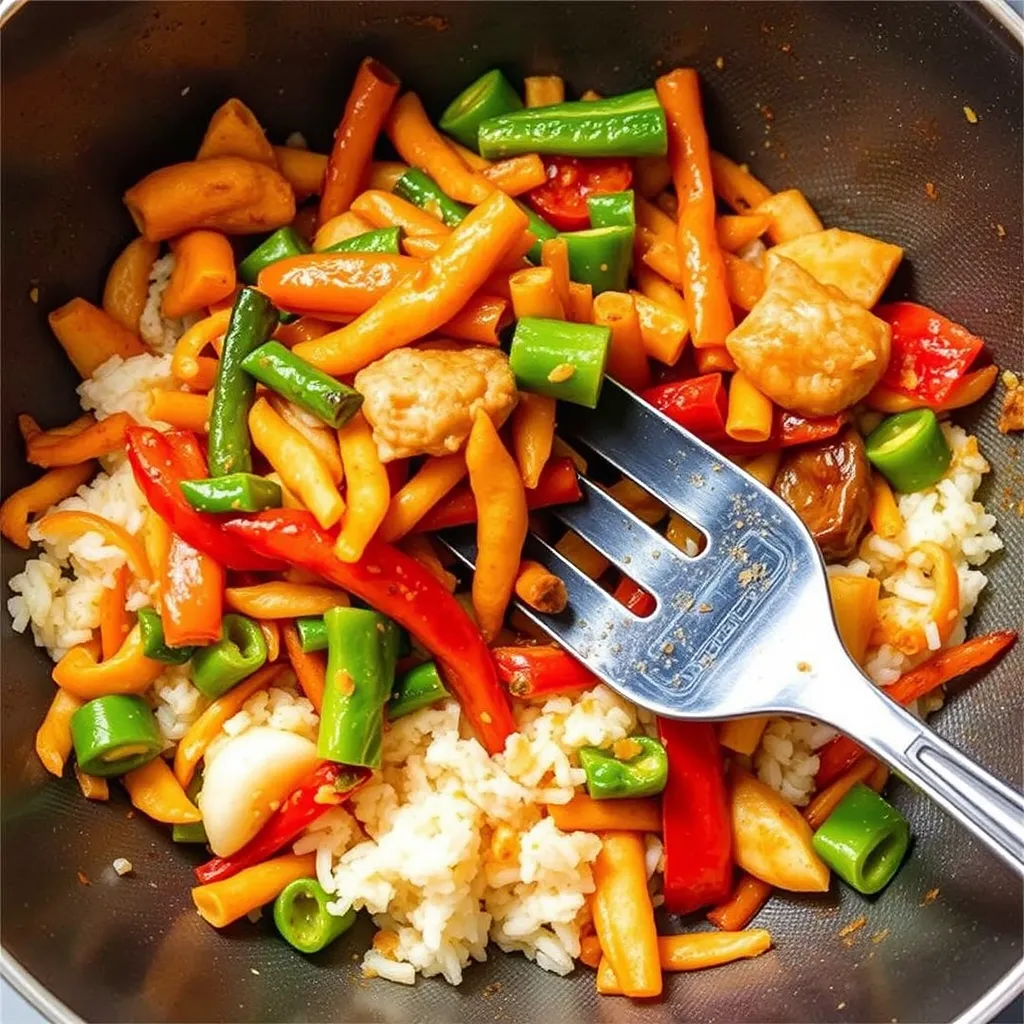
Prep Time: 10 minutes | Cook Time: 5 minutes | Serves: 4
Ingredients:
- 1 lb protein of choice (chicken, beef, tofu, shrimp)
- 4 cups mixed vegetables (broccoli, carrots, bell peppers, snap peas)
- 2 tablespoons oil
- 3 tablespoons stir-fry sauce
- 2 cloves garlic, minced
- 1 teaspoon ginger, minced
- Cooked rice for serving
Instructions:
- Cut protein into bite-sized pieces. Chop vegetables.
- Heat oil in a large wok or skillet over high heat.
- Add protein and cook until nearly done, about 2-3 minutes.
- Add vegetables, garlic, and ginger. Stir-fry for 2-3 minutes until vegetables are tender-crisp.
- Pour in stir-fry sauce, toss to coat, and cook for 1 minute more.
- Serve immediately over rice.
Breakfast-for-Dinner Frittata
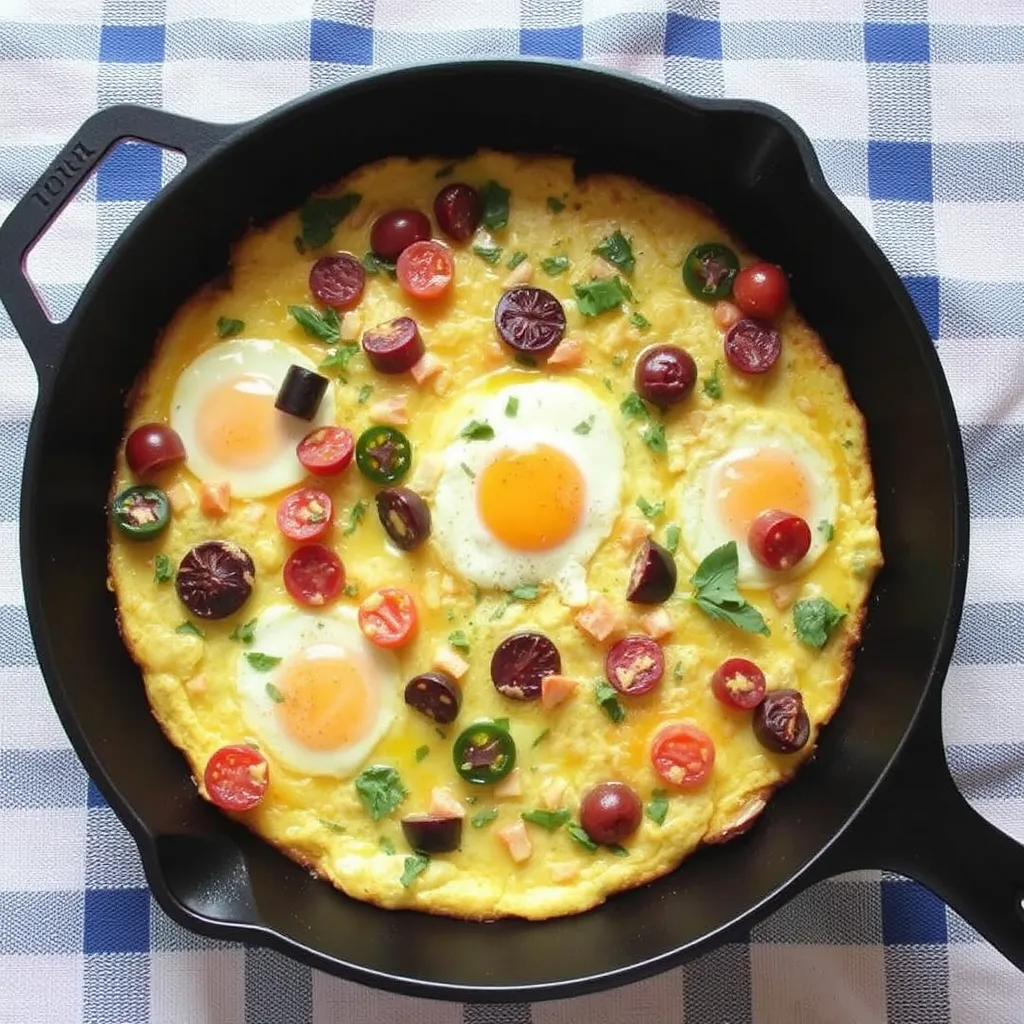
Prep Time: 5 minutes | Cook Time: 15 minutes | Serves: 4
Ingredients:
- 8 large eggs
- 1/4 cup milk
- 1 cup shredded cheese
- 2 cups vegetables (spinach, bell peppers, onions, mushrooms)
- 1 tablespoon olive oil
- Salt and pepper to taste
- Optional: 1/2 cup diced ham or cooked sausage
Instructions:
- Preheat oven to 375°F.
- In a bowl, whisk together eggs, milk, salt, and pepper.
- Heat olive oil in an oven-safe skillet over medium heat.
- Add vegetables and meat (if using) and sauté until vegetables are soft, about 3-4 minutes.
- Pour egg mixture over vegetables and cook until edges begin to set, about 2 minutes.
- Sprinkle cheese on top and transfer to oven.
- Bake for 10-12 minutes until center is set and top is golden.
- Let cool slightly before slicing and serving.
10-Minute Quesadillas
Prep Time: 5 minutes | Cook Time: 5 minutes | Serves: 4
Ingredients:
- 8 large flour tortillas
- 2 cups shredded cheese
- 2 cups protein of choice (rotisserie chicken, beans, cooked ground beef)
- 1 cup vegetables (bell peppers, onions, spinach)
- 2 tablespoons butter or oil
- Optional toppings: salsa, sour cream, guacamole
Instructions:
- Lay out tortillas on a work surface.
- Sprinkle cheese on half of each tortilla.
- Add protein and vegetables on top of cheese.
- Fold tortillas in half to create a semi-circle.
- Heat butter or oil in a large skillet over medium heat.
- Cook quesadillas for 2-3 minutes per side until golden and crispy.
- Cut into wedges and serve with optional toppings.
Flash-Fried Rice
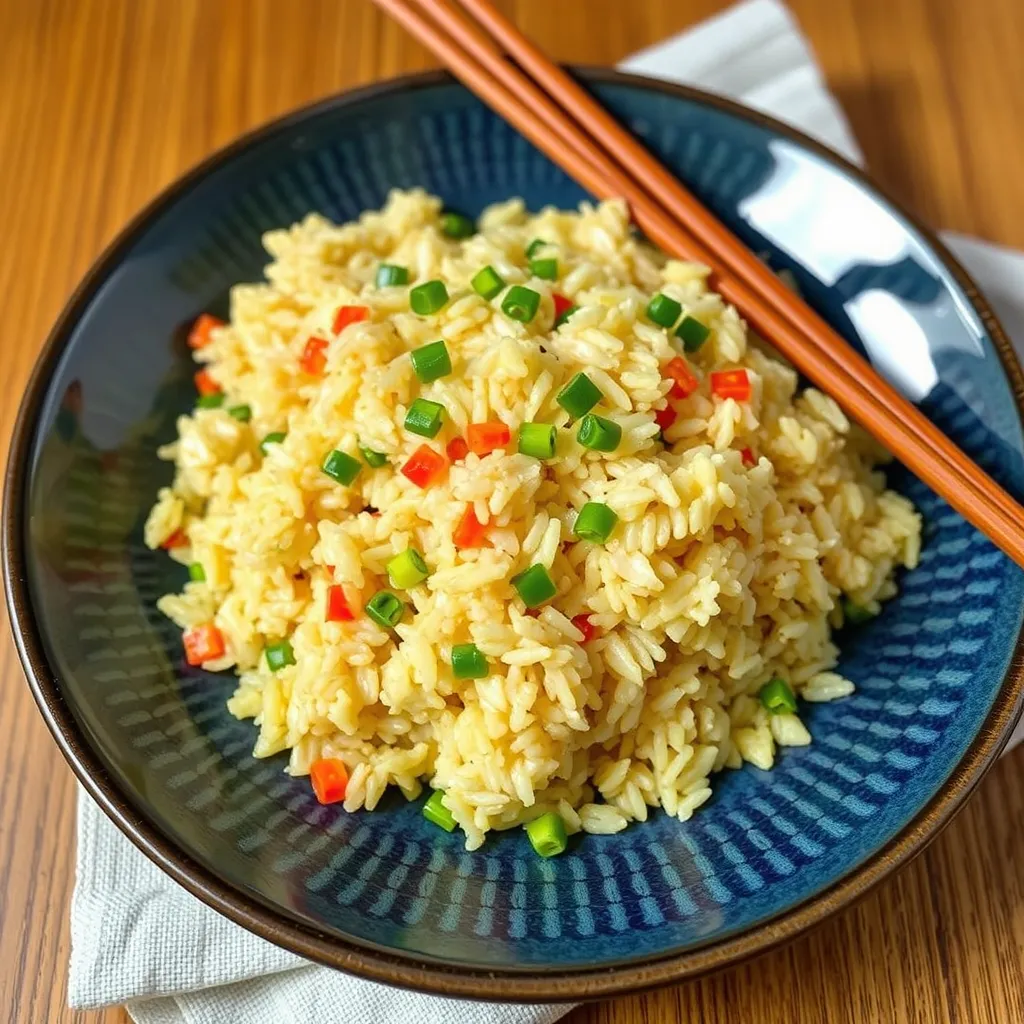
Prep Time: 5 minutes | Cook Time: 7 minutes | Serves: 4
Ingredients:
- 3 cups cooked and cooled rice
- 2 tablespoons oil
- 2 eggs, beaten
- 1 cup frozen mixed vegetables
- 1 cup cooked protein (chicken, ham, tofu)
- 2 tablespoons soy sauce
- 1 teaspoon sesame oil
- 2 green onions, sliced
Instructions:
- Heat oil in a large skillet or wok over high heat.
- Add beaten eggs and scramble until just set, about 30 seconds.
- Add frozen vegetables and protein, stir-fry for 2 minutes.
- Add rice, breaking up any clumps with a spatula.
- Pour soy sauce and sesame oil over rice mixture.
- Stir-fry for 3-4 minutes until everything is hot and well combined.
- Mix in green onions and serve immediately.
Express Mediterranean Pitas
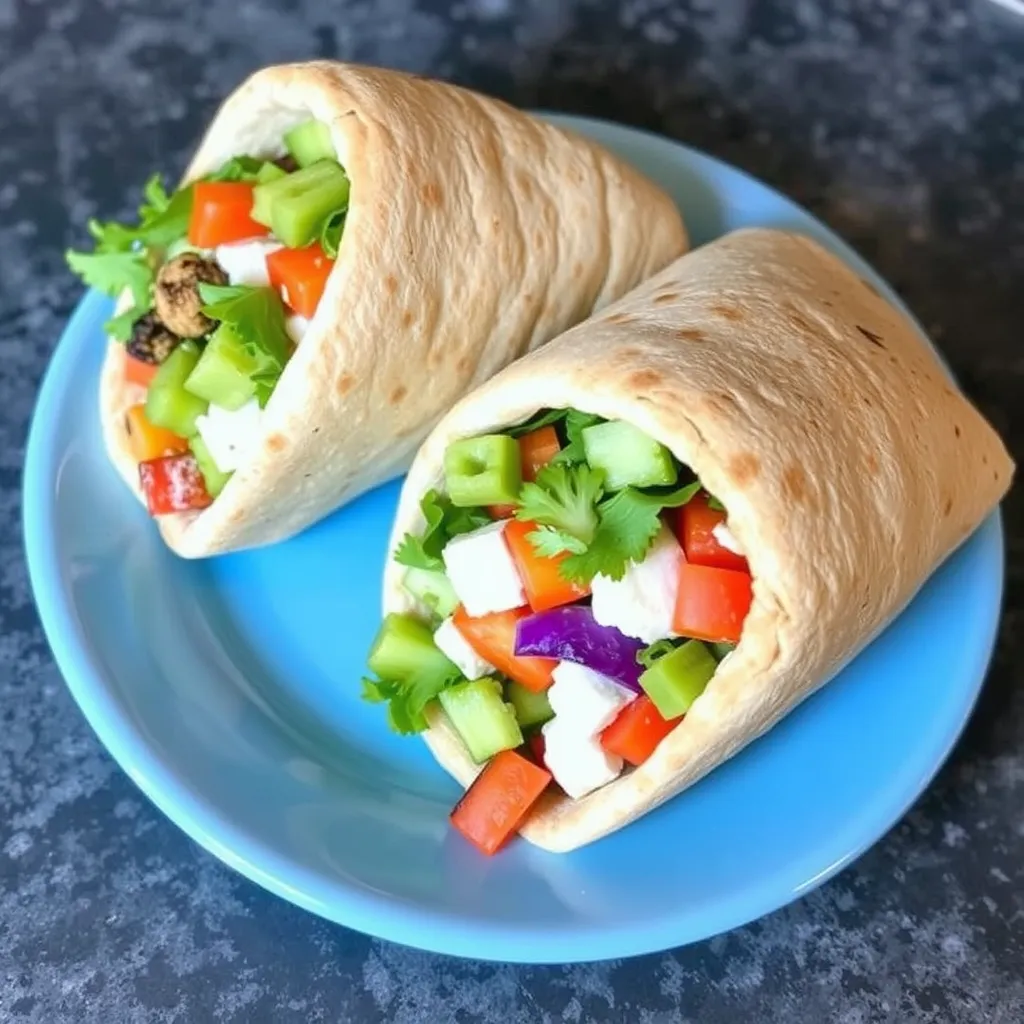
Prep Time: 10 minutes | Cook Time: 0 minutes | Serves: 4
Ingredients:
- 4 pita breads, warmed
- 1 cup hummus
- 2 cups cooked protein (rotisserie chicken, canned tuna, chickpeas)
- 2 cups fresh vegetables (cucumbers, tomatoes, red onion, lettuce)
- 1/2 cup feta cheese, crumbled
- 1/4 cup tzatziki sauce
- 1 tablespoon olive oil
- 1 tablespoon lemon juice
- Salt and pepper to taste
Instructions:
- Cut pita breads in half to form pockets.
- Spread hummus inside each pita pocket.
- Fill with protein, vegetables, and feta cheese.
- Drizzle with tzatziki, olive oil, and lemon juice.
- Season with salt and pepper before serving.
One-Pan Wonders: Easy Cleanup Family Meals
Sheet Pan Sausage & Root Vegetables
Prep Time: 10 minutes | Cook Time: 30 minutes | Serves: 4
Ingredients:
- 1 lb smoked sausage, sliced into rounds
- 4 cups mixed root vegetables (sweet potatoes, carrots, parsnips, red potatoes)
- 2 tablespoons olive oil
- 1 tablespoon maple syrup
- 1 teaspoon dried thyme
- 1 teaspoon garlic powder
- Salt and pepper to taste
Instructions:
- Preheat oven to 425°F. Line a large sheet pan with parchment paper.
- Cut root vegetables into 1-inch pieces.
- In a large bowl, toss vegetables and sausage with oil, maple syrup, and seasonings.
- Spread mixture evenly on prepared sheet pan.
- Roast for 25-30 minutes, stirring halfway, until vegetables are tender and golden.
- Serve directly from the pan or transfer to a serving dish.
Skillet Enchilada Casserole
Prep Time: 10 minutes | Cook Time: 20 minutes | Serves: 6
Ingredients:
- 1 lb ground beef or turkey
- 1 onion, diced
- 1 bell pepper, diced
- 2 cloves garlic, minced
- 1 can (15 oz) black beans, drained
- 1 can (10 oz) enchilada sauce
- 8 corn tortillas, cut into quarters
- 2 cups shredded Mexican cheese blend
- Optional toppings: sour cream, diced avocado, cilantro
Instructions:
- In a large oven-safe skillet, cook ground meat over medium heat until browned.
- Add onion, bell pepper, and garlic. Cook until vegetables soften, about 5 minutes.
- Stir in black beans and enchilada sauce.
- Preheat broiler.
- Layer tortilla pieces throughout the mixture, pushing some down into the sauce.
- Top with shredded cheese.
- Place skillet under broiler for 3-5 minutes until cheese is melted and bubbly.
- Let stand for 5 minutes before serving with optional toppings.
One-Pot Lemon Garlic Pasta
Prep Time: 5 minutes | Cook Time: 15 minutes | Serves: 4
Ingredients:
- 8 oz pasta (fettuccine or linguine)
- 2 tablespoons olive oil
- 3 cloves garlic, minced
- 2 cups chicken or vegetable broth
- 1 cup water
- Zest and juice of 1 lemon
- 1/2 teaspoon red pepper flakes (optional)
- 1/2 cup grated Parmesan cheese
- 2 tablespoons fresh parsley, chopped
- Salt and pepper to taste
Instructions:
- In a large pot or deep skillet, heat olive oil over medium heat.
- Add garlic and red pepper flakes (if using), cook for 30 seconds until fragrant.
- Add pasta, broth, water, lemon zest, and salt.
- Bring to a boil, then reduce heat to medium-low.
- Simmer uncovered, stirring occasionally, until pasta is tender and liquid has reduced to a sauce, about 10-12 minutes.
- Stir in lemon juice and Parmesan cheese.
- Top with parsley before serving.
Sheet Pan Honey-Dijon Salmon & Broccoli

Prep Time: 5 minutes | Cook Time: 15 minutes | Serves: 4
Ingredients:
- 4 salmon fillets (about 6 oz each)
- 1 large head broccoli, cut into florets
- 2 tablespoons olive oil
- 2 tablespoons honey
- 2 tablespoons Dijon mustard
- 2 cloves garlic, minced
- 1 tablespoon lemon juice
- Salt and pepper to taste
Instructions:
- Preheat oven to 400°F. Line a sheet pan with parchment paper.
- In a small bowl, mix honey, Dijon mustard, garlic, and lemon juice.
- Place salmon fillets and broccoli on sheet pan.
- Drizzle everything with olive oil and season with salt and pepper.
- Brush salmon with honey-dijon mixture.
- Bake for 12-15 minutes until salmon is cooked through and broccoli is tender-crisp.
- Serve directly from the pan.
Dutch Oven Chicken & Dumplings
Prep Time: 15 minutes | Cook Time: 40 minutes | Serves: 6
Ingredients: For the stew:
- 1.5 lbs boneless chicken thighs, cut into chunks
- 2 tablespoons olive oil
- 1 onion, diced
- 3 carrots, sliced
- 2 celery stalks, sliced
- 2 cloves garlic, minced
- 4 cups chicken broth
- 1 teaspoon dried thyme
- 2 bay leaves
- Salt and pepper to taste
For the dumplings:
- 1 1/2 cups all-purpose flour
- 1 tablespoon baking powder
- 1/2 teaspoon salt
- 3 tablespoons butter, melted
- 3/4 cup milk
- 1 tablespoon fresh parsley, chopped
Instructions:
- In a Dutch oven, heat oil over medium-high heat. Add chicken and brown on all sides, about 5 minutes.
- Add onion, carrots, celery, and garlic. Cook until vegetables begin to soften, about 5 minutes.
- Pour in chicken broth. Add thyme, bay leaves, salt, and pepper.
- Bring to a boil, then reduce heat and simmer for 15 minutes.
- Meanwhile, make the dumplings: In a bowl, whisk together flour, baking powder, and salt.
- Stir in melted butter, milk, and parsley until just combined.
- Drop spoonfuls of dumpling mixture onto the simmering stew.
- Cover and cook for 15 minutes without lifting the lid.
- Remove bay leaves before serving.
One-Pan Italian Gnocchi Bake
Prep Time: 5 minutes | Cook Time: 25 minutes | Serves: 4
Ingredients:
- 1 lb shelf-stable potato gnocchi
- 1 jar (24 oz) marinara sauce
- 1 cup shredded mozzarella cheese
- 1/4 cup grated Parmesan cheese
- 1 cup baby spinach
- 1 cup cherry tomatoes, halved
- 1 teaspoon Italian seasoning
- 2 cloves garlic, minced
- 2 tablespoons olive oil
- Fresh basil for garnish
Instructions:
- Preheat oven to 400°F.
- In a large oven-safe skillet or baking dish, combine gnocchi, marinara sauce, spinach, cherry tomatoes, Italian seasoning, and garlic.
- Drizzle with olive oil and stir to combine.
- Top with mozzarella and Parmesan cheese.
- Bake uncovered for 25 minutes until gnocchi is tender and cheese is bubbly and golden.
- Garnish with fresh basil before serving.
Single Skillet Teriyaki Chicken
Prep Time: 10 minutes | Cook Time: 15 minutes | Serves: 4
Ingredients:
- 1.5 lbs boneless chicken breasts, cut into bite-sized pieces
- 2 cups mixed vegetables (broccoli, bell peppers, carrots)
- 2 tablespoons oil
For the sauce:
- 1/3 cup soy sauce
- 1/4 cup water
- 3 tablespoons brown sugar
- 1 tablespoon honey
- 2 cloves garlic, minced
- 1 teaspoon ginger, grated
- 1 tablespoon cornstarch
- Cooked rice for serving
- Sesame seeds and green onions for garnish
Instructions:
- In a bowl, whisk together all sauce ingredients until cornstarch is dissolved.
- Heat oil in a large skillet over medium-high heat.
- Add chicken pieces and cook until lightly browned, about 5 minutes.
- Add vegetables and stir-fry for 3-4 minutes until crisp-tender.
- Pour sauce over chicken and vegetables.
- Reduce heat to medium and simmer for 3-5 minutes until sauce thickens.
- Serve over rice and garnish with sesame seeds and green onions.
Budget-Friendly Bites: Delicious Dinners That Don’t Break the Bank
Hearty Bean & Vegetable Soup
Prep Time: 10 minutes | Cook Time: 25 minutes | Serves: 6
Ingredients:
- 2 tablespoons olive oil
- 1 onion, diced
- 2 carrots, diced
- 2 celery stalks, diced
- 2 cloves garlic, minced
- 1 can (15 oz) kidney beans, drained
- 1 can (15 oz) cannellini beans, drained
- 1 can (14.5 oz) diced tomatoes
- 4 cups vegetable broth
- 1 teaspoon Italian seasoning
- 1 bay leaf
- 2 cups chopped kale or spinach
- Salt and pepper to taste
- Grated Parmesan for serving (optional)
Instructions:
- Heat oil in a large pot over medium heat.
- Add onion, carrots, and celery. Cook until vegetables begin to soften, about 5 minutes.
- Add garlic and cook for 30 seconds until fragrant.
- Pour in beans, tomatoes, broth, Italian seasoning, and bay leaf.
- Bring to a boil, then reduce heat and simmer for 15 minutes.
- Stir in greens and cook for additional 5 minutes until wilted.
- Remove bay leaf, season with salt and pepper.
- Serve with Parmesan cheese if desired.
Crispy Baked Potato Bar

Prep Time: 10 minutes | Cook Time: 1 hour | Serves: 4
Ingredients:
- 4 large russet potatoes
- 2 tablespoons olive oil
- Salt and pepper to taste
Toppings (choose any combination):
- 1 cup shredded cheese
- 1 cup chili (homemade or canned)
- 1 cup broccoli florets, steamed
- 1/2 cup sour cream
- 1/4 cup green onions, chopped
- 1/2 cup bacon bits or crumbled cooked bacon
- 1 cup black beans, warmed
- 1/2 cup salsa
Instructions:
- Preheat oven to 425°F.
- Scrub potatoes clean and pat dry.
- Poke several holes in each potato with a fork.
- Rub potatoes with olive oil and sprinkle with salt.
- Place directly on oven rack and bake for 50-60 minutes until skin is crisp and inside is soft.
- Meanwhile, prepare desired toppings.
- Split potatoes down the middle and fluff the insides with a fork.
- Set up a topping bar and let everyone customize their potato.
Savory Lentil Sloppy Joes
Prep Time: 10 minutes | Cook Time: 25 minutes | Serves: 6
Ingredients:
- 1 cup dry green or brown lentils, rinsed
- 3 cups water or vegetable broth
- 1 tablespoon olive oil
- 1 onion, finely diced
- 1 bell pepper, finely diced
- 2 cloves garlic, minced
- 1 can (15 oz) tomato sauce
- 2 tablespoons tomato paste
- 2 tablespoons brown sugar
- 1 tablespoon Worcestershire sauce
- 1 tablespoon chili powder
- 1 teaspoon mustard powder
- Salt and pepper to taste
- 6 hamburger buns
Instructions:
- In a pot, combine lentils and water/broth. Bring to a boil, then reduce heat and simmer covered for 15-20 minutes until lentils are tender but not mushy.
- Meanwhile, heat oil in a large skillet over medium heat.
- Add onion and bell pepper, cook until softened, about 5 minutes.
- Add garlic and cook for 30 seconds until fragrant.
- Drain lentils if needed and add to the skillet.
- Stir in tomato sauce, tomato paste, brown sugar, Worcestershire sauce, chili powder, and mustard powder.
- Simmer for 5-10 minutes until mixture thickens.
- Season with salt and pepper to taste.
- Serve on toasted hamburger buns.
Budget-Friendly Burrito Bowls
Prep Time: 15 minutes | Cook Time: 20 minutes | Serves: 4
Ingredients: For the base:
- 2 cups cooked rice
- 1 can (15 oz) black beans, drained and rinsed
- 1 tablespoon olive oil
- 1 teaspoon cumin
- 1/2 teaspoon chili powder
- Salt to taste
For toppings:
- 1 cup corn kernels (frozen, canned, or fresh)
- 1 cup diced tomatoes
- 1 avocado, diced
- 1/4 cup red onion, diced
- 1/4 cup cilantro, chopped
- 1 lime, cut into wedges
- Hot sauce or salsa
- Optional protein: 1 cup cooked, seasoned ground beef or shredded chicken
Instructions:
- In a saucepan, combine black beans with oil, cumin, chili powder, and salt. Heat over medium-low heat for 5 minutes.
- If using frozen corn, heat according to package directions.
- Prepare all fresh toppings and arrange in separate bowls.
- To serve, place rice in the bottom of each bowl.
- Top with seasoned beans, optional protein, and desired toppings.
- Squeeze lime wedges over the top before serving.
Frugal Fried Rice
Prep Time: 10 minutes | Cook Time: 10 minutes | Serves: 4
Ingredients:
- 3 cups cooked and cooled rice
- 2 tablespoons vegetable oil
- 2 eggs, beaten
- 1/2 cup carrots, diced small
- 1/2 cup frozen peas
- 1/4 cup green onions, sliced
- 2 cloves garlic, minced
- 2 tablespoons soy sauce
- 1 teaspoon sesame oil
- Optional protein: 1 cup diced cooked chicken, ham, or tofu
Instructions:
- Heat 1 tablespoon oil in a large skillet or wok over medium-high heat.
- Add beaten eggs and cook until set, breaking into pieces with a spatula. Remove and set aside.
- Add remaining oil to the pan. Add carrots and cook for 2 minutes.
- Add garlic and cook for 30 seconds until fragrant.
- Add rice, breaking up any clumps. Stir-fry for 3-4 minutes until rice is heated through.
- Add peas, protein (if using), reserved eggs, and green onions.
- Pour soy sauce and sesame oil over rice mixture.
- Stir-fry for another 2 minutes until everything is well combined and hot.
Pasta e Fagioli
Prep Time: 10 minutes | Cook Time: 25 minutes | Serves: 6
Ingredients:
- 2 tablespoons olive oil
- 1 onion, diced
- 2 carrots, diced
- 2 celery stalks, diced
- 3 cloves garlic, minced
- 1 can (14.5 oz) diced tomatoes
- 4 cups chicken or vegetable broth
- 1 can (15 oz) cannellini beans, drained and rinsed
- 1 can (15 oz) kidney beans, drained and rinsed
- 1 teaspoon dried oregano
- 1 teaspoon dried basil
- 1/2 teaspoon dried thyme
- 1 cup small pasta (ditalini, elbow, or small shells)
- Salt and pepper to taste
- Grated Parmesan for serving
Instructions:
- Heat oil in a large pot over medium heat.
- Add onion, carrots, and celery. Cook until vegetables soften, about 5 minutes.
- Add garlic and cook for 30 seconds until fragrant.
- Add diced tomatoes, broth, beans, and herbs. Bring to a boil.
- Reduce heat and simmer for 10 minutes.
- Add pasta and continue simmering until pasta is tender, about 8-10 minutes.
- Season with salt and pepper to taste.
- Serve with grated Parmesan cheese.
Economical Egg Drop Soup
Prep Time: 5 minutes | Cook Time: 5 minutes | Serves: 4
Ingredients:
- 4 cups chicken or vegetable broth
- 2 tablespoons cornstarch
- 1/4 cup cold water
- 3 eggs, beaten
- 2 green onions, sliced
- 1/4 teaspoon ground ginger
- 1 tablespoon soy sauce
- 1/2 teaspoon sesame oil
- Salt and white pepper to taste
Instructions:
- In a small bowl, whisk together cornstarch and cold water until smooth.
- In a pot, bring broth to a simmer over medium heat.
- Stir in ginger and soy sauce.
- Slowly pour in cornstarch mixture while stirring constantly.
- Simmer for 2 minutes until slightly thickened.
- While stirring the soup in a circular motion, slowly pour in beaten eggs to create threads.
- Remove from heat and stir in sesame oil and green onions.
- Season with salt and white pepper before serving.
Thrifty Tuna Noodle Casserole
Prep Time: 10 minutes | Cook Time: 25 minutes | Serves: 6
Ingredients:
- 8 oz egg noodles
- 2 cans (5 oz each) tuna, drained
- 1 cup frozen peas
- 1 can (10.5 oz) cream of mushroom soup
- 1/2 cup milk
- 1 teaspoon dried dill
- 1/2 teaspoon garlic powder
- 1 cup shredded cheddar cheese
- 1/4 cup breadcrumbs
- 1 tablespoon butter, melted
- Salt and pepper to taste
Instructions:
- Preheat oven to 375°F. Grease a 9×13 inch baking dish.
- Cook noodles according to package directions, stopping 1 minute before recommended time. Drain.
- In a large bowl, combine cooked noodles, tuna, peas, soup, milk, dill, garlic powder, salt, and pepper.
- Fold in 1/2 cup cheese.
- Transfer mixture to prepared baking dish and top with remaining cheese.
- Mix breadcrumbs with melted butter and sprinkle over the top.
- Bake for 20-25 minutes until bubbly and golden on top.
- Let rest for 5 minutes before serving.
Kid-Approved Classics (Picky Eater Friendly!)
Build-Your-Own Mini Pizzas
Prep Time: 10 minutes | Cook Time: 10 minutes | Serves: 4
Ingredients:
- 8 English muffins, split in half
- 1 cup pizza sauce
- 2 cups shredded mozzarella cheese
- Toppings of choice:
- Pepperoni slices
- Diced bell peppers
- Sliced mushrooms
- Diced ham
- Pineapple tidbits
- Sliced black olives
- Italian seasoning
Instructions:
- Preheat oven to 400°F. Line a baking sheet with parchment paper.
- Place English muffin halves cut-side up on the baking sheet.
- Spread about 1 tablespoon of pizza sauce on each half.
- Set up a “topping bar” with all ingredients in separate bowls.
- Let each family member create their own pizza with desired toppings.
- Sprinkle each pizza with cheese.
- Bake for 8-10 minutes until cheese is melted and bubbly.
- Let cool slightly before serving.
Hidden Veggie Pasta Sauce
Prep Time: 10 minutes | Cook Time: 30 minutes | Serves: 6
Ingredients:
- 1 tablespoon olive oil
- 1 onion, diced
- 2 carrots, diced
- 1 bell pepper, diced
- 1 zucchini, diced
- 2 cloves garlic, minced
- 1 can (28 oz) crushed tomatoes
- 1 tablespoon tomato paste
- 1 teaspoon dried basil
- 1 teaspoon dried oregano
- 1/2 teaspoon sugar
- Salt and pepper to taste
- 1 lb pasta of choice
Instructions:
- Heat oil in a large pot over medium heat.
- Add onion, carrots, bell pepper, and zucchini. Cook until vegetables soften, about 7-8 minutes.
- Add garlic and cook for 30 seconds until fragrant.
- Add crushed tomatoes, tomato paste, herbs, and sugar. Stir to combine.
- Bring to a simmer, then reduce heat to low. Cover and simmer for 15-20 minutes.
- Using an immersion blender, blend sauce until smooth. (Alternatively, carefully transfer to a regular blender in batches.)
- Season with salt and pepper to taste.
- Serve over cooked pasta of choice.
Breaded Chicken Tenders with Honey-Mustard Dip
Prep Time: 15 minutes | Cook Time: 15 minutes | Serves: 4
Ingredients: For chicken tenders:
- 1.5 lbs chicken tenderloins
- 1 cup panko breadcrumbs
- 1/4 cup grated Parmesan cheese
- 1 teaspoon garlic powder
- 1 teaspoon dried herbs (parsley, oregano, or Italian seasoning)
- 1/2 teaspoon paprika
- 2 eggs, beaten
- Salt and pepper to taste
- Cooking spray
For honey-mustard dip:
- 1/4 cup mayonnaise
- 2 tablespoons Dijon mustard
- 2 tablespoons honey
- 1 teaspoon lemon juice
Instructions:
- Preheat oven to 425°F. Line a baking sheet with parchment paper and spray with cooking spray.
- In a shallow dish, combine breadcrumbs, Parmesan, garlic powder, herbs, paprika, salt, and pepper.
- Place beaten eggs in a separate shallow dish.
- Dip each chicken tender in egg, then coat in breadcrumb mixture, pressing to adhere.
- Place on prepared baking sheet and spray lightly with cooking spray.
- Bake for 15-18 minutes until golden and cooked through (internal temperature of 165°F).
- While chicken bakes, whisk together all dip ingredients.
- Serve tenders hot with honey-mustard dip on the side.
Mac & Cheese with Sneaky Cauliflower
Prep Time: 15 minutes | Cook Time: 25 minutes | Serves: 6
Ingredients:
- 12 oz elbow macaroni
- 1 medium head cauliflower, cut into florets (about 4 cups)
- 2 tablespoons butter
- 2 tablespoons flour
- 2 cups milk
- 2 cups shredded cheddar cheese
- 1/2 cup grated Parmesan cheese
- 1/2 teaspoon garlic powder
- 1/4 teaspoon mustard powder
- Salt and pepper to taste
- Optional topping: 1/2 cup panko breadcrumbs mixed with 1 tablespoon melted butter
Instructions:
- Preheat oven to 375°F if using optional topping. Grease a 9×13 inch baking dish.
- Cook pasta according to package directions, stopping 2 minutes before recommended time.
- Meanwhile, steam cauliflower until very tender, about 8-10 minutes.
- Transfer cauliflower to a blender with 1/2 cup of milk. Blend until smooth.
- In a large pot, melt butter over medium heat. Add flour and whisk for 1 minute.
- Gradually whisk in remaining milk and cauliflower puree. Cook, stirring constantly, until thickened.
- Remove from heat and stir in cheeses, garlic powder, and mustard powder until melted.
- Season with salt and pepper to taste.
- Add drained pasta and stir to coat completely.
- If using topping: Transfer to baking dish, sprinkle with breadcrumb mixture, and bake for 15 minutes until golden.
- If not using topping: Serve immediately.
Mild Taco Bar
Prep Time: 15 minutes | Cook Time: 10 minutes | Serves: 4
Ingredients:
- 1 lb ground beef or turkey
- 1 packet mild taco seasoning (or 2 tablespoons homemade seasoning)
- 8-12 hard taco shells or soft tortillas
- Optional toppings (all served separately):
- Shredded lettuce
- Diced tomatoes
- Shredded cheese
- Mild salsa
- Sour cream
- Diced avocado
- Black olives
- Refried beans
Instructions:
- Cook ground meat in a skillet over medium heat until browned.
- Add taco seasoning and water according to package directions. Simmer for 5 minutes.
- Meanwhile, warm taco shells or tortillas according to package directions.
- Arrange all toppings in separate bowls on the table.
- Let each family member build their own taco with preferred ingredients.
Breakfast Dinner Board
Prep Time: 15 minutes | Cook Time: 15 minutes | Serves: 4
Ingredients:
- 8 eggs
- 8 strips bacon
- 8 sausage links
- 12 silver dollar pancakes (homemade or frozen)
- 2 cups fresh fruit (berries, banana slices, apple slices)
- Maple syrup
- Butter
- Optional: small bowls of granola, yogurt, and nuts
Instructions:
- Cook bacon according to package directions until crispy. Drain on paper towels.
- Cook sausage links according to package directions. Set aside.
- If using frozen pancakes, warm according to package directions. If making homemade, prepare according to your favorite recipe.
- Scramble eggs to desired doneness.
- Arrange all components on a large board or platter:
- Place eggs, bacon, and sausage in separate sections
- Fan out pancakes
- Fill empty spaces with fresh fruit
- Add small containers of maple syrup and butter
- Let everyone serve themselves breakfast-for-dinner style.
Kid-Friendly Teriyaki Meatballs
Prep Time: 15 minutes | Cook Time: 20 minutes | Serves: 4
Ingredients: For meatballs:
- 1 lb ground chicken or turkey
- 1/2 cup panko breadcrumbs
- 1 egg, beaten
- 2 tablespoons grated carrot
- 2 tablespoons minced onion
- 1 tablespoon soy sauce
- 1 teaspoon ginger, grated
- 1/2 teaspoon garlic powder
For teriyaki sauce:
- 1/3 cup soy sauce
- 1/4 cup water
- 3 tablespoons brown sugar
- 1 tablespoon honey
- 1 clove garlic, minced
- 1/2 teaspoon ginger, grated
- 1 tablespoon cornstarch mixed with 2 tablespoons water
For serving:
- Cooked rice
- Steamed broccoli florets
Instructions:
- Preheat oven to 400°F. Line a baking sheet with parchment paper.
- In a bowl, combine all meatball ingredients and mix gently until just combined.
- Form mixture into 16-20 meatballs (about 1.5 inches each).
- Place meatballs on prepared baking sheet and bake for 15-18 minutes until cooked through.
- While meatballs cook, make the sauce: In a saucepan, combine soy sauce, water, brown sugar, honey, garlic, and ginger.
- Bring to a simmer over medium heat, then stir in cornstarch mixture.
- Cook, stirring constantly, until sauce thickens, about 2 minutes.
- Toss cooked meatballs in sauce to coat.
- Serve over rice with steamed broccoli “trees” on the side.
Rainbow Veggie Pasta
Prep Time: 10 minutes | Cook Time: 15 minutes | Serves: 4
Ingredients:
- 12 oz pasta of choice
- 1 tablespoon olive oil
- 1 cup cherry tomatoes, halved (red)
- 1 orange bell pepper, diced (orange)
- 1 cup corn kernels (yellow)
- 1 cup peas (green)
- 1/2 cup purple cabbage, thinly sliced (purple/blue)
- 2 tablespoons butter
- 2 tablespoons grated Parmesan cheese
- 1 teaspoon Italian seasoning
- Salt and pepper to taste
Instructions:
- Cook pasta according to package directions. Reserve 1/2 cup pasta water before draining.
- In a large skillet, heat olive oil over medium heat.
- Add orange bell pepper and sauté for 2 minutes.
- Add corn and peas, cook for 2 more minutes.
- Add cherry tomatoes and purple cabbage, cook for 1 minute until just softened.
- Add drained pasta to the skillet along with butter and Italian seasoning.
- Toss everything together, adding reserved pasta water as needed to create a light sauce.
- Season with salt and pepper to taste.
- Sprinkle with Parmesan cheese before serving.
Make-Ahead Magic: Prep Now, Eat Later Dinners
Freezer-Friendly Enchiladas
Prep Time: 20 minutes | Cook Time: 30 minutes | Serves: 6
Ingredients:
- 2 lbs boneless chicken breasts or thighs
- 1 packet taco seasoning
- 1 onion, diced
- 1 bell pepper, diced
- 1 can (4 oz) diced green chiles
- 2 cans (10 oz each) enchilada sauce, divided
- 2 cups shredded Mexican blend cheese, divided
- 12 flour tortillas (8-inch)
- Optional toppings: sour cream, avocado, cilantro
Instructions:
- Cook chicken with taco seasoning according to packet directions. Shred chicken.
- In a large bowl, combine shredded chicken, onion, bell pepper, green chiles, 1/2 cup enchilada sauce, and 1 cup cheese.
- Pour 1/2 cup enchilada sauce in the bottom of a 9×13 inch baking dish.
- Fill each tortilla with about 1/3 cup filling, roll up, and place seam-side down in the baking dish.
- Pour remaining enchilada sauce over the top and sprinkle with remaining cheese.
To freeze: 6. Cover tightly with plastic wrap, then aluminum foil. Label and freeze for up to 3 months.
To bake from frozen: 7. Thaw overnight in refrigerator. 8. Preheat oven to 350°F. Remove plastic wrap but keep foil on. 9. Bake covered for 30 minutes, then uncover and bake 10-15 minutes more until hot and bubbly. 10. Serve with optional toppings.
Overnight Marinated Chicken
Prep Time: 10 minutes | Marinate: 4-24 hours | Cook Time: 20 minutes | Serves: 4
Ingredients:
- 4 boneless, skinless chicken breasts
For marinade:
- 1/4 cup olive oil
- 3 tablespoons lemon juice
- 2 cloves garlic, minced
- 1 tablespoon honey
- 1 teaspoon dried oregano
- 1 teaspoon dried thyme
- 1/2 teaspoon paprika
- Salt and pepper to taste
Instructions:
- In a bowl, whisk together all marinade ingredients.
- Place chicken in a zip-top bag or container.
- Pour marinade over chicken, seal, and turn to coat.
- Refrigerate 4 hours or overnight (up to 24 hours).
When ready to cook: 5. Preheat oven to 425°F. 6. Remove chicken from marinade and place in a baking dish. 7. Bake for 18-22 minutes until internal temperature reaches 165°F. 8. Let rest for 5 minutes before slicing and serving.
Sunday Sauce & Meatballs
Prep Time: 30 minutes | Cook Time: 3 hours | Serves: 8
Ingredients: For the sauce:
- 2 tablespoons olive oil
- 1 large onion, finely diced
- 4 cloves garlic, minced
- 2 cans (28 oz each) crushed tomatoes
- 1 can (6 oz) tomato paste
- 1 cup water
- 2 bay leaves
- 1 tablespoon dried basil
- 2 teaspoons dried oregano
- 1 teaspoon sugar
- Salt and pepper to taste
For the meatballs:
- 1 lb ground beef
- 1/2 lb ground pork
- 1/2 cup breadcrumbs
- 1/2 cup grated Parmesan cheese
- 2 eggs, beaten
- 3 cloves garlic, minced
- 1/4 cup fresh parsley, chopped
- 1 teaspoon dried oregano
- 1/2 teaspoon salt
- 1/4 teaspoon pepper
- 2 tablespoons olive oil for browning
Instructions:
- Make the sauce: Heat oil in a large pot over medium heat. Add onion and sauté until translucent, about 5 minutes.
- Add garlic and cook for 30 seconds until fragrant.
- Add crushed tomatoes, tomato paste, water, bay leaves, basil, oregano, sugar, salt, and pepper.
- Bring to a simmer, then reduce heat to low. Cover partially and simmer for 1 hour.
- Meanwhile, make the meatballs: In a large bowl, combine all meatball ingredients except olive oil. Mix gently until just combined.
- Form mixture into 1.5-inch meatballs (about 24-30 meatballs).
- Heat olive oil in a large skillet over medium-high heat. Brown meatballs in batches, turning occasionally, about 5-7 minutes per batch.
- Transfer browned meatballs to the simmering sauce.
- Continue simmering sauce with meatballs for about 2 hours, stirring occasionally.
- Remove bay leaves before serving.
- Serve over pasta or use for meatball subs.
Prep-Ahead Stir Fry Kits
Prep Time: 20 minutes | Cook Time: 10 minutes | Serves: 4
Ingredients: For each kit (make up to 3 and refrigerate):
- 1 lb protein of choice (chicken, beef, tofu, shrimp), cut into bite-sized pieces
- 4 cups mixed vegetables (broccoli, bell peppers, carrots, snap peas, mushrooms), chopped
- 3 cloves garlic, minced
- 1 tablespoon ginger, grated
For sauce (store separately):
- 1/4 cup soy sauce
- 2 tablespoons water
- 1 tablespoon honey or brown sugar
- 1 teaspoon sesame oil
- 1 tablespoon cornstarch
For cooking:
- 2 tablespoons vegetable oil
- Cooked rice for serving
Instructions: Prep ahead:
- Place protein in a zip-top bag or container.
- Place chopped vegetables in another bag or container.
- Combine garlic and ginger in a small container.
- Whisk together all sauce ingredients in a jar or container.
- Store all components in the refrigerator for up to 3 days.
When ready to cook: 6. Heat 1 tablespoon oil in a large wok or skillet over high heat. 7. Add protein and cook until nearly done, about 3-5 minutes. Remove and set aside. 8. Add remaining oil to the pan. Add vegetables, garlic, and ginger. 9. Stir-fry for 3-4 minutes until vegetables are crisp-tender. 10. Return protein to the pan. 11. Shake sauce to recombine, then pour over mixture in pan. 12. Cook for 1-2 minutes until sauce thickens. 13. Serve over cooked rice.
Convenient Casserole Collection
Italian Sausage and Pasta Bake
Prep Time: 20 minutes | Cook Time: 30 minutes | Serves: 6
Ingredients:
- 8 oz pasta (penne or rotini)
- 1 lb Italian sausage, casings removed
- 1 onion, diced
- 2 cloves garlic, minced
- 1 bell pepper, diced
- 1 jar (24 oz) marinara sauce
- 2 cups shredded mozzarella cheese
- 1/4 cup grated Parmesan cheese
- 1 teaspoon Italian seasoning
Instructions:
- Cook pasta according to package directions, stopping 2 minutes before recommended time. Drain.
- In a large skillet, cook sausage over medium heat, breaking it up as it cooks.
- Add onion and bell pepper, cook until vegetables soften, about 5 minutes.
- Add garlic and cook for 30 seconds until fragrant.
- Stir in marinara sauce and Italian seasoning.
- Fold in cooked pasta.
To prep ahead: 7. Transfer mixture to a greased 9×13 inch baking dish. 8. Top with mozzarella and Parmesan cheese. 9. Cover tightly and refrigerate for up to 2 days.
When ready to bake: 10. Preheat oven to 375°F. 11. Bake uncovered for 25-30 minutes until hot and bubbly.
Make-Ahead Pasta Bakes
Spinach and Ricotta Stuffed Shells
Prep Time: 25 minutes | Cook Time: 35 minutes | Serves: 6
Ingredients:
- 24 jumbo pasta shells
- 15 oz ricotta cheese
- 10 oz frozen spinach, thawed and squeezed dry
- 2 cups shredded mozzarella cheese, divided
- 1/2 cup grated Parmesan cheese
- 1 egg, beaten
- 2 cloves garlic, minced
- 1 teaspoon dried basil
- 1/2 teaspoon dried oregano
- 1/4 teaspoon nutmeg
- Salt and pepper to taste
- 2 cups marinara sauce
- Fresh basil for garnish (optional)
Instructions:
- Cook pasta shells according to package directions, stopping 2 minutes before recommended time. Drain and rinse with cold water.
- In a large bowl, combine ricotta, spinach, 1 cup mozzarella, Parmesan, egg, garlic, dried herbs, nutmeg, salt, and pepper.
- Spread 1/2 cup marinara sauce in the bottom of a 9×13 inch baking dish.
- Fill each shell with about 2 tablespoons of the ricotta mixture.
- Place filled shells in the baking dish.
- Pour remaining marinara sauce over shells.
- Sprinkle with remaining mozzarella cheese.
To prep ahead: 8. Cover tightly with foil and refrigerate for up to 2 days.
When ready to bake: 9. Preheat oven to 375°F. 10. Bake covered for 25 minutes, then uncover and bake for 10 more minutes until cheese is bubbly. 11. Garnish with fresh basil if desired before serving.
Ready-to-Bake Stuffed Peppers
Prep Time: 20 minutes | Cook Time: 35 minutes | Serves: 6
Ingredients:
- 6 large bell peppers, any color
- 1 lb ground beef or turkey
- 1 onion, diced
- 2 cloves garlic, minced
- 1 cup cooked rice
- 1 can (14.5 oz) diced tomatoes, drained
- 1 tablespoon tomato paste
- 1 teaspoon dried oregano
- 1 teaspoon dried basil
- 1/2 teaspoon paprika
- 1 cup shredded cheddar cheese, divided
- Salt and pepper to taste
- 1 cup tomato sauce
Instructions:
- Cut tops off peppers and remove seeds and membranes. If needed, slice a small piece from the bottom so peppers stand upright.
- In a large skillet, cook ground meat and onion over medium heat until meat is browned.
- Add garlic and cook for 30 seconds until fragrant.
- Stir in rice, diced tomatoes, tomato paste, and seasonings. Cook for 2 minutes.
- Remove from heat and stir in 1/2 cup cheese. Season with salt and pepper to taste.
- Pour tomato sauce into the bottom of a 9×13 inch baking dish.
- Fill each pepper with the meat mixture and arrange in the baking dish.
- Top each pepper with remaining cheese.
To prep ahead: 9. Cover tightly and refrigerate for up to 48 hours.
When ready to bake: 10. Preheat oven to 375°F. 11. Bake covered for 30 minutes, then uncover and bake for 5-10 more minutes until peppers are tender and cheese is melted.
Slow Cooker & Instant Pot Heroes: Hands-Off Family Meals
Set-and-Forget Pulled Chicken
Prep Time: 5 minutes | Cook Time: 4-6 hours (slow cooker) or 15 minutes (Instant Pot) | Serves: 6
Ingredients:
- 2 lbs boneless, skinless chicken breasts or thighs
- 1 cup chicken broth
- 2 cloves garlic, minced
- 1 teaspoon dried oregano
- 1 teaspoon cumin
- 1 teaspoon chili powder
- 1 teaspoon salt
- 1/2 teaspoon black pepper
- 1 tablespoon olive oil (for Instant Pot method)
Instructions: Slow Cooker Method:
- Place chicken in slow cooker.
- Add broth and all seasonings.
- Cover and cook on low for 6 hours or high for 4 hours.
- Remove chicken and shred with two forks.
- Return to slow cooker and stir to coat with juices.
Instant Pot Method:
- Select Sauté function and add oil to pot.
- Add chicken and sear for 2 minutes per side.
- Add broth and all seasonings.
- Close lid and set valve to sealing position.
- Cook on Manual/Pressure Cook for 10 minutes at high pressure.
- Allow natural release for 5 minutes, then quick release remaining pressure.
- Remove chicken and shred with two forks.
- Return to pot and stir to coat with juices.
Serving ideas:
- Use in tacos, burritos, or quesadillas
- Serve over rice with vegetables
- Make chicken salad sandwiches
- Add to soups or salads
Slow Cooker Beef Stew
Prep Time: 15 minutes | Cook Time: 8 hours | Serves: 6
Ingredients:
- 2 lbs beef stew meat, cut into 1-inch cubes
- 1/4 cup all-purpose flour
- 1 teaspoon salt
- 1/2 teaspoon black pepper
- 2 tablespoons olive oil (optional for browning)
- 1 onion, diced
- 3 carrots, chopped
- 3 celery stalks, chopped
- 2 potatoes, peeled and cubed
- 2 cloves garlic, minced
- 4 cups beef broth
- 2 tablespoons tomato paste
- 1 tablespoon Worcestershire sauce
- 1 teaspoon dried thyme
- 2 bay leaves
- 1 cup frozen peas (add during last 30 minutes)
- Fresh parsley for garnish (optional)
Instructions:
- In a large zip-top bag, combine flour, salt, and pepper. Add beef and shake to coat.
- Optional browning step: Heat oil in a large skillet over medium-high heat. Brown meat on all sides, about 5 minutes total. Transfer to slow cooker.
- Add onion, carrots, celery, potatoes, and garlic to slow cooker.
- In a bowl, whisk together beef broth, tomato paste, Worcestershire sauce, and thyme.
- Pour liquid mixture over ingredients in slow cooker. Add bay leaves.
- Cover and cook on low for 8 hours or high for 4-5 hours.
- During the last 30 minutes, stir in frozen peas.
- Remove bay leaves before serving.
- Garnish with fresh parsley if desired.
Instant Pot Risotto
Prep Time: 10 minutes | Cook Time: 15 minutes | Serves: 4
Ingredients:
- 2 tablespoons butter
- 1 onion, finely diced
- 2 cloves garlic, minced
- 1 1/2 cups arborio rice
- 1/2 cup white wine (optional, substitute broth if not using)
- 4 cups chicken or vegetable broth
- 1/2 teaspoon dried thyme
- 1/2 cup grated Parmesan cheese
- 2 tablespoons butter, cut into pieces
- Salt and pepper to taste
- Optional add-ins: 1 cup cooked peas, mushrooms, or asparagus
Instructions:
- Select Sauté function on Instant Pot. Add butter and melt.
- Add onion and cook until softened, about 3 minutes.
- Add garlic and cook for 30 seconds until fragrant.
- Add rice and stir to coat with butter, cooking for 1-2 minutes.
- Pour in wine (if using) and cook until mostly absorbed, about 1 minute.
- Add broth and thyme. Stir to combine.
- Close lid and set valve to sealing position.
- Cook on Manual/Pressure Cook for 6 minutes at high pressure.
- Quick release pressure when cooking is complete.
- Open lid and stir risotto. It may look soupy at first but will thicken as you stir.
- Stir in Parmesan cheese and remaining butter pieces until melted.
- Fold in optional add-ins if using.
- Season with salt and pepper to taste.
- Serve immediately.
Crockpot Thai-Inspired Curry
Prep Time: 10 minutes | Cook Time: 6-8 hours | Serves: 6
Ingredients:
- 1.5 lbs boneless chicken thighs, cut into chunks
- 1 onion, diced
- 2 bell peppers, sliced
- 2 carrots, sliced
- 1 can (14 oz) coconut milk
- 2 tablespoons red curry paste
- 2 tablespoons peanut butter
- 1 tablespoon soy sauce
- 1 tablespoon brown sugar
- 2 cloves garlic, minced
- 1 tablespoon ginger, grated
- 1 lime, juiced
- 1/4 cup fresh cilantro, chopped
- Cooked rice for serving
Instructions:
- Place chicken, onion, bell peppers, and carrots in slow cooker.
- In a bowl, whisk together coconut milk, curry paste, peanut butter, soy sauce, brown sugar, garlic, and ginger.
- Pour sauce over ingredients in slow cooker.
- Cover and cook on low for 7-8 hours or high for 3-4 hours.
- Just before serving, stir in lime juice.
- Serve over rice and garnish with fresh cilantro.
Instant Pot Pasta e Fagioli
Prep Time: 10 minutes | Cook Time: 20 minutes | Serves: 6
Ingredients:
- 1 tablespoon olive oil
- 1 onion, diced
- 2 carrots, diced
- 2 celery stalks, diced
- 3 cloves garlic, minced
- 1 can (14.5 oz) diced tomatoes
- 4 cups chicken or vegetable broth
- 1 can (15 oz) cannellini beans, drained and rinsed
- 1 can (15 oz) kidney beans, drained and rinsed
- 1 teaspoon dried oregano
- 1 teaspoon dried basil
- 1/2 teaspoon dried thyme
- 1 cup small pasta (ditalini, elbow, or small shells)
- Salt and pepper to taste
- Grated Parmesan for serving
- Fresh parsley, chopped (optional)
Instructions:
- Select Sauté function on Instant Pot. Add olive oil and heat.
- Add onion, carrots, and celery. Cook until vegetables begin to soften, about 5 minutes.
- Add garlic and cook for 30 seconds until fragrant.
- Add diced tomatoes, broth, beans, and herbs. Stir to combine.
- Add pasta and stir again.
- Close lid and set valve to sealing position.
- Cook on Manual/Pressure Cook for 5 minutes at high pressure.
- Quick release pressure when cooking is complete.
- Stir well and season with salt and pepper to taste.
- Serve with grated Parmesan and fresh parsley if desired.
Slow Cooker Enchilada Quinoa
Prep Time: 10 minutes | Cook Time: 4-6 hours | Serves: 6
Ingredients:
- 1 cup quinoa, rinsed
- 1 can (15 oz) black beans, drained and rinsed
- 1 can (15 oz) corn, drained
- 1 can (10 oz) enchilada sauce
- 1 can (14.5 oz) diced tomatoes with green chilies
- 1/2 onion, diced
- 2 cloves garlic, minced
- 1 bell pepper, diced
- 2 cups vegetable broth
- 1 tablespoon chili powder
- 1 teaspoon cumin
- 1/2 teaspoon dried oregano
- 1 cup shredded cheese (cheddar or Mexican blend)
- Optional toppings: avocado, sour cream, cilantro, lime wedges
Instructions:
- In a slow cooker, combine quinoa, black beans, corn, enchilada sauce, diced tomatoes, onion, garlic, and bell pepper.
- Add vegetable broth, chili powder, cumin, and oregano. Stir to combine.
- Cover and cook on low for 6 hours or high for 4 hours until quinoa is tender.
- In the last 10 minutes of cooking, sprinkle cheese on top and cover to melt.
- Serve with optional toppings.
Conclusion
The daily challenge of creating family dinners doesn’t have to be overwhelming. With this extensive collection of dinner ideas for families, you can navigate mealtime with confidence—whether you have 15 minutes or an afternoon, whether you’re cooking for adventurous eaters or the supremely picky.
Remember that the perfect family dinner isn’t about Instagram-worthy presentation or gourmet techniques. It’s about bringing everyone together around nourishing food that works for your unique household. Bookmark this guide, try something new tonight, and transform “what’s for dinner?” from a dreaded question into an opportunity for family connection.

35+ Fun & Easy Virtual Baby Shower Games (with Free Printables!)
Hosting a virtual baby shower games doesn’t mean sacrificing the fun and memorable moments that games bring to the celebration. In fact, with the right approach, online baby shower games can be just as engaging—sometimes even more so—than their in-person counterparts!
As someone who’s planned dozens of successful virtual baby showers, I’ve compiled this comprehensive guide to help you host games that will have your guests laughing, bonding, and creating special memories for the parents-to-be, all from the comfort of their own homes.
Whether you’re a first-time host feeling overwhelmed by the virtual format or you’re looking to level up your virtual baby shower game collection, you’ll find everything you need here. From quick icebreakers to sentimental keepsakes, tech-friendly adaptations of classics to modern digital games—complete with step-by-step instructions, free printables, and pro tips for seamless execution.
Table of Contents
Icebreakers & Get-to-Know-You Games
Starting your virtual baby shower with icebreakers helps guests feel comfortable and creates a welcoming atmosphere, especially when attendees might not know each other well.
Virtual Baby Shower Bingo

Description: A virtual twist on the classic game that gets everyone engaged from the start.
Why it Works Virtually: It’s easy to implement through screen sharing and keeps guests attentive throughout the event.
How to Play Virtually:
- Prep Needed: Create customized bingo cards featuring baby items, likely gifts, or things people might say during the shower.
- Materials Needed: Digital bingo cards (shared in advance), screen sharing capability.
- Step-by-Step Instructions:
- Email unique bingo cards to each guest before the event.
- At the beginning of the shower, explain the rules: guests mark their cards when they see items being opened or hear certain phrases.
- The first person to get 5 in a row (horizontally, vertically, or diagonally) types “BINGO” in the chat.
- Verify their card by having them share their screen or send a photo.
Tips for Success: Consider playing multiple rounds with different winning patterns (X-shape, full card, four corners). Have a digital gift card ready as a prize!
Baby Shower Scavenger Hunt

Description: Guests race to find baby-related items in their own homes.
Why it Works Virtually: Creates movement and energy while utilizing the home environment of each participant.
How to Play Virtually:
- Prep Needed: Create a list of common baby or household items.
- Materials Needed: List of items to find, timer.
- Step-by-Step Instructions:
- Prepare a list of 8-10 items such as “something yellow,” “a baby photo of yourself,” or “something soft.”
- Share the list via screen share or in the chat.
- Give guests 2-5 minutes to gather as many items as possible.
- When time’s up, have each guest show and explain their findings.
- Award points for each correct item; the person with the most points wins.
Tips for Success: Keep the list reasonable—mix easy and challenging items. Consider theme-based variations like “nursery items” or “baby animals.”
Two Truths and a Lie: Baby Edition

Description: A baby-themed version of the classic icebreaker game.
Why it Works Virtually: Easy to play without special materials and helps guests learn fun facts about each other.
How to Play Virtually:
- Prep Needed: Ask guests to prepare three statements about babies, parenting, or themselves as children.
- Materials Needed: Chat feature for voting.
- Step-by-Step Instructions:
- Each participant shares three statements: two true and one false.
- Other guests vote in the chat on which statement they think is the lie.
- The player reveals the lie, and guests who guessed correctly earn a point.
Tips for Success: Encourage creative, surprising statements! The host should prepare examples to demonstrate and get things started.
Classic Baby Shower Games (Adapted for Virtual)
Traditional shower games can work wonderfully online with just a few tweaks. Here’s how to adapt the classics:
Guess the Baby Food

Description: Contestants try to identify baby food flavors by appearance alone.
Why it Works Virtually: The reactions and guesses create plenty of laughs without needing to taste anything!
How to Play Virtually:
- Prep Needed: Purchase 5-8 different baby foods and remove the labels. Number each container.
- Materials Needed: Baby food jars, numbered labels, answer submission method.
- Step-by-Step Instructions:
- The host shows each unnumbered baby food jar on camera.
- Guests submit their guesses for each jar via private chat or a shared Google Form.
- After all guesses are submitted, reveal the correct flavors.
- The guest with the most correct guesses wins.
Tips for Success: Choose visually similar foods to make it challenging! Use a close-up camera view or take high-quality photos in advance to share.
Don’t Say “Baby” Challenge

Description: Guests try to avoid saying the word “baby” throughout the shower.
Why it Works Virtually: Simple to implement and creates ongoing engagement.
How to Play Virtually:
- Prep Needed: Virtual clothespin alternatives (digital images or points system).
- Materials Needed: Chat monitoring, points tracking system.
- Step-by-Step Instructions:
- At the beginning of the shower, explain that saying “baby” is forbidden.
- When someone says “baby,” other guests can call them out in the chat.
- The host keeps track of “slips” for each person.
- The person with the fewest slips by the end wins.
Tips for Success: Designate a co-host to monitor for the word. Periodically bring up topics likely to trigger the word “baby” to make it more challenging!
Baby Items Price is Right
Description: Test guests’ knowledge of baby item costs.
Why it Works Virtually: Easy to display items and collect guesses online.
How to Play Virtually:
- Prep Needed: Images of 8-10 baby items with their retail prices.
- Materials Needed: Digital slideshow, method for collecting guesses.
- Step-by-Step Instructions:
- Create a presentation showing one baby item per slide (without the price).
- Share your screen and give guests 30 seconds to submit their price guess via chat or a shared spreadsheet.
- Reveal the actual price and calculate who was closest without going over.
- Award points for each round.
Tips for Success: Include a mix of obvious items (diapers) and surprising ones (specialized baby gear). Consider sharing a spreadsheet where everyone can see all guesses for added fun.
Unique & Modern Online Games
These games are specifically designed for the virtual format and take advantage of digital tools.
Virtual Baby Shower Pictionary
Description: Draw and guess baby-related words and phrases.
Why it Works Virtually: Uses online whiteboard features for a fun, interactive experience.
How to Play Virtually:
- Prep Needed: Create a list of baby-related words and phrases.
- Materials Needed: Virtual whiteboard (Zoom whiteboard, Skribbl.io, or similar platform).
- Step-by-Step Instructions:
- Divide guests into two teams.
- Send a private message to the designated drawer with their word/phrase.
- Set a timer for 60 seconds for them to draw while their team guesses.
- Teams earn points for correct guesses within the time limit.
Tips for Success: Test your platform’s whiteboard feature beforehand. Have a backup like screen sharing with Paint or a similar drawing program.
Baby’s First Photos Prediction
Description: Guests create digital collages predicting what the baby will look like.
Why it Works Virtually: Leverages online tools and creates shareable keepsakes.
How to Play Virtually:
- Prep Needed: Ask parents-to-be for permission and to share their childhood photos.
- Materials Needed: Photos of both parents, access to a simple photo editing tool or app.
- Step-by-Step Instructions:
- Email photos of both parents to guests before the shower.
- Guests use simple tools like Canva, PicMonkey, or even PowerPoint to create their “baby prediction.”
- During the shower, each guest shares their screen to present their creation.
- Parents-to-be vote on their favorite prediction.
Tips for Success: Send links to free, easy-to-use editing tools in your invitation. Suggest alternatives like drawing by hand and taking a photo for less tech-savvy guests.
Virtual Baby Name Race
Description: Teams compete to create the most names from letters in a phrase.
Why it Works Virtually: Easy to implement with breakout rooms and encourages collaboration.
How to Play Virtually:
- Prep Needed: Choose a phrase related to the baby or parents.
- Materials Needed: Breakout rooms, timer, shared document for submissions.
- Step-by-Step Instructions:
- Create a phrase like “WELCOME BABY JOHNSON” or the parents’ full names.
- Divide guests into teams using breakout rooms.
- Teams have 5 minutes to create as many baby names as possible using only the letters in the phrase (each letter can only be used as many times as it appears).
- Return to the main room and count valid names.
Tips for Success: Create teams with a balance of creative people. Consider giving bonus points for names the parents are actually considering!
Printable/Downloadable Games (Played via Screen Share/Email)
These games use printable elements that can be shared digitally and played together online.
Baby Shower Word Scramble

Description: Unscramble baby-related words against the clock.
Why it Works Virtually: Easy to distribute and time remotely.
How to Play Virtually:
- Prep Needed: Create a list of 15-20 scrambled baby-related words.
- Materials Needed: Downloadable word scramble sheet, timer.
- Step-by-Step Instructions:
- Email the word scramble sheet to guests before the event.
- During the shower, set a 3-minute timer visible on screen.
- Guests unscramble as many words as possible before time runs out.
- Go through answers together, with guests self-scoring.
Tips for Success: Include a variety of difficulty levels. Create a shared spreadsheet where guests can enter their scores for everyone to see.
Virtual Baby Shower Trivia
Description: Test guests’ knowledge about the parents-to-be and baby facts.
Why it Works Virtually: Interactive and customizable for the specific couple.
How to Play Virtually:
- Prep Needed: Create 15-20 questions about the parents, pregnancy, and general baby facts.
- Materials Needed: Digital trivia sheet or online quiz platform (Kahoot, Quizizz).
- Step-by-Step Instructions:
- Build your quiz on a platform that allows real-time participation.
- Share the link or access code with guests during the shower.
- Play together, with results displayed instantly.
- Award a prize to the winner.
Tips for Success: Mix personal questions (“Where did the parents first meet?”) with general baby facts. Test your quiz platform in advance to ensure it works smoothly.
Baby Item Memory Game
Description: Test guests’ observation and memory skills with baby items.
Why it Works Virtually: Simple concept that works well with screen sharing.
How to Play Virtually:
- Prep Needed: Gather 15-20 baby items arranged on a tray.
- Materials Needed: Baby items, tray, camera, timer, answer submission method.
- Step-by-Step Instructions:
- Show guests the tray of items via screen share for 60 seconds.
- Remove the image and ask guests to write down all items they remember.
- After 2 minutes, have guests self-report their number of correct items.
- Show the tray again to verify answers.
Tips for Success: Include some unusual items along with the obvious ones. Consider a themed tray (bathtime, feeding, etc.) for a twist.
Quick & Simple Games (5-10 mins)
Perfect for keeping energy high or filling gaps between longer activities.
Emoji Baby Song Translation
Description: Decode baby-related songs represented only by emojis.
Why it Works Virtually: Visual, fun, and easy to implement with any video platform.
How to Play Virtually:
- Prep Needed: Create 10-15 emoji sequences representing baby songs or lullabies.
- Materials Needed: Slideshow with emoji sequences, chat feature for answers.
- Step-by-Step Instructions:
- Show one emoji sequence at a time (e.g., 🌟🌟🤔 for “Twinkle Twinkle Little Star”).
- Guests type their guesses in the chat.
- First correct answer gets a point.
Tips for Success: Include a mix of obvious songs and trickier ones. Consider having guests sing a line of the song once it’s guessed!
Baby Bump or Food Baby?
Description: Guests guess whether photos show actual pregnant bellies or food bellies.
Why it Works Virtually: Visual and humorous content works well on screen.
How to Play Virtually:
- Prep Needed: Collect 10-15 photos showing either pregnant women or people with “food babies.”
- Materials Needed: Digital slideshow, voting method.
- Step-by-Step Instructions:
- Display one image at a time.
- Guests vote “baby bump” or “food baby” via chat or reaction emojis.
- Reveal the correct answer after each round.
Tips for Success: Use images where it’s genuinely difficult to tell! Ask friends for funny food baby photos to make it more personal.
Nursery Rhyme Completion Challenge
Description: Guests complete the missing lines from popular nursery rhymes.
Why it Works Virtually: Quick, nostalgic, and requires no special materials.
How to Play Virtually:
- Prep Needed: List of nursery rhymes with key lines removed.
- Materials Needed: Chat feature for answers.
- Step-by-Step Instructions:
- Share the beginning of a nursery rhyme via screen or chat.
- Guests race to type the next line correctly in the chat.
- Award a point to the first correct response.
Tips for Success: Include some obscure rhymes along with well-known ones. Consider asking guests to recite the full rhyme for bonus points!
Sentimental & Keepsake Games
These activities create meaningful mementos for the parents-to-be.
Virtual Time Capsule
Description: Create a digital time capsule for the baby to open years later.
Why it Works Virtually: Leverages digital submission and creates a lasting keepsake.
How to Play Virtually:
- Prep Needed: Create a list of prompts for time capsule contributions.
- Materials Needed: Digital collection method (Google Form, email, shared document).
- Step-by-Step Instructions:
- Before the shower, send guests prompts like “Predictions for baby’s future,” “Message to baby,” “Current events,” etc.
- During the shower, guests share their contributions.
- Compile all submissions into a digital keepsake or printable book for the parents.
Tips for Success: Suggest specific formats like “Letter to baby on their 18th birthday” or “Predictions for baby’s first words.” Offer to print the digital submissions into a physical book.
Advice for the Parents Video Montage
Description: Collect video advice from guests for a heartfelt keepsake.
Why it Works Virtually: Creates a personalized video collection that can be treasured.
How to Play Virtually:
- Prep Needed: Request video submissions before the shower.
- Materials Needed: Video editing software or app, method to collect videos.
- Step-by-Step Instructions:
- Ask guests to record 30-second videos with parenting advice or wishes.
- Compile submissions into a single montage.
- Screen share the final video during the shower.
- Send the video file to the parents-to-be afterward.
Tips for Success: Provide specific prompts like “Share your best sleep trick” or “What do you wish someone had told you about parenting?” Send gentle reminders as the deadline approaches.
Virtual Baby Shower Wishes Wall
Description: Create a collaborative digital message board for the baby.
Why it Works Virtually: Interactive during the event and becomes a permanent keepsake.
How to Play Virtually:
- Prep Needed: Set up a digital collaboration space.
- Materials Needed: Platform like Padlet, Jamboard, or Miro.
- Step-by-Step Instructions:
- Create a digital board with space for each guest to add their message.
- Share the link during the shower.
- Guests add personal messages, advice, predictions, or images.
- Screen share the completed board and save it for the parents.
Tips for Success: Provide templates or prompts to inspire thoughtful messages. Suggest including photos of the guests to make it more personal.
Tips for Hosting Engaging Virtual Games
To ensure your virtual baby shower games run smoothly:
- Test Technology in Advance: Run through each game’s technical requirements before the big day.
- Consider Attention Spans: Virtual events can feel longer, so keep individual games under 15 minutes.
- Designate a Co-Host: Have someone help manage technical aspects while you focus on facilitating.
- Plan for All Tech Levels: Include options for guests who may be less tech-savvy.
- Create a Schedule: Share an agenda so guests know what to expect.
- Mix Game Types: Balance competitive games with collaborative and sentimental activities.
Recommended Platforms for Virtual Showers
PlatformProsConsBest ForZoomBreakout rooms, robust features, familiar to many40-min limit on free versionLarger showers, multiple gamesGoogle MeetFree, no time limit, easy accessFewer interactive featuresSimple, straightforward showersWebExHigh-quality video, good securityLearning curve for new usersTech-savvy groupsMicrosoft TeamsGood integration with other toolsRequires accounts for best experienceWork-related groups
Virtual Prize Ideas
Make winning special with these digital prize options:
- E-gift cards to popular retailers
- Digital subscription (streaming service, magazine, etc.)
- Online class or experience voucher
- Donation to a charity in the winner’s name
- Custom digital artwork or photo edit
- Priority for holding the baby at the first in-person meeting
Conclusion
Virtual baby showers can be just as memorable and engaging as traditional ones when you incorporate the right mix of games. With this comprehensive collection of 35+ virtual baby shower games, you’re equipped to host an unforgettable celebration that brings friends and family together despite the distance.
Remember that the most important element is creating moments of connection and joy for the parents-to-be. Whether you choose classic games adapted for the digital world or innovative online activities, your thoughtful planning will result in a celebration that everyone will cherish.

10+ Funniest Baby Shower Games Ever (That Aren’t Cringey!)
Looking for baby shower games that will have your guests genuinely laughing instead of forcing awkward smiles? You’ve come to the right place! I’ve curated this collection of the funniest baby shower games ever to ensure your celebration is memorable for all the right reasons.
Let’s face it—many traditional baby shower games can feel dated or uncomfortable. But fear not! These hilarious baby shower activities strike the perfect balance between fun and appropriate, delivering authentic laughter while celebrating the parents-to-be. From quick icebreakers to laugh-out-loud challenges, these games are designed to entertain guests of all ages and create lasting memories.
What makes these games truly funny? It’s their combination of surprise elements, friendly competition, and opportunities for genuine reactions. No fake smiles or polite chuckles here—just real, belly-laughing fun!
Table of Contents
Quick Navigation:
- Understanding “Funny” at Baby Showers
- Tips for Hosting Hilarious Games
- FAQs About Funny Baby Shower Games
Understanding Funniest Baby Shower Games Ever

Before diving into specific games, let’s consider what makes a baby shower game genuinely funny rather than awkward or boring:
Baby showers bring together diverse groups—family members, close friends, and sometimes colleagues—who may not know each other well. The best funny games act as perfect icebreakers while creating shared experiences that guests will talk about long after the event ends.
Different types of humor work for different crowds:
- Silly/Playful Humor: Great for mixed ages and more traditional groups
- Competitive Fun: Perfect for energetic crowds who enjoy friendly challenges
- Surprise Elements: Creates authentic reactions and memorable moments
- Creative Expression: Allows guests to showcase their personality
The key is knowing your audience while avoiding anything that might make guests genuinely uncomfortable. The games below are categorized to help you choose what’s right for your particular celebration!
The Ultimate Funny Games List
1. The Dirty Diaper Chocolate Bar Challenge
Humor Rating: Belly Laughs Best For: Breaking the ice, Co-ed showers Why It’s Genuinely Funny: The visual contrast between something that looks unappetizing and familiar candy creates an instant humor trigger. Watching guests’ reactions as they examine, sniff, and reluctantly taste “dirty diapers” is comedy gold!
How to Play:
- Melt different chocolate bars in microwave-safe bowls
- Place melted chocolate in clean, disposable diapers
- Number each diaper
- Pass them around and have guests smell, inspect, and taste the “contents”
- Provide answer sheets for guests to identify each candy bar
- Award a prize to whoever identifies the most correctly
Materials Needed:
- 6-8 different chocolate bars (Snickers, Milky Way, Hershey’s, etc.)
- Clean disposable diapers
- Microwave-safe bowls
- Answer sheets and pens
- Prize for the winner
Tips for Maximum Laughs: Choose chocolate bars with distinctive ingredients like nuts or caramel. The more realistic the “dirty diapers” look, the funnier the reactions will be!
2. Baby Food Gourmet Guessing
Humor Rating: Giggles to Belly Laughs Best For: Any crowd, especially foodies Why It’s Genuinely Funny: Adults trying to identify pureed foods while blindfolded often results in hilariously disgusted expressions and dramatic reactions—especially when they encounter unusual flavors like pureed meat or exotic vegetables!
How to Play:
- Remove labels from baby food jars and number them
- Blindfold volunteers or cover jars so contents aren’t visible
- Have participants taste each one and guess the flavor
- Award points for correct answers
- The person with the most correct guesses wins
Materials Needed:
- 8-10 jars of various baby foods (mix of fruits, vegetables, and meats for variety)
- Numbered labels
- Blindfolds
- Small spoons
- Answer sheets and pens
- Water for palate cleansing
Tips for Maximum Laughs: Include some unusual flavors like “Ham and Gravy” or “Garden Vegetables” alongside sweeter options. Take photos of guests’ expressions during tasting—they’re priceless!
3. Bobbing for Nipples Relay Race
Humor Rating: Belly Laughs Best For: Active groups, Co-ed showers Why It’s Genuinely Funny: The combination of the time pressure, the awkward bobbing motion, and the inherent silliness of adults frantically searching for baby bottle nipples creates non-stop laughter.
How to Play:
- Divide guests into teams of 3-4 people
- Fill large bowls with water and float several baby bottle nipples in each
- Teams line up relay-style
- Each person must retrieve one nipple using only their mouth (no hands!)
- Pass to next teammate after successful retrieval
- First team to collect all their nipples wins
Materials Needed:
- Baby bottle nipples (10-15 per team)
- Large bowls or tubs
- Towels for cleanup
- Timer
- Team prizes
Tips for Maximum Laughs: Add a few drops of food coloring to the water for visual appeal. Consider having participants wear shower caps for added humor.
4. Pregnant Belly Balloon Pop

Humor Rating: Chuckles to Giggles Best For: Active, competitive groups Why It’s Genuinely Funny: Watching adults (especially men) navigate simple tasks with a giant balloon “belly” creates instant visual comedy. The awkward movements and inevitable balloon pops create surprise moments that guarantee laughs.
How to Play:
- Divide guests into pairs
- One person in each pair inflates a large balloon and tucks it under their shirt
- Create an obstacle course or series of simple tasks (pick up object from floor, sit and stand, etc.)
- Partners work together to complete tasks without popping the “belly”
- Award prizes for fastest completion or most creative solutions
Materials Needed:
- Large round balloons
- Obstacle course items (chairs, small objects)
- Timer
- Prizes
Tips for Maximum Laughs: Have the non-pregnant partner give “helpful” instructions throughout. Record video for the parents-to-be to enjoy later!
5. Baby Sketch Artists

Humor Rating: Belly Laughs Best For: Any crowd, works well with larger groups Why It’s Genuinely Funny: Most people can’t draw well under pressure, especially with added challenges. The resulting “masterpieces” are often hilariously bad interpretations that guarantee laughs when revealed.
How to Play:
- Give each guest a paper plate and pen/marker
- Have everyone place the plate on top of their head
- Guide them through drawing a baby face with specific instructions: “Draw the head… now add two eyes… now add hair…” etc.
- Have everyone sign their artwork
- Display all creations and vote on categories like “Most Realistic,” “Most Abstract,” “Most Likely to Give Nightmares”
Materials Needed:
- Paper plates
- Markers or pens
- List of drawing instructions
- Funny award categories and small prizes
Tips for Maximum Laughs: Add challenging instructions like “Draw the baby with a pacifier and exactly three eyelashes on each eye.” Take photos of concentrated faces during drawing time!
6. Who’s That Baby? Photo Match
Humor Rating: Chuckles to Giggles Best For: Close friends and family Why It’s Genuinely Funny: The dramatic transformation from adorable (or awkward) baby photos to current adult appearance creates a fun guessing game with often surprising reveals.
How to Play:
- Before the shower, collect baby photos from as many guests as possible
- Create a numbered display or slideshow of the photos
- Provide answer sheets where guests guess which baby is which adult
- Award prizes for most correct matches
Materials Needed:
- Baby photos of guests (digital or printed)
- Answer sheets and pens
- Display board or digital slideshow setup
- Prize for the winner
Tips for Maximum Laughs: Include the parents-to-be’s baby photos! Encourage guests to share funny stories about their childhood after the reveal.
7. Diaper Changing Relay (Blindfolded)
Humor Rating: Belly Laughs Best For: Co-ed showers, active groups Why It’s Genuinely Funny: The combination of blindfolds, time pressure, and the fine motor skills required for diaper changes creates hilarious fumbling and mistakes that everyone can laugh at.
How to Play:
- Divide guests into teams
- Set up stations with baby dolls, diapers, wipes, and baby powder
- Blindfold the first person from each team
- They must remove the “dirty” diaper, wipe the doll, apply powder, and put on a fresh diaper
- Time each team; fastest (and relatively correct) diaper change wins
Materials Needed:
- Baby dolls
- Diapers (newborn size)
- Baby wipes (can use tissues)
- Baby powder (or cornstarch for less mess)
- Blindfolds
- Timer
Tips for Maximum Laughs: Add chocolate pudding to the “dirty” diapers for an extra challenge and more dramatic reactions. Consider having an experienced parent demonstrate the “correct” technique first.
8. Baby Food Recipe Creation

Humor Rating: Giggles Best For: Creative groups, foodies Why It’s Genuinely Funny: The absurd combinations and ridiculous marketing that guests create for their concoctions leads to presentations that rival comedy sketches.
How to Play:
- Divide guests into small teams
- Provide each team with common kitchen ingredients (banana, yogurt, avocado, etc.)
- Teams must create a “gourmet” baby food, name it, and design marketing
- Each team presents their creation with a sales pitch
- Award prizes for most creative, most disgusting, most likely to succeed, etc.
Materials Needed:
- Various food ingredients (soft fruits, vegetables, yogurt, etc.)
- Small bowls and spoons
- Index cards for naming/marketing
- Optional: small jars for packaging
Tips for Maximum Laughs: Encourage over-the-top marketing presentations. Have the parents-to-be be the judges and taste (tiny amounts of) the safer creations if they’re brave!
9. Don’t Say “Baby” Clothespin Game
Humor Rating: Chuckles Best For: Any crowd, works throughout the event Why It’s Genuinely Funny: The psychological challenge of avoiding a common word creates slip-ups and playful “gotcha” moments throughout the shower.
How to Play:
- Give each guest 3-5 clothespins to clip to their clothing
- Explain that saying the word “baby” is forbidden
- If someone catches another guest saying “baby,” they can claim one of their clothespins
- The person with the most clothespins at the end wins
Materials Needed:
- Wooden clothespins (3-5 per guest)
- Optional: Decorate clothespins with baby-themed stickers
- Prize for winner
Tips for Maximum Laughs: The host should occasionally create “traps” by asking questions that naturally lead to saying “baby.” Consider adding other forbidden words like “cute” or “adorable” for advanced players.
10. Pregnant Waddle Race
Humor Rating: Belly Laughs Best For: Active groups, outdoor/spacious venues Why It’s Genuinely Funny: The exaggerated movements and physical comedy of adults trying to waddle with objects between their knees creates visual humor everyone can appreciate.
How to Play:
- Place a balloon or small ball between each participant’s knees
- Mark a starting line and finish line about 15-20 feet apart
- Participants must waddle to the finish line without dropping their object
- If the object falls, they must return to start
- First to successfully cross the finish line wins
Materials Needed:
- Balloons or small balls
- Tape/markers for start/finish lines
- Prize for winner
Tips for Maximum Laughs: Have participants balance something on their heads simultaneously for an added challenge. Set up an obstacle course for advanced waddling!
11. Baby Shower Charades
Humor Rating: Giggles to Belly Laughs Best For: Any crowd, especially animated groups Why It’s Genuinely Funny: Watching people act out baby-related activities often results in hilarious pantomimes and exaggerated expressions.
How to Play:
- Create cards with baby-related terms (breastfeeding, changing diapers, baby’s first steps, etc.)
- Divide guests into teams
- Players take turns drawing cards and acting out the terms
- Teams guess what’s being acted out
- Award points for correct guesses
Materials Needed:
- Cards with baby-related terms
- Timer
- Scorekeeping method
Tips for Maximum Laughs: Include some challenging terms like “baby’s first tantrum” or “sleep training.” Consider recording especially funny performances to share later.
12. Daddy Knows Best Quiz
Humor Rating: Belly Laughs Best For: Co-ed showers Why It’s Genuinely Funny: The dad-to-be’s often surprising or clueless answers about baby care create moments of genuine humor and gentle ribbing.
How to Play:
- Before the shower, ask the mom-to-be about baby care (how many diapers needed daily, proper bath temperature, etc.)
- At the shower, ask the dad-to-be the same questions
- Compare answers for each question
- Award dad points for correct answers or close guesses
Materials Needed:
- Prepared questions about baby care
- Scorecards
- Prize for dad if he scores well
Tips for Maximum Laughs: Include some very specific questions about baby products or procedures. Have mom dramatically react to particularly wrong answers!
Tips for Hosting Hilarious Games
To ensure your funny baby shower games are successful:
- Know Your Audience: Consider the comfort level and sense of humor of your guests, especially the parents-to-be.
- Timing Is Everything: Schedule games when energy might be lagging, typically after food or between opening gifts.
- Be Prepared: Have all materials ready and organized before guests arrive.
- Set the Tone: Your enthusiasm as the host will be contagious! Explain games with excitement.
- Prize Strategy: Have a variety of small, fun prizes. Gift cards, baby-themed items, or funny trophies work well.
- Mix and Match: Combine active games with more relaxed ones to maintain energy throughout.
- Have Backups: Keep 1-2 extra games ready in case some finish quickly or don’t resonate.
FAQs About Funny Baby Shower Games
How many baby shower games should you play?
For a typical 2-3 hour shower, plan for 3-4 games. Quality trumps quantity—a few hilarious games are better than many mediocre ones.
What are good funny baby shower games for a co-ed party?
The Dirty Diaper Challenge, Daddy Knows Best Quiz, and Blindfolded Diaper Changing Relay work particularly well for mixed groups. Look for games that avoid overly feminine themes and incorporate friendly competition.
Are there any funny baby shower games that aren’t messy?
Yes! Baby Sketch Artists, Who’s That Baby, Don’t Say “Baby,” and Baby Shower Charades provide laughs without the mess. These are perfect for venues with cleaning restrictions.
How do you make traditional baby shower games funnier?
Add unexpected twists, time constraints, or physical challenges to classic games. For example, turn “Guess the Baby Food” into a blindfolded taste test with dramatic commentary.
What are alternatives to cringey baby shower games?
Focus on games that don’t embarrass anyone or rely on invasive questions. The games in this list avoid measuring the mother’s belly, making inappropriate guesses, or creating uncomfortable situations.
Conclusion: Let the Laughter Begin!
With these funniest baby shower games ever, your celebration is guaranteed to be memorable, entertaining, and genuinely fun for everyone involved. Remember that the ultimate goal is to celebrate the parents-to-be and create a joyful atmosphere—the laughter these games generate is the perfect backdrop for such a special occasion.
Choose games that match your guest list and the parents’ personalities, prepare your materials in advance, and don’t forget to capture photos of all the hilarious moments!
Have you played any of these games at a baby shower? Do you have another funny game that had guests rolling with laughter? Share your experiences in the comments below!
