Make Bouncy Balls at Home for Fun Science Learning
Imagine this: it’s a rainy Saturday afternoon, and the kids are bouncing off the walls—not exactly the best scenario when you’re trying to keep the peace at home. You look around, and all you see are half-finished puzzles, abandoned toys, and that endless pile of laundry. Sound familiar? As parents, we’ve all been there, desperate for activities that keep our littles occupied while also sneaking in a bit of learning. That’s where the magic of science comes in!
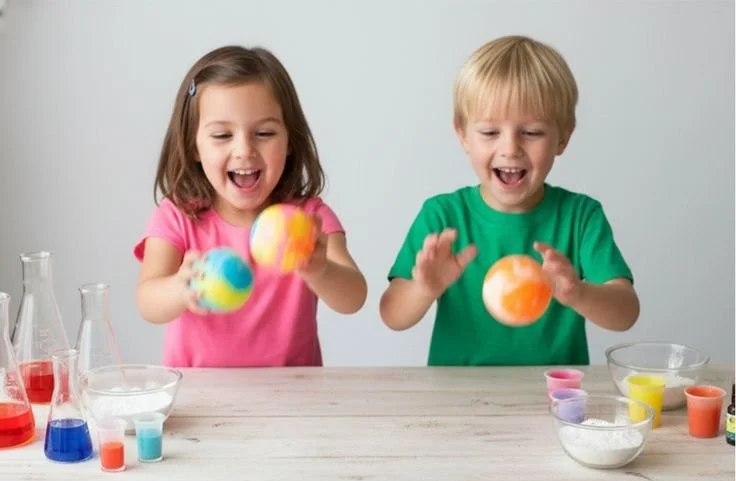
What if I told you that you could turn a dreary day into a whirlwind of fun and education with a simple kitchen experiment that transforms into a new toy? It’s time to dive into the world of chemistry and create homemade bouncy balls! This delightful project isn’t just a blast—it’s a perfect blend of STEM learning, hands-on creativity, and tons of bouncing once the experiment is complete.
Why Bouncy Balls?
You might be asking yourself, why bouncy balls? Well, here’s the thing: not only are these colorful, squishy toys incredibly engaging for kids aged 6-12, but they also provide a hands-on way to understand polymers and chemical reactions. By combining common household ingredients, kids can witness science in action and then enjoy their creations afterward.
Now, let’s get into the nitty-gritty!
Supplies You’ll Need
You don’t need to make a special trip to the store for this project. Here’s a quick list of supplies you probably already have at home:
- White school glue (like Elmer’s)
- Cornstarch
- Baking soda
- Water
- Food coloring (optional but highly recommended for added fun)
- Mixing bowl
- Spoon
- Measuring cups
- Rubber gloves (optional but keeps the mess in check)
Step-by-Step Instructions
Now that we’ve got our supplies ready, let’s jump into making those bouncy balls!
Step 1: Gather the Ingredients
In a mixing bowl, combine 1 tablespoon of school glue with 1/2 teaspoon of cornstarch. If you’re feeling adventurous (and let’s be honest, who doesn’t want a little extra color?), add a few drops of food coloring. Kids love choosing their favorite colors for a personal touch!
Step 2: Mix the Magic
Next, mix these ingredients together using a spoon until you have a uniform consistency. It should feel somewhat thick and sticky—the perfect mixture for our next step!
Step 3: Time for the Reaction
Now it’s time for some chemistry! In a separate bowl, combine 1 tablespoon of baking soda with 1 tablespoon of water and mix it until it’s well combined. Then, pour the baking soda mixture into the glue mixture and stir it up. This is where the magic happens! Kids will be amazed as they see the ingredients react.
Step 4: Get Your Hands Dirty
Once the mixture thickens up, it’s time for kids to dive in! (Remember, rubber gloves can help keep things clean.) They can use their hands to knead the mixture until they form a ball. This may take a minute or two, so don’t rush this step. It’s all part of the experience!
Step 5: Let It Bounce
Let the freshly made bouncy balls sit for about 10 minutes. This waiting game is part of the anticipation (and let’s face it, kids are experts at waiting when it’s for something exciting!). Once they’re ready to go, kids can test their creations and see how high they can bounce them indoors or outdoors.
Embedding Learning in Play
What’s really exciting about this experiment is how it hits multiple learning notes. As your kids mix and create, they’re learning about how polymers work.
What Are Polymers?
Polymers are large molecules made up of smaller units called monomers. In simple terms, think of them as chains of links. The glue has some polymers, and they create bubbles when you mix with baking soda and cornstarch. This reaction holds vital lessons in chemistry without sounding too much like a textbook! Kids will naturally be curious, asking questions like, “Why does it bounce?” or “What makes it stretchy?”
When they see their bouncy balls not only come to life but bring joy during playtime, it reinforces the connection between learning and having fun.
Quick Tips for a Successful Experiment
- Get Messy: Embrace the mess—it’s part of the fun! Let your kids explore textures and combine colors as they wish.
- Ask Questions: Keep the conversation flowing. Ask questions about what they think will happen with each step. This starts a dialogue that engages their minds.
- Experiment with Recipes: Once you’ve made the basic bouncy ball, why not tweak the recipe? Try adding glitter for sparkle or using different types of glue to see if that changes the outcome.
Mistakes to Avoid
It’s easy to feel overwhelmed with science projects, but there are a few common hiccups to watch out for:
- Not Mixing Enough: Ensure all ingredients are thoroughly mixed. Sometimes the fun can lead to shortcuts, and that might mean no bounce!
- Skipping Waiting Time: Patience is a virtue here. Give those balls time to firm up before bouncing.
Bonus Ideas for Extended Learning
After you’ve made and played with your bouncy balls, why not extend the fun and learning even further?
- Design Challenge: Challenge your kids to create the highest bouncing ball. Use different materials, colors, or sizes and see which one reigns supreme.
- Bounce Tests: Conduct bounce tests using a scale to measure how high each ball bounces. It brings math into the picture without the kids even realizing they’re learning!
FAQs About Homemade Bouncy Balls
Can we store the bouncy balls?
Absolutely! After you’ve made them, store them in a container at room temperature. They can last a few weeks but keep an eye on them—they might get a little dry over time.
Is this project safe for younger kids?
If you have younger kids (under the age of 6), be cautious with this experiment, as they might put things in their mouths. However, it can be supervised in a safe environment with older siblings demonstrating.
Wrapping It Up
You know, when I first stumbled upon this idea of creating homemade bouncy balls, I was skeptical. Would my kids actually enjoy it? Would it really be fun? Here’s the truth: they not only loved making them, but they also played proudly with their creations for weeks!
So if you’re looking for an engaging activity that mixes playtime with pivotal learning experiences, give these homemade bouncy balls a go. You’ll get to flex those science muscles while your little ones bounce into happiness. So grab your supplies and dive into this fun experiment. Trust me, you won’t regret it!