
Pin on 12th birthday 🎂🥳
12 Unforgettable Ideas for Celebrating Your Child’s 12th Birthday 🎂🥳
Are you feeling the pressure of planning a memorable 12th birthday for your child? As they transition from being little ones to pre-teens, this special birthday can be a pivotal moment for both children and parents. Finding a balance between fun, excitement, and age-appropriate activities might seem daunting, but fear not! I’ve gathered 12 fantastic ideas that will make your child’s 12th birthday truly unforgettable.
1. Outdoor Movie Night
Set up a projector in your backyard and create a cozy space with blankets and pillows. Let your child choose their favorite movie, and don’t forget the popcorn!
2. Adventure Park Outing
Visit a nearby amusement or adventure park. Whether they love roller coasters or zip-lining, spending the day together will be full of laughter and thrills.
3. Themed Costume Party
Pick a favorite movie or book theme and ask guests to come dressed accordingly. A costume party adds an element of creativity and fun!
4. Escape Room Challenge
Book a session at a local escape room. It’s a fun way for kids to work together and solve puzzles, enhancing teamwork and critical thinking skills.
5. DIY Craft Party
Set up different crafting stations. From tie-dye shirts to friendship bracelets, let the kids unleash their creativity.
6. Virtual Game tournament
Organize a friendly gaming tournament with their favorite video games. Make it a virtual event if some friends can’t join in person!
7. Sleepover Bash
A classic! Let the kids stay up late for games, movies, and snacks. Plus, you get to spend some quality time with them while they have fun.
8. Outdoor Adventure Day
Plan a day filled with hiking, picnicking, and exploring nature. Incorporate fun activities like scavenger hunts to keep them engaged.
9. Spa Day at Home
Create a tranquil spa atmosphere with DIY face masks, manicures, and relaxing music. It’s a great way for them to unwind and enjoy some pampering.
10. Cooking Party
Let the kids take the helm in the kitchen! Choose a fun recipe (like pizza or cupcakes) and guide them as they create delicious masterpieces.
11. Karaoke Night
Set up a karaoke machine or use a karaoke app. Encourage kids to sing their hearts out and share their favorite songs!
12. Outdoor Talent Show
Allow each child to showcase a talent, whether it’s singing, dancing, or even magic tricks. Support their confidence with applause and cheers.
Quick Tips for Planning the Perfect 12th Birthday
- Invitations Matter: Whether digital or printed, make fun invitations that match the theme.
- Consider Dietary Preferences: Check for allergies or dietary restrictions ahead of time.
- Capture the Moments: Designate someone to take photos or set up a photo booth.
- Theme it Up: A cohesive theme can make everything feel more special!
Common Mistakes to Avoid
- Over-scheduling the Day: Leave time for unstructured fun!
- Neglecting Age Appropriateness: Choose activities that suit a 12-year-old’s interest and maturity.
- Forget about the Cake: A unique cake related to the theme can be a showstopper!
FAQs
What is a good budget for a 12th birthday party?
A budget of $200-$500 can cover most activities, but adjust based on your plans.
Should I invite the entire class?
It depends! Consider whether your child prefers a smaller gathering or a big bash.
Bonus Ideas
- Fundraising Party: Encourage guests to donate to a cause your child cares about instead of bringing gifts.
- Bucket List Adventure: Check off something from your child’s bucket list, like skydiving or a thrilling escape room!
By planning one of these engaging and fun activities, you’re sure to make your child’s 12th birthday a day they’ll remember fondly. Make the day as special as they are, and most importantly, enjoy every moment together!
Pinterest Description
Looking for ideas to celebrate your child’s 12th birthday? Check out these 12 unforgettable birthday party ideas that will create lasting memories. From DIY crafts to outdoor adventures, there’s something for every pre-teen!
Pinterest Title Ideas
- 12 Insanely Fun Ideas for Your Child’s 12th Birthday
- Celebrate Your Tween: 12 Birthday Bash Ideas They’ll Love!
- Unforgettable 12th Birthday Ideas: Make Their Day Special!
- 12 Creative Ways to Celebrate a 12-Year-Old’s Birthday
- Planning the Best 12th Birthday? Here are 12 Amazing Ideas!
Embrace this special milestone with warmth and love, and your child is sure to have a birthday that’s truly unforgettable!
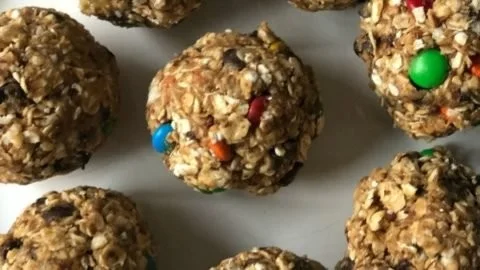
No-Bake M&M and Chocolate Chip Lactation Bites
5 Sweet Reasons to Try No-Bake M&M and Chocolate Chip Lactation Bites
As a new mom, finding the energy to keep up with your little one can feel overwhelming. If you’re breastfeeding, you may also be looking for tasty snacks that can boost your milk supply. Enter no-bake M&M and chocolate chip lactation bites! Not only are they incredibly easy to make, but they’re also packed with ingredients that support lactation. Let’s dive into how to create these delightful bites, and explore why they can be a lifesaver for new parents.
Why Choose Lactation Bites?
1. Quick Energy Boost
New moms need energy, and these bite-sized snacks provide the perfect pick-me-up. High in healthy fats and complex carbohydrates, they can help keep your energy levels stable throughout the day.
2. Supports Milk Production
Packed with ingredients like oats and flaxseed, these lactation bites contain galactagogues, which can help increase milk supply.
3. Simple Preparation
No-bake means less time in the kitchen! You’ll love how quickly you can whip these up while juggling the demands of a newborn.
4. Family-Friendly Treat
Your little one might be too young for these snacks, but the whole family can enjoy them! Even older siblings will love the colorful M&Ms and chocolatey goodness.
5. Customizable
Feel free to get creative with this recipe! You can switch up the mix-ins or adjust the sweetness to suit your palate.
Step-by-Step Guide to Making No-Bake M&M and Chocolate Chip Lactation Bites
Ingredients You’ll Need
- 1 cup rolled oats
- 1/2 cup peanut butter (or almond butter)
- 1/3 cup honey or maple syrup
- 1/4 cup ground flaxseed
- 1/2 cup mini chocolate chips
- 1/3 cup M&Ms
- 1 tsp vanilla extract
Instructions
Mix Dry Ingredients
In a large bowl, combine the oats, ground flaxseed, mini chocolate chips, and M&Ms. This is a great time to involve your older kids—let them mix to their delight!Add Wet Ingredients
Add the peanut butter, honey, and vanilla extract to the dry ingredients. Stir until everything is well-combined. You might need to use your hands for this—just be prepared for a sticky situation!Chill the Mixture
Cover the bowl with plastic wrap and place it in the fridge for about 30 minutes. This step helps the bites to firm up, making them easier to roll into balls.Form the Bites
Once chilled, scoop out a tablespoon of the mixture and roll it into a ball between your palms. Repeat until all the mixture is used.Store and Enjoy
Place the bites in an airtight container and store them in the refrigerator for up to a week. They can also be frozen for longer storage—just thaw them before enjoying!
Quick Tips for Making the Best Lactation Bites
- Add Nuts or Seeds: For an extra nutrition boost, consider mixing in chopped nuts or seeds such as chia or hemp.
- Use Different Nut Butters: If you’re allergic to peanut butter, try sunflower seed butter or cashew butter for similar texture and flavor.
- Make Them Ahead of Time: Prepare a double batch for those busy days when you need snacks on hand!
Mistakes to Avoid
- Skipping the Fridge Step: Don’t skip chilling the mixture; it helps the bites hold together better.
- Over-mixing: While it’s tempting to keep stirring, too much mixing can make the bites tough. Mix just until combined!
FAQs
Q: Can I make these vegan?
A: Absolutely! Swap honey for maple syrup and use nut or seed butter without added sugars.
Q: How many should I eat?
A: Start with 1-2 bites a day and see how your body responds. They are nutrient-dense, so it’s easy to enjoy them in moderation.
Bonus Ideas
- Try Different Mix-Ins: Use dried fruits, coconut flakes, or even protein powder for a unique twist.
- Create a Fun Activity: Get older siblings involved by letting them help with mixing and rolling! It makes for a fun family bonding time.
Now that you know how to whip up these no-bake M&M and chocolate chip lactation bites, you can enjoy a delicious snack for both your energy and milk production. Happy snacking!
Pinterest Description
Delight in these no-bake M&M and chocolate chip lactation bites designed to nourish new moms! With just five simple ingredients, you’ll have a fun, energy-boosting snack that supports milk production—perfect for busy parents!
Catchy Pinterest Title Ideas
- "Sweet & Simple: No-Bake Lactation Bites You’ll Love"
- "Boost Your Milk Supply with Yummy No-Bake Bites!"
- "No-Bake M&M and Chocolate Chip Lactation Bites: A Must-Try Snack"
- "Easy Lactation Snack: M&M and Chocolate Chip Bites"
- "Lactation Bites: The Perfect Snack for New Moms!"
Now go ahead and treat yourself (and your family) to these scrumptious bites that are both nutritious and delightful! Happy cooking!
Wickedly Healthy Breastfeeding Snacks
15 Wickedly Healthy Breastfeeding Snacks for Busy Moms
Navigating motherhood while nourishing a little one can feel overwhelming, especially when you’re juggling the demands of breastfeeding. Have you ever felt that nagging hunger pang but didn’t know what to grab? You’re not alone! Finding quick and nutritious snacks that won’t derail your healthy eating can be a challenge. But fear not, mama! Here are 15 wickedly healthy breastfeeding snacks that are not only delicious but also easy to prepare and perfect for those milk-making moments.
Why Healthy Snacks Matter for Breastfeeding Moms
Breastfeeding requires extra energy and nutrients to keep you fueled throughout the day. Choosing healthy snacks can help:
- Support milk production: Certain snacks can help enhance your milk supply.
- Keep energy levels up: Prevent those mid-afternoon crashes with wholesome, vibrant foods.
- Satisfy cravings: Nourish your body while keeping hunger at bay.
15 Wickedly Healthy Breastfeeding Snacks
1. Greek Yogurt Parfait
Layer delicious Greek yogurt with fresh fruits and a sprinkle of granola. It’s packed with protein and probiotics!
2. Nut Butter & Whole-Grain Toast
Spread almond or peanut butter on whole-grain toast. Add banana or a drizzle of honey for an extra boost.
3. Homemade Energy Bites
Mix rolled oats, nut butter, honey, and dark chocolate chips. Roll into balls and refrigerate for an on-the-go treat.
4. Trail Mix
Combine nuts, seeds, and dried fruits for a simple, energy-packed snack. Look for no added sugar options!
5. Veggies & Hummus
Slice up crunchy veggies like carrots, cucumbers, and bell peppers. Pair with hummus for a satisfying, nutrient-rich dip.
6. Oatmeal Cookies
Bake a batch of oatmeal cookies with added chia seeds or flaxseed for fiber and omega-3s.
7. Smoothie
Blend your favorite fruits with spinach, yogurt, and a splash of almond milk for a refreshing boost anytime.
8. Cheese & Apple Slices
Pair whole-grain crackers with cheddar cheese and apple slices. This combo offers protein and sweetness!
9. Avocado Toast
Smash ripe avocado on whole-grain toast. Add a sprinkle of salt or feta for flavor; it’s creamy and nourishing!
10. Chia Seed Pudding
Mix chia seeds with almond milk and a touch of sweetener. Let it sit overnight for a delightful breakfast option!
11. Hard-Boiled Eggs
Prep hard-boiled eggs at the beginning of the week. They’re an excellent source of protein for quick snacking.
12. Banana Pancakes
Mash ripe bananas with eggs, cook up the mixture, and enjoy these easy pancakes that are healthy and filling!
13. Edamame
Lightly salted edamame is a fun, nutritious snack that provides protein and fiber—perfect for munching.
14. Fresh Fruit
Grab a piece of fruit like a banana, apple, or berries for instant nourishment—nature’s candy!
15. Coconut Yogurt
If you’re avoiding dairy, coconut yogurt is a creamy alternative that tastes great with fruit and nuts.
Quick Tips / Mom Hacks
- Meal Prep: Dedicate a day to prep snacks to ease daily decisions.
- Portable Containers: Use reusable snack bags or containers to grab-and-go easily.
- Stay Hydrated: Drink plenty of water alongside your snacks to support milk production!
Mistakes to Avoid
- Skipping Meals: It’s easy to forget to eat; prioritize regular meals and snacks.
- Overly Processed Snacks: Opt for whole foods instead of pre-packaged snacks that can be high in sugar.
FAQs
What should I snack on during late-night feedings?
Some quiet snacks include nut butter with rice cakes or a simple banana to keep your energy up without too much fuss.
Can certain snacks improve milk supply?
Yes! Oats, flaxseeds, and healthy fats like those found in nuts and avocados are great options.
Finding time to nourish yourself as a breastfeeding mom can be tricky, but these wickedly healthy snacks will keep you energized and satisfied. Try mixing and matching as you discover your favorites! Remember, healthy snacking doesn’t have to be complicated—just a little prep can go a long way.
Pinterest Description: Discover 15 wickedly healthy snacks perfect for busy breastfeeding moms! These quick and nutritious bites will keep you energized while taking care of your little one. Perfect for easy meal prep!
Catchy Pinterest Title Ideas:
- "15 Delicious Snacks Every Breastfeeding Mom Needs!"
- "Nourishing Snacks for New Moms: 15 Healthy Ideas!"
- "Fuel Your Breastfeeding Journey: 15 Wickedly Healthy Snacks!"
- "Quick Energy Boosts: 15 Snacks for Breastfeeding Mamas!"
- "Your Guide to 15 Easy, Healthy Snacks for Breastfeeding!"
Now, go ahead and whip up something delicious—your body (and baby) will thank you! 🍏❤️
No-Bake Lactation Bites
Nourishing No-Bake Lactation Bites: 7 Easy Recipes to Boost Your Milk Supply
Are you a new mom struggling to find quick and easy ways to boost your milk supply? You’re not alone! Breastfeeding can be overwhelming, and the last thing you want is to stress over nutritious snacks. That’s where these delightful no-bake lactation bites come to the rescue. Not only are they super simple to make, but they’re packed with ingredients known to help increase milk production. Let’s dive into seven delicious recipes that you can whip up in no time!
Why No-Bake Lactation Bites?
Before we jump into the recipes, let’s take a moment to talk about why no-bake lactation bites are a must-try for breastfeeding moms:
- Quick and easy: No time for baking? No problem!
- Healthy ingredients: Packed with oats, flaxseed, and other lactation-friendly goodies.
- Portable: Perfect for busy days or when you’re on the go!
- Customizable: Feel free to add or swap ingredients to suit your taste.
7 Delicious No-Bake Lactation Bite Recipes
1. Peanut Butter Oat Bites
Ingredients:
- 1 cup rolled oats
- 1/2 cup peanut butter
- 1/4 cup honey
- 2 tablespoons ground flaxseed
- 1/4 cup chocolate chips (optional)
Instructions:
- In a mixing bowl, combine rolled oats, peanut butter, honey, and flaxseed.
- Mix until well combined. Add chocolate chips if desired.
- Roll the mixture into bite-sized balls.
- Refrigerate for at least 30 minutes before enjoying.
2. Chocolate Almond Energy Bites
Ingredients:
- 1 cup almond flour
- 1/2 cup almond butter
- 1/4 cup honey
- 2 tablespoons cocoa powder
- 1 tablespoon flaxseed
Instructions:
- Mix all ingredients in a bowl until well blended.
- Roll into small balls and place on a baking sheet lined with parchment.
- Chill in the fridge for at least half an hour.
3. Coconut Chia Seed Bites
Ingredients:
- 1 cup rolled oats
- 1/2 cup desiccated coconut
- 1/4 cup chia seeds
- 1/2 cup almond butter
- 1/4 cup maple syrup
Instructions:
- Combine the oats, coconut, chia seeds, almond butter, and maple syrup in a bowl.
- Stir until everything is combined.
- Form into small bites and refrigerate for 30 minutes.
4. Pumpkin Spice Lactation Bites
Ingredients:
- 1 cup oats
- 1/2 cup pumpkin puree
- 1/4 cup nut butter
- 1/4 cup honey
- 1 teaspoon pumpkin pie spice
Instructions:
- Mix all ingredients in a bowl until combined.
- Roll into balls and place in the fridge for at least 30 minutes before serving.
5. Berry Bliss Bites
Ingredients:
- 1 cup rolled oats
- 1/4 cup dried cranberries (or your favorite dried fruit)
- 1/2 cup almond butter
- 2 tablespoons honey
- 1 tablespoon flaxseed
Instructions:
- Combine all ingredients in a mixing bowl.
- Roll into bite-sized balls and chill for 30 minutes.
6. Cinnamon Raisin Oat Bites
Ingredients:
- 1 cup rolled oats
- 1/4 cup raisins
- 1/2 cup almond butter
- 1/4 cup maple syrup
- 1 teaspoon cinnamon
Instructions:
- Mix oats, raisins, almond butter, maple syrup, and cinnamon in a bowl.
- Form into bites and refrigerate for 30 minutes.
7. Dark Chocolate Blackberry Bites
Ingredients:
- 1 cup oats
- 1/2 cup crushed blackberries
- 1/4 cup peanut butter
- 1/4 cup honey
- 1/4 cup dark chocolate chips
Instructions:
- Combine oats, blackberries, peanut butter, honey, and chocolate chips in a bowl.
- Form into bite-sized balls and chill for 30 minutes.
Quick Tips for Making Lactation Bites
- Batch-making: Make a double or triple batch and store them in the fridge or freezer for easy access.
- Flavors: Don’t be afraid to experiment! Try different nut butters or mix in seeds, nuts, or more dried fruits.
- Storage: Keep the bites in an airtight container. They can last up to a week in the fridge and a month in the freezer.
Frequently Asked Questions (FAQs)
1. How many lactation bites should I eat?
Start with 2-3 bites a day, as they are calorie-dense but nursing moms may need more calories.
2. Can I use other sweeteners?
Absolutely! Agave syrup, stevia, or any sweetener you prefer can work just as well.
3. Are these snacks suitable for non-breastfeeding moms?
Yes! These bites are delicious and nutritious for anyone looking for a healthy snack.
Bonus Ideas
Feeling adventurous? Add a pinch of sea salt or a drizzle of honey on top of your bites before refrigerating for extra flavor. You can also try adding protein powder to boost the nutritional value!
Wrap Up
Now that you have these delicious no-bake lactation bite recipes at your fingertips, you can enjoy healthy, nourishing snacks that support your breastfeeding journey. Remember, every little bite counts when it comes to caring for yourself and your baby!
Pinterest Description
Looking for quick and nutritious snacks to boost your milk supply? Try these 7 easy no-bake lactation bites! Packed with wholesome ingredients, they’re perfect for busy breastfeeding moms!
Catchy Pinterest Title Ideas
- 7 Easy No-Bake Lactation Bites to Boost Milk Supply
- Nourishing No-Bake Lactation Bites Every Mom Should Try!
- Fuel Your Milk Supply with These 7 Irresistible No-Bake Bites
- The Ultimate Guide to 7 Quick No-Bake Lactation Snacks
- 7 Delicious Lactation Bites for Busy Moms: No Baking Needed!
Happy snacking, moms! Your well-being matters, and these bites are a sweet way to show yourself some love!
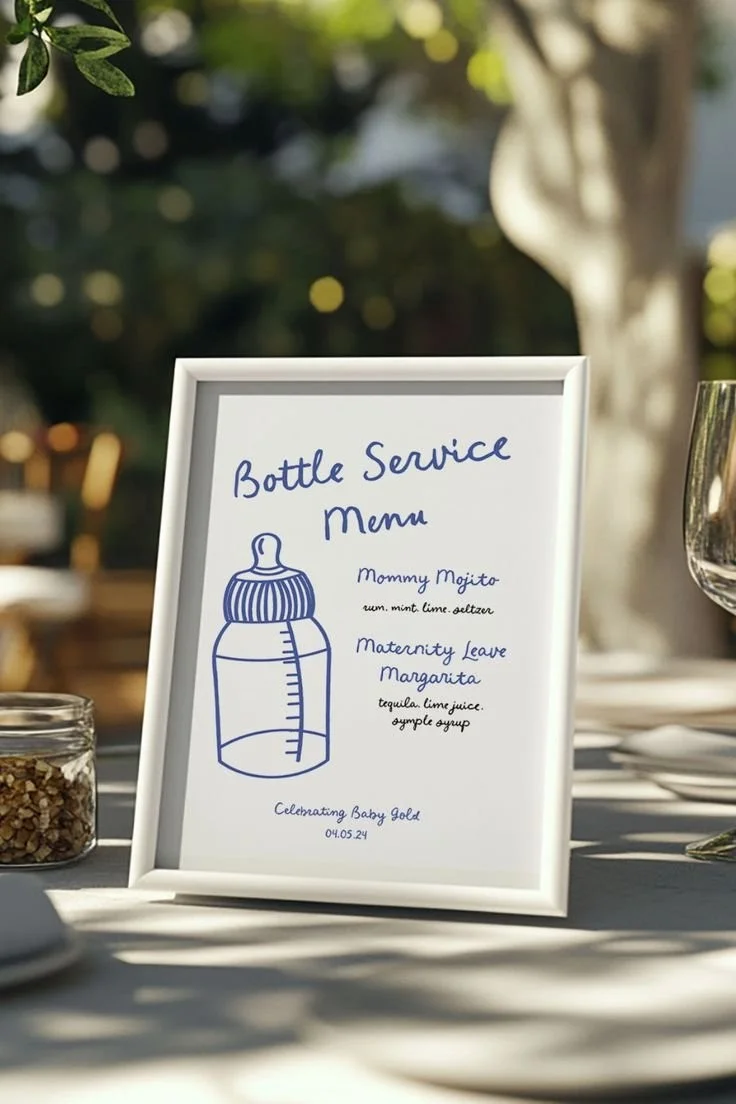
The Ultimate Baby Shower Accessory: Customizable Drink Menu Sign!
The Ultimate Baby Shower Accessory: Customizable Drink Menu Sign!
Are you planning a baby shower and feeling overwhelmed by all the details? One simple yet impactful way to elevate your celebration is through a customizable drink menu sign! This charming accessory not only informs your guests about the available beverages but also adds a personal touch to your event decor. In this article, we’ll explore how a drink menu sign can make your baby shower unforgettable while providing you with tips and ideas to create your own.
Why You Need a Customizable Drink Menu Sign
Imagine walking into a beautifully decorated room, only to be left wondering what refreshing drinks await you. A drink menu sign eliminates confusion and gets everyone excited about the fun beverages available. Here are a few reasons why you should include one at your next baby shower:
1. Adds a Personal Touch
Craft a drink menu that reflects the parents-to-be’s preferences or the theme of the baby shower.
2. Guides Guests
Help attendees find their favorite drink options easily, enhancing their overall experience.
3. Enhances Decor
A visually appealing drink menu can become a centerpiece, complementing your baby shower’s theme.
4. Sparks Conversations
Guests will bond over shared drink preferences, making for a more engaging atmosphere.
How to Create Your Customizable Drink Menu Sign
Creating a standout drink menu sign is easier than you might think! Follow this step-by-step guide to craft a fabulous display that will wow your guests.
Step 1: Choose Your Sign Style
Consider whether you want a chalkboard, framed print, or digital display. Your choice will set the tone for the entire setup.
Step 2: Define Your Drink Selection
Include a variety of beverages to cater to all tastes:
- Mocktails for Expecting Moms
- Sparkling Berry Lemonade
- Virgin Piña Colada
- Cocktails for Adults
- Mimosas
- Baby Blue Margaritas
- Non-Alcoholic Options
- Iced Tea
- Flavored Water Stations
Step 3: Design Your Menu
Use a graphics design tool or templates from sites like Canva to create your sign:
- Keep it simple and readable
- Use colors that match your theme
- Add playful fonts
Step 4: Customize the Details
Add personal touches such as:
- Names of the parents-to-be
- The baby’s due date or gender reveal theme
- Fun facts about the drinks
Step 5: Set It Up
Place your sign on an easel or hang it prominently near the drink station for maximum visibility.
Quick Tips for a Flawless Setup
- Print Multiple Copies: Have smaller versions of the menu at each table for convenience.
- Incorporate a Tasting Station: Let guests sample different drinks before making their choice.
- Include Garnishes: Fresh herbs, fruits, or cute straws can elevate presentations.
Common Mistakes to Avoid
- Overcomplicating the Menu: Keep it simple and stick to 3-5 beverage choices.
- Neglecting Dietary Restrictions: Consider guests with allergies or dietary preferences by providing at least one non-alcoholic option.
- Lack of Visibility: Ensure your sign is easy to read from afar.
FAQs About Customizable Drink Menu Signs
Q: How do I print my drink menu?
A: You can print it at home using high-quality paper or take it to a local print shop for a professional finish.
Q: What if I’m not great at design?
A: Use pre-made templates and simply add your own text for an easy solution.
Q: Can I change the menu once it’s printed?
A: If you use a chalkboard or a digital display, it’s easy to update. Paper versions will require new prints.
Bonus Ideas for a Unique Baby Shower Experience
- Themed Drink Names: Name each drink creatively based on nursery rhymes or baby-related themes.
- DIY Drink Station: Encourage guests to customize their drinks by providing an assortment of mixers, garnishes, and fun add-ins.
Creating a customizable drink menu sign isn’t just an accessory; it’s a way to enhance the joy of celebrating new life. With a little creativity and planning, you’ll be able to craft an unforgettable experience for you and your guests.
Pinterest Description:
Elevate your baby shower with a customizable drink menu sign! Discover why this fabulous accessory adds a personal touch while guiding guests and enhancing decor. Follow our easy steps to create the perfect drink sign that complements your celebration.
Catchy Pinterest Title Ideas:
- "Transform Your Baby Shower with a Custom Drink Menu Sign!"
- "Make Your Baby Shower Unforgettable with This Drink Menu Idea!"
- "Step Up Your Baby Shower Game: Create a Stunning Drink Menu Sign!"
- "Curate the Perfect Drinks: The Essential Baby Shower Menu Sign!"
- "Personalize Your Baby Shower: Crafting a Custom Drink Menu Sign!"
40+ Outdoor Activities to Do at Home for Kids age 2-10 – Free Outdoor Activities Checklist – Natural Beach Living
40+ Outdoor Activities to Do at Home for Kids Age 2-10: Your Ultimate Free Outdoor Activities Checklist!
Are you finding it challenging to keep your little ones engaged and entertained, especially when outdoor adventures aren’t always on the table? You’re not alone! As parents, we crave quality, stimulating outdoor time with our kids, but sometimes staying home is the best option. Luckily, there are countless creative and fun activities you can enjoy right in your backyard or patio. Let’s dive into 40+ Outdoor Activities to Do at Home for Kids Age 2-10 that are sure to inspire joy and adventure while keeping your little explorers safe, happy, and engaged!
Why Outdoor Activities Matter
Before we jump into the list, let’s take a moment to acknowledge why outdoor activities are essential for children. Fresh air, sunlight, and physical activity are vital for healthy growth. Outdoor play encourages social skills, sparks imagination, and can even boost mood. Plus, it’s a fantastic way for families to bond. So let’s get those energy levels up!
40+ Fun & Free Outdoor Activities
1. Nature Scavenger Hunt
Create a simple checklist of natural items to find, like acorns, leaves, or rocks. Kids will love the thrill of searching for treasures!
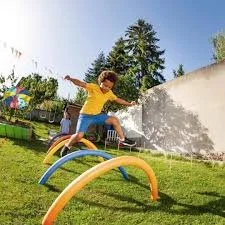
2. DIY Obstacle Course
Use cushions, chairs, and ropes to make an exciting obstacle course. Challenge your kids to complete it as quickly as they can!
3. Bubble Blowing
Who doesn’t love bubbles? Make your own bubble solution and watch the joy as kids chase and pop them!
4. Balloon Volleyball
Set up a “net” using a rope and use a balloon for a fun network game. It’s safe and great for all ages!
5. Gardening Together
Teach your kids some basics of planting by starting a small garden or even using pots. It’s hands-on learning at its best!
6. Painting Nature
Gather leaves and flowers, and allow your kids to create beautiful nature prints on paper using paint.
7. Simon Says (Outdoor Edition)
Take this classic game outside! Use fun outdoor commands like “jump like a frog” or “walk like a crab.”
8. Create a Fort
Use blankets and picnic tables to build a fort. It’s a great way for kids to use their imagination and create a special hideaway.
9. Shadow Tag
On a sunny day, play tag using shadows as your point of contact. It’s a fun twist on a classic game!
10. DIY Bird Feeders
Use pine cones, peanut butter, and birdseed to make bird feeders. Hang them in the yard and watch the lovely visitors!
11. Water Balloon Toss
Fill up some balloons and enjoy a light-hearted toss with the kids. Get ready to laugh and get a bit wet!
12. Leaf Jumping Pile
Collect leaves and make a pile to jump into. It’s like autumn fun any time of the year!
13. Star Gazing
On a clear evening, lay down blankets and gaze at the stars. Teach your kids about constellations and create your own stories!
14. Mini Olympics
Set up various games like sack races, three-legged races, and long jumps in your yard for a fun day of “competition.”
15. Nature Art Collage
Collect natural items and create a collage. Use glue and paper to display your creations!
16. Crazy Hat Relay Race
Gather hats from around the house and have fun racing with them! Kids can bounce from one station to another while wearing their silly hats.
17. Rock Painting
Gather smooth stones and let your kids paint them with fun designs. Use these as garden decorations afterward!
18. Treasure Map Adventure
Create a simple treasure map and lead your kids on a quest in your backyard. Bury some toys as treasure for added excitement!
19. Outdoor Movie Night
Set up a projector and blanket for a magical outdoor movie experience. Don’t forget the popcorn!
20. Treetop Observations
Take a walk around your neighborhood and observe birds and other wildlife. Bring binoculars for a closer look!
21. DIY Chalkboard
If you have a wooden fence or an old board, use it as a chalkboard for endless outdoor drawing fun.
22. Kite Making and Flying
Make simple kites together and fly them on a windy day. This will be a delightful experience your kids won’t forget!
23. Picnic Party
Pack a meal and have a picnic in your yard. Enjoy nature while indulging in yummy snacks.
24. Freeze Dance
Play some music outside and have the kids dance. When the music stops, they must freeze!
25. Hide and Seek
A classic game that never gets old! Encourage the kids to find creative hiding spots around the garden.
26. Nature Journaling
Have your children document what they see outside: plants, bugs, weather! It’s a wonderful way to combine play and learning.
27. Insect Exploration
Go on a bug hunt with magnifying glasses to observe insects in their natural habitat. It’s educational and thrilling!
28. Family Dance Party
Pop on their favorite tunes and have a dance party outside. It’s a great way to lift spirits!
29. Cloud Watching
Laying back on the grass and watching the clouds form shapes can be a calming and imaginative activity.
30. DIY Wind Chimes
Use recycled materials and let your kids design their wind chimes to hang in the backyard.
31. Mini Gardening
Start a mini herb garden in pots for your kids to care for. It teaches them responsibility and they can help in the kitchen!
32. Sandcastle Building (if you have sand)
If you have a sandbox or a sandy area, encourage your kids to unleash their creativity while building sandcastles.
33. Nature Bracelets
Use tape wrapped around your child’s wrist to collect flowers and leaves, creating unique nature bracelets!
34. Color Hunt
Choose a color and have kids search for items in your yard that match. It’s a fun learning experience!
35. DIY Water Slide
If you’ve got a slip-n-slide, let the kids enjoy this exhilarating way to cool off!
36. Shadow Tracing
On a sunny day, have kids lie down and trace their shadows with chalk. It’s a fun way to combine art and play.
37. Nature Bingo
Create Bingo cards featuring items found outdoors and enjoy hunting to complete the card.
38. Pinecone Art
Collect pinecones and have fun turning them into animals or characters with paint and embellishments.
39. Outdoor Reading Nook
Create a cozy reading spot outside for some fresh air story time.
40. Water Painting
Use water and paintbrushes on your driveway or sidewalk for a mess-free painting activity.
Quick Tips / Mom Hacks
- Make a Schedule: Plan outdoor activities in advance to ensure you make the most of sunny days.
- Involve Kids in Setup: Let them help set up activities, boosting their enthusiasm and engagement.
- Rotate Activities: Keep the excitement alive by rotating activities through the week!
Mistakes to Avoid
- Overplanning: Sometimes the best experiences are unstructured. Allow for free playtime, too!
- Not Supervising: Always keep an eye on kids, especially for water-related activities or climbing.
FAQs
What age are these activities suitable for?
Most of these activities are ideal for children aged 2-10, with some being easily adjustable for different ages.
How can I adapt activities for younger children?
Choose simpler tasks and minimize complexity to keep it enjoyable and safe for toddlers.
Bonus Activity!
Create an Outdoor Memories Journal. Have your children jot down or draw their favorite memories after each outdoor adventure. It’s a beautiful way to document their childhood!
Ready to make memories? With these 40+ outdoor activities, your children will surely enjoy creative play while soaking up nature. Don’t forget to grab your free Outdoor Activities Checklist for the ultimate planning guide to keep you and your kids engaged throughout the seasons!
Pinterest Description:
Discover 40+ fun outdoor activities you can do at home for kids aged 2-10! This ultimate free checklist includes creative ideas that will keep your little ones entertained and help you make unforgettable memories in your backyard.
Catchy Pinterest Title Ideas:
- "40+ Outdoor Activities to Spark Joy for Kids 2-10!"
- "Ultimate Backyard Fun: 40+ Kids Activities Checklist!"
- "Endless Fun: 40+ Free Outdoor Activities for Your Kids!"
- "40+ Creative Ways to Keep Kids Active Outside!"
- "Backyard Adventures: 40+ Fun Activities for Kids!"
Now get ready to step outside, enjoy the fresh air, and have a blast with your kids! 🌳✨
5 Toddler Activities To Boost Confidence and Teach Essential Life Skills 1-year-old, 2-year-old
5 Fun Toddler Activities to Boost Confidence and Teach Essential Life Skills
As parents, one of our biggest wishes for our little ones is to see them blossom into confident, capable individuals. But how can we nurture their self-esteem while teaching them fundamental life skills? Luckily, there are fun and engaging activities you can easily incorporate into your daily routine with your 1 and 2-year-olds. Let’s explore five delightful toddler activities that not only encourage confidence but also lay the groundwork for essential skills they’ll need as they grow!
1. Treasure Hunt: Finding Fun in Every Corner
Creating a treasure hunt is a fantastic way to engage your child’s curiosity and boost their confidence as they explore their surroundings.
How to Set It Up:
- Select a Location: Choose a safe, familiar space like your living room or backyard.
- Hide Objects: Use soft toys, colorful blocks, or even household items that your child is familiar with.
- Create Clues: For older toddlers, you can provide simple verbal clues. For example, “It’s under something soft!”
Why It Works:
- Encourages problem-solving and critical thinking.
- Provides a sense of achievement when they find the "treasure".
2. Artistic Expression: Crafting Confidence
Art isn’t just about colors and shapes; it’s a fantastic way for toddlers to express themselves and gain confidence.
Art Ideas:
- Finger Painting: Let them go wild with colors! Offer safe, washable paints and let creativity flow.
- Collage Making: Provide magazines, pictures, and glue. Allow them to create their own masterpiece.
Benefits:
- Helps develop fine motor skills.
- Boosts self-esteem as they showcase their unique creations.
3. Role Play: Imaginative Adventures
Toddlers love pretending! Role-playing not only stokes their imagination but also teaches social skills.
Role Play Activities:
- Playing House: Encourage them to mimic daily tasks you do, like cooking or cleaning.
- Dress-Up Fun: Provide costumes or everyday clothes that allow them to explore different roles.
Why Role Play?
- Promotes empathy and understanding of emotions.
- Instills a sense of independence and responsibility.
4. Music and Movement: Dance Party Fun
Children often express their emotions through music and movement. Hosting a dance party at home can be a joyous way to build confidence.
How to Create a Dance Party:
- Choose Fun Songs: Pick their favorite tunes and dance together.
- Incorporate Instruments: Use simple instruments like shakers or drums.
The Benefits:
- Develops coordination and physical skills.
- Encourages expression and enjoyment of movement.
5. Puzzle Play: Piece it Together
Puzzles are not only fun but also enhance critical thinking skills, hand-eye coordination, and patience.
Puzzle Ideas:
- Simple Wooden Puzzles: Look for those with bright colors and different shapes.
- Interactive Puzzles: Consider sound or texture puzzles to stimulate their senses.
Why Puzzles?
- Offers a sense of accomplishment when pieces fit together.
- Fosters problem-solving skills and patience.
Quick Tips / Mom Hacks:
- Homemade Activities: Using everyday materials can create fun, unique projects. For instance, a cardboard box can turn into a spaceship!
- Routine Enhancements: Incorporate these activities into everyday tasks. Cooking dinner? Let them help by stirring or washing vegetables.
Mistakes to Avoid:
- Neglecting Guidance: While independence is important, providing gentle guidance can help your little one feel secure in their exploration.
- Underestimating Interests: Observe what excites your child and tailor activities to fit their preferences for maximum engagement.
FAQs
Q: How can I help my toddler feel more confident?
A: Engage them in activities that promote decision-making and celebrate their successes, no matter how small.
Q: What if my child doesn’t seem interested?
A: Sometimes, it takes a few tries! Keep things light and fun, and be ready to switch activities if they lose interest.
Pinterest Description
Looking for engaging activities to help your toddler build confidence? Discover 5 fun and easy activities that encourage essential life skills while ensuring endless fun! Perfect for 1 and 2-year-olds!
Catchy Pinterest Title Ideas
- "5 Activities to Boost Your Toddler’s Confidence Today!"
- "Unlock Your Toddler’s Potential: 5 Fun Activities They’ll Love!"
- "Confidence & Skills: 5 Toddler Activities for Happy Little Learners!"
- "Easy Toddler Activities to Build Life Skills and Confidence!"
- "Discover 5 Fun Ways to Make Your Child Shine with Confidence!"
By incorporating these activities into your daily routine, you’ll not only help your toddler develop essential life skills but also watch their confidence grow right before your eyes. So, gather your treasures and art supplies, and let the learning and fun begin!

7 No-Mess Toddler Lunch Ideas for Busy Moms (No Cleanup!)
7 No-Mess Toddler Lunch Ideas for Busy Moms (No Cleanup!)
As a busy mom, juggling a toddler’s needs while managing household chores can feel overwhelming, especially during lunchtime. If you’re tired of the mess and searching for quick, nutritious meals that won’t leave your kitchen looking like a tornado hit, you’re in the right place! Here are 7 no-mess toddler lunch ideas that are not only easy to prepare but also enjoyable for your little one!
Why No-Mess Lunches?
Let’s face it: meals involving toddlers often come with an unexpected side of chaos. With these no-mess lunch ideas, you can make lunchtime simpler and cleaner without sacrificing nutrition. Think of it this way: less mess equals more time for cuddles, playtime, and that much-deserved cup of coffee!
1. Pita Pockets
Quick and Nutritious
- Ingredients: Whole wheat pita bread, hummus, sliced cucumbers, and shredded chicken.
- Instructions: Spread hummus inside the pita, stuff it with chicken and cucumbers, and let your toddler enjoy. Less cleaning means more time for snuggles!
2. DIY Lunchables
A Fun Build-Your-Own Meal!
- Ingredients: Whole grain crackers, cheese slices, and deli turkey.
- Instructions: Arrange the crackers, cheese, and turkey on a plate. Let your child assemble their own snacks for a fun lunch that’s also hands-on!
3. Fruit & Yogurt Parfaits
Sweet and Satisfying!
- Ingredients: Greek yogurt, mixed berries, and granola.
- Instructions: Layer yogurt, berries, and granola in a small cup or mason jar. This rainbow of flavors is both visually appealing and delicious, with virtually no mess to clean up!
4. Cheesy Roll-Ups
A Tasty Twist!
- Ingredients: Tortilla wraps, cheese slices, and deli meat.
- Instructions: Place cheese and deli meat on a tortilla, roll it up, and cut into pinwheels. They’re easy to eat and fun to make!
5. Veggie Cups with Dip
All the Crunch!
- Ingredients: Carrot sticks, cucumber slices, and ranch dressing.
- Instructions: Fill a small cup with your toddler’s favorite veggies and a side of dip at the bottom. Less mess means more creativity with flavors!
6. Oven-Baked Egg Muffins
Breakfast for Lunch!
- Ingredients: Eggs, diced bell peppers, cheese, and spinach.
- Instructions: Whisk eggs with diced veggies, pour into muffin tins, and bake. These muffins can be made in advance and stored in the fridge. Just pop one in the microwave, and you’re ready to go!
7. Nut Butter Banana Wraps
A Sweet Treat!
- Ingredients: Whole grain tortillas, nut butter (or sun butter), and banana.
- Instructions: Spread the nut butter over the tortilla, place a banana in the center, roll it up, and slice. This sweet wrap is packed with energy and easy to hold.
Quick Tips for No-Mess Lunches
- Prep Ahead: Take time on the weekends to prepare ingredients for quick assembly during the week.
- Use Muffin Tins: Perfect for serving small portions of different foods without the mess.
- Choose Finger Foods: Opt for items that are easy for your toddler to eat without too many utensils!
Mistakes to Avoid
- Overloading Plates: Avoid overcrowding to minimize mess and overwhelm.
- Skip the Sauces: Dips are great, but be cautious with too many wet toppings that can spill easily.
FAQs
Q: Are these lunch ideas suitable for picky eaters?
A: Absolutely! Customize each lunch idea to include your child’s favorite ingredients.
Q: Can I prepare these meals the night before?
A: Yes! Many of these ideas can be prepped ahead of time for easy access at lunchtime.
Bonus Ideas
- Cheese Quesadillas: Quick to cook and easy to eat.
- Smoothie Packs: Blend fruits and spinach and pour into a cup for a nutritious drink.
Now you have an arsenal of no-mess toddler lunch ideas to streamline your busy days! Prepare these meals in advance, and you’re bound to feel the relief of less cleanup and more quality time with your little one.
Pinterest Description
Looking for quick and no-mess toddler lunch ideas? Check out these 7 simple and nutritious lunches that busy moms can whip up in no time—perfect for picky eaters and lunchbox win!
Catchy Pinterest Title Ideas
- "7 Easy No-Mess Lunches for Busy Moms (Toddler Approved!)"
- "Ditch the Mess: 7 Toddler Lunches You Can Make in No Time!"
- "No Cleanup Required! 7 Quick Toddler Lunch Ideas for Moms on the Go"
- "Quick & Delicious: 7 No-Mess Lunch Ideas Your Toddler Will Love!"
- "7 Mess-Free Lunches for Toddlers: Fast, Fun, and Convenient!"
Time to enjoy mealtime without the hassle! Happy lunch-making!
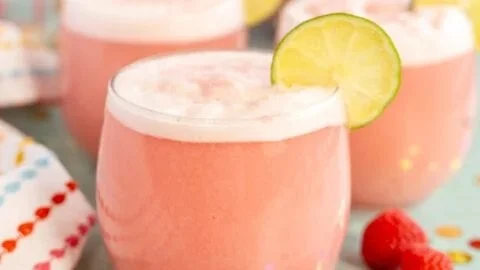
Best Pink Punch Recipe for a Girl Baby Shower Refreshment
Perfectly Refreshing Pink Punch: A Sweet Treat for Every Occasion
Are you tired of the same old drinks at your kids’ parties and playdates? If you’re on the hunt for something colorful, delicious, and just downright fun, look no further than Pink Punch! This delightful drink isn’t just beautiful to look at; it’s super easy to whip up and sure to be a hit with kids and adults alike. In this guide, I’ll show you how to create this refreshing beverage in just a few simple steps, plus provide some creative twists to keep things exciting.
Why Pink Punch is the Ultimate Party Beverage
- Fun and Festive: The vibrant pink color is eye-catching and instantly sets a party mood.
- Customizable: You can play around with flavors, making it suitable for all age groups and occasions.
- Easy to Make: With minimal ingredients, you’ll have a crowd-pleaser in no time!
How to Make Pink Punch: A Step-by-Step Guide
Ingredients You’ll Need
Here’s a quick shopping list for your Pink Punch creation:
- Juice: 4 cups of pink lemonade or cranberry juice
- Soda: 2 cups of lemon-lime soda or ginger ale for fizz
- Fruit Garnishes: Sliced strawberries, lemons, and limes
- Ice: Crushed or cubed, depending on your preference
Step 1: Mix the Base
In a large punch bowl, combine the juice and soda. Stir gently to keep that fizzy goodness alive!
Step 2: Add the Garnishes
Toss in those lovely fruit slices, which not only enhance the flavor but also make the punch visually appealing.
Step 3: Add Ice
Pour in your ice to chill the punch. If you’re using cubed ice, consider freezing some leftover pink lemonade in ice cube trays for an added aesthetic!
Step 4: Serve with a Smile
Pour the punch into clear cups to showcase the beautiful pink hue. Add a straw or a fun little umbrella for an extra touch of fun!
Quick Tips / Mom Hacks
- Make It Ahead of Time: Prepare the base of the punch without adding soda and refrigerate. Add the soda and ice right before serving.
- Color Variations: Swap pink lemonade for blue raspberry lemonade for a striking blue punch.
- Add a Splash of Fun: For adults, consider adding some vodka or champagne to the mix!
Mistakes to Avoid
- Using Flat Soda: Always add soda last to keep that bubbly excitement.
- Skipping Garnishes: Fruits not only add flavor but also enhance the visual appeal. Don’t skip this step!
- Using Too Much Ice: If you add too much ice right away, it might dilute your punch. Serve ice on the side if you can!
FAQs
Can I make Pink Punch in bulk?
Absolutely! Just multiply the ingredients and use a larger bowl. It’s perfect for parties!
What if my kids don’t like pink lemonade?
No worries! Substitute with other fruit juices like pineapple or mango but adjust sweetness accordingly.
How long can I store Pink Punch?
It’s best enjoyed fresh, but you can keep leftovers in the fridge for a day. Just remember to add fresh soda before serving again!
Bonus Ideas
- Themed Variations: Adjust the fruit and juices based on the season or holiday.
- Healthier Option: Use sparkling water instead of soda for a lighter twist.
- Make it Magic: Add a dash of edible glitter for a sparkling effect.
With these tips and tricks, you’ll have the most delightful Pink Punch that your family and friends will love. Impress them at your next gathering and create lasting memories over this fun drink!
Short Pinterest Description
Discover how to make the most delicious Pink Punch that everyone will adore! This easy recipe is perfect for parties, playdates, and family gatherings. Get ready to impress guests with this colorful and refreshing drink!
Catchy Pinterest Title Ideas
- “Bubbling Pink Punch: A Sweet Recipe for Every Celebration!”
- “5 Reasons Why Pink Punch is Your Go-To Party Drink”
- “How to Make the Ultimate Pink Punch: Easy Step-by-Step Guide”
- “Colorful Pink Punch Recipe: Perfect for Kids’ Parties!”
- “Refreshing Pink Punch: A Fun Drink Idea for Any Occasion”
Now, go ahead and make that perfect Pink Punch! Your taste buds will thank you, and your gatherings will be all the more joyful! 🍹✨
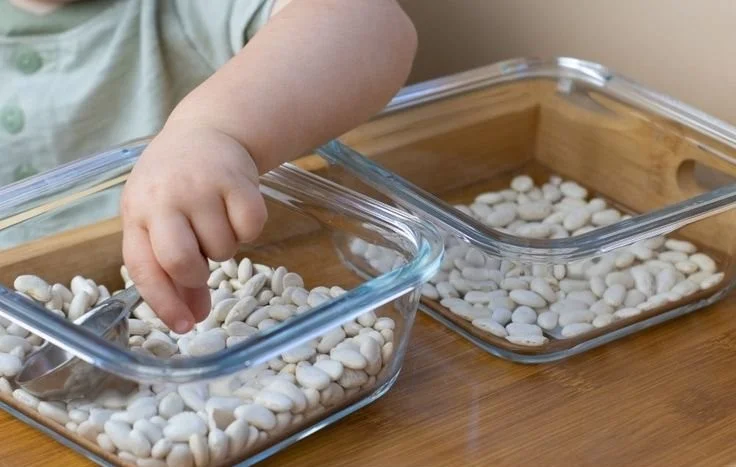
Concentration-Building Activities for Toddlers
10 Fun Concentration-Building Activities for Toddlers
Are you looking for ways to help your busy little one focus and concentrate better? As a parent, it can be challenging to keep toddlers engaged, especially when their attention seems to flit around like a butterfly. The good news is that there are simple and enjoyable activities you can incorporate into your daily routine to help train their concentration and focus.
In this article, we’ll explore 10 fun, engaging, and effective concentration-building activities that your toddler will love!
Why Focus Matters
Before diving into the activities, let’s talk for a moment about why focus and concentration are so important for toddlers. Children learn through exploration and play, and fostering their ability to concentrate can lead to improved:
- Cognitive Development: Better focus helps in learning new skills and concepts.
- Emotional Regulation: Concentration activities teach patience and self-control.
- Problem Solving Skills: The ability to focus aids in tackling challenges creatively.
10 Engaging Concentration-Building Activities
1. Puzzle Play
Introduce simple jigsaw puzzles. They require problem-solving skills and allow toddlers to focus on completing the picture.
2. Simon Says
This classic game not only provides fun but also encourages toddlers to listen closely and follow instructions, enhancing their concentration.
3. Memory Card Game
Create a DIY memory card game with family photos or animal images. Turning cards over requires focus and enhances memory!
4. Treasure Hunt
Organize a small treasure hunt around your home or yard. Asking them to find specific items keeps their attention focused on the task.
5. Building Blocks
Let your toddler build towers or structures with blocks. This promotes fine motor skills and concentration as they balance pieces carefully.
6. Storytime with a Twist
Read a short story and pause to ask questions. This encourages active listening and keeps their minds engaged with the narrative.
7. Sorting Activities
Have them sort objects by size, color, or type. This not only builds concentration but also teaches categorization skills!
8. Sticker Fun
Provide stickers and a blank sheet of paper. Encourage your toddler to create patterns or pictures which requires focus and creativity.
9. Drawing Doodles
Give your toddler some crayons and paper to doodle or draw. Set a timer for a few minutes and ask them to concentrate solely on their drawing during that time.
10. Nature Walks
Take a walk outside and challenge your little one to spot different colors, shapes, or animals. This keeps them engaged and develops observational skills!
Quick Tips / Mom Hacks
- Create a Quiet Space: Designate a specific area free of distractions where your toddler can focus on activities.
- Follow Their Interests: Tailor activities to what your child enjoys most, whether it’s animals, colors, or vehicles.
- Use Timers: Set a timer for short, focused sessions, gradually increasing the time as their concentration improves.
Mistakes to Avoid
- Overloading with Tasks: Don’t overwhelm your toddler with too many activities at once; start small and build as their focus improves.
- Distracting Environments: Minimize distractions to help your toddler concentrate better.
- Expecting Perfection: Remember that concentration builds gradually. Celebrate small achievements and progress!
FAQs
Q: How long should concentration-building activities last?
A: Start with activities that last 5-10 minutes, increasing duration as your toddler’s attention span develops.
Q: Are certain activities better for older toddlers?
A: Yes! Tailor activities to your toddler’s age, interests, and developmental stage.
Bonus Ideas
If you’re interested in extending these activities even further, consider combining them. For example, have a nature walk and then do a nature-themed drawing when you return home. The possibilities are endless!
Pinterest Description
Discover fun activities that enhance your toddler’s concentration and focus! From puzzle play to nature walks, these 10 engaging ideas are easy for parents to implement and will keep your little ones happily occupied.
Catchy Pinterest Title Ideas
- "10 Fun Activities to Boost Your Toddler’s Concentration!"
- "Engaging Ways to Help Your Toddler Focus – 10 Must-Try Ideas!"
- "Unlock Your Toddler’s Focus: 10 Simple Activities!"
- "Concentration Made Fun: 10 Activities for Happy Toddlers"
- "Strengthen Your Toddler’s Attention with These 10 Fun Activities!"
By embracing these simple yet effective concentration-building activities, you’ll not only nurture your toddler’s focus but also create quality moments of fun and connection. Happy playing!
