
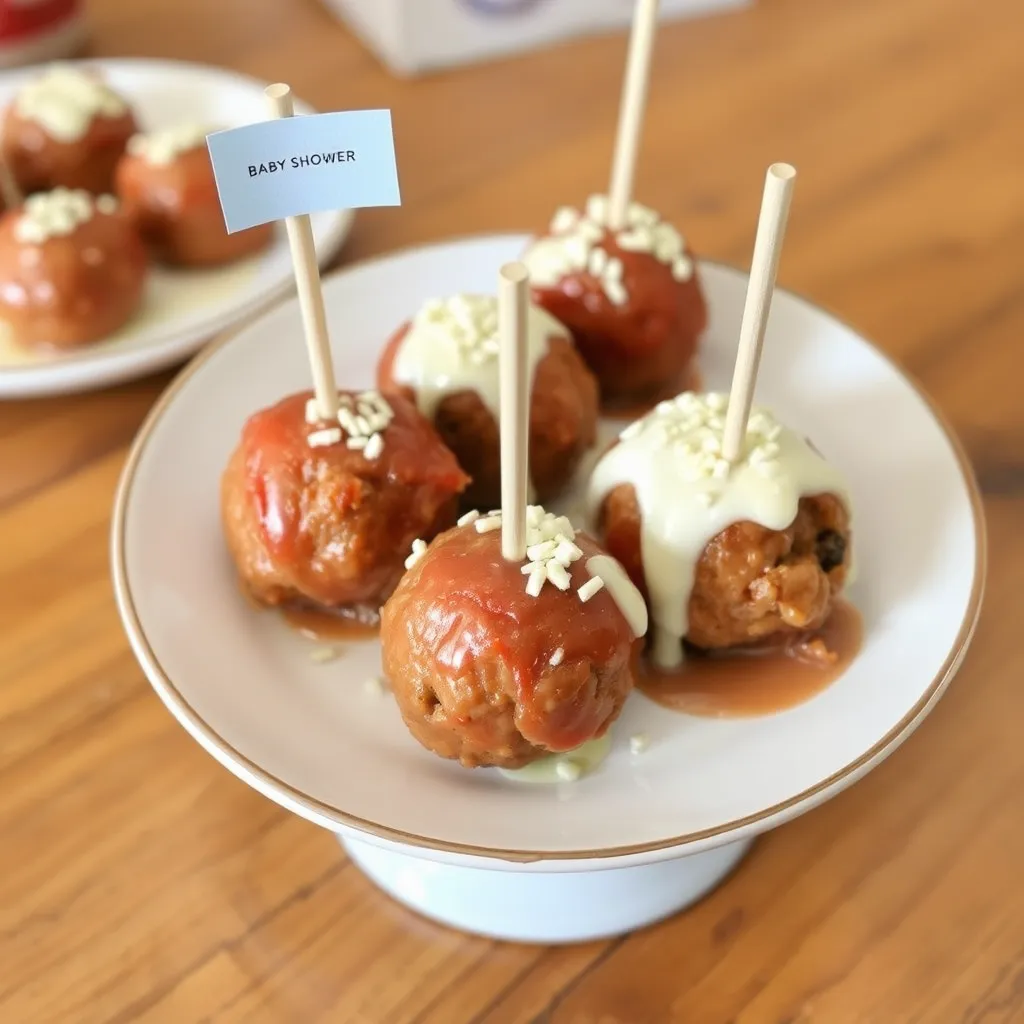
How to Make the Best Baby Shower Meatballs
Are you planning a baby shower? One of the most popular and beloved appetizers you can serve is baby shower meatballs. These little bites of heaven are delicious and incredibly easy to make. Whether you’re hosting a small gathering or a large celebration, these meatballs will be a hit with everyone. In this article, we’ll guide you through making the best meatballs, including tips on using the oven, adding chili sauce, and even incorporating pineapple for a tropical twist.
Table of Contents
Key Takeaways:
- Baby shower meatballs are a delicious and easy-to-make appetizer.
- These meatballs can be prepared in the oven or slow cooker.
- Adding chili sauce or pineapple can give your meatballs a unique flavor.
- A single serving of baby shower meatballs is around 100-150 calories.
- Use simple ingredients to create a memorable dish for your baby shower.
Why Choose Baby Shower Meatballs?
Baby shower meatballs are a fantastic choice for several reasons:
- Easy to Prepare: They require minimal effort and can be made ahead of time.
- Delicious Flavor: With the right ingredients, these meatballs can be packed with flavor.
- Perfect for Sharing: They are bite-sized, making them ideal for guests to enjoy without needing utensils.
- Versatile: You can customize the recipe to suit any taste or theme.
Ingredients for Baby Shower Meatballs
Before you start, gather the following ingredients for baby shower meatballs:
- 1 pound ground beef (or a mix of ground beef and pork)
- 1/2 cup breadcrumbs
- 1/4 cup grated Parmesan cheese
- 1 egg
- 2 cloves garlic, minced
- 1 teaspoon dried oregano
- 1 teaspoon dried basil
- 1/2 teaspoon salt
- 1/4 teaspoon black pepper
- 1/4 cup olive oil (for frying)
- 1 cup marinara sauce (for dipping or coating)
How to Make the Best Baby Shower Meatballs
Follow these simple steps to make the best baby shower meatballs:
- Mix the Ingredients: In a large bowl, combine the ground beef, breadcrumbs, Parmesan cheese, egg, garlic, oregano, basil, salt, and pepper. Mix well until all the ingredients are evenly distributed.
- Form the Meatballs: Using your hands, roll the mixture into small meatballs, about 1 inch in diameter. Place them on a plate or tray.
- Cook the Meatballs: Heat the olive oil in a large skillet over medium heat. Add the meatballs and cook until they are browned on all sides, about 3-4 minutes per side. Alternatively, you can bake them in the oven at 375°F (190°C) for 20-25 minutes.
- Add the Sauce: Once the meatballs are cooked, transfer them to a slow cooker or a baking dish. Pour the marinara sauce over the meatballs and stir gently to coat.
- Cook Further: If using a slow cooker, cook on low for 2-3 hours or on high for 1-2 hours. If using the oven, bake at 350°F (175°C) for 15-20 minutes.
- Serve: Serve the meatballs hot with additional marinara sauce on the side for dipping.
Quick Baby Shower Meatballs Recipe
If you’re short on time, you can make quick baby shower meatballs using a slow cooker. Here’s how:
- Mix the Ingredients: Follow the same mixing process as above.
- Form the Meatballs: Roll the mixture into small meatballs.
- Add to Slow Cooker: Place the meatballs in a slow cooker. Pour the marinara sauce over the meatballs and stir gently to coat.
- Cook: Cook on low for 4-5 hours or on high for 2-3 hours.
- Serve: Serve the meatballs hot with additional marinara sauce on the side for dipping.
Black Baby Shower Meatballs Recipe
For a unique twist, try making black baby shower meatballs. These meatballs get their color from black beans and are a fun addition to any baby shower menu.
- Mix the Ingredients: In a large bowl, combine 1 pound of ground beef, 1/2 cup of black bean puree (blend black beans in a food processor), 1/2 cup of breadcrumbs, 1/4 cup of grated Parmesan cheese, 1 egg, 2 cloves of minced garlic, 1 teaspoon of dried oregano, 1 teaspoon of dried basil, 1/2 teaspoon of salt, and 1/4 teaspoon of black pepper. Mix well.
- Form the Meatballs: Roll the mixture into small meatballs.
- Cook the Meatballs: Heat olive oil in a skillet and cook the meatballs until browned on all sides. Alternatively, bake them in the oven at 375°F (190°C) for 20-25 minutes.
- Add the Sauce: Transfer the meatballs to a slow cooker or baking dish. Pour the marinara sauce over the meatballs and stir gently to coat.
- Cook Further: Cook in the slow cooker on low for 2-3 hours or on high for 1-2 hours. If using the oven, bake at 350°F (175°C) for 15-20 minutes.
- Serve: Serve the meatballs hot with additional marinara sauce on the side for dipping.
Baby Shower Meatballs with Chili Sauce
Add a bit of heat to your baby shower meatballs by using chili sauce. This version is perfect for those who enjoy a little spice.
- Mix the Ingredients: Follow the basic meatball recipe as described above.
- Form the Meatballs: Roll the mixture into small meatballs.
- Cook the Meatballs: Brown the meatballs in a skillet or bake them in the oven.
- Add the Sauce: In a small bowl, mix 1 cup of marinara sauce with 1/4 cup of chili sauce. Pour this mixture over the cooked meatballs and stir gently to coat.
- Cook Further: Cook in the slow cooker or oven as described in the previous recipes.
- Serve: Serve the meatballs hot with additional chili sauce on the side for dipping.
Baby Shower Meatballs with Pineapple
For a tropical twist, try making baby shower meatballs with pineapple. This version is sweet and tangy, perfect for a summer baby shower.
- Mix the Ingredients: Follow the basic meatball recipe as described above.
- Form the Meatballs: Roll the mixture into small meatballs.
- Cook the Meatballs: Brown the meatballs in a skillet or bake them in the oven.
- Add the Sauce: In a small bowl, mix 1 cup of marinara sauce with 1/2 cup of crushed pineapple. Pour this mixture over the cooked meatballs and stir gently to coat.
- Cook Further: Cook in the slow cooker or oven as described in the previous recipes.
- Serve: Serve the meatballs hot with additional pineapple sauce on the side for dipping.
Calories in Baby Shower Meatballs
One of the concerns when planning a baby shower menu is the calorie count. On average, a single serving of baby shower meatballs (about 3-4 meatballs) contains around 100-150 calories. This can vary based on the size of the meatballs and the type of sauce used. If you’re watching your calorie intake, you can use lean ground turkey or chicken instead of beef to reduce the calorie count.
Frequently Asked Questions (FAQs)
Can I make baby shower meatballs ahead of time?
Yes, you can make baby shower meatballs ahead of time. Simply cook the meatballs, let them cool, and store them in an airtight container in the refrigerator for up to 3 days. Reheat them in the oven or microwave before serving.
What can I serve with baby shower meatballs?
Baby shower meatballs pair well with a variety of sides. Some popular options include:
- Vegetable platter with dip
- Crackers and cheese
- Fresh fruit skewers
- Mini quiches
- Caprese salad skewers
Can I freeze baby shower meatballs?
Yes, you can freeze baby shower meatballs. After cooking, let them cool completely, then place them in a freezer-safe container or bag. They can be stored in the freezer for up to 3 months. To reheat, thaw them in the refrigerator overnight and then warm them in the oven or microwave.
Are baby shower meatballs suitable for a vegetarian menu?
No, traditional baby shower meatballs contain meat. However, you can make a vegetarian version using a mix of beans, vegetables, and breadcrumbs. Check out our vegetarian meatball recipe for inspiration.
Conclusion
Baby shower meatballs are a delightful addition to any baby shower menu. Whether you choose to make them in the oven, slow cooker, or with a unique twist like chili sauce or pineapple, these meatballs are sure to be a hit with your guests. With simple ingredients and easy preparation, you can create a memorable and delicious dish that everyone will love. Happy cooking!
For more baby shower ideas and recipes, check out our baby shower ideas and baby shower recipes.

1 Year Old Cake Smash A Fun First Birthday Tradition (Messy Moments You’ll Love)
Celebrating your little one’s first birthday is a special moment that you’ll want to cherish forever. One popular tradition that has gained a lot of traction in recent years is the 1 year old cake smash. This fun and messy activity not only provides a memorable experience for your baby but also gives you some fantastic photos to look back on. In this article, we’ll cover everything you need to know about planning and executing the perfect 1 year old cake smash.
Table of Contents
Key Takeaways
- What is a 1 year old cake smash? It’s a fun tradition where your baby gets to play with and eat a small cake.
- Why do it? It’s a great way to capture candid and adorable moments.
- When to do it? Typically during or after the main birthday party.
- How to prepare? Choose a simple, kid-friendly cake and a suitable location.
- What to wear? Dress your baby in easy-to-clean clothes or a special outfit.
- How to capture the moment? Have a camera ready and consider hiring a professional photographer.
What is a 1 Year Old Cake Smash?

A 1 year old cake smash is a delightful tradition where your baby gets to interact with a small, kid-friendly cake. This can involve touching, playing, and even eating the cake. The idea is to create a fun and memorable experience for both your baby and you, while capturing some adorable and candid photos along the way.
The Best Smash Cake Ideas for Your Baby’s First Birthday Party
Why Do a 1 Year Old Cake Smash?
There are several reasons why parents choose to do a 1 year old cake smash:
- Memories: It’s a unique way to celebrate your baby’s first birthday and create lasting memories.
- Photos: The photos you get from a cake smash session are often some of the most precious and funny moments of your baby’s first year.
- Fun: Babies love the sensory experience of feeling and tasting the cake, which can be a joyful and engaging activity for them.
- Tradition: It’s a fun tradition that many families enjoy and pass down through generations.
When to Do a 1 Year Old Cake Smash

The best time to do a 1 year old cake smash is typically during or right after the main birthday party. Here are a few tips:
- During the Party: If you have a small, intimate gathering, you can incorporate the cake smash into the party itself. Just make sure to have a designated area that can get messy.
- After the Party: For larger parties, it might be better to do the cake smash after the guests have left. This way, you can focus on your baby and get some high-quality photos without distractions.
How to Prepare for a 1 Year Old Cake Smash
Preparation is key to ensuring a smooth and enjoyable 1 year old cake smash. Here’s what you need to do:
Choose the Right Cake
Select a simple, kid-friendly cake that your baby can easily handle. Some popular options include:
- Fruit Puree Cakes: These are made with natural ingredients and are safe for babies who are just starting to eat solids.
- Sugar-Free Cakes: If you’re concerned about sugar intake, consider a sugar-free or low-sugar cake.
- Mini Cupcakes: These are easier for babies to hold and play with.
For more ideas, check out Happiest Baby’s guide to smash cake ideas.
Pick a Suitable Location
Choose a location that can handle a bit of mess. Some good options include:
- Outdoor Area: A grassy area or a patio can be a great spot for a cake smash.
- Bathtub: If you prefer an indoor option, the bathtub is a convenient choice as it’s easy to clean up afterward.
- Playroom or Kitchen: Lay down a plastic sheet or a large towel to catch any mess.
Dress Your Baby Appropriately
Since the cake smash can get messy, dress your baby in clothes that are easy to clean or a special outfit that you don’t mind getting dirty. Some parents opt for a cute onesie or a simple dress. You can also use a bib to protect their clothes.
Have a Camera Ready
Make sure you have a camera or smartphone ready to capture the moment. If you want professional-quality photos, consider hiring a photographer. They can help you set up the scene and capture the best angles.
How to Capture the Moment
Taking great photos during a 1 year old cake smash is all about being prepared and flexible. Here are some tips:
- Use a Fast Shutter Speed: Babies move quickly, so a fast shutter speed will help you capture clear, sharp photos.
- Get Down to Their Level: Kneel or sit on the ground to get eye-level shots of your baby.
- Use Natural Light: If you’re indoors, try to position your baby near a window to take advantage of natural light.
- Be Patient: Your baby might be hesitant at first, so give them time to warm up to the cake. The best moments often happen when they start to really enjoy themselves.
FAQs About 1 Year Old Cake Smashes
Is a cake smash safe for my baby?
Yes, a 1 year old cake smash is generally safe as long as you choose a cake made with safe, kid-friendly ingredients. Avoid cakes with nuts, chocolate, or any other allergens. Always supervise your baby during the activity to ensure they don’t choke on any pieces of cake.
Can I do a cake smash if my baby hasn’t started solids yet?
Absolutely! You can still do a cake smash even if your baby hasn’t started solids. Just make sure to choose a cake that is safe for babies, such as a fruit puree cake. The main goal is to have fun and capture some adorable moments.
Do I need to hire a professional photographer?
While hiring a professional photographer can result in higher-quality photos, it’s not necessary. Many parents get great results using their smartphones or cameras. If you’re comfortable taking photos yourself, go for it!
What should I do with the leftover cake?
If there’s any leftover cake after the cake smash, you can share it with family and friends or save it for later. Some parents also freeze the leftover cake for future use.
Conclusion
A 1 year old cake smash is a wonderful way to celebrate your baby’s first birthday and create lasting memories. With a little preparation and the right approach, you can ensure that both you and your baby have a fun and memorable experience. Don’t forget to capture the moment with plenty of photos, and most importantly, enjoy the time with your little one!
For more tips on planning a memorable first birthday party, check out our First Birthday Party Ideas and Baby First Year Milestones articles.
Happy celebrating!
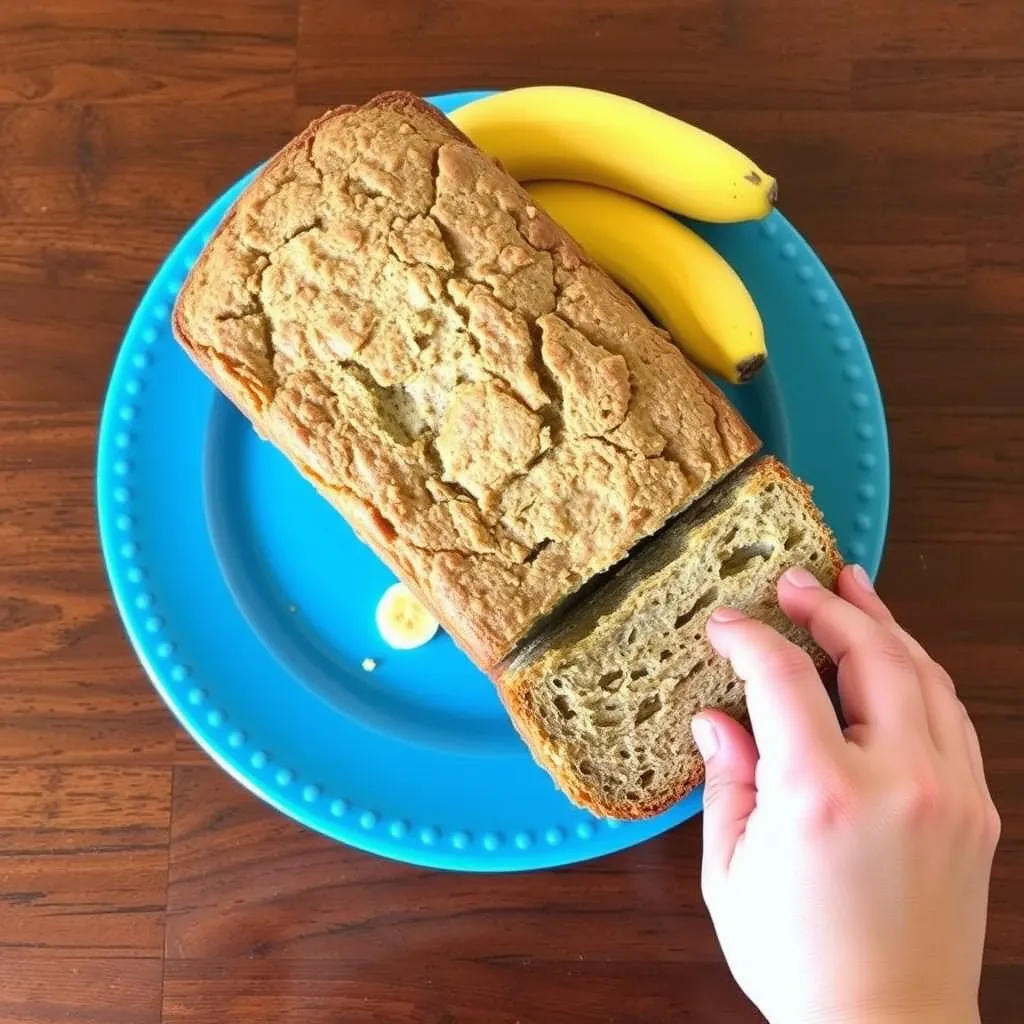
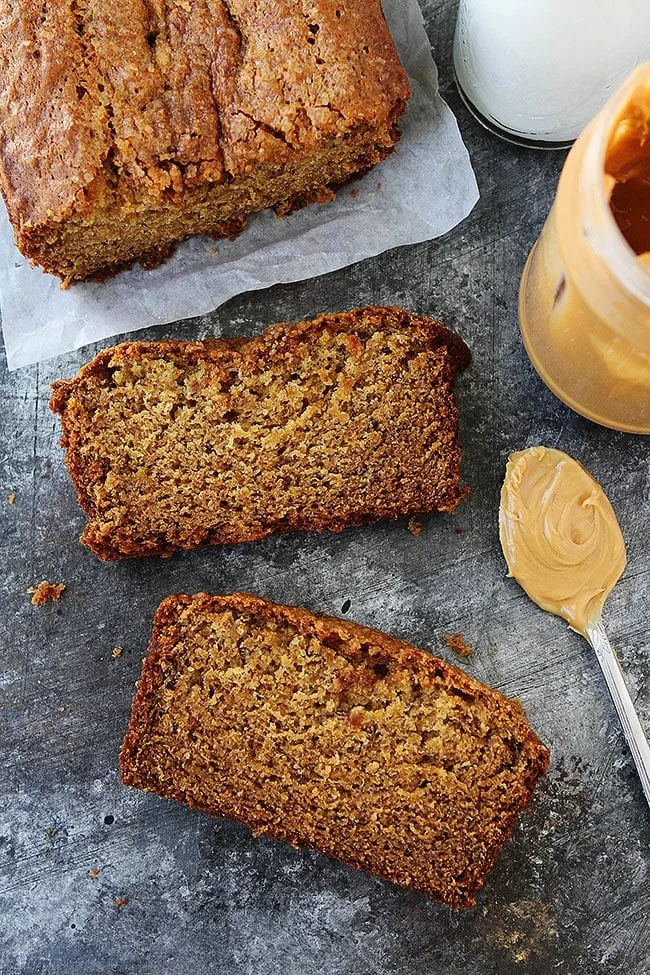
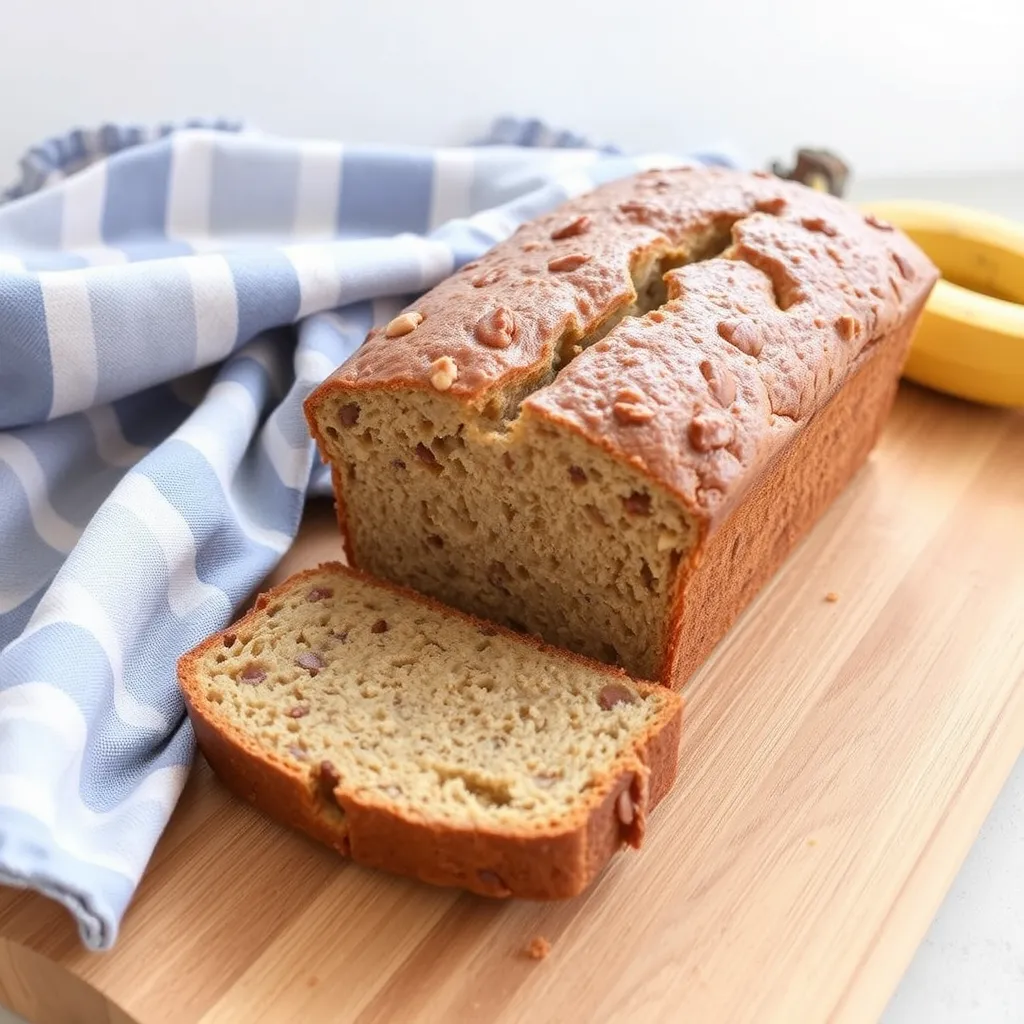
How to Serve Banana Bread to Baby A Simple Guide for Parents
Are you wondering how to serve banana bread to baby? Look no further! This guide will provide you with all the essential information you need to ensure your little one enjoys this delicious treat safely and nutritiously. Whether you’re a first-time parent or a seasoned pro, this article will cover everything from preparation to serving tips.
Table of Contents
Key Takeaways
- Banana bread is safe for babies over 6 months old.
- Choose a recipe without added sugar and nuts for younger babies.
- Start with small, manageable pieces to prevent choking.
- Monitor your baby for any allergic reactions after introducing banana bread.
- Store leftover banana bread properly to maintain freshness and safety.
Is Banana Bread Safe for Babies?
Yes, banana bread is generally safe for babies over 6 months old. However, it’s important to choose the right type of banana bread and prepare it correctly. Here are some key points to consider:
Age Considerations
According to the American Academy of Pediatrics, babies can start eating solid foods around 6 months of age. At this stage, their digestive systems are more developed, and they can handle a variety of textures.
Choosing the Right Recipe
When making banana bread for your baby, opt for a recipe that is free from added sugars and nuts. These ingredients can pose a risk of choking or allergic reactions. A simple, homemade banana bread recipe is the best choice. Here’s a basic recipe you can try:
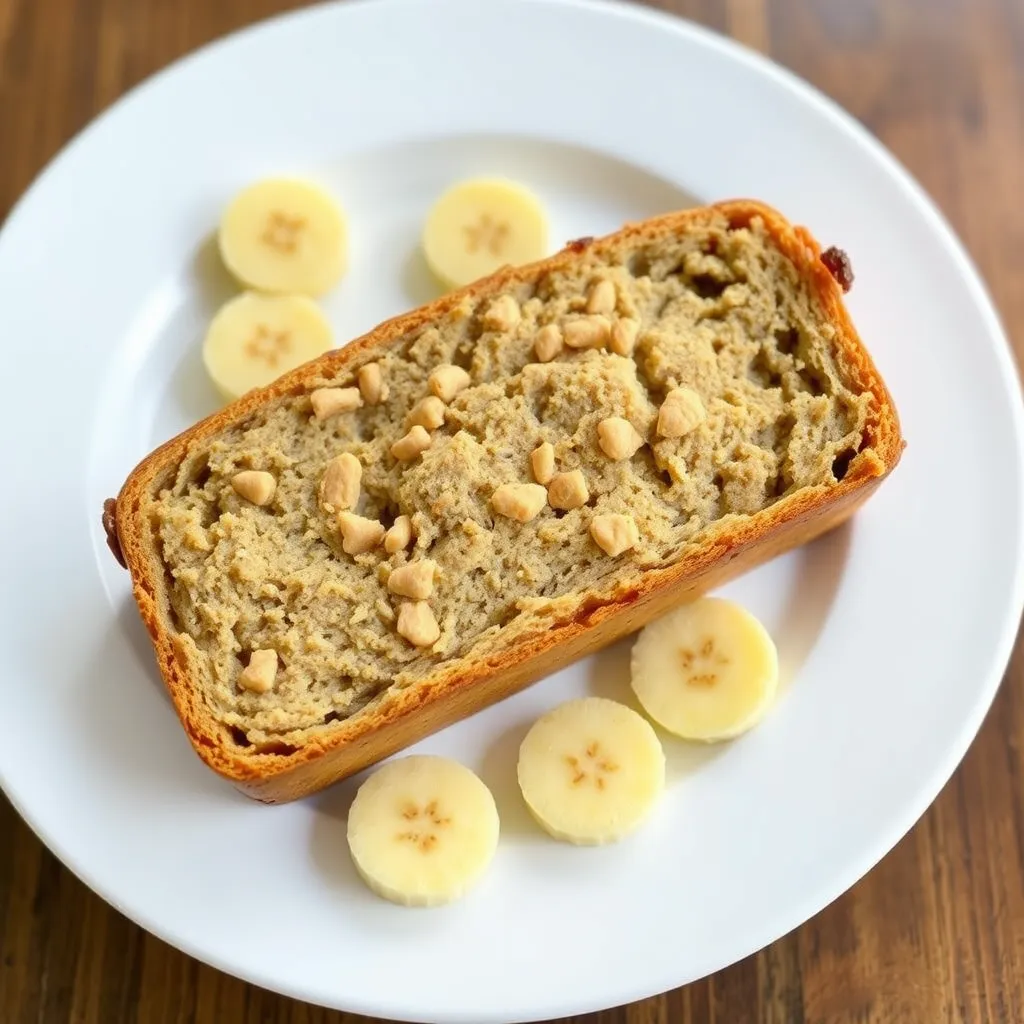
10 Banana Bread Recipes for Baby
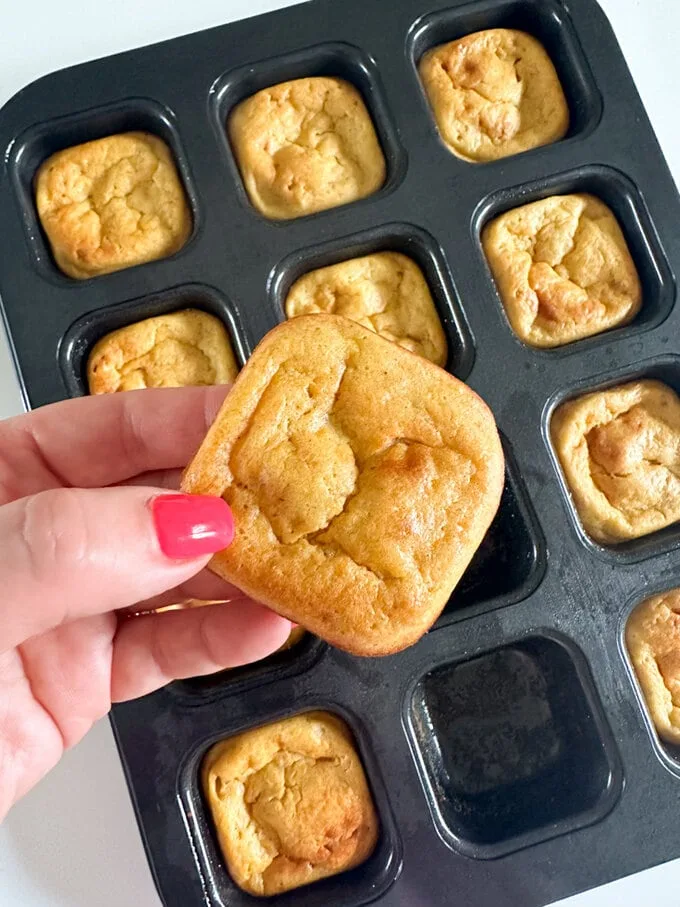
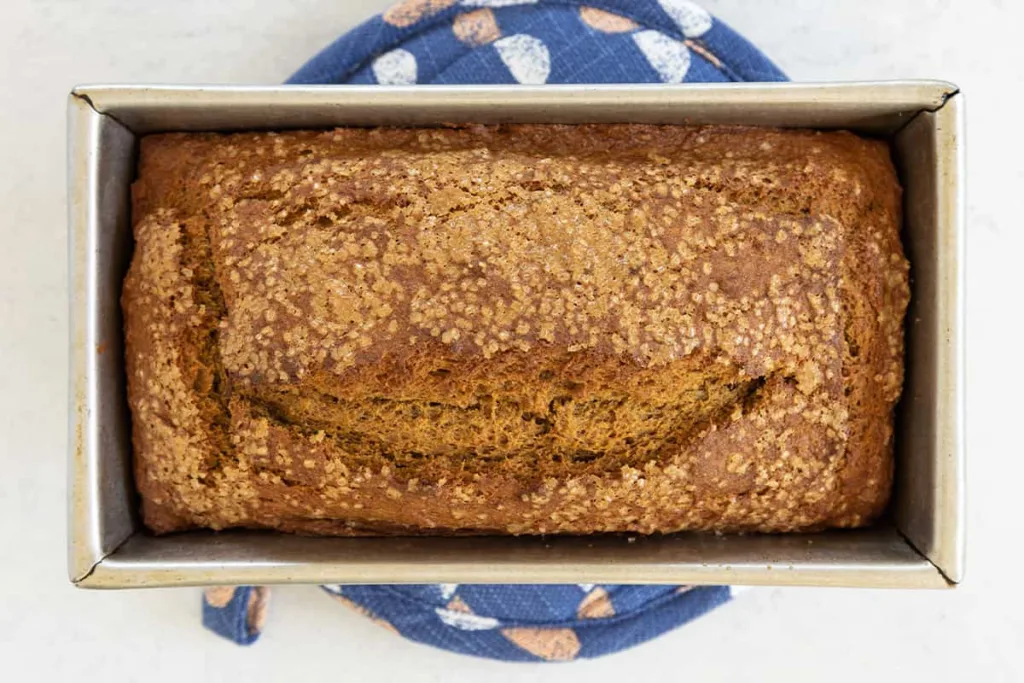
1. Basic Banana Bread

This simple recipe is perfect for beginners and requires minimal ingredients.
- 2 ripe bananas, mashed
- 1 egg
- 1/4 cup melted butter
- 1 teaspoon baking powder
- 1/2 teaspoon vanilla extract
- 1 cup whole wheat flour
Instructions:
- Preheat your oven to 350°F (175°C).
- In a large bowl, mix the mashed bananas, egg, melted butter, baking powder, and vanilla extract.
- Gradually stir in the whole wheat flour until well combined.
- Pour the mixture into a greased loaf pan.
- Bake for 35-40 minutes, or until a toothpick inserted into the center comes out clean.
- Cool on a wire rack before slicing and serving to your baby.
⭐ What Parents Use When Making This
These are popular, parent-approved items that make this easier and less stressful.
Makes smooth purees fast and saves cleanup time.
👉 Check Price on AmazonPerfect for storing meals safely in the fridge or freezer.
👉 See on AmazonGentle on gums and easy for first feeds.
👉 View on Amazon


2. Oatmeal Banana Bread
Oats add extra fiber and a delightful texture to this banana bread.
- 2 ripe bananas, mashed
- 1 egg
- 1/4 cup applesauce
- 1 teaspoon baking powder
- 1/2 teaspoon vanilla extract
- 1 cup rolled oats
Instructions:
- Preheat your oven to 350°F (175°C).
- In a large bowl, mix the mashed bananas, egg, applesauce, baking powder, and vanilla extract.
- Stir in the rolled oats until well combined.
- Pour the mixture into a greased loaf pan.
- Bake for 35-40 minutes, or until a toothpick inserted into the center comes out clean.
- Cool on a wire rack before slicing and serving to your baby.
3. Carrot Banana Bread
Add some extra vitamins and minerals with this carrot-infused banana bread.
- 2 ripe bananas, mashed
- 1 egg
- 1/4 cup melted coconut oil
- 1 teaspoon baking powder
- 1/2 teaspoon vanilla extract
- 1/2 cup grated carrots
- 1 cup whole wheat flour
Instructions:
- Preheat your oven to 350°F (175°C).
- In a large bowl, mix the mashed bananas, egg, melted coconut oil, baking powder, and vanilla extract.
- Stir in the grated carrots and whole wheat flour until well combined.
- Pour the mixture into a greased loaf pan.
- Bake for 35-40 minutes, or until a toothpick inserted into the center comes out clean.
- Cool on a wire rack before slicing and serving to your baby.
4. Almond Flour Banana Bread

This gluten-free option is perfect for babies with dietary restrictions.
- 2 ripe bananas, mashed
- 2 eggs
- 1/4 cup melted coconut oil
- 1 teaspoon baking powder
- 1/2 teaspoon vanilla extract
- 1 cup almond flour
Instructions:
- Preheat your oven to 350°F (175°C).
- In a large bowl, mix the mashed bananas, eggs, melted coconut oil, baking powder, and vanilla extract.
- Stir in the almond flour until well combined.
- Pour the mixture into a greased loaf pan.
- Bake for 35-40 minutes, or until a toothpick inserted into the center comes out clean.
- Cool on a wire rack before slicing and serving to your baby.
5. Avocado Banana Bread

Avocado adds healthy fats and a creamy texture to this banana bread.
- 2 ripe bananas, mashed
- 1 ripe avocado, mashed
- 1 egg
- 1/4 cup applesauce
- 1 teaspoon baking powder
- 1/2 teaspoon vanilla extract
- 1 cup whole wheat flour
Instructions:
- Preheat your oven to 350°F (175°C).
- In a large bowl, mix the mashed bananas, mashed avocado, egg, applesauce, baking powder, and vanilla extract.
- Stir in the whole wheat flour until well combined.
- Pour the mixture into a greased loaf pan.
- Bake for 35-40 minutes, or until a toothpick inserted into the center comes out clean.
- Cool on a wire rack before slicing and serving to your baby.
6. Pumpkin Banana Bread
Pumpkin adds a touch of fall flavor and extra nutrients to this banana bread.
- 2 ripe bananas, mashed
- 1/4 cup pumpkin puree
- 1 egg
- 1/4 cup melted butter
- 1 teaspoon baking powder
- 1/2 teaspoon vanilla extract
- 1 cup whole wheat flour
Instructions:
- Preheat your oven to 350°F (175°C).
- In a large bowl, mix the mashed bananas, pumpkin puree, egg, melted butter, baking powder, and vanilla extract.
- Stir in the whole wheat flour until well combined.
- Pour the mixture into a greased loaf pan.
- Bake for 35-40 minutes, or until a toothpick inserted into the center comes out clean.
- Cool on a wire rack before slicing and serving to your baby.
⭐ What Parents Use When Making This
These are popular, parent-approved items that make this easier and less stressful.
✅ Tot Cut & Prep Set, Baby Eating Essentials
Makes smooth purees fast and saves cleanup time. 👉 Check Price on Amazon
✅ Baby-Led Weaning Food Cutters
Perfect for storing meals safely in the fridge or freezer. 👉 See on Amazon
✅ Tot Mash Maker Baby Food Mill
Gentle on gums and easy for first feeds. 👉 View on Amazon

7. Sweet Potato Banana Bread
Sweet potatoes are a great source of vitamins and minerals for your baby.
- 2 ripe bananas, mashed
- 1/4 cup sweet potato puree
- 1 egg
- 1/4 cup melted butter
- 1 teaspoon baking powder
- 1/2 teaspoon vanilla extract
- 1 cup whole wheat flour
Instructions:
- Preheat your oven to 350°F (175°C).
- In a large bowl, mix the mashed bananas, sweet potato puree, egg, melted butter, baking powder, and vanilla extract.
- Stir in the whole wheat flour until well combined.
- Pour the mixture into a greased loaf pan.
- Bake for 35-40 minutes, or until a toothpick inserted into the center comes out clean.
- Cool on a wire rack before slicing and serving to your baby.
8. Blueberry Banana Bread

Blueberries add a burst of color and antioxidants to this banana bread.
- 2 ripe bananas, mashed
- 1/4 cup fresh blueberries
- 1 egg
- 1/4 cup melted butter
- 1 teaspoon baking powder
- 1/2 teaspoon vanilla extract
- 1 cup whole wheat flour
Instructions:
- Preheat your oven to 350°F (175°C).
- In a large bowl, mix the mashed bananas, egg, melted butter, baking powder, and vanilla extract.
- Gently fold in the blueberries.
- Stir in the whole wheat flour until well combined.
- Pour the mixture into a greased loaf pan.
- Bake for 35-40 minutes, or until a toothpick inserted into the center comes out clean.
- Cool on a wire rack before slicing and serving to your baby.
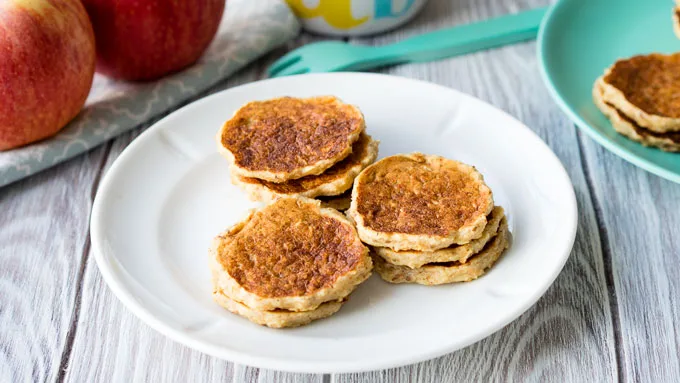
9. Apple Cinnamon Banana Bread

The combination of apple and cinnamon creates a delicious and aromatic banana bread.
- 2 ripe bananas, mashed
- 1/4 cup grated apple
- 1 egg
- 1/4 cup melted butter
- 1 teaspoon baking powder
- 1/2 teaspoon vanilla extract
- 1/2 teaspoon ground cinnamon
- 1 cup whole wheat flour
Instructions:
- Preheat your oven to 350°F (175°C).
- In a large bowl, mix the mashed bananas, grated apple, egg, melted butter, baking powder, vanilla extract, and ground cinnamon.
- Stir in the whole wheat flour until well combined.
- Pour the mixture into a greased loaf pan.
- Bake for 35-40 minutes, or until a toothpick inserted into the center comes out clean.
- Cool on a wire rack before slicing and serving to your baby.
10. Peanut Butter Banana Bread
Peanut butter adds protein and a rich flavor to this banana bread.
- 2 ripe bananas, mashed
- 1/4 cup natural peanut butter
- 1 egg
- 1/4 cup melted butter
- 1 teaspoon baking powder
- 1/2 teaspoon vanilla extract
- 1 cup whole wheat flour
Instructions:
- Preheat your oven to 350°F (175°C).
- In a large bowl, mix the mashed bananas, natural peanut butter, egg, melted butter, baking powder, and vanilla extract.
- Stir in the whole wheat flour until well combined.
- Pour the mixture into a greased loaf pan.
- Bake for 35-40 minutes, or until a toothpick inserted into the center comes out clean.
- Cool on a wire rack before slicing and serving to your baby.
Banana Pancakes for Baby 10 Simple 4-Ingredient Recipes
⭐ What Parents Use When Making This
These are popular, parent-approved items that make this easier and less stressful.
✅ Tot Cut & Prep Set, Baby Eating Essentials
Makes smooth purees fast and saves cleanup time. 👉 Check Price on Amazon
✅ Baby-Led Weaning Food Cutters
Perfect for storing meals safely in the fridge or freezer. 👉 See on Amazon
✅ Tot Mash Maker Baby Food Mill
Gentle on gums and easy for first feeds. 👉 View on Amazon

How to Serve Banana Bread to Baby
Once you have your banana bread ready, it’s time to prepare it for your little one. Follow these steps to ensure a safe and enjoyable experience:
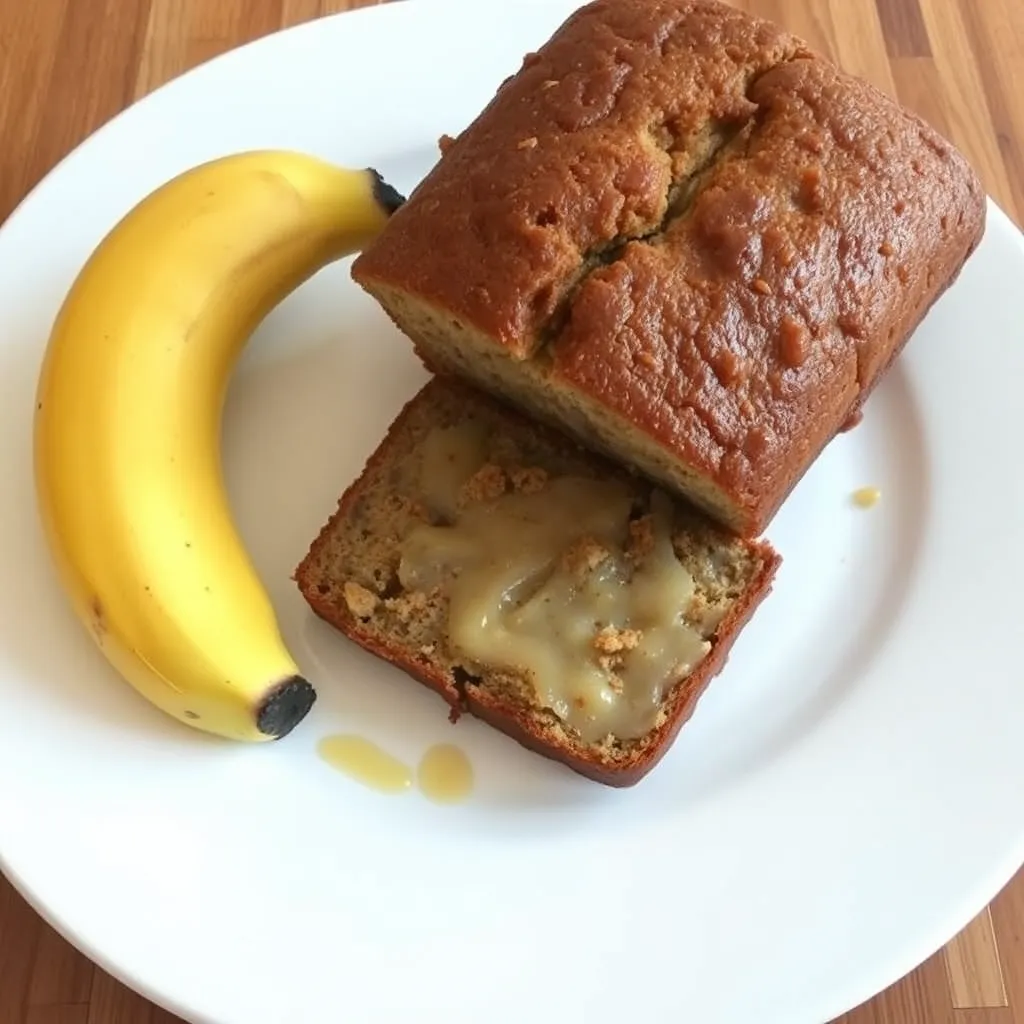
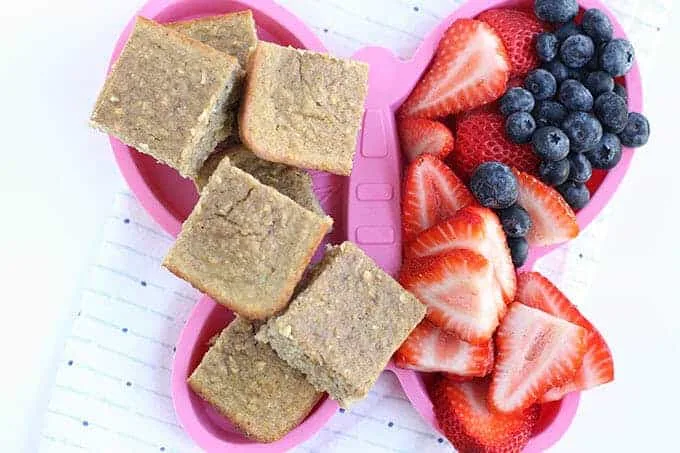
Cutting the Bread
Start by cutting the banana bread into small, manageable pieces. This helps prevent choking and makes it easier for your baby to handle. Aim for pieces that are about the size of your baby’s finger.
Introducing Banana Bread
When introducing banana bread to your baby, start with a small piece and watch for any signs of allergic reactions. Common symptoms include rash, hives, difficulty breathing, and vomiting. If you notice any of these symptoms, stop feeding immediately and consult your pediatrician.
Serving Tips
Here are some additional tips to make serving banana bread to your baby a success:
Temperature
Make sure the banana bread is at room temperature or slightly warm before serving. Hot food can burn your baby’s mouth, so it’s best to let it cool down.
Texture
If your baby is just starting to eat solids, you can mash the banana bread slightly to make it easier to swallow. As your baby gets more comfortable with different textures, you can offer larger, firmer pieces.
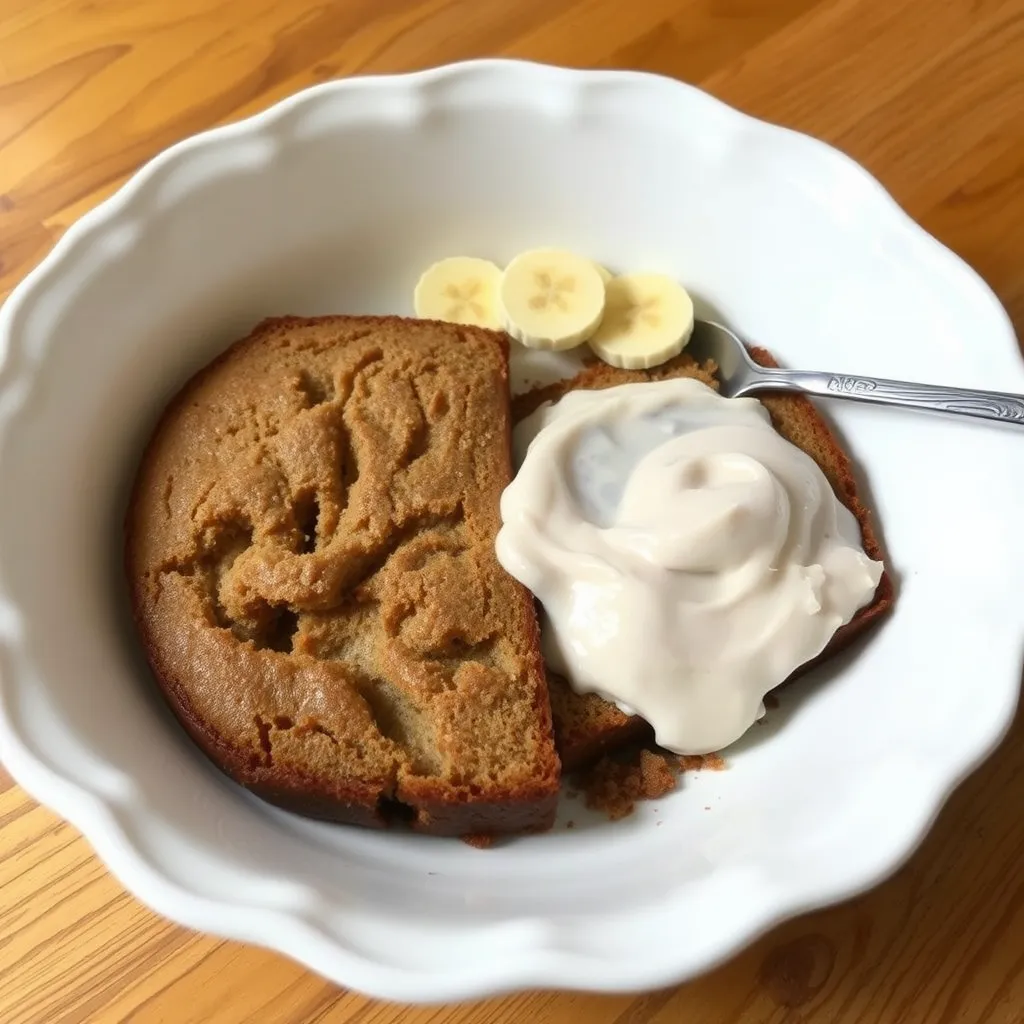
Pairing with Other Foods
Banana bread pairs well with other baby-friendly foods. You can serve it alongside pureed fruits, vegetables, or yogurt. This not only adds variety to your baby’s diet but also ensures they get a balanced mix of nutrients.
Storing Banana Bread
Proper storage is crucial to keep your banana bread fresh and safe for your baby. Here are some tips:
Room Temperature
Store the banana bread in an airtight container at room temperature for up to 3 days. Make sure the bread is completely cooled before storing it.
Refrigeration
If you want to extend the shelf life, you can store the banana bread in the refrigerator for up to 5 days. Wrap it tightly in plastic wrap or aluminum foil to prevent it from drying out.
Freezing
To keep the banana bread for a longer period, you can freeze it. Slice the bread and place the slices in a freezer-safe bag or container. Label the bag with the date and store it in the freezer for up to 3 months. When you’re ready to serve, thaw the bread at room temperature or in the refrigerator overnight.
Frequently Asked Questions (FAQ)
Can I add honey to banana bread for my baby?
No, it’s best to avoid adding honey to banana bread for babies under 1 year old. Honey can contain spores of Clostridium botulinum, which can cause botulism in infants.
Can I use alternative flours?
Yes, you can use alternative flours like oat flour or almond flour if your baby has specific dietary needs. Just make sure to choose a flour that is safe for your baby and doesn’t contain any allergens.
What if my baby doesn’t like banana bread?
Every baby has different tastes and preferences. If your baby doesn’t seem to enjoy banana bread, don’t worry. There are plenty of other healthy and delicious foods you can try. Keep offering a variety of foods to help your baby develop a diverse palate.
Can I use store-bought banana bread?
While it’s possible to use store-bought banana bread, it’s best to check the ingredient list carefully. Many commercial brands contain added sugars, preservatives, and other additives that may not be suitable for babies. Homemade banana bread is always the safer and healthier option.
Conclusion
Serving banana bread to your baby can be a delightful and nutritious experience. By choosing the right recipe, preparing the bread correctly, and following these serving tips, you can ensure that your little one enjoys this tasty treat safely. Remember to monitor your baby for any allergic reactions and introduce new foods gradually. Happy feeding!
For more tips on feeding your baby, check out our other articles on introducing solids to babies and baby-friendly recipes.
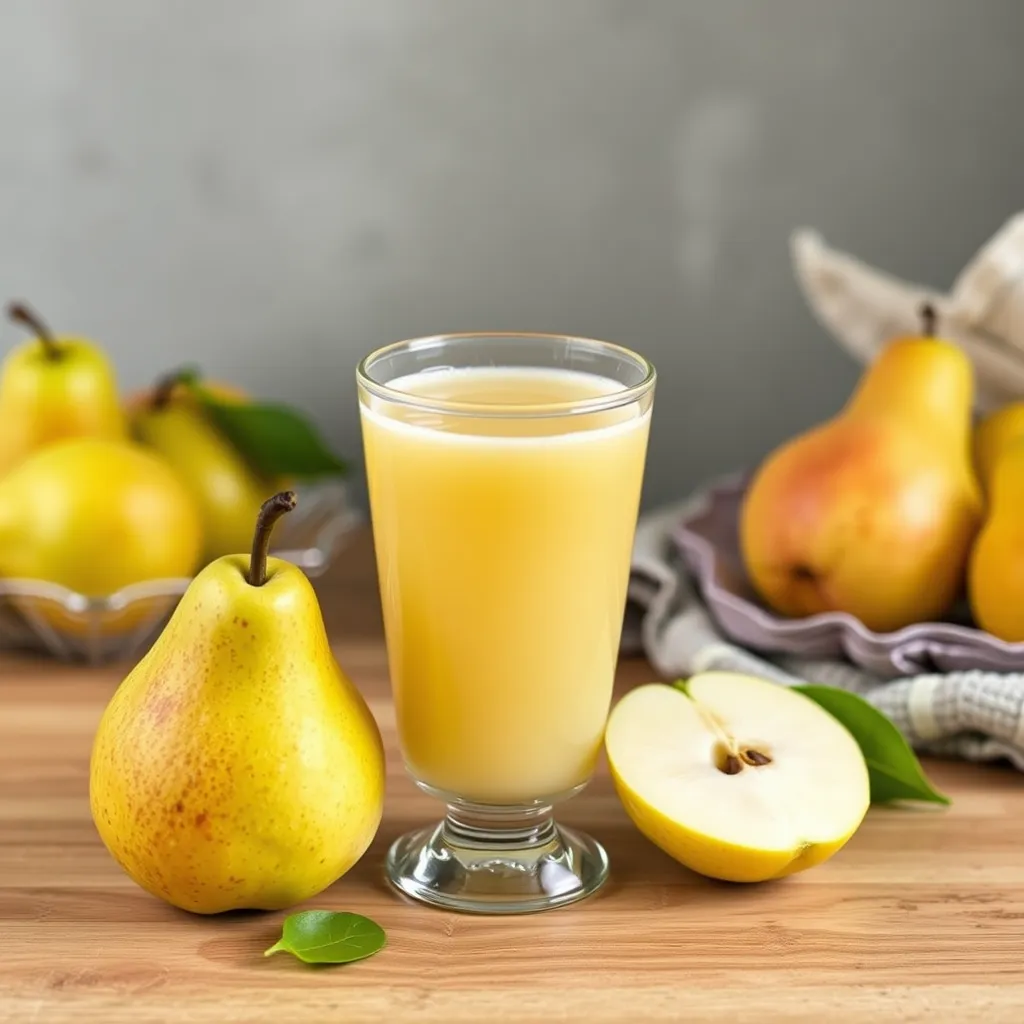
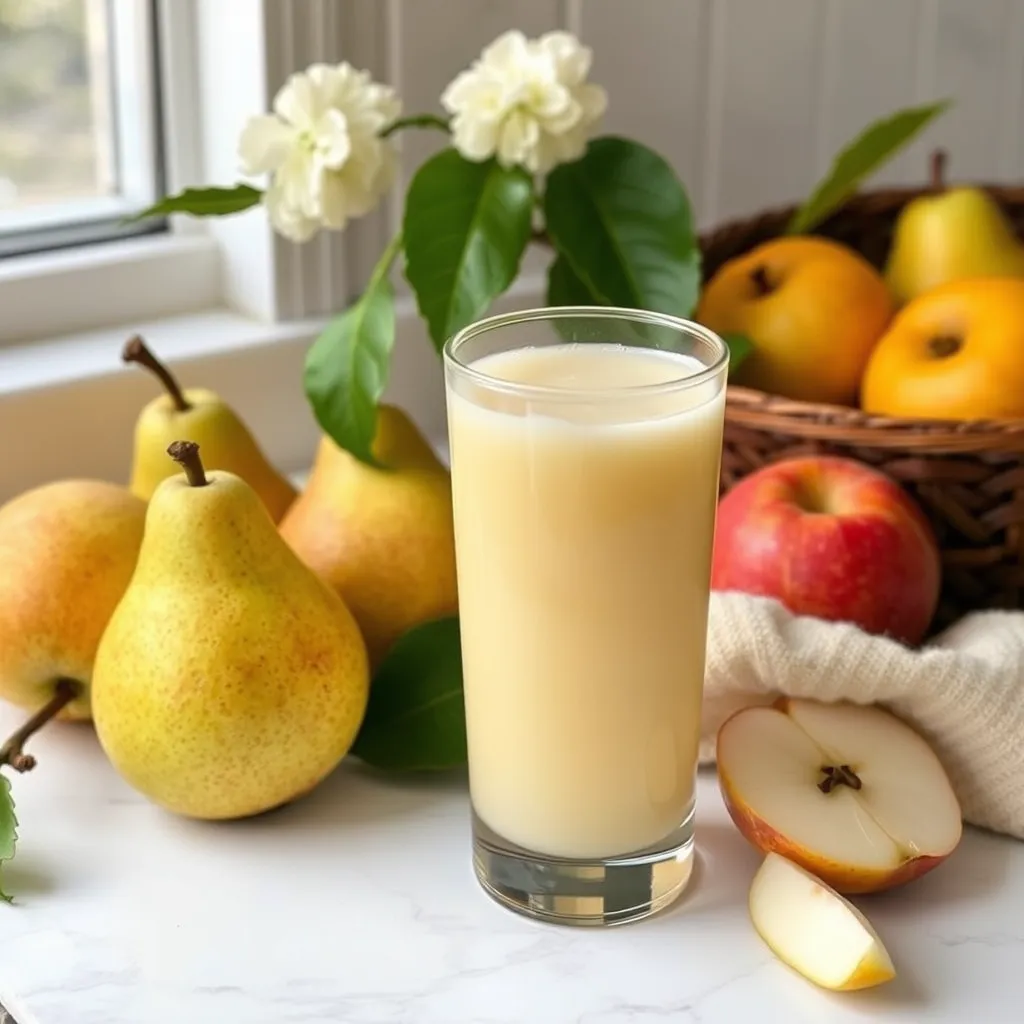
Pear Juice for 7 Month Old A Safe and Healthy Choice
As a parent, you want to ensure your little one gets the best nutrition possible. Introducing solid foods and juices to your baby’s diet can be both exciting and daunting. One popular choice among parents is pear juice for 7 month olds. But is it safe? What are the benefits? Let’s dive into everything you need to know about giving pear juice to your baby.
Table of Contents
Key Takeaways:
- Pear juice is a safe and healthy choice for 7-month-olds.
- It is rich in essential nutrients and can help with digestion.
- Always dilute pear juice with water before giving it to your baby.
- Start with small amounts and monitor for any allergic reactions.
- Consult your pediatrician before introducing new foods to your baby’s diet.
Is Pear Juice Safe for 7 Month Olds?
Yes, pear juice is generally considered safe for 7-month-olds. According to the American Academy of Pediatrics (AAP), you can introduce fruit juices to your baby’s diet after they reach 6 months of age. However, it’s important to choose the right type of juice and prepare it properly to ensure it’s safe for your baby.
Benefits of Pear Juice for 7 Month Old Babies
Pear juice offers several benefits for your 7-month-old baby:
- Nutrient-rich: Pears are a good source of vitamins and minerals, including vitamin C, vitamin K, and potassium. These nutrients support your baby’s growth and development.
- Digestive Aid: Pears contain fiber, which can help regulate your baby’s bowel movements and prevent constipation. This is particularly useful for babies who are starting to eat more solid foods.
- Gentle on the Stomach: Pear juice is less acidic than many other fruit juices, making it gentler on your baby’s delicate stomach.
- Hydration: Giving your baby pear juice can help keep them hydrated, especially during hot weather or when they are teething.
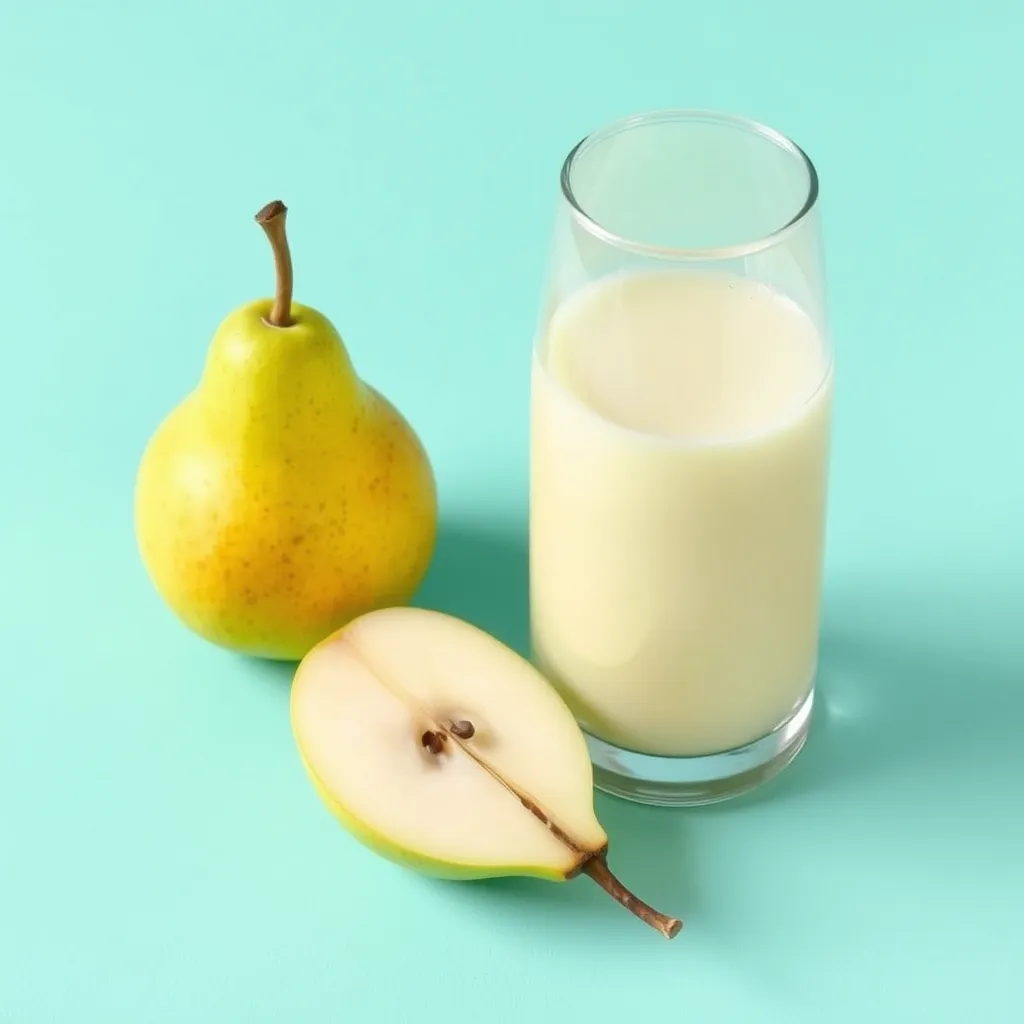
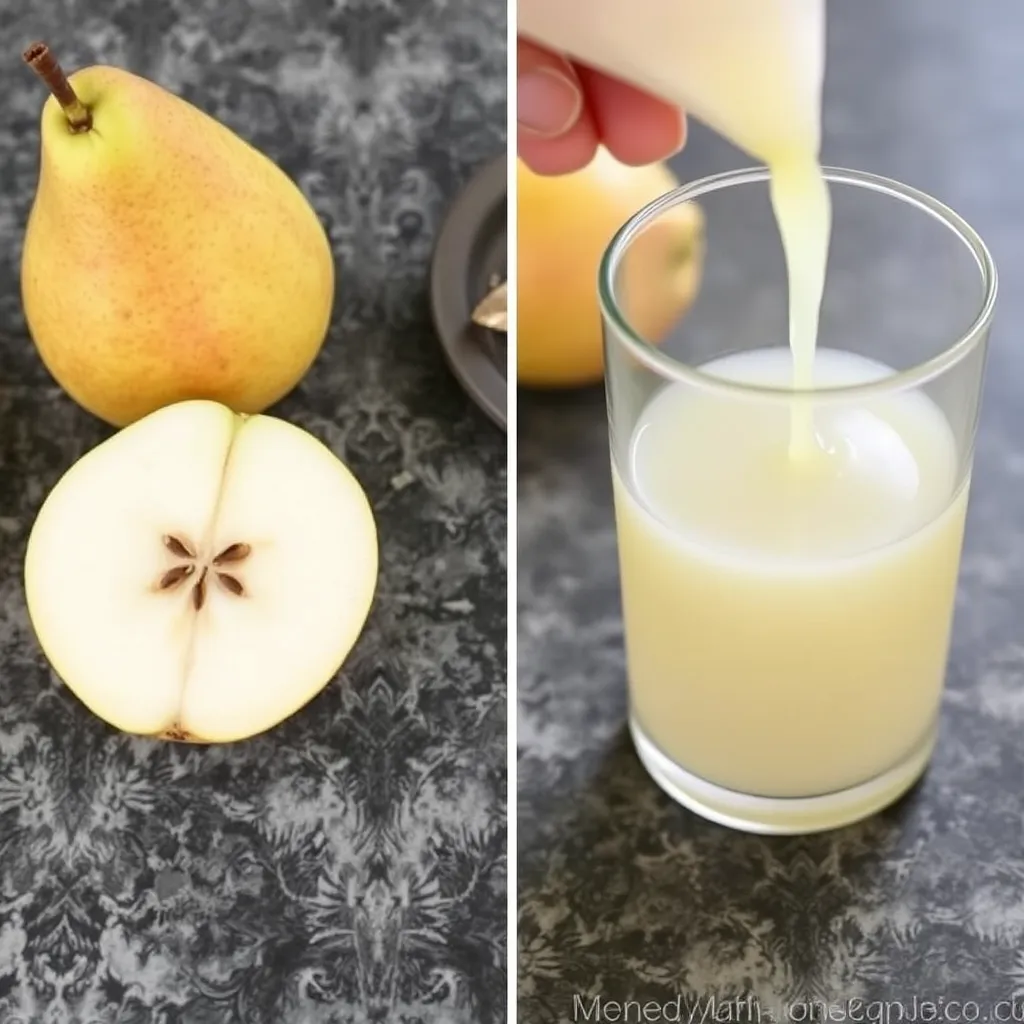
How to Prepare Pear Juice for Your Baby
When preparing pear juice for your 7-month-old, follow these steps to ensure it’s safe and suitable for their needs:
- Choose Fresh Pears: Opt for fresh, ripe pears without any bruises or blemishes. Organic pears are a great choice to avoid pesticides.
- Wash Thoroughly: Wash the pears under running water to remove any dirt or residue.
- Peel and Core: Peel the pears and remove the core and seeds. These parts can be difficult for your baby to digest and may pose a choking hazard.
- Blend or Puree: Blend the peeled and cored pears until smooth. You can use a blender, food processor, or baby food maker.
- Dilute with Water: Dilute the pear puree with water to create a smooth, drinkable consistency. A common ratio is 1 part pear puree to 4 parts water.
- Serve Fresh: Serve the diluted pear juice immediately or store it in the refrigerator for up to 24 hours. Avoid giving your baby leftover juice that has been sitting out.
Tips for Introducing Pear Juice to Your Baby
Here are some tips to help you introduce pear juice to your 7 month old safely:
- Start with Small Amounts: Begin with a small amount of diluted pear juice, about 1-2 ounces, and gradually increase the amount over time.
- Monitor for Allergies: Watch for any signs of an allergic reaction, such as rash, swelling, or difficulty breathing. If you notice any symptoms, stop giving the juice and consult your pediatrician.
- Avoid Added Sugars: Choose unsweetened pear juice or make your own to avoid added sugars. Too much sugar can lead to tooth decay and other health issues.
- Limit Daily Intake: The AAP recommends limiting fruit juice intake to 4 ounces per day for babies between 6-12 months of age. Excessive juice consumption can lead to diarrhea and other digestive issues.
- Use a Sippy Cup: Encourage your baby to drink pear juice from a sippy cup rather than a bottle. This helps promote proper oral development and reduces the risk of tooth decay.
Recipes for Homemade Pear Juice
Making homemade pear juice is easy and ensures that your baby is getting a fresh, nutritious drink. Here are two simple recipes to try:
Basic Homemade Pear Juice
Ingredients:
- 1 ripe pear
- 1 cup water
Instructions:
- Wash, peel, and core the pear.
- Cut the pear into small pieces and place them in a blender or food processor.
- Add 1 cup of water and blend until smooth.
- Strain the mixture through a fine-mesh sieve to remove any pulp.
- Dilute the juice with additional water if needed.
- Serve immediately or refrigerate for later use.
Spiced Pear Juice
Ingredients:
- 1 ripe pear
- 1 cup water
- 1/4 teaspoon cinnamon
- A dash of nutmeg (optional)
Instructions:
- Wash, peel, and core the pear.
- Cut the pear into small pieces and place them in a blender or food processor.
- Add 1 cup of water and the spices.
- Blend until smooth.
- Strain the mixture through a fine-mesh sieve to remove any pulp.
- Dilute the juice with additional water if needed.
- Serve immediately or refrigerate for later use.
Frequently Asked Questions (FAQ)
Can I give my 7-month-old store-bought pear juice?
While store-bought pear juice is generally safe, it’s best to choose unsweetened varieties and check the ingredient list for any added sugars or preservatives. Making your own pear juice at home is often a better option as it allows you to control the ingredients and ensure freshness.
How often should I give my baby pear juice?
The AAP recommends limiting fruit juice intake to 4 ounces per day for babies between 6-12 months of age. Depending on your baby’s needs and preferences, you can offer pear juice once or twice a day.
Can pear juice cause diarrhea in babies?
While pear juice is generally well-tolerated, excessive consumption can lead to diarrhea due to its high sugar content. Always dilute the juice with water and limit daily intake to 4 ounces or less.
What are the signs of an allergic reaction to pear juice?
Signs of an allergic reaction to pear juice may include rash, hives, swelling, difficulty breathing, or vomiting. If you notice any of these symptoms, stop giving the juice and contact your pediatrician immediately.
Can pear juice help with baby constipation?
Yes, pear juice can help relieve constipation in babies due to its high fiber content. However, it’s important to introduce pear juice gradually and monitor your baby’s response. If constipation persists, consult your pediatrician for further advice.
Conclusion
Pear juice is a safe and nutritious option for 7-month-olds when prepared and introduced correctly. It offers numerous benefits, including essential nutrients, digestive aid, and hydration. By following the tips and recipes provided, you can ensure that your baby enjoys the delicious taste of pear juice while reaping its health benefits. Always consult your pediatrician before introducing new foods to your baby’s diet to ensure they are appropriate and safe.
For more information on baby nutrition and recipes, check out our other articles:
- Easy and Healthy Cures for Baby Constipation
- Pear for Babies: When to Introduce, Benefits, and Recipes
- Pear for Baby: Health Benefits, Nutritional Value, and Recipes
Happy feeding!
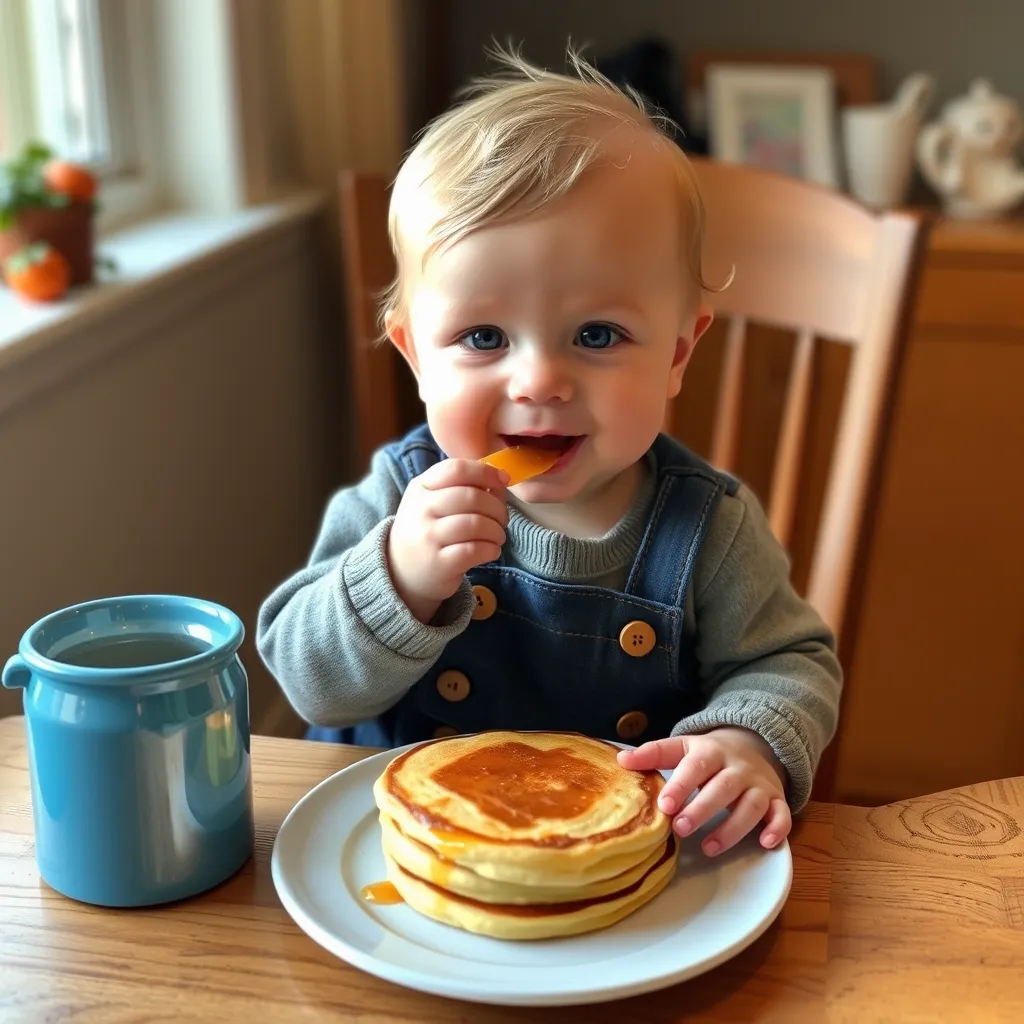
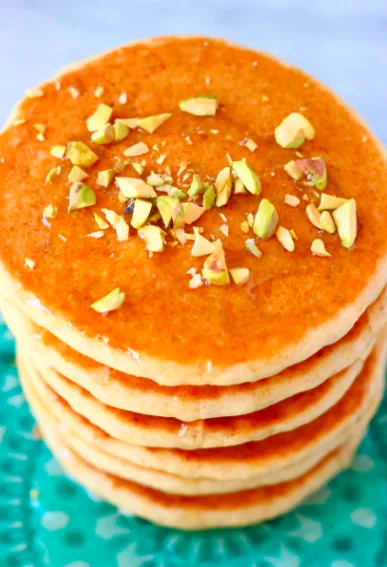
Pancakes for Babies with No Teeth Perfect for Your Baby!
Introducing your baby to solid foods can be an exciting yet daunting experience. One of the most popular and nutritious options is pancakes. But how do you make pancakes that are safe and enjoyable for babies who haven’t grown their teeth yet? This guide will walk you through everything you need to know about making pancakes for babies with no teeth.
Table of Contents
Key Takeaways
- Simple Ingredients: Use only a few, wholesome ingredients to make baby-friendly pancakes.
- Texture Matters: Ensure the pancakes are soft and easy to gum.
- Nutrient-Rich: Add mashed fruits or vegetables to boost nutrition.
- Portion Control: Serve small, manageable pieces to prevent choking.
- Supervision: Always watch your baby while they eat to ensure safety.
Why Pancakes for Babies with No Teeth?
Pancakes are a fantastic introduction to solids because they are:
- Soft and Easy to Gum: Babies without teeth can easily mash them with their gums.
- High in Nutrients: You can add various fruits and vegetables to make them more nutritious.
- Fun to Eat: They are a great way to encourage self-feeding and hand-eye coordination.
1. Basic 3-Ingredient Pancakes
- 1 ripe banana
- 2 large eggs
- 1/4 cup rolled oats (optional for texture)
Step-by-Step Recipe
- Mash the Banana: In a mixing bowl, mash the ripe banana until it’s smooth.
- Add Eggs: Crack the eggs into the bowl and mix well until the batter is smooth and creamy.
- Blend Oats (Optional): If you want a thicker texture, blend the rolled oats into a fine powder and add it to the mixture.
- Cook the Pancakes: Heat a non-stick pan over medium heat. Drop spoonfuls of the batter onto the pan and cook for about 2 minutes on each side or until golden brown.
- Cool and Serve: Let the pancakes cool slightly before serving. Cut them into small, manageable pieces for your baby.
💡 These are the tools parents mention most
These are popular, parent-approved items that make this easier and less stressful.
Makes smooth purees fast and saves cleanup time.
👉 Check Price on AmazonPerfect for storing meals safely in the fridge or freezer.
👉 See on AmazonGentle on gums and easy for first feeds.
👉 View on Amazon

2. Two-Ingredient Pancakes

Ingredients:
- 1 ripe banana
- 2 large eggs
Instructions:
- Mash the banana in a mixing bowl until it is smooth.
- Add the eggs to the bowl and whisk until well combined.
- Heat a non-stick skillet over medium heat. Lightly grease the skillet with a small amount of oil or butter.
- Scoop about 1/4 cup of the batter into the skillet and spread it out slightly to form a small pancake.
- Cook for about 2 minutes on each side, or until the edges start to look dry and the center is set.
- Repeat with the remaining batter.
PreviewThese two-ingredient pancakes are the ultimate in simplicity. They are perfect for babies who are just starting to explore solid foods. The combination of banana and eggs creates a soft, fluffy texture that is easy for babies to gum and digest.
💡 These are the tools parents mention most
These are popular, parent-approved items that make this easier and less stressful.
✅ Tiny Spoon (2 Pack in Pewter)
Makes smooth purees fast and saves cleanup time. 👉 Check Price on Amazon
✅ Silicone Training Cup for Infants
Perfect for storing meals safely in the fridge or freezer. 👉 See on Amazon
✅ Straw Training System (Sage) – 9 Months
Gentle on gums and easy for first feeds. 👉 View on Amazon

3. Egg Yolk Ragi Pancakes
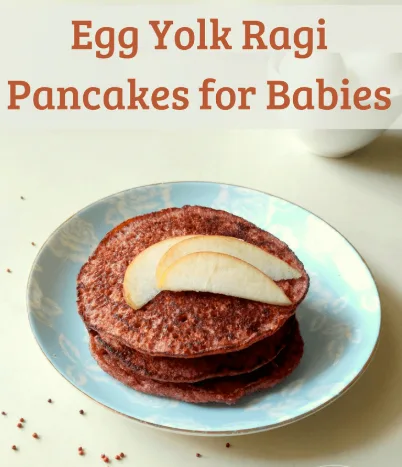
Ingredients :
- 1 egg yolk
- ¼ cup homemade applesauce
- ½ cup dry roasted ragi flour (finger millet)
- 1 tablespoon butter
- Water as required
Step-by-Step Instructions :
- In a mixing bowl, whisk the egg yolk until it becomes light and fluffy.
- Add the homemade applesauce to the bowl and mix well 1.
- Gradually incorporate the ragi flour while stirring continuously to avoid lumps.
- Melt the butter and add it to the mixture along with enough water to achieve a smooth batter consistency.
- Heat a non-stick pan over medium heat and pour a small amount of batter onto the pan.
- Cook until bubbles form on the surface, then flip and cook the other side until golden brown.
4. Baby Cereal Pancakes
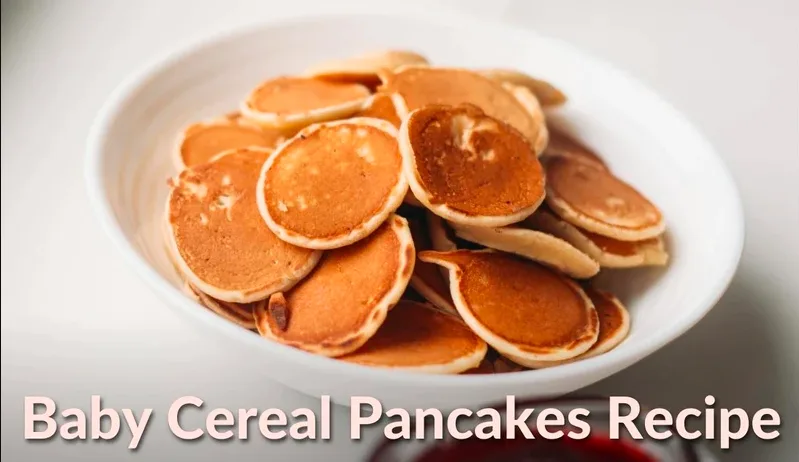
Ingredients :
- 1 large egg
- 1 ripe banana
- 1/3 cup baby cereal
- 2 tablespoons milk of choice (breastmilk, formula, cow’s milk, nut milk, etc.)
Step-by-Step Instructions :
- Mash the banana in a bowl until it is smooth and creamy.
- Beat the egg and mix it thoroughly with the mashed banana.
- Stir in the baby cereal gradually, ensuring there are no lumps in the mixture.
- Add the milk bit by bit to adjust the thickness of the batter, making sure it’s not too runny or too thick.
- Lightly grease a skillet with oil or butter and heat it up.
- Drop spoonfuls of the batter onto the skillet and cook until set, then turn them over to cook the other side
5. Egg-Free Beet Pancakes
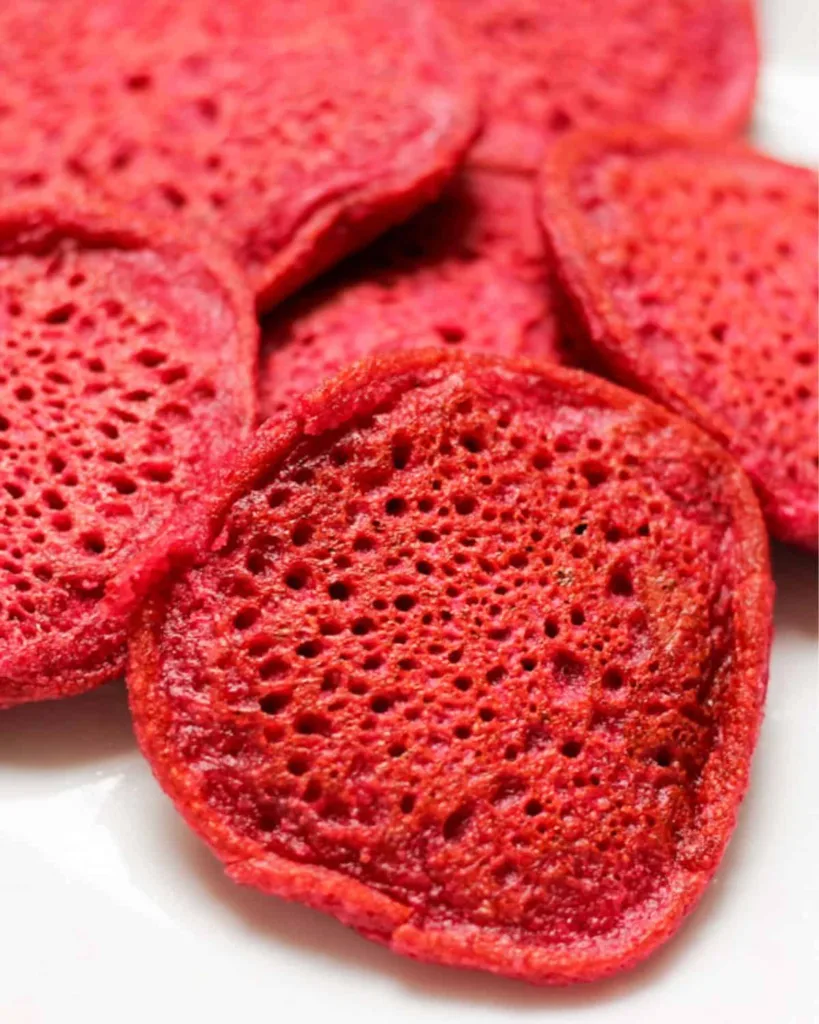
Ingredients :
- 1 banana (100g peeled)
- 100g cooked beetroot
- 120g oats
- 1/2 cup milk
- 1/3 cup yoghurt
- 1 tsp baking powder
- 1 tsp vanilla extract
Step-by-Step Instructions :
- Blend the banana and cooked beetroot in a food processor until smooth.
- Add the oats, milk, yogurt, baking powder, and vanilla extract to the blender and process until you get a uniform batter 3.
- If necessary, adjust the consistency by adding more milk.
- Preheat a non-stick frying pan over medium heat.
- Pour a ladle of batter onto the pan and spread it out gently.
- Cook until the edges start to look set, then carefully flip and cook the other side.
6. Egg-Free and Dairy-Free Pancake Recipe
Ingredients :
- 120g self-raising flour (or plain flour + 1 1/2 teaspoon baking powder)
- 190ml of your choice of milk (such as almond, oat, or any other plant-based milk)
- Mashed banana or apple puree to act as a binding agent instead of eggs 5
Instructions :
- In a mixing bowl, combine the flour and the milk until smooth.
- Add mashed banana or apple puree into the mixture and blend well.
- Lightly grease a non-stick pan with a small amount of oil and heat over medium-low heat.
- Pour about 1/4 cup of batter onto the pan for each pancake.
- Cook until bubbles appear on the surface, then flip and cook the other side until golden brown.
7. Mashed Banana Pancakes (Egg-Free & Dairy-Free)
Ingredients :
- 2 ripe bananas, mashed
- 1 cup oat flour (or gluten-free flour if needed)
- 1 teaspoon baking powder
- 1 tablespoon olive oil or melted coconut oil
- A pinch of cinnamon (optional)
Step-by-Step Instructions :
- In a mixing bowl, combine the mashed bananas with the oat flour, baking powder, and oil.
- Stir until you have a smooth batter. If it’s too thick, add a little water to reach the desired consistency.
- Heat a non-stick skillet over medium heat.
- Drop spoonfuls of the batter onto the skillet and cook until bubbles form on the surface.
- Flip the pancakes and cook the other side until golden brown 9.
8. Flaxseed Pancakes (Vegan & Gluten-Free)
Ingredients :
- 1 tablespoon ground flaxseed mixed with 3 tablespoons water (to replace an egg)
- 1 cup almond flour (or any gluten-free flour)
- 1/2 teaspoon baking soda
- 1/4 teaspoon salt
- 1/4 cup unsweetened applesauce
- 1/4 cup almond milk (or any plant-based milk)
Step-by-Step Instructions :
- In a small bowl, mix the flaxseed with water and let it sit for 5 minutes to thicken.
- In a larger mixing bowl, whisk together the almond flour, baking soda, and salt.
- Add the flaxseed mixture, applesauce, and almond milk to the dry ingredients and stir until combined.
- Heat a non-stick pan over medium heat and grease lightly.
- Pour about 1/4 cup of batter per pancake onto the pan and cook until set, then flip and cook the other side.
💡 These are the tools parents mention most
These are popular, parent-approved items that make this easier and less stressful.
✅ Tiny Spoon (2 Pack in Pewter)
Makes smooth purees fast and saves cleanup time. 👉 Check Price on Amazon
✅ Silicone Training Cup for Infants
Perfect for storing meals safely in the fridge or freezer. 👉 See on Amazon
✅ Straw Training System (Sage) – 9 Months
Gentle on gums and easy for first feeds. 👉 View on Amazon
Tips for Making Baby-Friendly Pancakes
Here are some additional tips to ensure your baby enjoys these pancakes safely:
- Use Fresh Ingredients: Always use fresh, high-quality ingredients to avoid any risk of contamination.
- Avoid Additives: Steer clear of added sugars, salt, or any other additives that aren’t suitable for babies.
- Test for Allergies: Introduce new ingredients one at a time to monitor for any allergic reactions.
- Vary the Flavors: Experiment with different fruits and vegetables to keep the meals interesting and nutritious.
Adding Nutritional Boosts
To make your pancakes for babies with no teeth even more nutritious, consider adding:
- Mashed Sweet Potatoes: Rich in vitamins and minerals.
- Pureed Apples: High in fiber and natural sweetness.
- Pumpkin Puree: Packed with vitamin A and fiber.
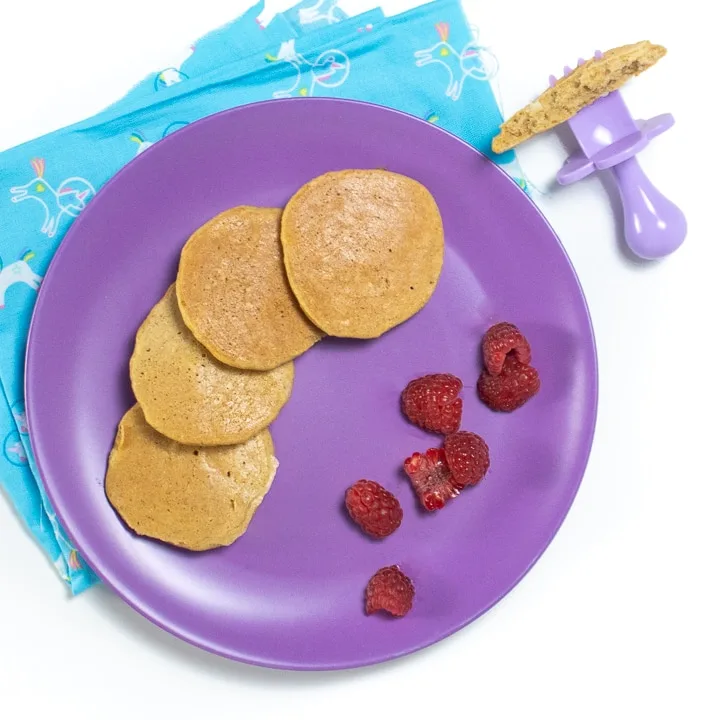
Serving Suggestions
Here are some creative ways to serve your baby-friendly pancakes:
- Finger Foods: Cut the pancakes into small, bite-sized pieces for easy handling.
- Dipping Sauces: Offer a small amount of pureed fruit or yogurt for dipping.
- Mini Pancake Stacks: Layer small pancakes with a thin layer of pureed fruit in between.
Frequently Asked Questions (FAQ)
Can babies eat pancakes?
Yes, babies can eat pancakes as long as they are made with simple, wholesome ingredients and are soft enough for them to gum. Avoid adding sugar, salt, or any other additives that aren’t suitable for babies.
When can babies start eating pancakes?
Babies can start eating pancakes around 6 months of age, which is when most babies begin to transition to solid foods. Always consult with your pediatrician before introducing new foods.
Are pancakes healthy for babies?
Yes, pancakes can be healthy for babies if they are made with nutrient-rich ingredients like bananas, eggs, and mashed fruits or vegetables. They provide essential nutrients and are a fun way to introduce solids.
Can I freeze baby-friendly pancakes?
Yes, you can freeze baby-friendly pancakes. Simply place them in a single layer on a baking sheet and freeze until solid. Then, transfer them to an airtight container or freezer bag. To reheat, thaw in the refrigerator overnight and warm in a microwave or toaster oven.
Conclusion
Making pancakes for babies with no teeth is a delightful and nutritious way to introduce your little one to solid foods. By using simple, wholesome ingredients and ensuring the pancakes are soft and easy to gum, you can create a safe and enjoyable meal for your baby. Remember to always supervise your baby while they eat and consult with your pediatrician if you have any concerns.
For more tips on introducing solids and other baby-friendly recipes, check out our articles on eggs for babies and 3-ingredient pancakes. Happy cooking!

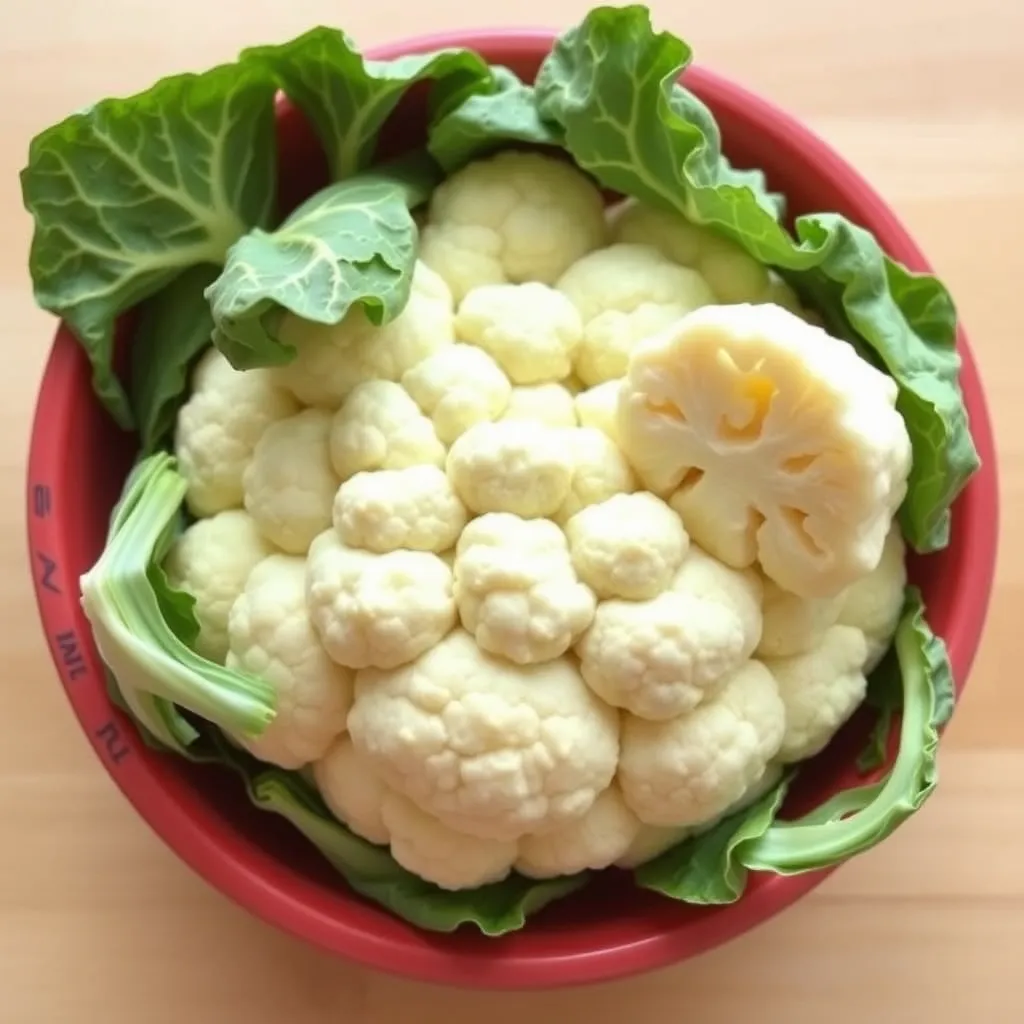
How Old Are Babies When Eating Cauliflower?
Welcome to our guide on introducing cauliflower to your baby! If you’re wondering, “How old are babies when eating cauliflower?” you’re in the right place. We’ll cover everything you need to know, from the best age to start to the health benefits and potential risks. Let’s dive in!
Table of Contents
Key Takeaways:
- Babies can start eating cauliflower around 6 months of age.
- Cauliflower is rich in vitamins and minerals, making it a healthy choice for babies.
- Start with small, well-cooked pieces to avoid choking hazards.
- Introduce cauliflower gradually and watch for any allergic reactions.
How Old Are Babies When Eating Cauliflower?
Babies can typically start eating cauliflower around 6 months of age. This is when most infants are ready to begin solid foods. However, every baby is different, so it’s important to consult with your pediatrician before introducing new foods.
Why 6 Months?
At 6 months, your baby’s digestive system is more developed, and they have better control over their mouth and tongue movements. This makes it easier for them to handle and swallow solid foods like cauliflower.
Health Benefits of Cauliflower for Babies
Cauliflower is a fantastic addition to your baby’s diet because it’s packed with essential nutrients. Here are some of the key benefits:
- Vitamin C: Boosts the immune system and helps with iron absorption.
- Fiber: Aids digestion and prevents constipation.
- Potassium: Regulates blood pressure and supports heart health.
- Folate: Essential for brain development and cell growth.
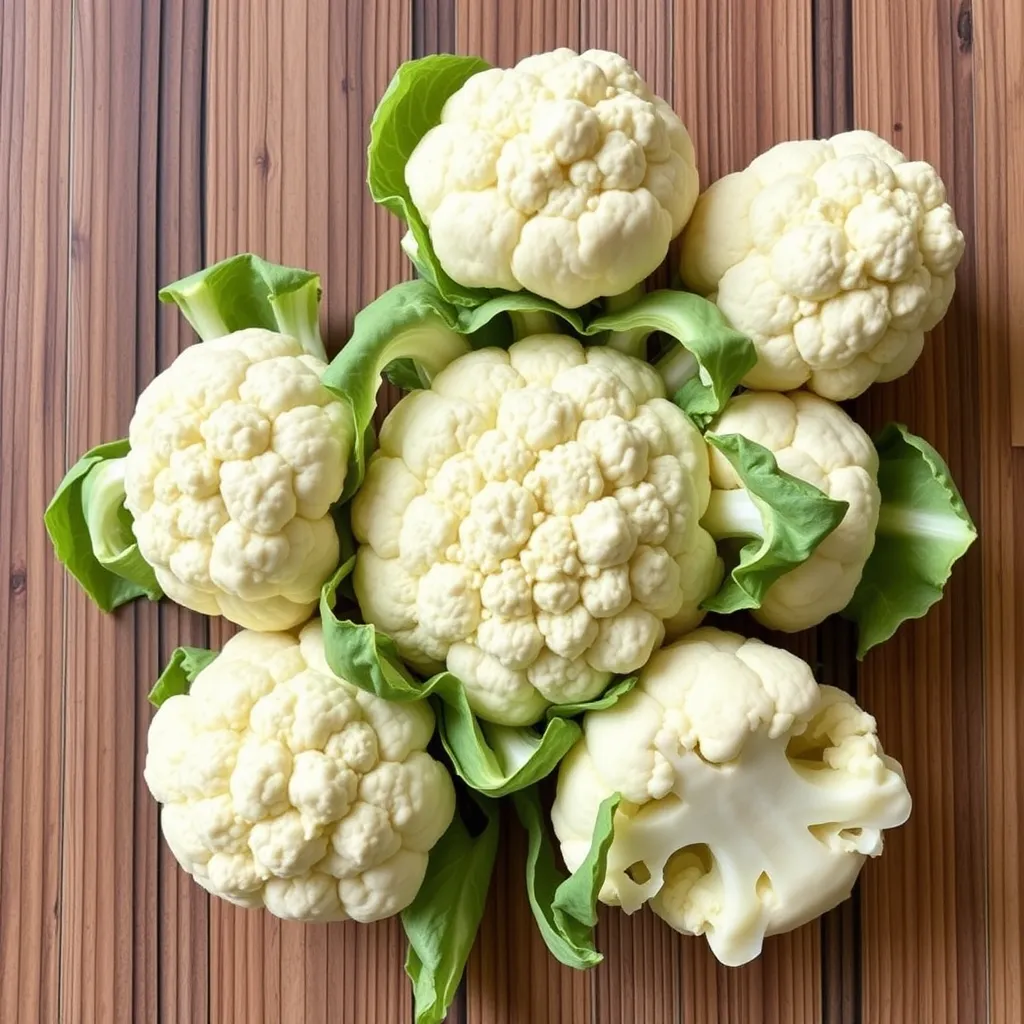
Preparing Cauliflower for Your Baby
When introducing cauliflower to your baby, it’s crucial to prepare it properly to ensure it’s safe and easy to eat. Here’s a step-by-step guide:
- Choose Fresh Cauliflower: Look for firm, white heads with no brown spots.
- Wash Thoroughly: Rinse the cauliflower under running water to remove any dirt or pesticides.
- Cook Until Soft: Boil, steam, or microwave the cauliflower until it’s very soft. You can also puree it for younger babies.
- Cool Down: Allow the cooked cauliflower to cool to a safe temperature before serving.
- Serve in Small Pieces: Cut the cauliflower into small, manageable pieces to prevent choking.
Snacks to Pack 3 Year Old for Montessori School
Introducing Cauliflower Gradually
When you first introduce cauliflower to your baby, start with a small amount and gradually increase the quantity over time. This allows your baby’s digestive system to adjust and helps you monitor for any adverse reactions.
Signs of Allergic Reactions
While rare, some babies may be allergic to cauliflower. Watch for the following signs:
- Rash or hives
- Swelling of the lips, tongue, or face
- Vomiting or diarrhea
- Difficulty breathing
If you notice any of these symptoms, stop feeding cauliflower immediately and contact your pediatrician.
Creative Ways to Serve Cauliflower to Your Baby
Once your baby is comfortable with cauliflower, you can get creative with how you serve it. Here are some ideas:
- Cauliflower Puree: Blend cooked cauliflower with a little breast milk or formula for a smooth, creamy texture.
- Cauliflower Rice: Pulse raw cauliflower in a food processor to create “rice,” then cook it until tender.
- Cauliflower Mashed Potatoes: Mix mashed cauliflower with mashed potatoes for a nutritious twist on a classic dish.
- Cauliflower Soup: Blend cooked cauliflower with broth and a bit of cream for a comforting, warm meal.
Why Cherry for babies Are the Perfect Snack
Frequently Asked Questions (FAQ)
Can I give my 4-month-old baby cauliflower?
It’s generally recommended to wait until your baby is at least 6 months old before introducing solid foods, including cauliflower. At 4 months, your baby’s digestive system may not be ready, and there’s a higher risk of choking.
Is cauliflower a common allergen for babies?
No, cauliflower is not a common allergen. However, it’s always a good idea to introduce new foods one at a time and watch for any signs of an allergic reaction.
Can I mix cauliflower with other vegetables for my baby?
Absolutely! Mixing cauliflower with other vegetables can enhance the nutritional value and flavor of your baby’s meals. Try combining it with carrots, peas, or sweet potatoes.
How often should I feed my baby cauliflower?
You can include cauliflower in your baby’s diet a few times a week. Just make sure to offer a variety of foods to ensure a balanced diet.
Can I freeze cauliflower puree for later use?
Yes, you can freeze cauliflower puree in ice cube trays or small containers for up to 3 months. This is a great way to save time and ensure you always have a healthy meal option on hand.
Conclusion
Introducing cauliflower to your baby can be a rewarding experience. Starting around 6 months of age, cauliflower can provide numerous health benefits while being a tasty and versatile addition to your baby’s diet. Remember to prepare it safely, introduce it gradually, and watch for any signs of allergic reactions. Happy feeding!
For more tips on introducing solid foods to your baby, check out our articles on best first solid foods for babies and safe foods for babies.
References:
When Can Babies Start Eating Peas, Green Beans, and Zucchini?
Introducing solid foods to your baby is an exciting milestone! But when can babies start eating peas, green beans, and zucchini? This guide will help you navigate this important transition with confidence. Let’s dive in!
Table of Contents
Key Takeaways
- Babies can start eating peas, green beans, and zucchini around 6 months of age.
- These vegetables are nutrient-rich and easy to digest.
- Start with purees and gradually introduce finger foods.
- Always consult with your pediatrician before introducing new foods.
When Can Babies Eat Peas, Green Beans, and Zucchini?
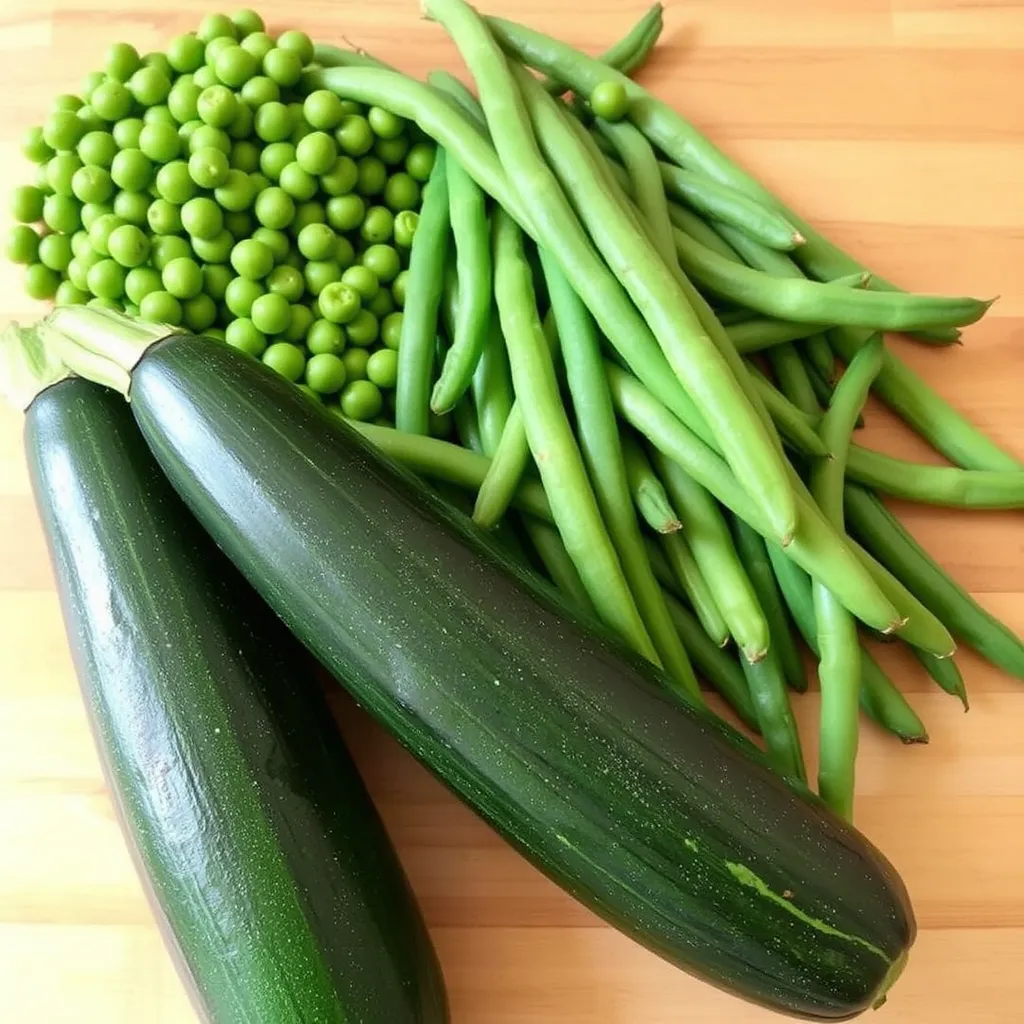
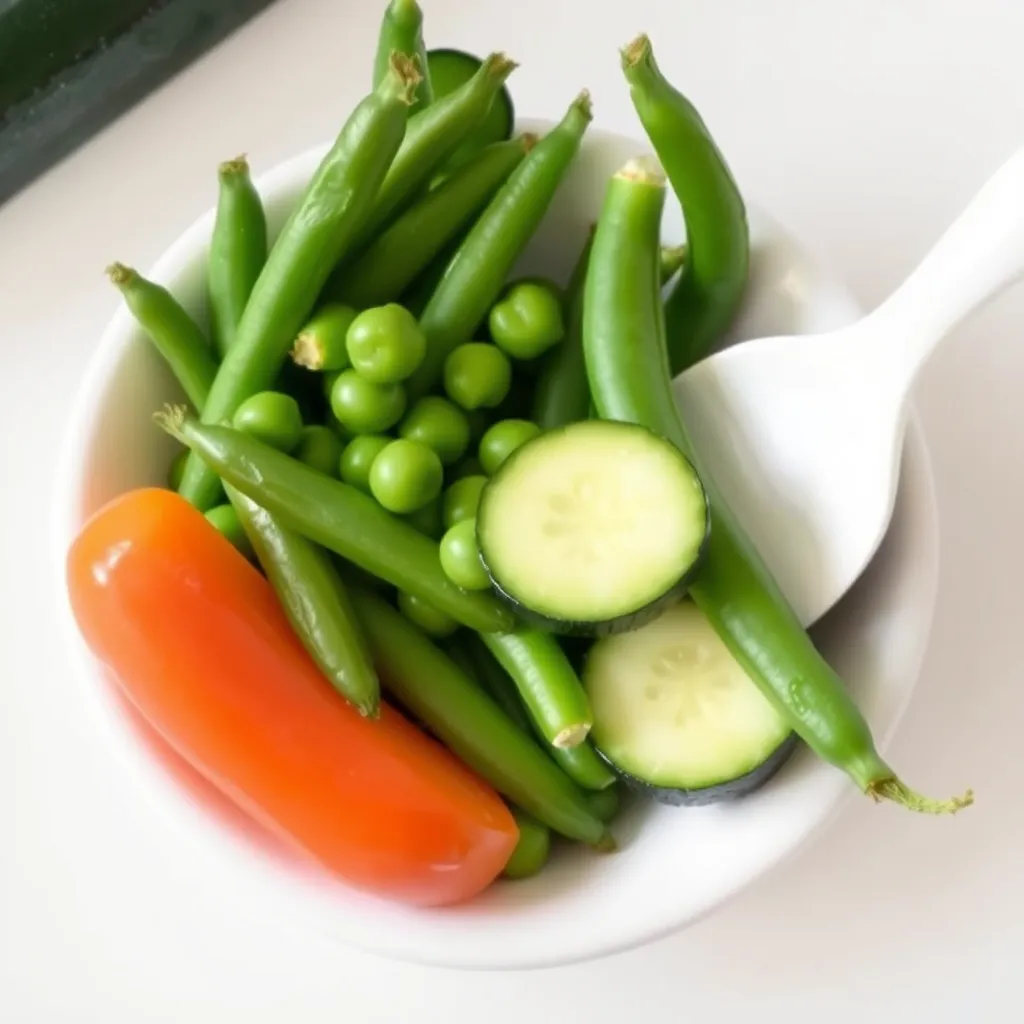
According to the American Academy of Pediatrics, most babies are ready to start eating solid foods around 6 months of age. This is when they typically have the necessary developmental skills to handle solids. Peas, green beans, and zucchini are excellent choices for early solid foods because they are:
- Nutrient-Rich: These vegetables are packed with essential vitamins and minerals, including vitamin C, fiber, and potassium.
- Easy to Digest: They are gentle on a baby’s developing digestive system.
- Versatile: They can be prepared in various ways, from purees to finger foods.
Preparing Peas, Green Beans, and Zucchini for Your Baby
Here are some simple steps to prepare these vegetables for your little one:
Peas
- Cook the Peas: Boil or steam fresh or frozen peas until they are soft.
- Puree (if needed): For younger babies, blend the cooked peas into a smooth puree. Add a little water or breast milk to achieve the desired consistency.
- Mash (for older babies): For babies who are a bit older, you can mash the peas instead of pureeing them.
Green Beans
- Cook the Green Beans: Steam or boil fresh green beans until they are tender.
- Puree (if needed): Blend the cooked green beans into a smooth puree for younger babies.
- Mash (for older babies): Mash the cooked green beans for older babies who are ready for more texture.
Zucchini
- Cook the Zucchini: Steam or bake sliced zucchini until it is soft.
- Puree (if needed): Blend the cooked zucchini into a smooth puree for younger babies.
- Slice (for older babies): Cut the cooked zucchini into small, manageable pieces for older babies who are practicing their pincer grasp.
Introducing Peas, Green Beans, and Zucchini to Your Baby
When introducing these vegetables, it’s important to follow these guidelines:
- Start Slowly: Introduce one vegetable at a time and wait a few days before trying another. This helps you identify any potential allergies or sensitivities.
- Watch for Reactions: Keep an eye out for any signs of allergic reactions, such as rashes, hives, or difficulty breathing. If you notice any of these symptoms, contact your pediatrician immediately.
- Offer Small Amounts: Begin with small amounts of pureed vegetables and gradually increase the quantity as your baby becomes more comfortable with solids.
- Make It Fun: Encourage your baby to explore the texture and taste of these vegetables. Let them play with the food and get messy—it’s all part of the learning process!
Combining Peas, Green Beans, and Zucchini
Once your baby is comfortable with each individual vegetable, you can start combining them to create more interesting and flavorful meals. Here’s a simple recipe to try:
Pea, Green Bean, and Zucchini Puree
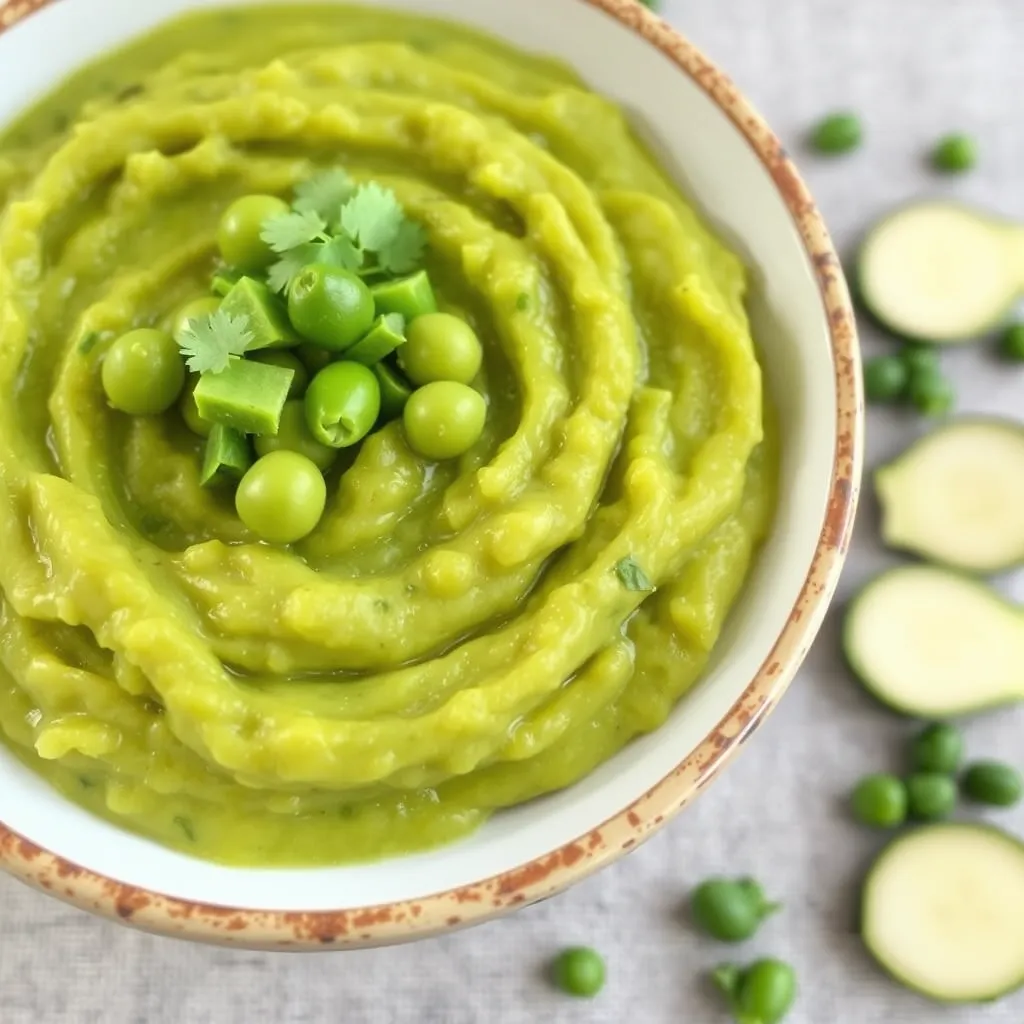
Preview
- Cook the Vegetables: Steam or boil 1 cup of peas, 1 cup of green beans, and 1 cup of zucchini until they are soft.
- Blend Together: Place the cooked vegetables in a blender or food processor and blend until smooth. Add a little water or breast milk to achieve the desired consistency.
- Add a Twist (optional): For an extra flavor boost, you can add a small handful of fresh mint leaves to the puree.
- Serve: Let the puree cool slightly before serving it to your baby.
Frequently Asked Questions (FAQ)
When can babies start eating solid foods?
Babies can usually start eating solid foods around 6 months of age. However, it’s always best to consult with your pediatrician to ensure your baby is developmentally ready.
Are peas, green beans, and zucchini safe for babies?
Yes, peas, green beans, and zucchini are safe and nutritious for babies. Just make sure to cook them thoroughly and introduce them one at a time to monitor for any allergic reactions.
How should I prepare these vegetables for my baby?
Cook the vegetables until they are soft, then puree or mash them depending on your baby’s age and ability to handle different textures. For older babies, you can also cut them into small pieces for finger foods.
What should I do if my baby doesn’t like these vegetables?
Don’t worry if your baby initially rejects these vegetables. It can take several tries for a baby to develop a taste for new foods. Continue offering them in different forms and combinations, and be patient.
Can I mix these vegetables with other foods?
Absolutely! Once your baby is comfortable with each individual vegetable, you can start combining them with other foods to create more varied and interesting meals. Just make sure to introduce new foods one at a time to monitor for any reactions.
Conclusion
Introducing peas, green beans, and zucchini to your baby is a wonderful way to provide them with essential nutrients and help them develop healthy eating habits. Remember to start slowly, watch for reactions, and make mealtime a fun and engaging experience for your little one. If you have any concerns, don’t hesitate to consult with your pediatrician.
For more tips on introducing solid foods to your baby, check out our other articles on when babies can eat green beans and introducing solid foods to your baby.
Happy feeding!
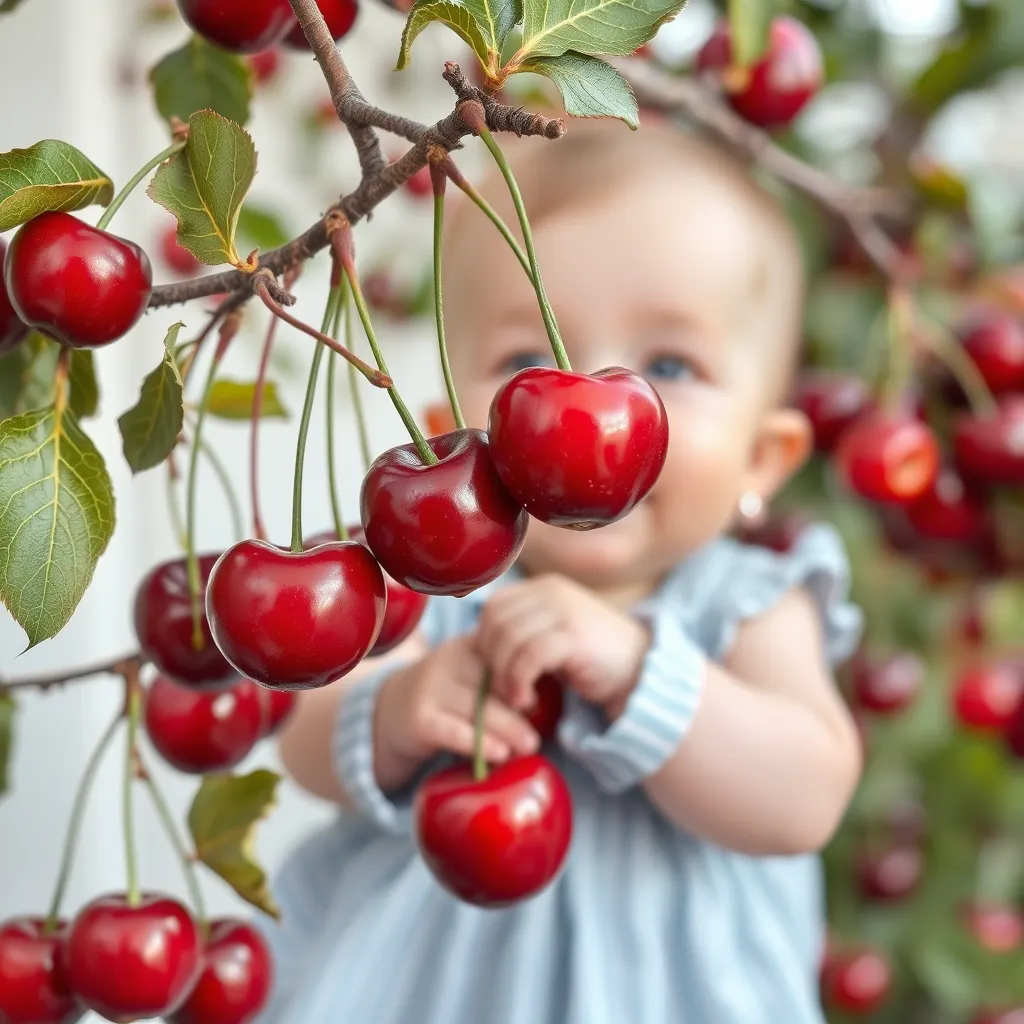
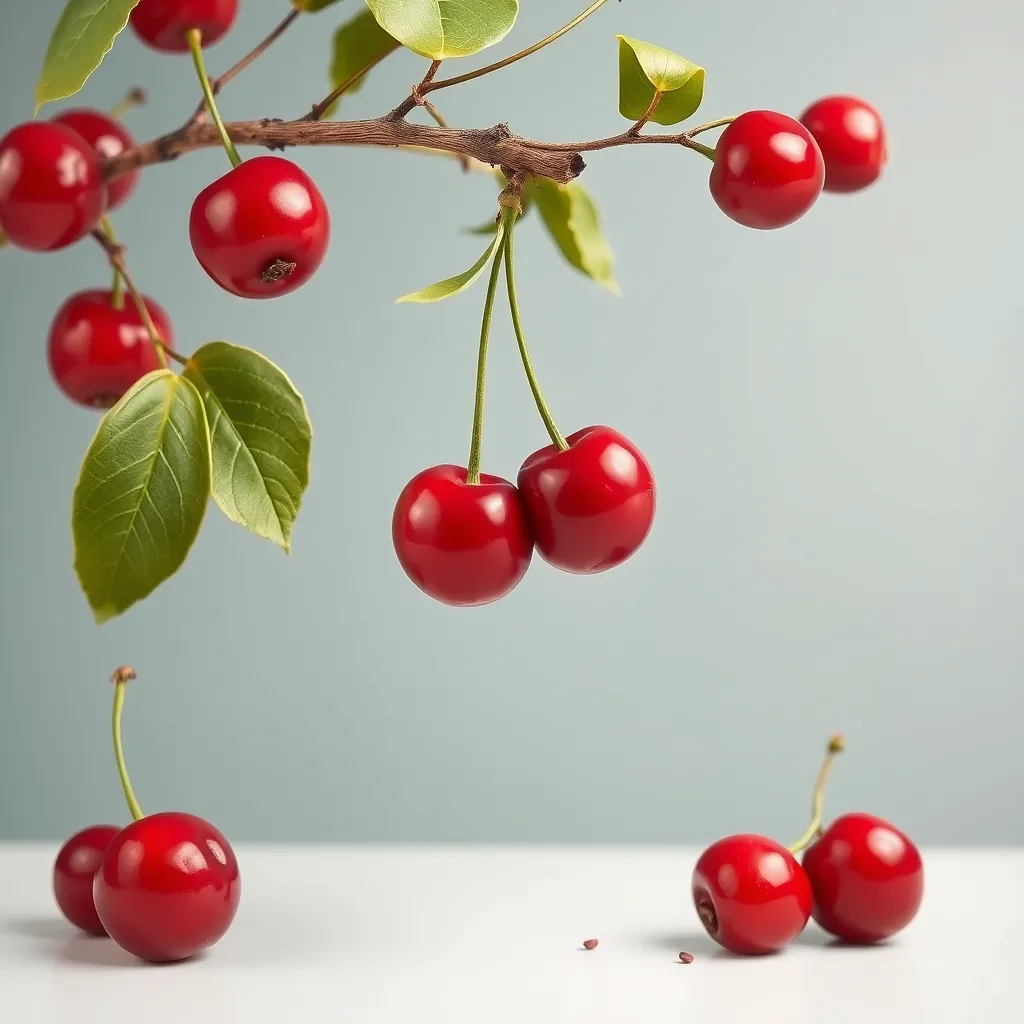
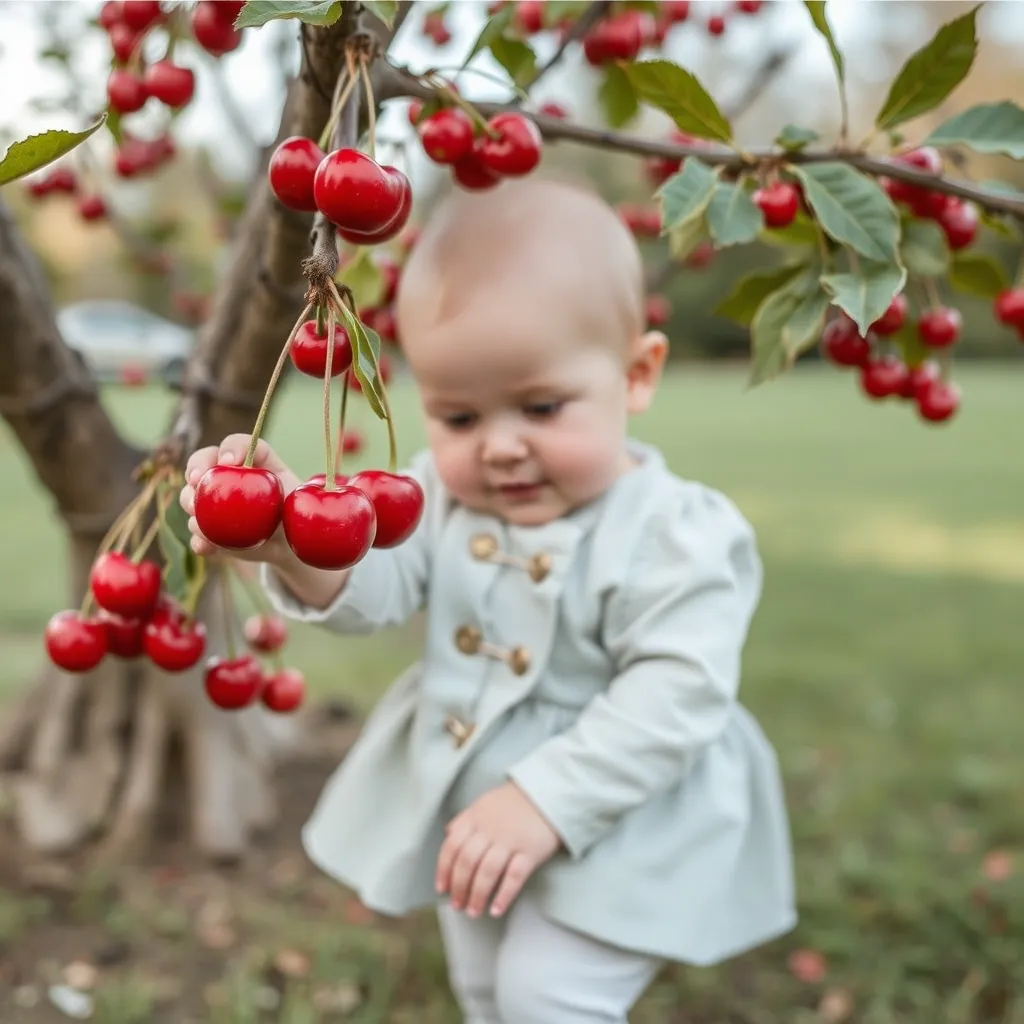
Why Cherry for babies Are the Perfect Snack
Cherry for Babies are delicious and packed with essential nutrients that can benefit your baby’s health. Whether you’re introducing solids or looking for a healthy snack, cherries can be a wonderful addition to your baby’s diet. In this article, we’ll explore the benefits of cherries for babies, how to prepare them, and answer some common questions.
Table of Contents
Key Takeaways
- Cherries are rich in vitamins, minerals, and antioxidants.
- They can help improve sleep quality and boost the immune system.
- Cherries should be introduced after 6 months of age.
- Always ensure cherries are pitted and pureed for younger babies.
- Consult your pediatrician before introducing new foods.
Why Are Cherry for Babies Good?
Cherries are a superfood for babies because they are loaded with essential nutrients. Here are some key benefits:
Rich in Vitamins and Minerals
Cherries are a great source of vitamin C, which helps strengthen the immune system. They also contain potassium, which is important for maintaining healthy blood pressure and heart function. Additionally, cherries are rich in iron, which supports healthy blood production and prevents anemia.
Antioxidant Powerhouse
Cherries are high in antioxidants, which help protect cells from damage caused by free radicals. This can reduce the risk of chronic diseases and support overall health. Antioxidants like anthocyanins, which give cherries their vibrant color, have been linked to improved cognitive function and reduced inflammation.
Supports Sleep Quality
Cherries are one of the few natural sources of melatonin, a hormone that regulates sleep. Including cherries in your baby’s diet can help promote better sleep patterns, which is crucial for their growth and development.
When Can Babies Eat Cherries?
It’s best to introduce cherries to your baby after they reach 6 months of age. By this time, your baby’s digestive system is more developed and better equipped to handle solid foods. Always consult your pediatrician before introducing new foods to ensure they are safe and appropriate for your baby.
How to Prepare Cherries for Babies
Preparing cherries for your baby is easy and can be done in several ways depending on your baby’s age and stage of development.
For Younger Babies (6-8 Months)
For younger babies, it’s important to puree cherries to ensure they are smooth and easy to digest. Here’s a simple recipe:
- Wash the cherries: Rinse the cherries under cold water to remove any dirt or pesticides.
- Pit the cherries: Remove the pits using a cherry pitter or a small knife. Pits can be a choking hazard, so it’s crucial to remove them completely.
- Cook the cherries: Boil the pitted cherries in a small amount of water until they are soft and tender.
- Puree the cherries: Use a blender or food processor to puree the cooked cherries until smooth. Add a little water if needed to achieve the desired consistency.
For Older Babies (9-12 Months)
Older babies can enjoy mashed or chopped cherries. Here’s how to prepare them:
- Wash and pit the cherries: As with younger babies, make sure to wash and pit the cherries thoroughly.
- Mash the cherries: Use a fork or potato masher to mash the cherries until they are soft and easy to eat. You can also chop them into small pieces if your baby is ready for finger foods.
Cherry Recipes for Babies
Here are a couple of easy and nutritious recipes that incorporate cherries into your baby’s diet:
Cherry and Banana Puree
This sweet and creamy puree is perfect for younger babies.
- 1 cup pitted cherries
- 1 ripe banana
- 2 tablespoons water
- Boil the pitted cherries until soft.
- Puree the cooked cherries and banana together in a blender or food processor.
- Add water to achieve the desired consistency.
Cherry and Oatmeal Porridge
This hearty porridge is ideal for older babies who are ready for more textured foods.
- 1/2 cup rolled oats
- 1 cup water or breastmilk
- 1/2 cup pitted and chopped cherries
- 1 teaspoon honey (for babies over 12 months)
- Cook the oats in water or breastmilk according to package instructions.
- Stir in the chopped cherries and cook for an additional 5 minutes.
- Sweeten with honey if desired and serve warm.
FAQs About Cherries for Babies
Can babies eat raw cherries?
Raw cherries can be a choking hazard for babies, especially those under 12 months old. It’s best to cook and puree cherries for younger babies and chop them into small pieces for older babies.
Are cherries allergenic?
While cherries are generally safe for most babies, some may experience allergic reactions. Common symptoms include rash, itching, and difficulty breathing. If you notice any of these symptoms, stop feeding cherries and consult your pediatrician.
Can cherries cause constipation in babies?
Cherries are high in fiber and usually help prevent constipation. However, if your baby is prone to constipation, introduce cherries gradually and monitor their bowel movements. If constipation persists, consult your pediatrician.
Can I freeze cherry puree?
Yes, you can freeze cherry puree for later use. Pour the puree into ice cube trays and freeze. Once frozen, transfer the cubes to a freezer bag and store for up to 3 months. Thaw in the refrigerator or at room temperature before serving.
Conclusion
Cherry for Babies are a delicious and nutritious addition to your baby’s diet. They are rich in vitamins, minerals, and antioxidants, and can help improve sleep quality and boost the immune system. Always prepare cherries safely and consult your pediatrician before introducing new foods. With a little preparation, your baby can enjoy the sweet and healthful benefits of cherries.
For more information on introducing solids and other healthy foods for babies, check out our articles on Introducing Solids to Your Baby and Healthy Snacks for Babies.
Stay tuned for more tips and recipes to keep your baby happy and healthy!
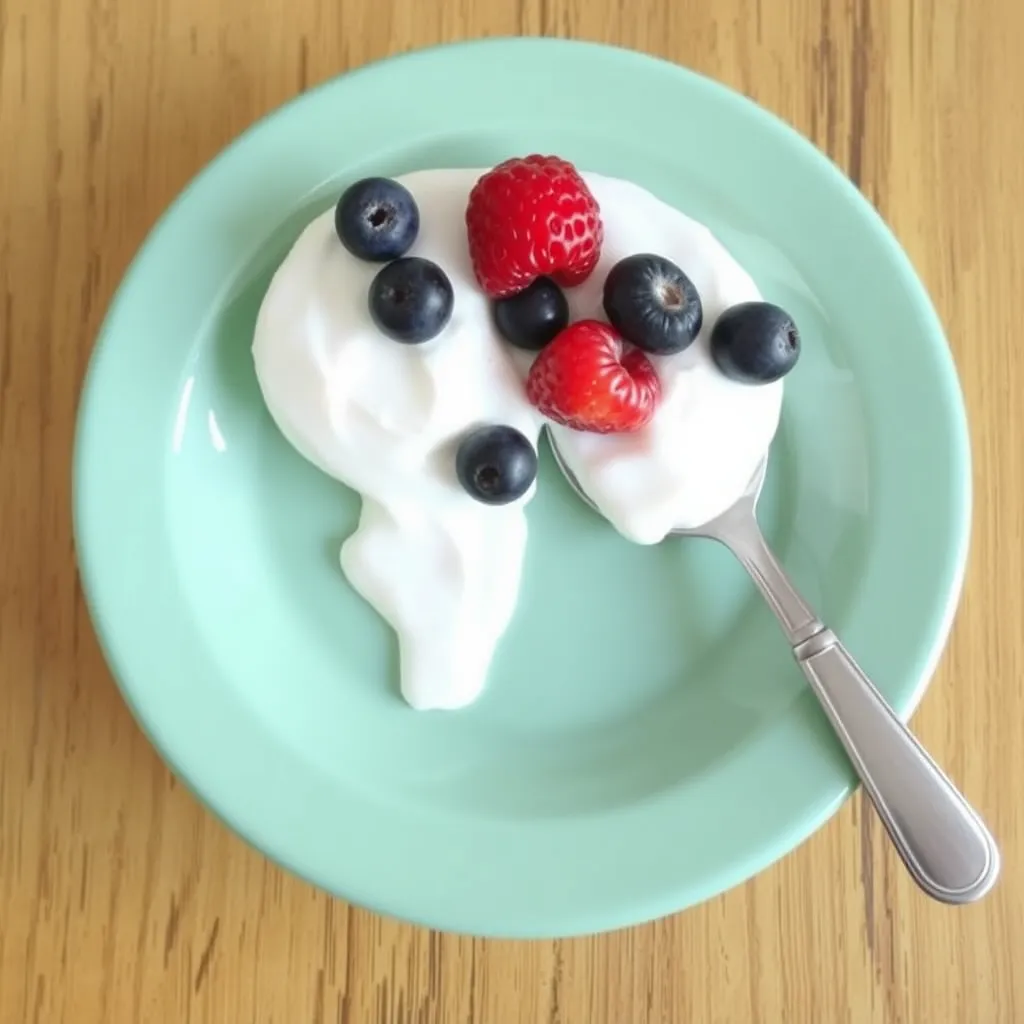
5 Simple Yogurt Melts Baby Recipes Must-Try
As a parent, you’re always looking for easy, healthy snacks that your baby will love. You want something nutritious, tasty, and, of course, safe. Enter yogurt melts! These sweet, creamy treats are the perfect snack for babies who are starting to explore new flavors and textures. They’re fun to make, and easy to store, and your little one will love them. In this article, we’ll explore why yogurt melts baby are the perfect snack, share several delicious recipes, and give you tips to make sure your homemade yogurt melts are a hit.
Table of Contents
Why Yogurt Melts Are Perfect for Babies
If you’ve been wondering why yogurt melts should be on your baby’s snack list, you’re not alone. Yogurt melts are a popular choice for many parents for several reasons. Let’s dive into why these little treats are perfect for babies.
Nutritional Benefits
Yogurt melts are a great way to sneak in some essential nutrients. Greek yogurt, which is the base for most yogurt melt recipes, is loaded with:
- Calcium – Important for building strong bones.
- Protein – Supports your baby’s growth and development.
- Probiotics – These “good” bacteria help improve digestion and strengthen the immune system.
Because yogurt melts are made with plain, unsweetened Greek yogurt, they are naturally sweet without the need for added sugar. This means you can offer your baby a healthy snack that won’t cause a sugar rush or upset their stomach.
Texture and Safety
One of the key benefits of yogurt melts is their texture. These treats melt quickly in your baby’s mouth, making them a safe option for babies who are just starting to eat solids. Unlike hard snacks that can pose a choking hazard, yogurt melts are soft, smooth, and easy for your baby to gum down.
They’re also small and easy for little hands to grab. Whether your baby is in the early stages of feeding or closer to toddlerhood, yogurt melts are simple to eat and enjoy.
The Basics of Making Yogurt Melts for Babies
Making yogurt melts at home is incredibly easy. You only need a few simple ingredients, and the steps are straightforward. Here’s what you’ll need:
Ingredients You’ll Need
- Plain Greek Yogurt: Always choose unsweetened, full-fat Greek yogurt. This will ensure your baby gets the healthiest version of yogurt, packed with calcium and probiotics.
- Natural Sweeteners (optional): If you want to add a bit of sweetness, you can use small amounts of natural sweeteners like honey or fruit puree. However, make sure your baby is old enough to consume honey (for babies over 1 year old).
- Optional Add-ins: To make things more exciting, you can mix in fruit purees, cinnamon, or vanilla extract to add flavor and variety.
- Molds or Parchment Paper: You’ll need either silicone molds or parchment paper to shape the yogurt into meltable pieces.
Equipment
- A blender or whisk: To mix the yogurt and other ingredients smoothly.
- Freezer trays or parchment paper: To form the melts before freezing.
- Baking sheet: If you prefer spooning the yogurt directly onto a baking sheet, this will work too!
5 Simple Yogurt Melts Baby Recipes to Try
Now that you know why yogurt melts are great and how easy they are to make, let’s get into some simple, delicious recipes that your baby will love. Each of these recipes uses different flavors and ingredients to make sure your baby has a variety of healthy snacks to choose from.
1. Classic Yogurt Melts
These are the most basic yogurt melts, and they’re a great introduction to yogurt-based treats.
- Ingredients:
- 1 cup plain Greek yogurt
- 1-2 tsp honey (optional)
- 1/4 cup fruit puree (banana or strawberry works great)
- Instructions:
- Mix Greek yogurt with honey (if using) and fruit puree in a bowl.
- Spoon the mixture into silicone molds or onto parchment paper.
- Freeze for 2-3 hours.
- Serve as a chilled, creamy snack for your baby.
2. Banana Yogurt Melts
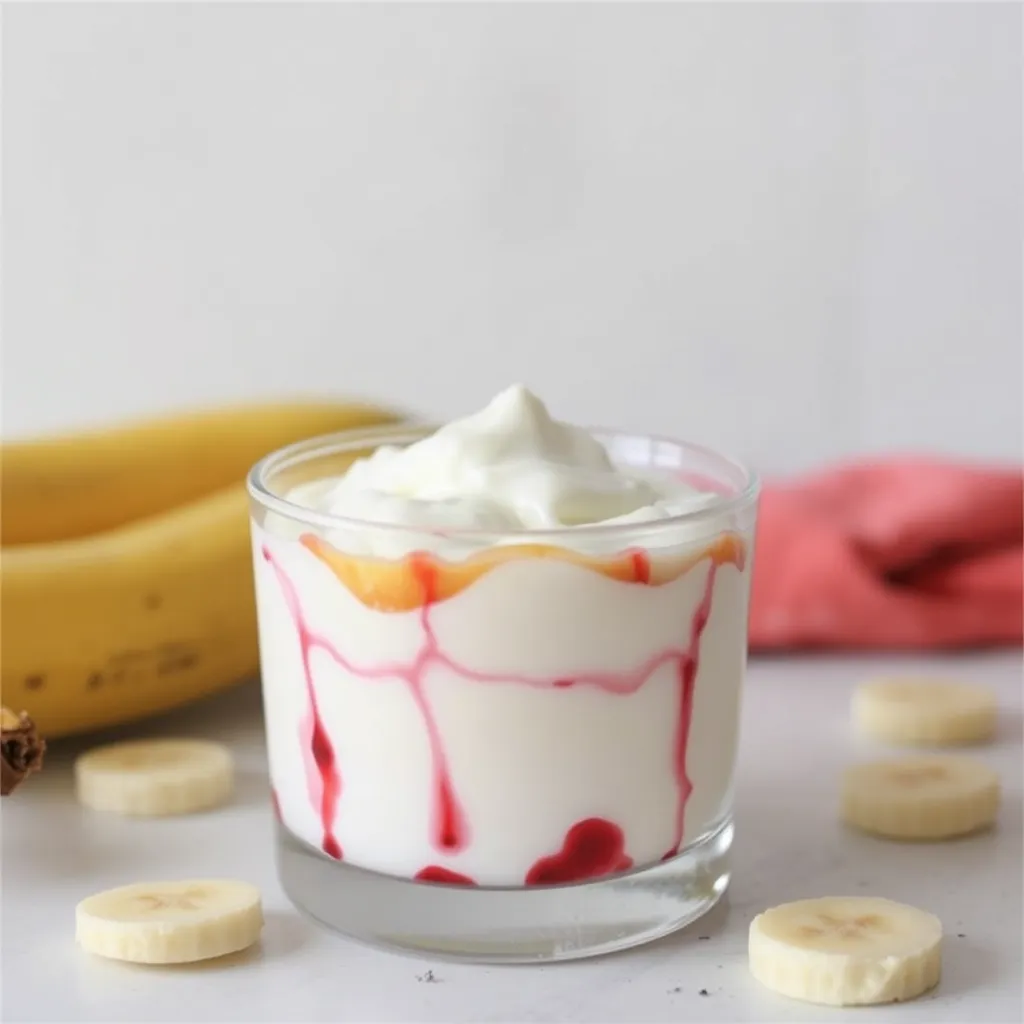
This recipe uses mashed banana to create a naturally sweet flavor your baby will enjoy.
- Ingredients:
- 1 cup plain Greek yogurt
- 1 ripe banana (mashed)
- 1 tsp vanilla extract
- Instructions:
- Mash the banana thoroughly and mix it with Greek yogurt.
- Add vanilla extract and stir well.
- Spoon the mixture into molds or onto parchment paper.
- Freeze for 3-4 hours until solid.
3. Blueberry Yogurt Melts
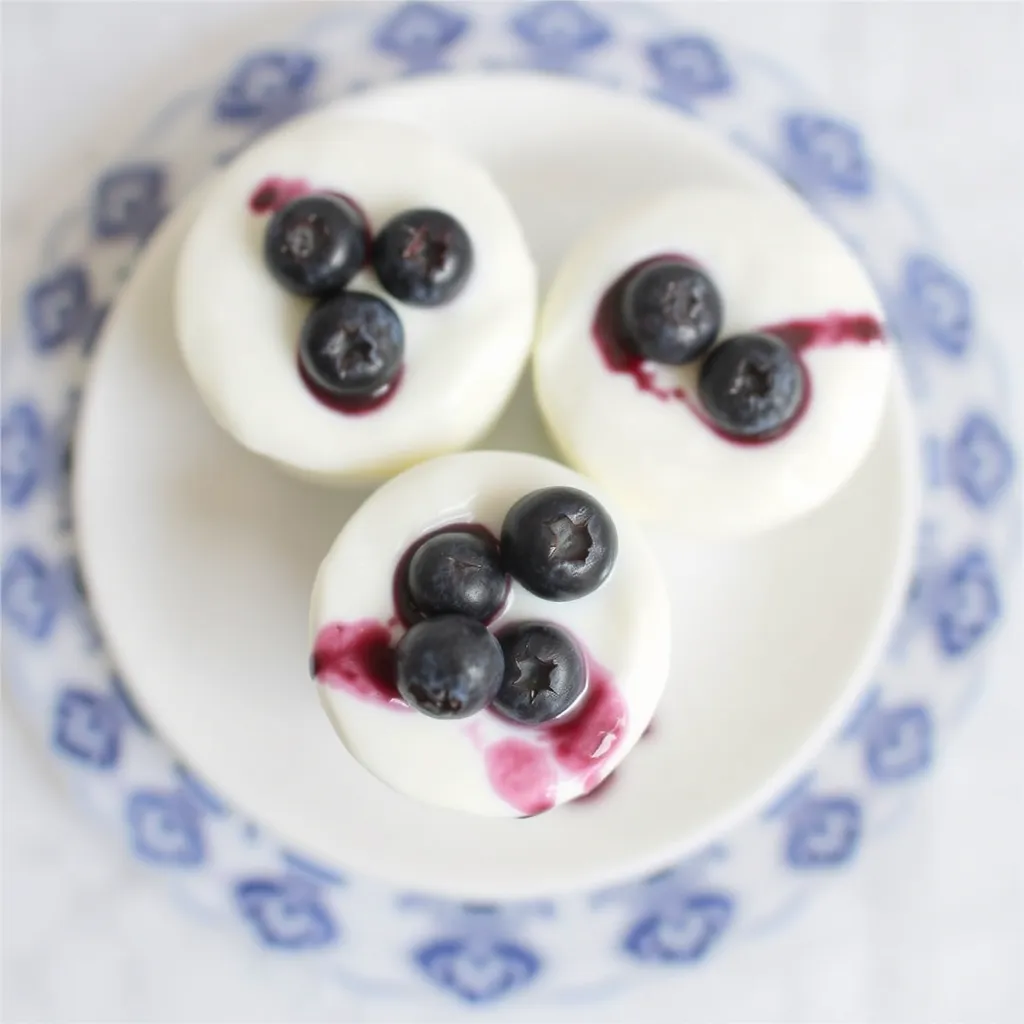
Blueberries are packed with antioxidants, making this recipe not only tasty but healthy too.
- Ingredients:
- 1 cup plain Greek yogurt
- 1/2 cup fresh or frozen blueberries (pureed)
- Instructions:
- Puree the blueberries until smooth.
- Stir the blueberry puree into the Greek yogurt.
- Spoon the mixture into molds or onto parchment paper.
- Freeze for 2-3 hours before serving.
4. Mixed Fruit Yogurt Melts
This recipe combines a few fruit flavors to give your baby a taste of multiple fruits at once.
- Ingredients:
- 1 cup plain Greek yogurt
- 1/4 cup apple puree
- 1/4 cup mango puree
- Instructions:
- Stir the pureed apple and mango into the Greek yogurt.
- Spoon the mixture into molds or onto a lined baking sheet.
- Freeze for 2-3 hours until firm.
5. Cinnamon Apple Yogurt Melts
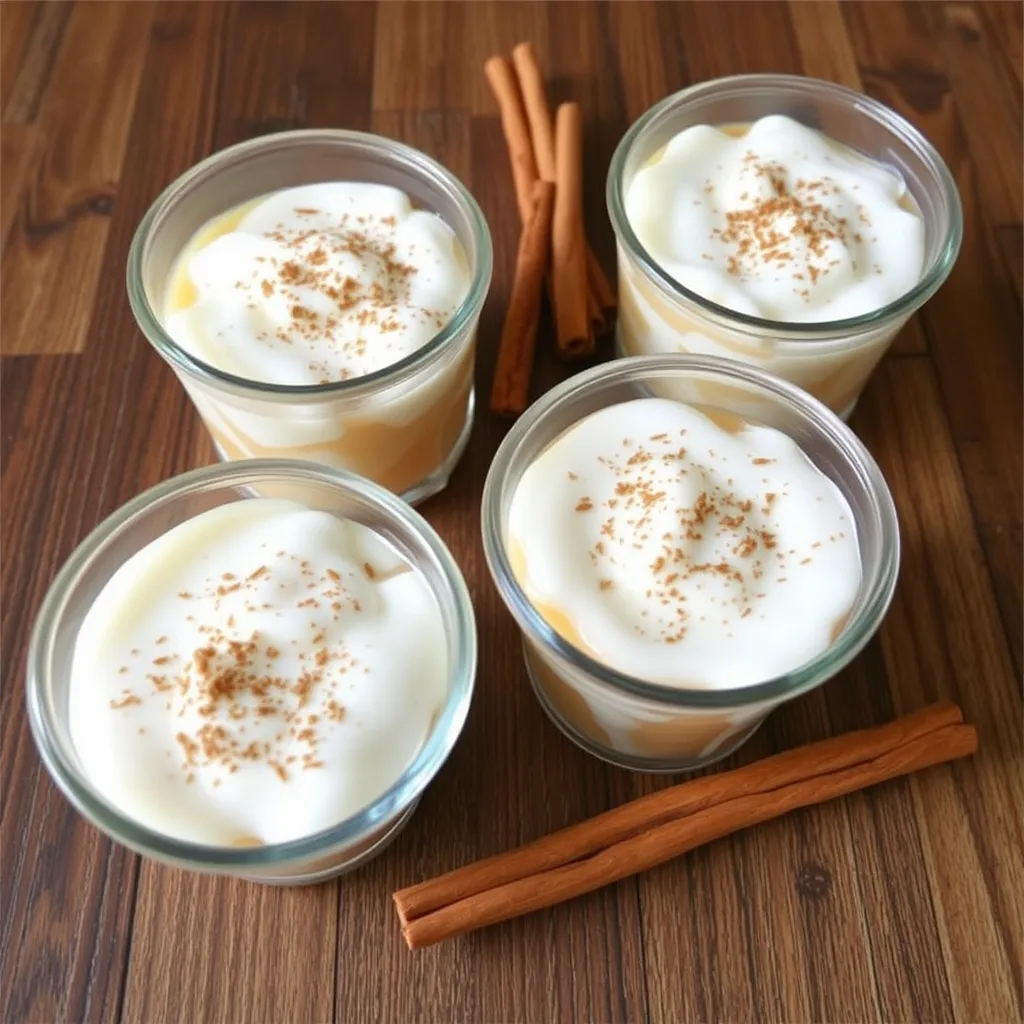
If you’re looking for a flavor combination that’s both comforting and nutritious, these cinnamon apple yogurt melts are perfect.
- Ingredients:
- 1 cup plain Greek yogurt
- 1/4 cup unsweetened apple sauce
- 1/4 tsp ground cinnamon
- Instructions:
- Stir the apple sauce and cinnamon into the yogurt.
- Spoon the mixture onto parchment paper or into molds.
- Freeze until solid, about 3 hours.
How to Store Yogurt Melts for Babies
Once you’ve made these yummy yogurt melts, you’ll want to know how to store them properly to keep them fresh.
Freezing and Shelf Life
Yogurt melts are best stored in the freezer. After freezing, they’ll last for up to one month. Just make sure they’re in an airtight container to maintain freshness. If you’ve used molds, you can easily pop the melts out and store them in a zip-lock bag for easy access.
Tips for Easy Storage
- Use a silicone ice cube tray for individual servings. This way, you can grab a few melts at a time and avoid wasting them.
- If you spread the yogurt mixture onto a baking sheet, freeze it for a couple of hours, then transfer the melts to a ziplock bag for easy storage.
Tips for Making Yogurt Melts for Babies
If you want to make the most of your yogurt melt-making experience, here are a few tips to ensure success:
Using Different Fruits
You don’t have to stick to just one fruit. You can get creative and try fruits like:
- Peach puree
- Pineapple puree
- Strawberry puree
- Pumpkin puree (great for fall!)
Just make sure the fruits you use are safe and age-appropriate for your baby.
Sweetening Naturally
If you want to sweeten the yogurt melts, you can add small amounts of:
- Mashed bananas
- Pureed dates
- Applesauce
This gives the melts a natural sweetness without the need for refined sugars.
Watch for Allergies
Whenever you introduce a new food to your baby, it’s a good idea to wait a few days before introducing another new ingredient. This helps you monitor for any allergic reactions. If your baby has a history of allergies, consult your pediatrician before introducing new foods.
Why Yogurt Melts Make the Perfect Baby Snack
Yogurt melts are more than just a treat. They offer a lot of health benefits, making them the perfect snack for your baby.
Health Benefits
- Probiotics: Support a healthy digestive system.
- Calcium and Vitamin D: Essential for bone development.
- Protein: Helps with growth and muscle development.
Convenience
- Freezer-friendly: You can make a big batch, store them in the freezer, and have snacks ready at all times.
- Teething-friendly: The coolness of yogurt melts can help soothe your baby’s sore gums.
Conclusion: Healthy, Homemade Yogurt Melts Your Baby Will Love!
Yogurt melts baby reacipes are an excellent, healthy snack for your baby. Whether you’re introducing new flavors or sticking with the classics, these homemade treats are both nutritious and easy to make. Not only are they packed with beneficial nutrients, but they’re also fun and simple to prepare. Try these recipes today and watch your baby enjoy the cool, creamy goodness of homemade yogurt melts!
FAQ: Yogurt Melts Baby Recipes
Q1: Are yogurt melts safe for babies?
Yes! Yogurt melts are a safe and healthy snack for babies, especially those who have started solids. Just make sure they’re made with unsweetened, plain yogurt, and always supervise your baby while they enjoy their treat.
Q2: Can I make yogurt melts without molds?
Yes, you can. Simply spread the yogurt mixture onto a parchment-lined baking sheet and freeze. Once frozen, break them into pieces.
Q3: How long do yogurt melts last?
Yogurt melts can last in the freezer for up to one month if stored in an airtight container.
Get started making these nutritious yogurt melts today and give your baby a snack that’s as delicious as it is healthy!
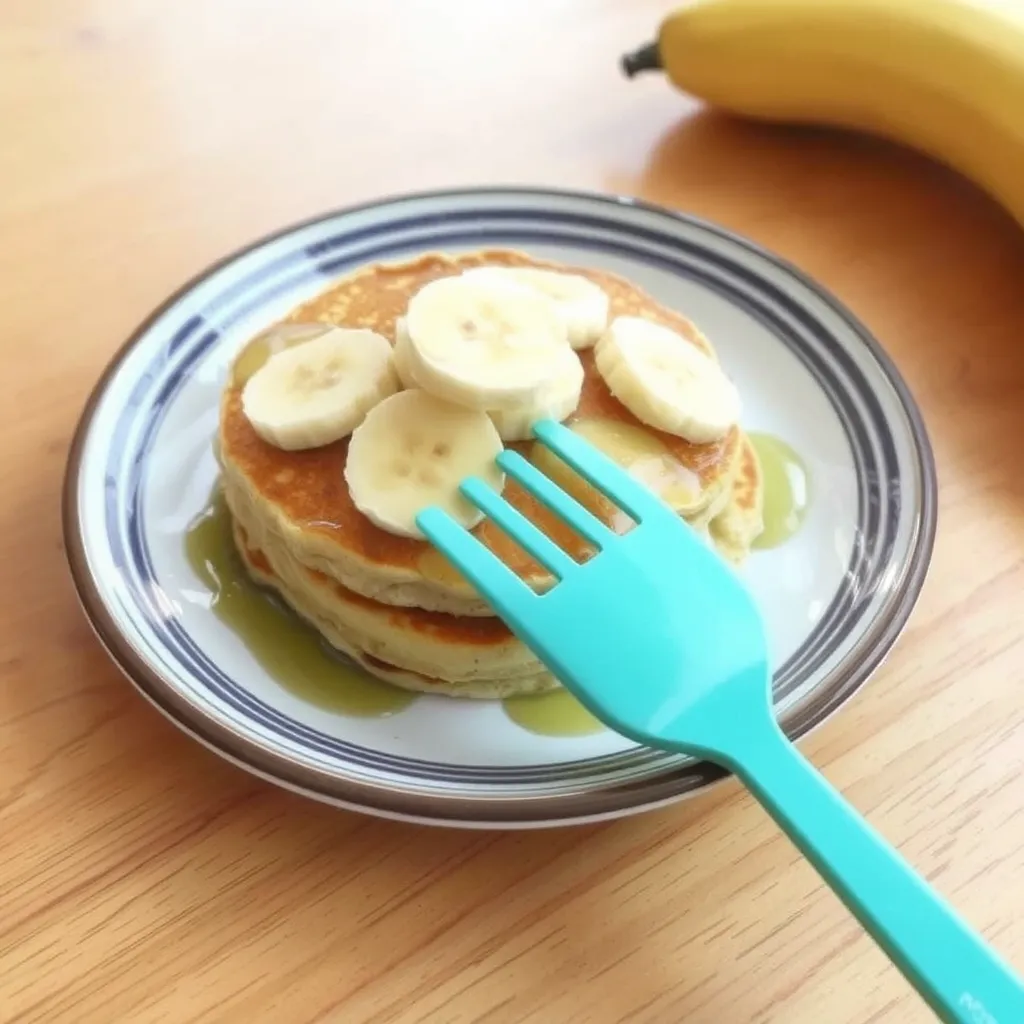
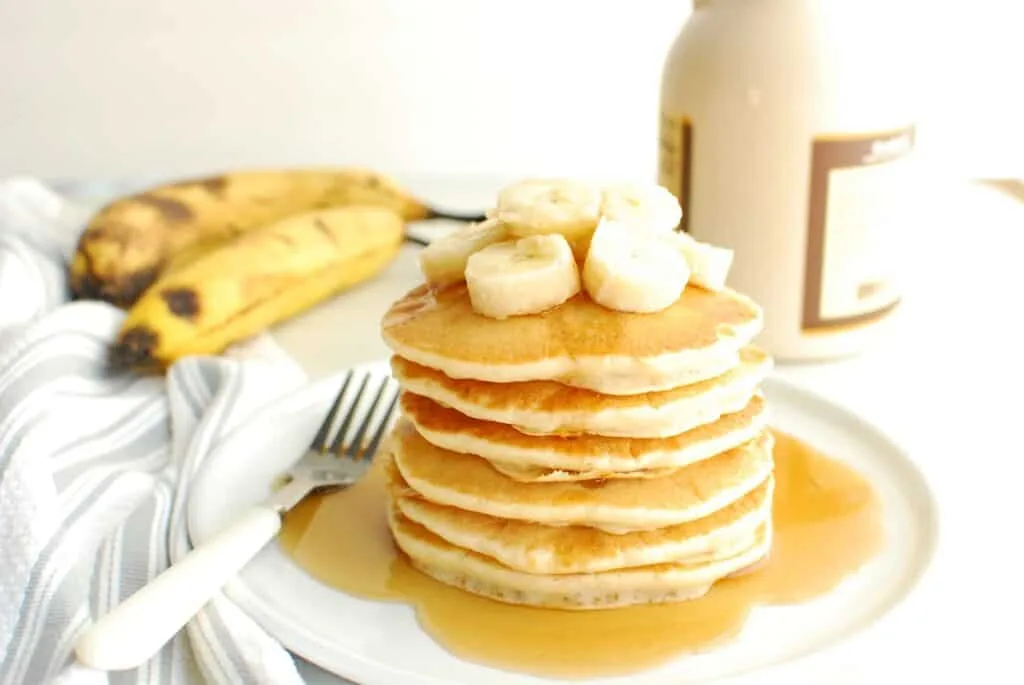
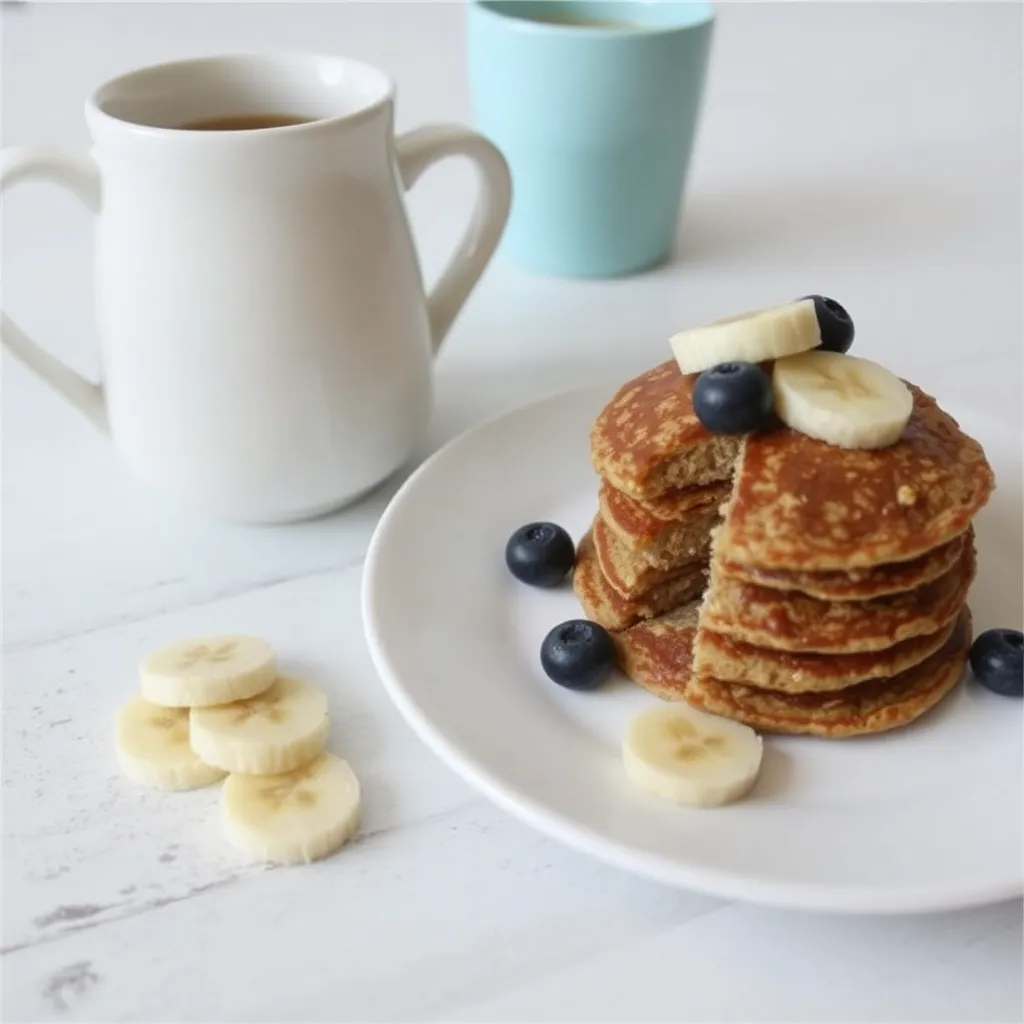
Banana Pancakes for Baby 10 Simple 4-Ingredient Recipes
As a parent, you know the excitement of introducing new foods to your baby. Watching their curious eyes light up as they taste something different is such a joyful experience. When it comes to first foods, banana pancakes for baby are a game-changer. They’re soft, naturally sweet, and super easy to make. Plus, they’re packed with nutrition, which means you’re giving your baby something tasty and healthy.
In this guide, we’ll share why banana pancakes are perfect for babies, how you can make them, and even give you a variety of recipes to try at home. Whether your little one is just starting solids or is ready for more adventurous flavors, there’s a recipe here for you!
Table of Contents
Why Banana Pancakes Are Perfect for Babies
Nutritional Benefits
Bananas are like nature’s candy, but they’re actually super healthy. They’re loaded with potassium, fiber, and vitamins that help your baby grow strong. Pairing bananas with simple ingredients like eggs or oats adds protein and energy to your baby’s meal.
Soft and Easy to Eat
The texture of banana pancakes is perfect for tiny mouths. They’re soft and fluffy, which makes them easy to chew (or gum, if your baby doesn’t have teeth yet). You can even break them into smaller pieces for little fingers to grab.
Naturally Sweet and Flavorful
Babies love the natural sweetness of bananas. You don’t need to add sugar or honey (which isn’t safe for babies under one). The taste of banana pancakes is simple and wholesome—perfect for your baby’s developing palate.
How to Make Banana Pancakes for Babies
Making banana pancakes is so easy! Here’s a basic recipe to get you started.
Ingredients Table
| Ingredient | Quantity |
|---|---|
| Ripe banana | 1 medium |
| Egg | 1 large |
| Flour (optional) | 2 tbsp |
| Cinnamon (optional) | A pinch |
| Oil/Butter for cooking | 1 tsp |
Step-by-Step Instructions
- Peel and mash the banana in a bowl until it’s smooth and creamy.
- Crack the egg into the banana mixture and whisk until combined.
- If you want a thicker batter, add flour and a pinch of cinnamon for flavor.
- Heat a non-stick pan and add a little oil or butter.
- Pour small dollops of batter onto the pan to make mini pancakes.
- Cook on medium heat for about 1-2 minutes on each side until golden.
- Let the pancakes cool before serving them to your baby.
10 Simple 4-Ingredient Banana Pancake Recipes for Babies
Here are some fun ways to switch up the basic recipe!
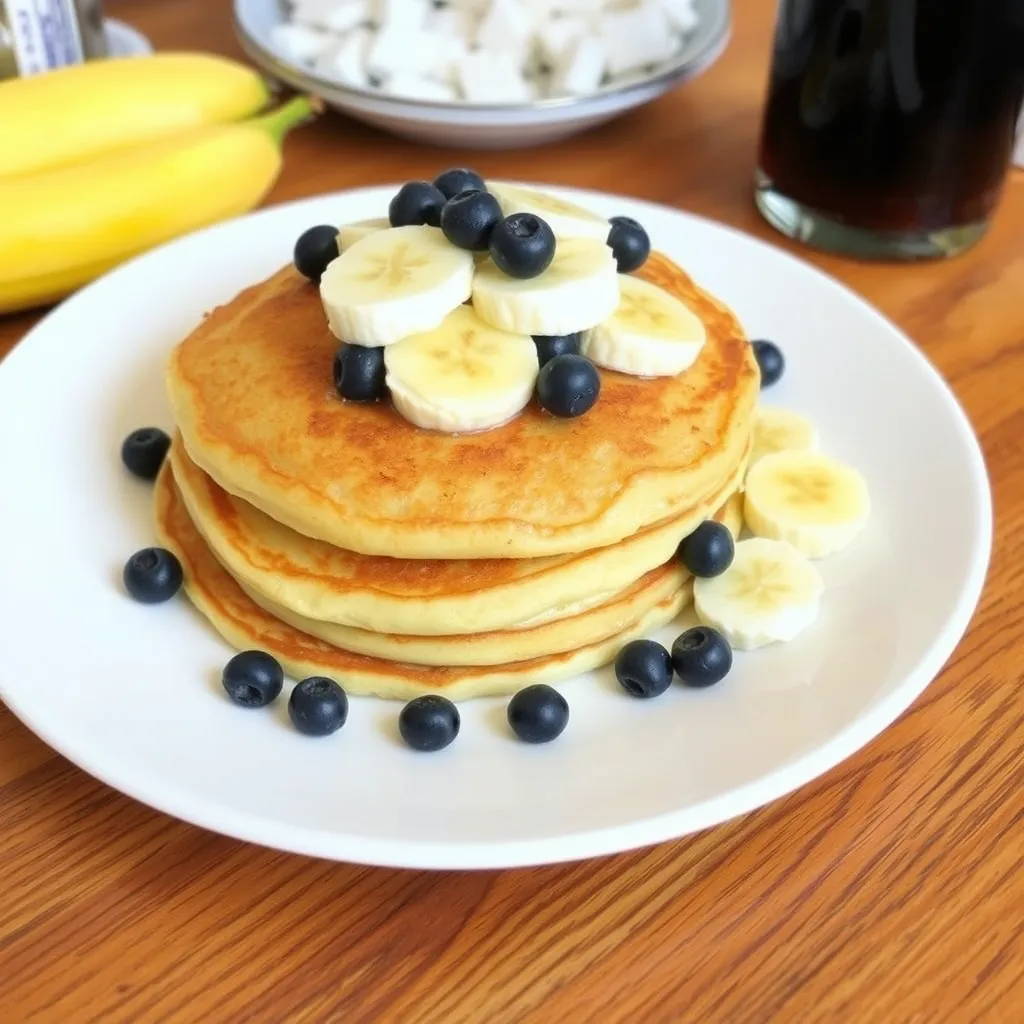
1. Classic Banana Pancakes
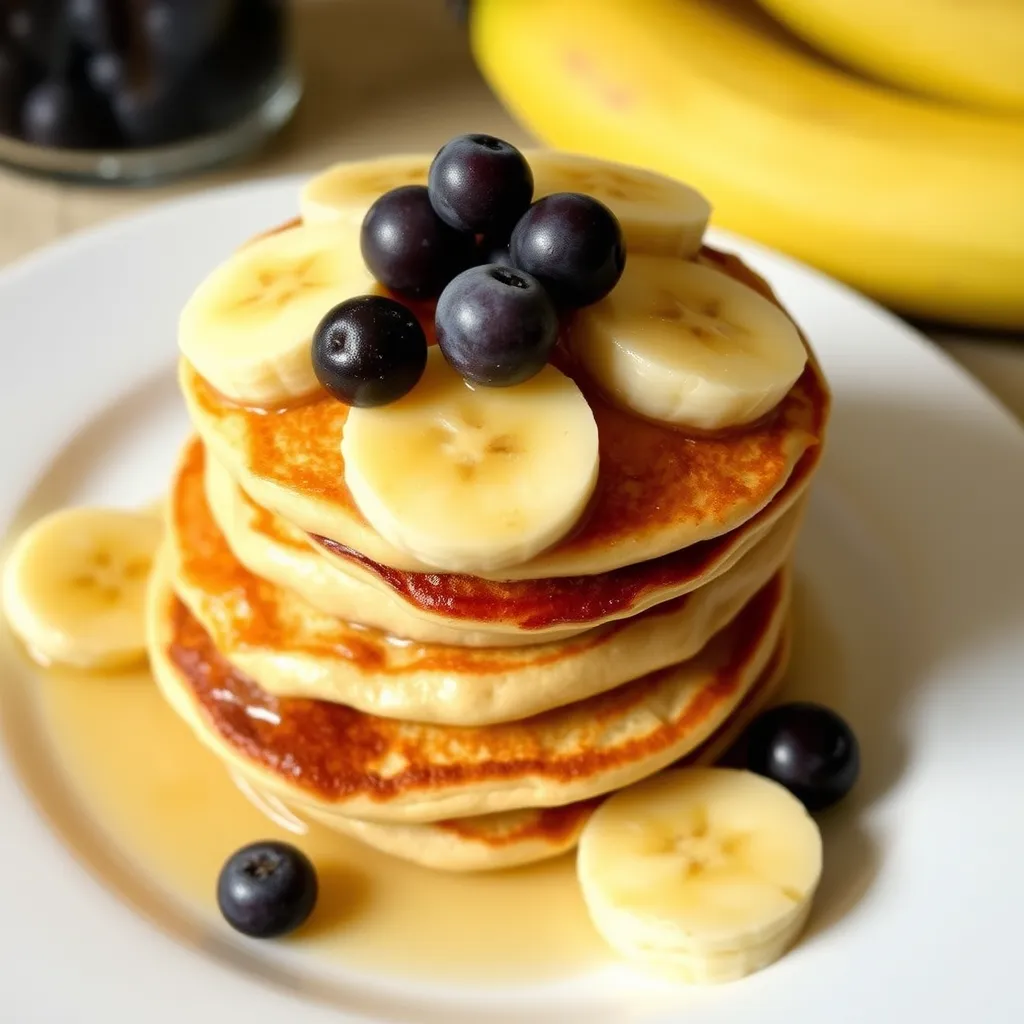
- 1 ripe banana
- 1 egg
- 2 tbsp flour
- A pinch of cinnamon
2. Banana Oat Pancakes
- 1 ripe banana
- 1 egg
- 2 tbsp rolled oats
- A splash of breast milk or formula
3. Banana and Yogurt Pancakes
- 1 ripe banana
- 1 egg
- 2 tbsp plain yogurt
- 2 tbsp flour
⭐ What Parents Use When Making This
These are popular, parent-approved items that make this easier and less stressful.
Makes smooth purees fast and saves cleanup time.
👉 Check Price on AmazonPerfect for storing meals safely in the fridge or freezer.
👉 See on AmazonGentle on gums and easy for first feeds.
👉 View on Amazon


4. Dairy-Free Banana Pancakes
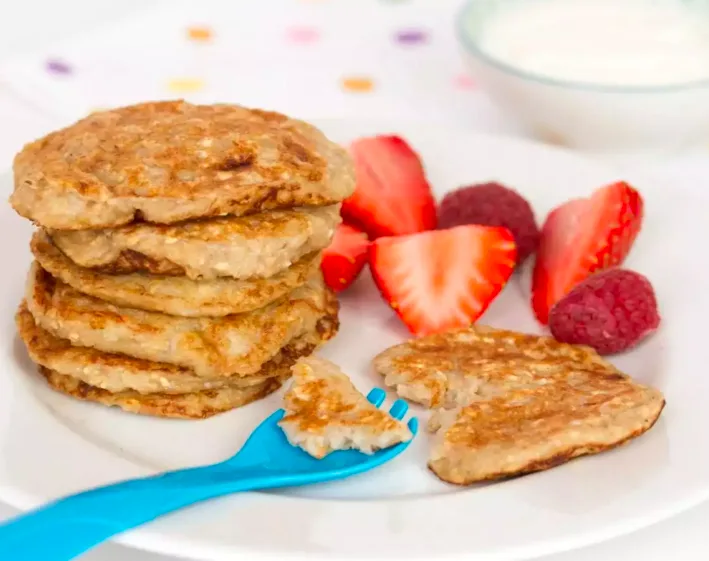
- 1 ripe banana
- 1 egg
- 2 tbsp coconut flour
- A dash of vanilla
5. Gluten-Free Banana Pancakes
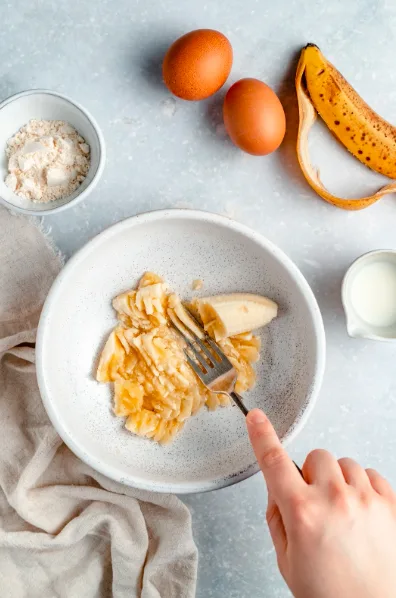
- 1 ripe banana
- 1 egg
- 2 tbsp almond flour
- A sprinkle of cinnamon
6. Protein-Packed Pancakes
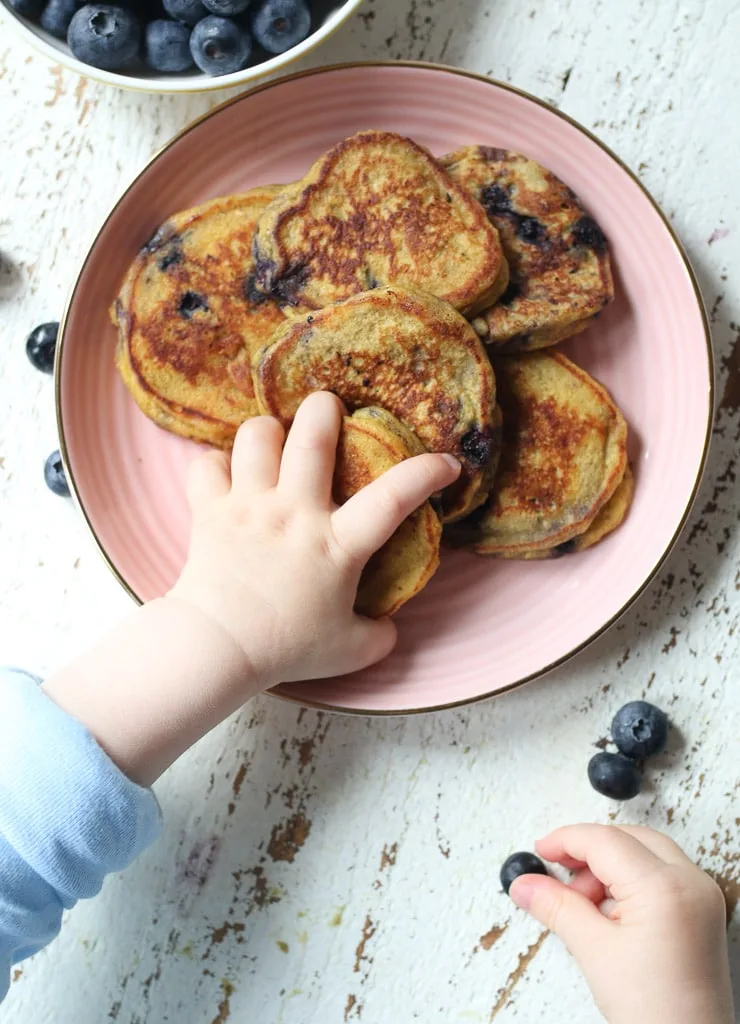
- 1 ripe banana
- 1 egg
- 1 tbsp peanut butter
- 1 tbsp rolled oats
7. Banana Sweet Potato Pancakes
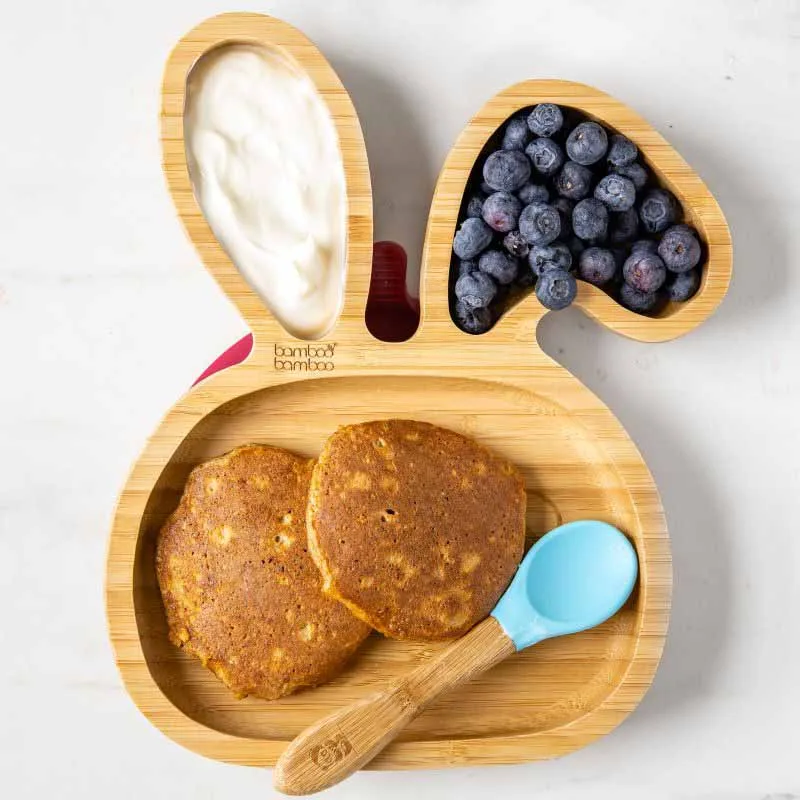
- 1 ripe banana
- 1 egg
- 2 tbsp mashed sweet potato
- A pinch of cinnamon
8. Banana Spinach Pancakes
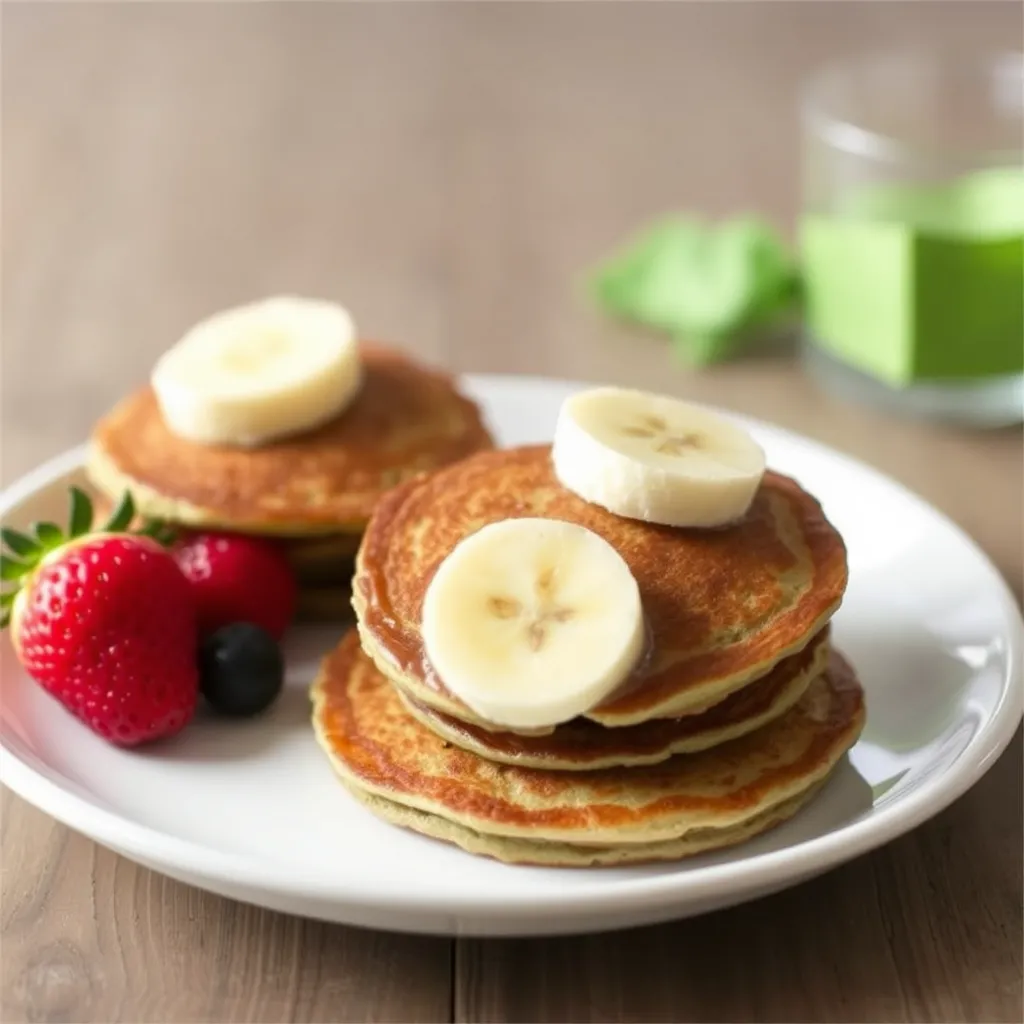
- 1 ripe banana
- 1 egg
- 2 tbsp flour
- A handful of spinach, blended
⭐ What Parents Use When Making This
These are popular, parent-approved items that make this easier and less stressful.
✅ Tiny Spoon (2 Pack in Pewter) – 6 Months
Makes smooth purees fast and saves cleanup time. 👉 Check Price on Amazon
✅ Tot Stick and Stay Suction Plate
Perfect for storing meals safely in the fridge or freezer. 👉 See on Amazon
✅ Grownsy Baby Food Maker with Steam Basket
Gentle on gums and easy for first feeds. 👉 View on Amazon
9. Banana Coconut Pancakes

- 1 ripe banana
- 1 egg
- 2 tbsp shredded coconut
- 1 tbsp coconut flour
10. Apple-Banana Pancakes
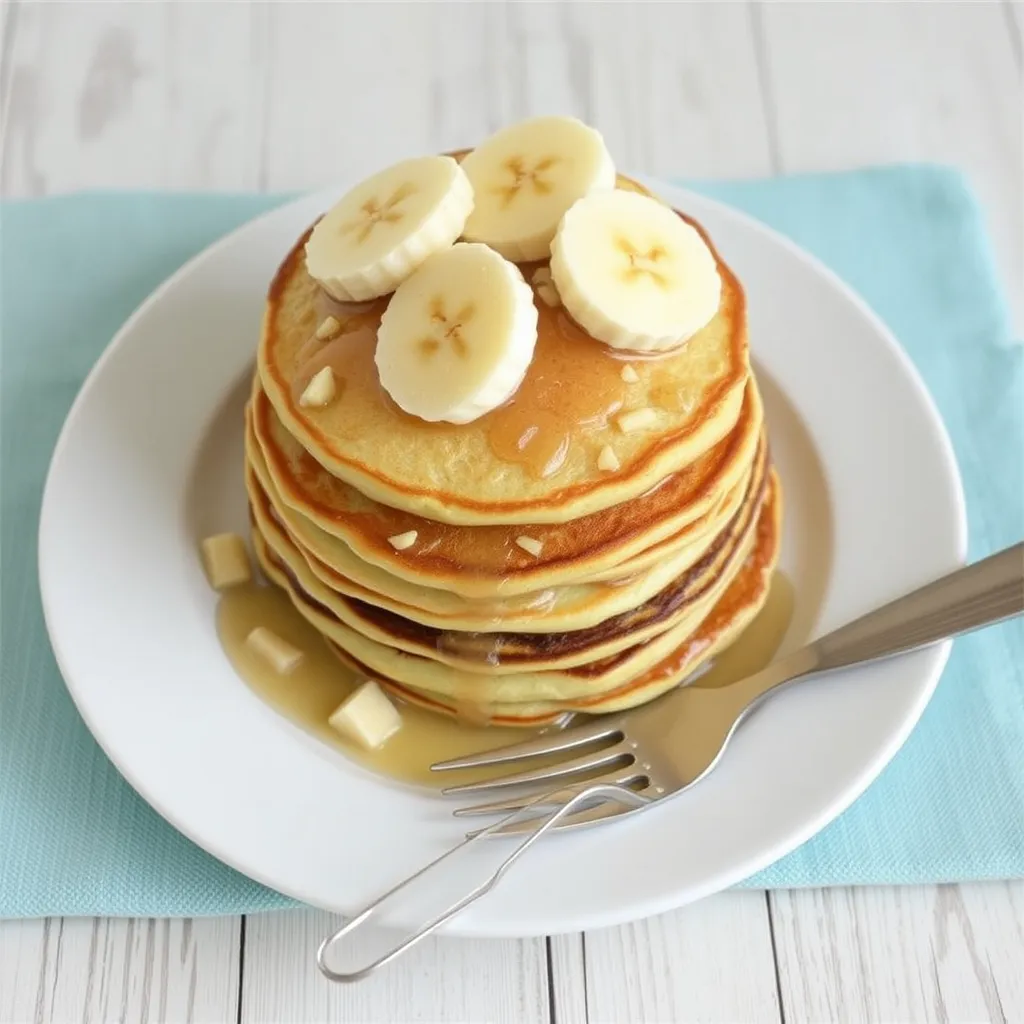
- 1 ripe banana
- 1 egg
- 1 tbsp apple puree
- 2 tbsp rolled oats
Age-Appropriate Pancake Ideas
6-9 Months
Keep it simple! Stick to the banana and egg recipe without extras. These are easy for your baby to pick up and chew.
9-12 Months
Add in a bit more texture with oats or finely chopped fruit. You can also experiment with spices like cinnamon or nutmeg.
12 Months and Older
Now’s the time to get creative. Add mix-ins like blueberries, peanut butter, or even finely shredded carrots. Just make sure any new ingredient is safe for your baby.
Serving and Storage Tips
How to Serve Banana Pancakes
- Serve plain or with a dollop of baby-safe yogurt.
- Try topping with mashed berries or a sprinkle of finely grated cheese.
Storage
- Refrigerate leftovers in an airtight container for up to 3 days.
- Freeze pancakes with parchment paper between layers for easy reheating.
Reheating
- Warm pancakes gently in a pan or microwave. Just make sure they’re not too hot!
Common Questions About Banana Pancakes for Babies (FAQ)
1. Can babies eat banana pancakes at 6 months?
Yes, as long as they’re soft and made with baby-safe ingredients, banana pancakes are a great first food.
2. Are banana pancakes healthy?
Definitely! They’re full of natural nutrients from bananas, and you can add even more goodness with ingredients like oats or yogurt.
3. What can I use instead of eggs?
You can use chia seeds, flaxseed, or baby-safe applesauce as an egg substitute.
4. How do I prevent choking?
Cut pancakes into small, manageable pieces for your baby. Always supervise during meals.
5. Can I freeze banana pancakes?
Yes, freeze them in a single layer, then transfer them to a freezer bag. Reheat as needed!
Conclusion: Banana Pancakes for Baby – A Tasty First Step
Banana pancakes for baby are not just delicious—they’re a simple way to introduce your baby to healthy, wholesome foods. With just a few ingredients and a little effort, you can create meals that are nutritious and loved by your baby.
Why not give these recipes a try today? You’ll love seeing your little one enjoy every bite, and they’ll love the yummy taste!
